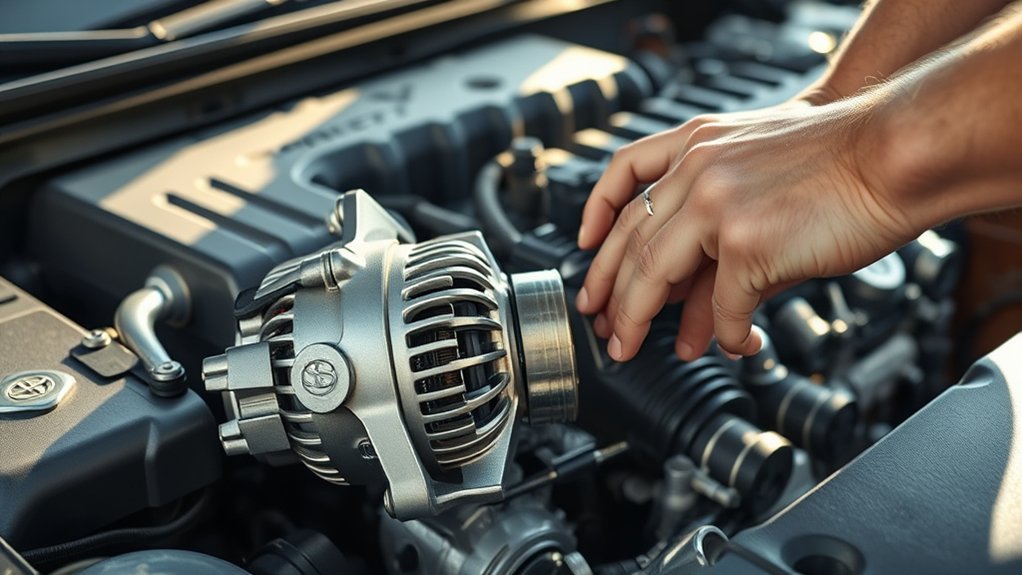
Replacing an alternator on a Toyota RAV4 can be a manageable repair, but only after you confirm the charging-system fault and identify the exact vehicle configuration. This guide applies to gasoline-only RAV4 models with a conventional belt-driven alternator. Fastener sizes, belt routing, access steps, torque values, and initialization procedures vary by model year and engine.
Quick Answer
To replace a gasoline Toyota RAV4 alternator, diagnose the charging fault first, disconnect the negative battery cable, release the serpentine belt, label and remove the wiring, unbolt the alternator, install a VIN-matched replacement, torque the fasteners to factory specifications, refit the belt, reconnect the battery, and test the charging system.
Key Takeaways
- A charging warning light, dim lights, or a dead battery does not prove the alternator has failed.
- Test the battery, terminals, grounds, belt, wiring, and charging voltage before buying a replacement.
- Confirm the RAV4 model year, engine, and VIN because tools, access steps, and torque values differ.
- Disconnect and isolate the negative battery cable before touching the alternator output terminal.
- Use the factory repair information for belt-tensioner direction, fastener torque, and post-battery initialization.
- This procedure does not apply to RAV4 Hybrid or Plug-in Hybrid high-voltage systems.
At a Glance
| Time Required | Plan several hours. Access, corrosion, engine layout, and experience can change the repair time. |
| Difficulty | Intermediate to advanced. You must safely handle a spring-loaded tensioner, heavy electrical wiring, and model-specific fasteners. |
| Tools Needed | VIN-specific repair information, multimeter, metric sockets and wrenches, ratchet, extensions, torque wrench, tensioner tool or suitable long-handled ratchet, trim-clip tool, gloves, and eye protection. |
| Cost | Varies by model year, engine, alternator output, new or remanufactured part, core charge, taxes, and local labor rates. |
Warning: Do not use this procedure on a RAV4 Hybrid or Plug-in Hybrid. Toyota states that these vehicles contain high-voltage DC and AC systems that can cause severe burns, electric shock, or fatal injury. Do not touch orange cables, the service plug, the inverter, or other high-voltage components. Review Toyota’s RAV4 Hybrid safety precautions.
Identifying Symptoms of Alternator Failure

A failing alternator can produce several warning signs, but none of them confirms the diagnosis by itself. The alternator is one part of a charging system that also includes the battery, drive belt, fuses, fusible links, cables, grounds, connectors, and electronic controls.
Common symptoms include:
- Charging-system warning light: A battery-shaped warning symbol usually indicates a charging-system problem, not automatically a bad battery or alternator. Toyota recommends checking the applicable owner’s manual when a warning appears.
- Dim or flickering lights: Headlights, dashboard lights, or interior lamps may change brightness when system voltage is unstable.
- Repeated dead battery: A battery may discharge because it is defective, the alternator is not recharging it, or an electrical device is drawing power while the vehicle is off.
- Slow or inconsistent accessories: Power windows, the blower motor, audio equipment, or other systems may behave unpredictably.
- Grinding, whining, or chirping: Noise near the alternator can come from a worn bearing, pulley, belt, tensioner, or another accessory.
- Burning-rubber or electrical smell: A slipping belt, overheated connection, or internal electrical fault needs immediate attention.
- Engine stalling after a jump-start: The vehicle may stop when the available battery charge is depleted.
Treat the battery warning light as a charging-system warning. Test the system before replacing a component.
If a red charging warning remains on while driving, electrical assistance begins failing, or the engine starts to stall, pull over safely. Continuing to drive can leave you without sufficient power for essential vehicle systems.
Diagnose the Charging System Before Replacement
DENSO recommends checking the battery and the rest of the charging circuit before condemning the alternator. Its charging-system diagnostic guidance specifically identifies batteries, cables, grounds, fuses, wiring, and drive belts as possible causes of low or unstable charging.
1. Inspect the Battery and Connections
Turn the vehicle off and inspect the battery case, terminals, cable ends, and grounds. Look for corrosion, looseness, damaged insulation, broken strands, or a swollen or leaking battery case.
A fully charged battery commonly measures around 12.6 volts after it has rested with the engine off. A lower reading does not automatically prove the battery is defective. Charge and test the battery according to the battery manufacturer’s procedure before evaluating alternator output.
2. Inspect the Serpentine Belt
Check the belt for cracks, glazing, frayed edges, missing ribs, oil contamination, or looseness. A slipping or damaged belt can prevent an otherwise functional alternator from producing enough power.
Also inspect the tensioner and pulleys for wobble, roughness, misalignment, or noise. Do not place your hands near the belt with the engine running.
3. Check Fuses, Wiring, and Grounds
Inspect the charging-system fuse or fusible link identified in the applicable owner’s manual or electrical diagram. Check the alternator connector, output cable, battery cable, engine ground, and body ground for damage or high resistance.
4. Measure Charging Voltage
Set a digital multimeter to DC volts and measure across the battery terminals. With the engine running, DENSO gives approximately 13.0 to 14.5 volts as general charging-system guidance. Your RAV4’s factory specification takes priority because voltage can change with temperature, battery condition, engine speed, and electrical load.
Turn on the headlights, cabin blower, and rear defroster while watching the meter. A large or persistent voltage drop may point to an alternator, belt, wiring, battery, or connection problem.
Note: Do not replace the alternator based on one voltage reading. Confirm the battery is charged, the belt is driving the pulley, the connections are secure, and the applicable fuses are intact.
What Tools Do You Need to Replace Your Alternator?
The exact tools depend on the RAV4 model year, engine, and alternator location. Gather the correct repair information before disassembly rather than assuming every RAV4 uses the same sockets or tensioner arrangement.
Essential Hand Tools
| Tool | Purpose |
|---|---|
| Metric socket and wrench set | Removes the battery terminal, brackets, wiring terminal, and mounting bolts. Confirm sizes for your vehicle. |
| Ratchet and extensions | Reaches recessed fasteners without forcing the tool at an angle. |
| Torque wrench | Tightens mounting bolts and electrical fasteners to the model-specific specification. |
| Belt-tensioner tool or long-handled ratchet | Rotates the spring-loaded tensioner in the direction specified for the engine. |
| Digital multimeter | Checks battery and charging-system voltage before and after the repair. |
| Trim-clip or connector tool | Releases harness retainers without pulling on the wires. |
Safety Equipment Required
Wear safety glasses and snug-fitting work gloves. Work with the engine cool, set the parking brake, place the transmission in Park, remove the key or move the smart key away from the vehicle, and keep loose clothing clear of the belt drive.
Use insulated protection over the disconnected negative battery cable so it cannot spring back onto the terminal. Keep metal tools away from the positive battery post and alternator output terminal.
Specialty Tools and Information
Some RAV4 engines provide enough access with ordinary hand tools. Others may require a longer extension, swivel socket, low-profile ratchet, underbody-panel tools, or removal of a nearby bracket.
The most important specialty resource is the repair procedure for the exact VIN, model year, and engine. It identifies:
- The correct belt-tensioner rotation direction
- The belt-routing diagram
- Required component-removal order
- Alternator mounting-bolt torque
- Output-terminal nut torque
- Battery-disconnection precautions
- Required feature initialization after reconnection
Choose the Correct Replacement Alternator
Do not order an alternator by vehicle name alone. Match the replacement using the VIN and compare it physically with the original before installation.
| Check | What to Compare |
|---|---|
| Electrical connector | Plug shape, pin count, locking tab, and connector position |
| Output terminal | Stud size, location, protective cap, and cable clearance |
| Mounting points | Ear spacing, bolt-hole diameter, bracket alignment, and housing shape |
| Pulley | Diameter, groove count, offset, and pulley type |
| Electrical rating | Output rating and application listed for the VIN |
DENSO’s alternator installation guidance recommends comparing the replacement case, pulley offset, pulley type, mounting holes, and connector locations with the original unit.
Step-by-Step Guide to Disconnecting the Battery
Safety Precautions Before Disconnecting
Switch off the engine and all accessories. Allow the engine and exhaust components to cool. Keep the key away from the vehicle so the electrical system cannot wake unexpectedly.
Battery disconnection may erase saved settings or require certain features to be initialized. Depending on the year and equipment, this can affect the clock, multimedia system, power windows, moonroof, or power liftgate. Review the applicable Toyota owner’s manual before disconnecting the battery.
Battery Disconnection Procedure
- Locate the 12-volt battery and identify the negative terminal marked with a minus symbol.
- Use the correctly sized wrench or socket to loosen the negative cable clamp.
- Lift the cable from the terminal without twisting or pulling on the cable itself.
- Move and insulate the cable so it cannot touch the battery terminal.
- Wait briefly before disconnecting alternator wiring so stored electrical energy can dissipate.
Do not allow a wrench to bridge the positive terminal and a metal body or engine component. A direct short can cause severe arcing, burns, wiring damage, or battery failure.
How to Safely Remove the Serpentine Belt
The serpentine-belt tensioner contains a powerful spring. Confirm the correct tool position and direction of movement before applying force.
- Record the routing: Photograph the belt and compare it with the underhood routing label or factory diagram.
- Inspect the belt: Check for cracks, glazing, oil contamination, missing ribs, frayed edges, or uneven wear.
- Fit the tool securely: Seat the correct socket, ratchet, or tensioner tool completely on the tensioner.
- Rotate in the specified direction: Move the tensioner slowly according to the engine-specific procedure.
- Slip the belt from an accessible pulley: Keep your fingers away from the space between the belt and pulley.
- Release the tensioner slowly: Do not let it snap against its stop.
- Move the belt aside: Keep it clean and note which side contacted the pulleys.
Pro Tip: Take clear photos of the belt routing, alternator connector, output cable, brackets, and bolt locations before removing anything. The photos make reassembly faster and help prevent crossed wiring or incorrect belt routing.
Alternator Replacement: How to Disconnect and Remove the Alternator
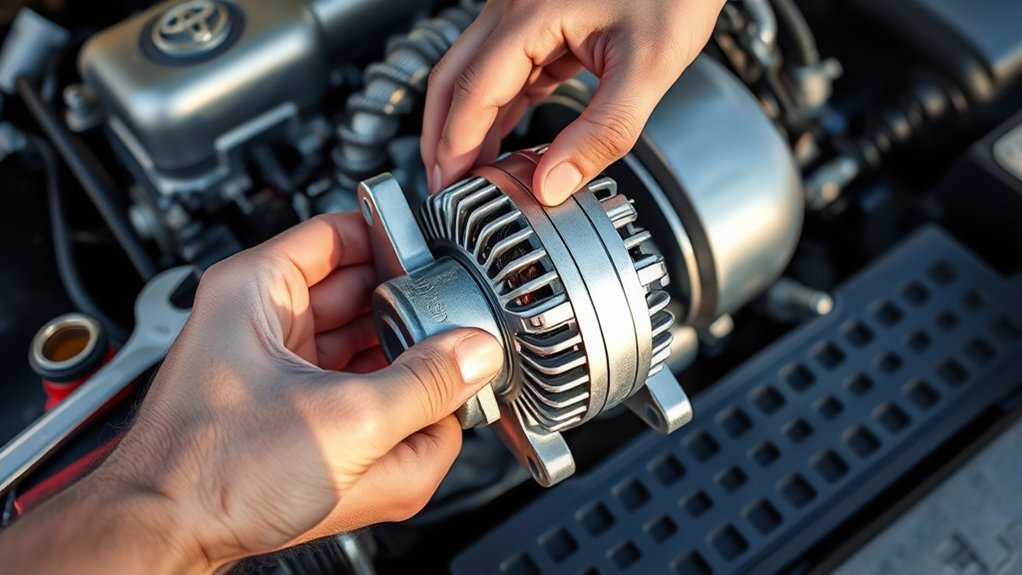
After disconnecting the battery and removing the belt from the alternator pulley, inspect the surrounding space. Remove only the covers, air ducts, braces, clips, or harness retainers identified in the model-specific procedure.
Label every connector, bracket, and fastener before removal. Do not pull an electrical connector by its wires.
- Remove any access components: Take off the engine cover, intake duct, splash shield, or bracket only when required for your engine.
- Release harness retainers: Use a trim-clip tool instead of prying with a sharp screwdriver.
- Remove the output-terminal cover: Lift the protective cap from the alternator B+ terminal.
- Disconnect the output cable: Confirm the negative battery cable is isolated, then remove the terminal nut with the correct socket. Keep the cable from touching metal.
- Unplug the control connector: Depress its lock and pull on the connector housing, not the wires.
- Support the alternator: Alternators are heavier than they appear and can fall when the last bolt is removed.
- Loosen the mounting bolts: Note each bolt’s position, length, washers, spacers, and bracket orientation.
- Remove the mounting bolts: Hold the alternator securely as the final fastener comes out.
- Extract the alternator: Rock it gently by hand if the mounting sleeves grip the housing. Do not strike the case or lever against refrigerant lines, wiring, plastic parts, or the radiator.
Inspect the removed alternator’s connectors, pulley, mounting ears, and housing. Compare these features directly with the replacement before beginning installation.
Best Practices for Installing a New Alternator
- Inspect the mounting area: Remove loose dirt and corrosion without damaging machined surfaces or wiring.
- Position the alternator: Align the mounting ears and brackets without forcing the housing into place.
- Install the bolts by hand: Start every mounting bolt several turns to avoid cross-threading.
- Tighten in the specified sequence: Use the Toyota repair procedure for the exact bolt torque. Do not guess or rely on values from another engine.
- Reconnect the electrical plug: Push until the lock engages. Tug lightly on the housing to confirm it is secure.
- Reconnect the output cable: Install it in its original orientation and tighten the nut to the factory specification. Overtightening can damage the insulated terminal; undertightening can create heat and resistance.
- Close the terminal cover: Confirm the protective cap completely covers the live connection.
- Reinstall brackets and retainers: Keep the harness away from the belt, pulleys, exhaust, and sharp edges.
- Route the serpentine belt: Follow the diagram and confirm that every rib is seated in every grooved pulley.
- Release the tensioner slowly: Recheck belt alignment from more than one angle.
- Reinstall removed access parts: Secure all ducts, covers, splash shields, and fasteners.
- Reconnect the negative battery cable: Tighten it securely without overtightening the clamp.
Do not pry against or strike the new alternator housing to adjust belt tension. DENSO recommends using the manufacturer’s belt-tension and fastener specifications and checking pulley alignment after installation.
How to Test Your New Alternator for Proper Operation
Complete a visual and electrical inspection before considering the repair finished.
1. Perform a Pre-Start Inspection
- Confirm all tools and loose fasteners are removed from the engine bay.
- Check that the alternator bolts, connector, output cable, and protective cap are secure.
- Confirm the belt follows the correct path.
- Verify that every belt rib is centered in its pulley grooves.
- Make sure wiring and hoses cannot contact the belt or pulleys.
2. Start the Engine and Observe
Start the engine while standing clear of the belt drive. The charging warning should turn off after the engine starts. Watch the belt for smooth tracking and listen for squealing, clicking, grinding, or rubbing.
Stop the engine immediately if the belt walks off a pulley, the tensioner moves violently, smoke appears, or you hear severe mechanical noise.
3. Test Voltage With and Without Electrical Load
- Measure voltage across the battery terminals with the engine idling.
- Compare the result with the factory charging-system specification.
- As general screening guidance, DENSO lists approximately 13.0 to 14.5 volts with the engine running.
- Turn on the headlights, blower motor, and rear defroster.
- Confirm the voltage remains stable enough to support the added load.
- Check the instrument panel for warning lights or messages.
A normal charging test includes the battery, belt, wiring, grounds, fuses, and electrical load. It is not only a test of the replacement alternator.
If the New Alternator Does Not Charge
Turn off the engine and check the following before assuming the new unit is defective:
- The battery is sufficiently charged and passes a battery test.
- The negative battery terminal is connected securely.
- The alternator output cable and control connector are fully connected.
- The output-terminal protective cap is not interfering with the cable connection.
- The charging-system fuse or fusible link is intact.
- The belt is routed correctly and turning the alternator pulley.
- The battery, engine, and body grounds are clean and secure.
- The replacement alternator matches the VIN, connector, pulley, and output requirement.
- No diagnostic trouble codes identify a control-circuit or communication fault.
If the wiring, battery, belt, fuses, and installation are correct but the output remains outside specification, have the charging system tested professionally.
Cost of Alternator Replacement
RAV4 alternator replacement does not have one reliable universal price. The total depends on the exact vehicle and the repair choices you make.
| Cost Factor | Why It Matters |
|---|---|
| Model year and engine | Different layouts change alternator fitment, access, and labor time. |
| New or remanufactured unit | Part price, warranty, component replacement, and testing standards differ. |
| Core charge | A refundable core charge may apply until the old alternator is returned. |
| Related parts | A worn belt, tensioner, battery, damaged cable, or corroded terminal can add to the repair. |
| Labor and location | Hourly rates, access time, taxes, and regional pricing vary. |
| Warranty | Coverage may differ for the part, labor, roadside costs, and commercial use. |
Request a VIN-matched written estimate that separates the alternator, core charge, related parts, labor, taxes, and warranty terms. A cheaper part is not a saving if the pulley, connector, mounting position, or electrical output is wrong.
New Versus Remanufactured Alternator
A new alternator is not automatically the only reliable choice, and a remanufactured alternator is not automatically inferior. Compare the manufacturer, testing process, replaced wear components, warranty terms, fitment accuracy, and supplier support.
Choose a unit specifically cataloged for the VIN and buy from a source that clearly handles warranty claims and core returns.
Preventing Future Alternator Issues
You cannot prevent every internal alternator failure, but routine inspections can reduce avoidable strain and catch charging problems early.
- Maintain the battery: A weak or internally damaged battery can place heavy demand on the charging system.
- Keep terminals and grounds clean: Corrosion and loose connections create resistance, heat, and unstable voltage.
- Inspect the serpentine belt: Replace a cracked, glazed, stretched, oily, or frayed belt.
- Check the tensioner and pulleys: Noise, wobble, rough bearings, or poor alignment can damage the belt and alternator.
- Repair fluid leaks: Engine oil or coolant contamination can damage the belt and electrical components.
- Install accessories correctly: High-powered lighting, audio equipment, inverters, and other additions can overload the charging system or create poor ground paths.
- Respond to warning lights promptly: Early diagnosis can prevent a roadside breakdown or repeated battery damage.
Clean connections, a healthy battery, and a properly aligned belt help the alternator operate without unnecessary electrical or mechanical strain.
Frequently Asked Questions
How long does it take to replace a Toyota RAV4 alternator?
Plan several hours for a careful DIY replacement. The actual time depends on the model year, engine, component access, corrosion, tools, and your experience. Diagnostic testing and post-installation inspection should be included in the repair time.
Can I drive my RAV4 with a failing alternator?
Driving is risky when the charging warning remains on. The vehicle may continue only until the battery loses enough charge, after which the engine or essential electrical systems can stop working. Pull over safely and arrange testing or towing if lights dim, steering assistance changes, warning messages multiply, or the engine begins to stall.
What mistakes should I avoid during alternator replacement?
Common mistakes include skipping diagnosis, ordering the wrong alternator, failing to disconnect the battery, shorting the output terminal, forcing connectors, forgetting the belt route, rotating the tensioner incorrectly, cross-threading bolts, guessing torque values, misaligning the belt, and failing to test the system under electrical load.
Do I need to reset the vehicle computer after replacing the alternator?
A dedicated alternator reset is not universally required. Disconnecting the battery may erase settings or require initialization of model-specific features such as power windows, the moonroof, multimedia security, or the power liftgate. Follow the owner’s manual for your year and equipment, then check and clear diagnostic trouble codes only after correcting their cause.
Is a new alternator better than a remanufactured alternator?
Either can be suitable when it matches the VIN and comes from a reputable manufacturer. Compare the testing process, replaced internal components, output rating, fitment, warranty, supplier support, and core-return policy instead of judging the part only by whether it is new or remanufactured.
Can I use this alternator procedure on a RAV4 Hybrid or Plug-in Hybrid?
No. Hybrid and Plug-in Hybrid RAV4 models contain high-voltage systems and use a different electrical architecture. Do not touch orange wiring, the service plug, inverter components, or other high-voltage parts. Use Toyota-approved hybrid service procedures and a qualified technician.
Why is my new alternator not charging the battery?
Possible causes include a discharged or defective battery, open fuse or fusible link, loose output cable, unplugged control connector, poor ground, incorrect belt routing, slipping belt, wrong replacement unit, damaged wiring, or an electronic control fault. Recheck the complete charging circuit before replacing the alternator again.
Conclusion
A successful Toyota RAV4 alternator replacement begins with diagnosis, not parts replacement. Confirm that you have a gasoline-only model, test the battery and charging circuit, identify the correct VIN-matched alternator, and follow the engine-specific belt, access, and torque procedures.
After installation, check the belt alignment, wiring clearance, warning lights, charging voltage, and operation under electrical load. Stop and obtain professional help if the procedure involves a hybrid high-voltage system, damaged wiring, uncertain torque specifications, or charging results that remain outside the applicable Toyota specification.
Sources
- Toyota Dashboard Warning Lights — explains warning-light interpretation and the need to consult the vehicle owner’s manual.
- DENSO Charging System Diagnosis — supports battery, belt, fuse, wiring, ground, and charging-voltage checks.
- DENSO Alternator Removal and Installation — supports battery disconnection, part comparison, belt inspection, manufacturer torque specifications, and post-installation testing.
- Toyota RAV4 Hybrid Warranty and Maintenance Guide — supports the high-voltage safety warning and hybrid repair limitation.
- Toyota Digital Owner’s Manuals — provides model-year-specific warnings, operating information, and initialization procedures.
