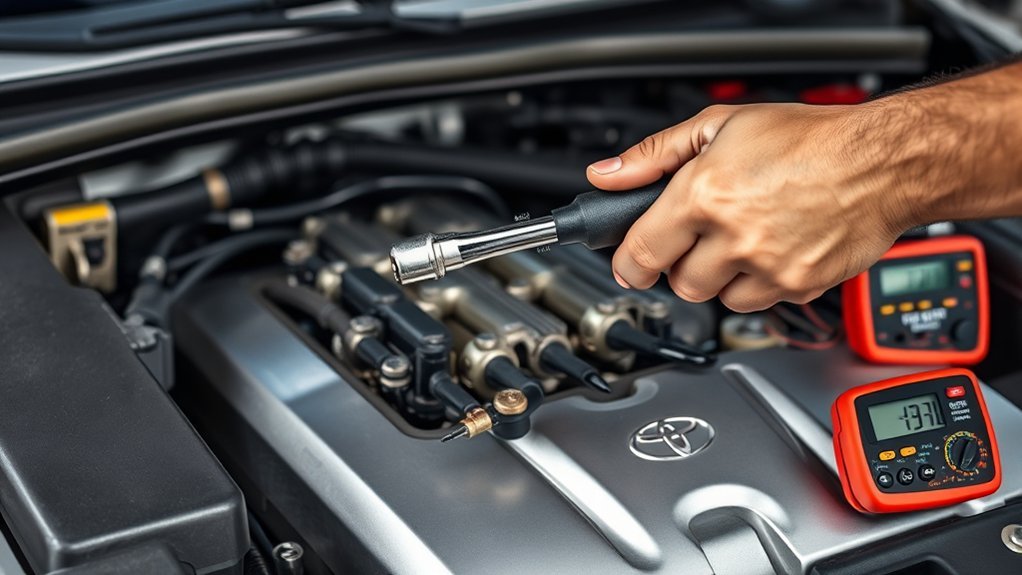
To replace a Toyota RAV4 oxygen (O2) sensor safely, diagnose the fault before removing a part. Save the diagnostic codes and freeze-frame data, identify the exact bank and sensor position, and confirm the replacement by model year, engine or hybrid powertrain, emissions specification, and VIN. RAV4 sensor technology, location, connector, access method, and tightening procedure vary across generations, so the repair information for your exact vehicle takes priority over a generic torque value or sensor description.
Last updated: September 19, 2026 — sensor terminology, diagnostic guidance, Toyota repair-information references, schema, and link compliance reviewed.
Quick Answer
Save the diagnostic codes and confirm the exact sensor position and sensor type before buying a part. Let the exhaust cool, follow the model-specific procedure for the 12-volt battery, unplug the connector, and loosen the sensor with the correct oxygen-sensor tool—often a 22 mm or 7/8-inch slotted socket, but verify the fit first. Start the replacement by hand, tighten it to the specification for your exact RAV4 and tool setup, reconnect the harness, then scan the vehicle again and check for exhaust leaks or returning codes.
Key Takeaways
- An OBD-II code identifies a monitored fault or circuit. It does not automatically prove that the oxygen or air/fuel-ratio sensor is defective.
- Confirm the model year, engine or hybrid powertrain, emissions specification, bank, sensor number, and sensor type before ordering a replacement.
- Sensor position and sensor technology are separate questions. Do not assume every Sensor 1 or Sensor 2 uses the same type of sensing element across RAV4 generations.
- Use safe lifting equipment whenever access requires working below the RAV4. Never rely on a hydraulic jack alone.
- Many replacement sensors have anti-seize pre-applied. Add more only when the sensor manufacturer instructs you to do so.
- Start the new sensor by hand and use the model-specific tightening procedure instead of tightening it as hard as possible.
- After the repair, check for exhaust leaks, scan for returning codes, and allow the OBD readiness monitors to complete.
At a Glance
| Time Required | Varies by sensor location, model year, corrosion, access, and whether shields or underbody panels must be removed |
| Difficulty | Moderate; difficult when the sensor is beneath the vehicle, heavily rusted, or close to fragile exhaust components |
| Tools Needed | OBD-II scan tool, correctly sized oxygen-sensor socket or wrench, ratchet, extensions, torque wrench, penetrating oil, gloves, safety glasses, wheel chocks, and jack stands when needed |
| Cost | Varies by model year, sensor type, and sensor position. Direct-fit air/fuel-ratio sensors can cost more than some conventional oxygen sensors, and seized parts or damaged exhaust threads can increase labor costs. |
Before You Buy or Loosen Anything
- Record the exact stored and pending DTCs plus freeze-frame data.
- Confirm the model year, engine or hybrid powertrain, drivetrain, and emissions certification.
- Identify the exact bank and sensor number from the code and repair information.
- Confirm whether that position uses an air/fuel-ratio sensor or another oxygen-sensor design on your application.
- Look up the battery-disconnection procedure, access instructions, required tool, and tightening specification before starting.
What Does an Oxygen Sensor Do on a Toyota RAV4?
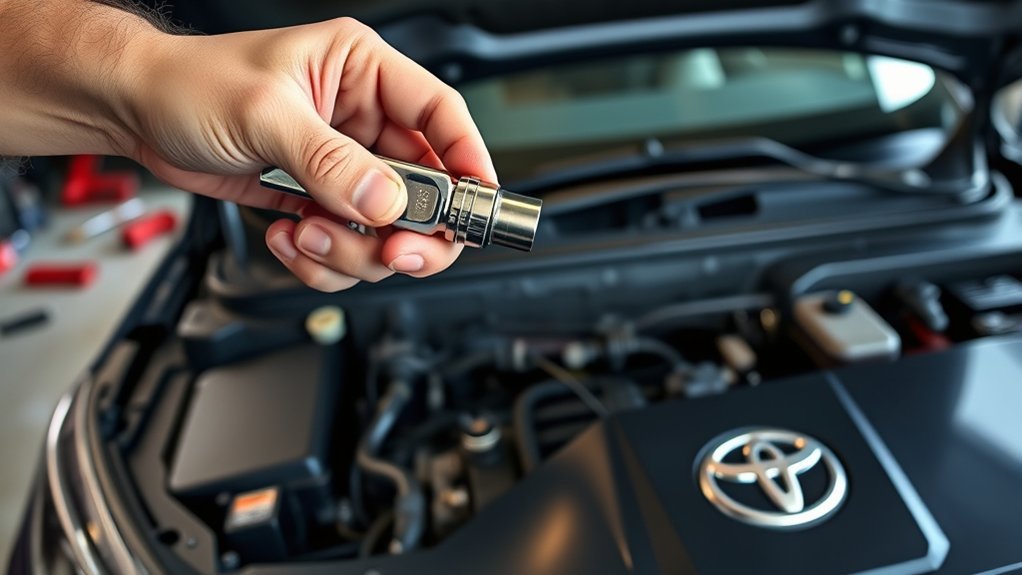
Your RAV4 uses exhaust sensors to report information about combustion and catalytic-converter operation to the engine control module. The computer uses that information to control fuel delivery, test emissions components, and illuminate the malfunction indicator light when it detects a qualifying fault.
Sensor 1 is generally the sensor closest to the engine and ahead of the monitored catalyst, while Sensor 2 is farther downstream. Position does not automatically identify the sensor technology. Depending on the RAV4 model year and powertrain, Toyota may use an air/fuel-ratio sensor or another heated oxygen-sensor design in a given position. Confirm the terminology and test procedure for the exact vehicle rather than assuming every upstream or downstream sensor works the same way.
Note: A wideband air/fuel-ratio sensor is not tested like a conventional 0–1V narrowband oxygen sensor. Use the correct scan-tool parameter and Toyota diagnostic information for your model instead of applying one voltage range to every RAV4.
Four-cylinder RAV4 engines have one cylinder bank, identified as Bank 1. Some older V6 RAV4 models have Bank 1 and Bank 2. The code description, wiring diagram, or repair manual should identify which bank and sensor position requires testing.
Do not assume a sensor has failed because you see a lean-mixture, rich-mixture, or catalyst-efficiency code. Intake leaks, exhaust leaks, misfires, fuel-pressure problems, damaged wiring, connector corrosion, and catalyst problems can all influence sensor readings. As the Walker oxygen-sensor training guide explains, an OBD-II code alone does not prove that the reporting sensor is defective.
How Do You Know Which RAV4 Oxygen Sensor Is Bad?
Begin with an OBD-II scan instead of disconnecting the battery or clearing the malfunction light. Record the following information:
- The exact stored and pending diagnostic trouble codes
- The code description, including bank and sensor position
- Freeze-frame engine speed, temperature, load, and fuel-trim data
- Whether the malfunction light is steady or flashing
- The current OBD readiness-monitor status
Codes that name an oxygen-sensor or air/fuel-ratio-sensor circuit, signal, or heater provide a starting point, but you still need to inspect the connector, wiring, heater power, grounds, exhaust system, and engine operating condition. A code such as P0420 concerns catalyst-monitor efficiency and does not automatically authorize an oxygen-sensor replacement. Toyota diagnostic procedures evaluate catalyst performance using information from sensors before and after the catalyst, so an exhaust leak, mixture fault, sensor problem, or deteriorated catalyst must be separated through testing. For additional layout context, see this guide to the Toyota RAV4 catalytic-converter layout.
When live data is available, compare the relevant scan parameters with the model-specific diagnostic procedure. Conventional narrowband sensors and wideband A/F sensors produce different data. The DENSO sensor troubleshooting reference provides general background, but Toyota specifications for your exact RAV4 take priority.
A trouble code tells you what the computer detected. It does not tell you to replace a part without testing the circuit and the conditions that produced the code.
How Do You Identify the Correct RAV4 Oxygen Sensor?
Match the replacement by VIN, model year, engine or hybrid powertrain, emissions certification, sensor position, sensor type, connector, wire count, and harness length. Do not select a part only because the threaded body looks similar.
Pay particular attention to these differences:
- Sensor 1 versus Sensor 2: The positions serve different diagnostic roles and may use different internal designs or connectors.
- A/F sensor versus conventional O2 sensor: These sensor technologies are not automatically interchangeable, even when parts catalogs or scan tools use overlapping O2 terminology.
- Federal versus California emissions: Some applications use different parts for different emissions certifications.
- Direct-fit versus universal: A direct-fit sensor includes the intended connector and harness. A universal sensor may require manufacturer-approved wiring procedures.
Use the Toyota Manuals and Warranties portal for model-year owner, maintenance, and warranty information. For exact North American repair procedures, wiring diagrams, diagnostic steps, and service specifications, use the Toyota Technical Information System (TIS). Also check whether an emissions warranty may cover the diagnosed component before paying for the repair. Coverage depends on the model year, registration location, component, mileage, and warranty terms.
What Tools Do You Need to Replace a RAV4 Oxygen Sensor?
A 22 mm, or approximately 7/8-inch, slotted oxygen-sensor socket fits many sensors, but it is not universal. Access can also require a crowfoot-style wrench, offset wrench, extension, or swivel. Verify the tool size and fit before applying force.
Gather these items before starting:
- OBD-II scan tool capable of reading stored and pending codes
- Correct replacement sensor
- Correctly sized oxygen-sensor socket or wrench
- Ratchet, extensions, and a hand-operated breaker bar if needed
- Torque wrench covering the required installation specification
- Penetrating lubricant
- Small pick or flat-tip tool for the connector lock, when appropriate
- Thread chaser intended for oxygen-sensor bungs, if the threads need light cleaning
- Safety glasses and heat-resistant work gloves
- Wheel chocks, floor jack, and correctly rated jack stands when underbody access is required
Warning: Never work beneath a RAV4 supported only by a hydraulic jack. Use Toyota-approved lifting points, wheel chocks, and properly rated jack stands on a solid, level surface. Stop if you cannot reach the sensor without placing yourself near an unstable vehicle or hot exhaust.
Before You Begin: Safety and Vehicle Preparation
- Park safely. Choose a level, well-ventilated work area. Shift to Park, apply the parking brake, and chock the wheels that will remain on the ground.
- Turn the vehicle completely off. Remove the key or move the smart key away from the vehicle.
- Check Hybrid and Prime status. Confirm the READY indicator is off so the gasoline engine cannot start automatically. Do not touch orange high-voltage cables or components.
- Let the exhaust cool. Exhaust manifolds, catalytic converters, pipes, and sensors can cause severe burns.
- Save the scan data. Record codes, freeze-frame data, and readiness status before clearing codes or disconnecting the battery.
- Check the 12-volt battery procedure. Some model-specific repair procedures require negative-terminal disconnection and a specified waiting period; other work may not. Follow Toyota repair information for the exact vehicle.
- Raise the vehicle only when required. Follow the applicable Toyota lifting procedure and support the vehicle with jack stands.
Do not disconnect the negative battery cable simply to erase a code. When the repair procedure requires battery disconnection, save diagnostic information first and follow its shutdown, waiting, reconnection, and initialization instructions. Battery disconnection can reset ordinary diagnostic information, readiness monitors, and some vehicle settings.
How Do You Remove a Toyota RAV4 Oxygen Sensor?
1. Confirm the Sensor Location
Follow the wiring diagram, code description, or repair procedure to identify the correct sensor. Sensor 1 is generally the monitored sensor closest to the engine, while Sensor 2 is farther downstream. Do not remove the easiest sensor merely because it is visible.
2. Inspect and Record the Wire Routing
Note how the harness passes around heat shields, brackets, the engine, and moving components. Take a reference photo if the route is difficult to remember. The replacement wire must not contact the exhaust, drive axle, steering parts, or sharp edges.
3. Unplug the Electrical Connector
Release any harness clips, press the connector lock, and separate the connector by its housing. Do not pull on the wires. Inspect the terminals for bent pins, moisture, oil, corrosion, heat damage, or a loose fit.
4. Apply Penetrating Lubricant
Apply a small amount of penetrating lubricant where the sensor threads enter the exhaust bung. Keep lubricant away from the electrical connector and nearby hot components. Allow it time to work according to the product directions.
5. Loosen the Old Sensor
Seat the correctly sized oxygen-sensor socket fully over the hex and apply smooth, controlled force. Avoid sudden impacts. Once the sensor breaks free, turn it out by hand when possible.
Warning: Do not use an impact wrench or an arbitrary removal-torque target. Stop if the sensor hex rounds, the socket spreads, the bung twists, or the exhaust begins to deform. A technician may need to remove the exhaust section or repair the bung.
6. Inspect the Exhaust Bung
Check the bung for damaged, contaminated, or missing threads. Remove loose debris without pushing material into the exhaust. Use a suitable thread chaser only when the threads need light restoration. Cross-threaded or severely damaged bungs require professional repair.
How Do You Install a New RAV4 Oxygen Sensor?

1. Compare the New and Old Sensors
Confirm that the thread size, connector, wire count, harness length, clips, and sensor type match the removed part. The protective tip may look different, but the replacement must be cataloged for the exact application and position.
2. Follow the Anti-Seize Instructions
Inspect the replacement threads. Bosch states that its oxygen sensors come with conductive anti-seize pre-applied, and other manufacturers may supply or specify their own thread treatment. Do not add more when the replacement instructions say the threads are already prepared. See the Bosch oxygen-sensor information and the instructions supplied with your replacement.
When separate anti-seize is specified, apply only the amount and type directed by the sensor manufacturer. Keep it away from the sensor tip, vents, protective tube, and electrical connector.
Pro Tip: Extra anti-seize is not extra protection. Too much can contaminate the sensor, alter tightening friction, and spread onto surrounding parts.
3. Start the Sensor by Hand
Thread the sensor into the bung by hand for several turns. It should rotate smoothly. If it binds immediately, back it out and inspect the threads. Never use a ratchet to force a sensor that has not started correctly.
4. Tighten to the Correct Specification
Use a torque wrench and the specification supplied by Toyota for the exact application or by the replacement-sensor manufacturer when appropriate. Generic aftermarket instructions sometimes cite a value near 35 lb-ft for certain threaded sensors, but that is not a universal RAV4 specification. Sensor design, thread treatment, bung material, and the tool arrangement can affect the correct procedure.
If Toyota specifies a special service tool, crowfoot, or other offset tool, follow the repair manual’s torque-wrench orientation and effective-length instructions. Do not assume that a specification intended for a straight socket can be applied unchanged through a differently positioned extension tool. Toyota’s Technical Information System is the final reference for model-specific repair procedures.
The Walker installation guide likewise advises starting the sensor by hand, tightening it to specification, and avoiding overtightening.
5. Route and Connect the Harness
Follow the original routing. Reinstall every heat shield, bracket, and harness clip that was removed. Keep the wire away from the exhaust and any rotating or steering component. Push the electrical connector together until its lock engages.
6. Reassemble and Lower the Vehicle
Reinstall any covers or shields using their original fasteners. Remove tools from beneath the vehicle, lower it safely, remove the wheel chocks when appropriate, and reconnect the battery if the approved procedure required disconnection.
| Check | Correct Result |
|---|---|
| Part match | Correct sensor technology, position, connector, and harness length |
| Threads | Sensor starts smoothly by hand without binding |
| Anti-seize | Used only as directed and kept away from the sensing end |
| Tightening | Tightened with the specified tool arrangement and applicable torque procedure |
| Harness | Connector locked and wire secured away from heat and moving parts |
What Should You Check After Replacing the Sensor?
- Start the vehicle in a ventilated area. Listen for an exhaust leak around the sensor bung.
- Watch the dashboard. A malfunction light may remain on until the stored code is cleared or the OBD system completes enough successful tests.
- Scan the vehicle again. Check for immediate, pending, or returning codes.
- Review live data. Select the scan parameter that matches the installed sensor technology rather than assuming a conventional narrowband voltage display.
- Check fuel trims and operating condition. Abnormal readings may indicate an unresolved intake leak, fuel problem, misfire, or exhaust leak.
- Confirm readiness later. Replacing an emissions component, clearing codes, or disconnecting the battery can leave one or more OBD monitors incomplete.
Note: Do not schedule an emissions inspection immediately after clearing codes or disconnecting the battery. The vehicle must complete its applicable self-tests. The California Bureau of Automotive Repair OBD reference explains that readiness monitors must rerun after these events.
What Should You Do If the New Oxygen Sensor Doesn’t Work?
A returning code does not necessarily mean the new part is defective. The timing and type of fault can help narrow the problem.
| What Happens | Likely Areas to Check |
|---|---|
| A heater or circuit code returns immediately | Wrong sensor, loose connector, bent terminal, damaged wiring, blown fuse, missing power, poor ground, or incompatible sensor technology |
| The same code returns after driving | Intake leak, exhaust leak, fuel-delivery problem, misfire, contamination, incorrect sensor, or unresolved circuit fault |
| P0420 or P0430 returns | Catalyst efficiency, exhaust leaks, engine-control problems, misfires, fuel mixture, and the accuracy of the applicable pre- and post-catalyst sensor data |
| No sensor data appears | Incorrect scan parameter, unsupported generic PID, open circuit, connector problem, sensor-type mismatch, or scan-tool limitation |
| An exhaust leak develops | Loose sensor, damaged bung, cross-threading, cracked exhaust component, or a disturbed gasket |
| The sensor will not tighten | Damaged or stripped bung threads requiring thread repair or exhaust-component replacement |
Use a multimeter only with the correct wiring diagram and test procedure. Probing the wrong terminal, applying voltage to a signal circuit, or measuring an air/fuel-ratio sensor as though it were a conventional narrowband O2 sensor can produce misleading results or circuit damage.
Stop and seek professional diagnosis when the wiring disappears into an inaccessible harness, the exhaust bung is damaged, the sensor is seized, the engine is misfiring, or the scan results do not match the code description.
Do RAV4 Oxygen Sensors Have a Replacement Interval?
Your RAV4 does not need a universal oxygen-sensor replacement at 60,000, 100,000, or any other one-size-fits-all mileage. Follow the maintenance and emissions information for your model year, and replace a sensor when testing confirms a fault, the part is physically damaged, or Toyota specifies replacement for the application.
| Task | When to Do It |
|---|---|
| Scan a malfunction light | As soon as practical; stop driving if the light flashes or the engine misfires severely |
| Inspect exhaust pipes and mountings | At the intervals listed in the applicable Toyota maintenance guide and whenever you hear or smell an exhaust leak |
| Inspect sensor wiring | During related repairs or when a sensor-circuit code appears |
| Repair misfires and mixture problems | Promptly, because prolonged abnormal combustion can overheat or damage the catalytic converter |
| Replace an oxygen or A/F sensor | When diagnosis confirms a sensor or heater failure, the part is physically damaged, or Toyota specifies replacement |
The EPA’s OBD frequently asked questions explains the role of onboard diagnostics in identifying emissions-related faults. Responding to an actual fault and completing the correct diagnosis is more useful than replacing sensors on an invented universal mileage schedule.
Frequently Asked Questions
How often should I replace my Toyota RAV4 oxygen sensor?
Do not use a universal replacement interval. Follow the maintenance information for your model year and replace the sensor when diagnosis confirms a failure, the part is damaged, or Toyota specifies replacement for that application.
Can a faulty oxygen sensor cause engine or catalytic-converter damage?
A sensor fault does not automatically damage the engine. However, an unresolved sensor, fuel-control problem, or misfire can contribute to an excessively rich or lean condition. Prolonged rich operation or severe misfiring can overheat and damage the catalytic converter.
What are the symptoms of a bad oxygen sensor?
Possible signs include a malfunction light, abnormal fuel economy, rough running, hesitation, failed emissions testing, or relevant sensor-circuit codes. These symptoms also have other causes, so test the wiring, connector, exhaust system, fuel control, and sensor data before replacing the part.
Is it safe to drive with an oxygen-sensor warning?
A steady malfunction light does not by itself prove an immediate mechanical emergency, but the fault should be diagnosed soon. Stop driving and arrange service if the light flashes, the engine misfires badly, power drops sharply, the exhaust overheats, or the vehicle produces strong fuel or exhaust odors.
Will replacing the oxygen sensor turn off the check engine light?
It will resolve the light only when the replaced sensor, its heater, or its related circuit is the actual cause. The light or code can return when the real problem is damaged wiring, an exhaust leak, an intake leak, a fuel-system fault, a misfire, an incompatible sensor, or a failing catalytic converter.
Which RAV4 sensor is Bank 1 Sensor 1?
Bank 1 Sensor 1 is the monitored Sensor 1 position on Bank 1 and is generally the sensor closest to the engine before the monitored catalyst. Four-cylinder RAV4 engines have only Bank 1. Older V6 models have two cylinder banks, so use the applicable wiring diagram or Toyota repair information to identify the bank correctly.
Should I disconnect the battery before replacing the sensor?
Follow the repair procedure for your exact model. Some RAV4 procedures require disconnecting the negative 12-volt cable and observing a waiting period. Save codes and freeze-frame information first because battery disconnection can reset diagnostic information, readiness monitors, and some vehicle settings.
How many oxygen sensors does a Toyota RAV4 have?
There is no single sensor count that applies to every RAV4. The number and type vary with model year, engine or hybrid powertrain, emissions certification, and exhaust layout. Use the VIN, emissions label, parts information, and Toyota repair manual for the exact vehicle instead of assuming that every RAV4 has two sensors.
Do I need to replace both RAV4 oxygen sensors at the same time?
No. Do not automatically replace both sensors because one code appeared. Diagnose the affected circuit and replace the sensor or related component that testing identifies unless the Toyota procedure for the exact fault calls for additional replacement.
What torque should I use for a RAV4 oxygen sensor?
Use the specification and tool arrangement listed for your exact model year, powertrain, sensor position, and replacement part. Do not treat a generic 35 lb-ft value as a universal RAV4 specification. If the procedure uses an offset special service tool, follow its torque-wrench setup instructions as well.
Will replacing an oxygen sensor fix a P0420 code?
Not automatically. P0420 is a catalyst-efficiency code, and diagnosis can involve the catalytic converter, exhaust leaks, fuel-control problems, misfires, and the accuracy of the sensors used to monitor the catalyst. Test the system before replacing a sensor solely because P0420 is stored.
Conclusion
A successful Toyota RAV4 oxygen-sensor replacement starts with diagnosis, not parts swapping. Save the scan data, identify the correct bank and sensor position, confirm the actual sensor technology, match the replacement to the VIN and emissions package, and use safe access equipment.
During installation, protect the exhaust threads, follow the sensor manufacturer’s anti-seize instructions, start the sensor by hand, and use the correct Toyota or replacement-part tightening procedure. Finish by checking the connector, wire routing, exhaust seal, live data, returning codes, and readiness status. When the sensor is seized, the bung is damaged, or the diagnostic results remain unclear, professional repair is safer than applying more force.
Sources
- Toyota Manuals and Warranties — model-year owner information, maintenance information, and warranty documentation
- Toyota Technical Information System (TIS) — Toyota repair manuals, wiring diagrams, service bulletins, diagnostic procedures, and model-specific service information
- DENSO O2 and A/F Sensor Troubleshooting — sensor behavior, testing, and air/fuel-ratio sensor distinctions
- Walker Oxygen Sensor Installation Guide — removal, thread preparation, tightening, and harness installation
- Bosch Premium Oxygen Sensors — direct-fit sensor design and thread-treatment information
- U.S. EPA OBD Frequently Asked Questions — malfunction-light and onboard-diagnostic background
- California Bureau of Automotive Repair OBD Test Reference — readiness-monitor requirements after repairs and battery disconnection
