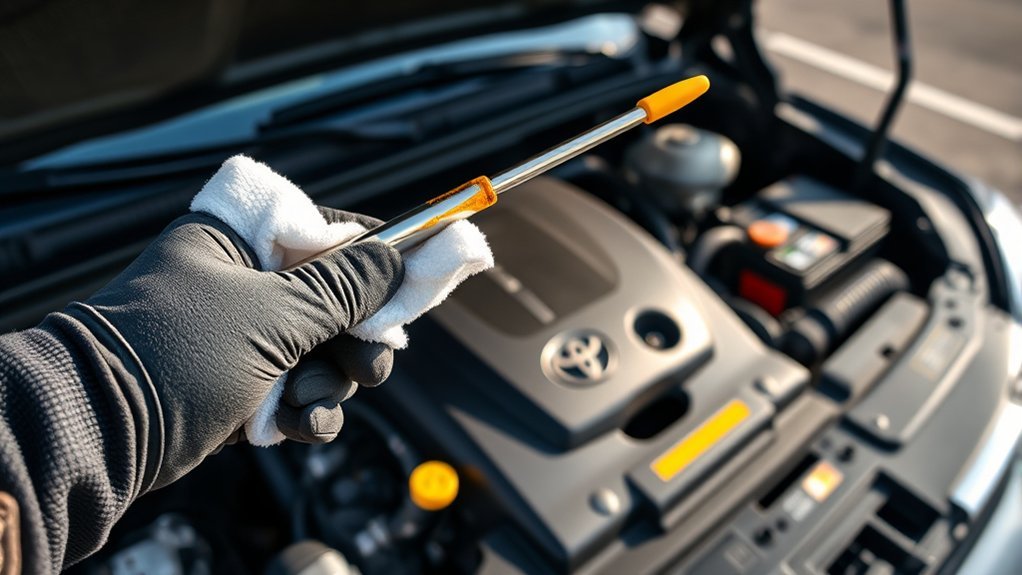
Checking your Toyota Tundra’s oil level takes only a few minutes, but the reading is useful only when you follow the correct process. Park on level ground, use the procedure in your truck’s owner’s manual, and never confuse the engine’s total oil capacity with the much smaller amount that may be needed for topping up.
Quick Answer
Park your Toyota Tundra on level ground, warm the engine, switch it off, and wait at least five minutes. Remove the dipstick, wipe it clean, fully reinsert it, then pull it out again. The oil should sit between the low and full marks. Add the specified oil slowly if needed.
Key Takeaways
- Use level ground and wait long enough after shutting off a warmed engine for the oil to return to the oil pan.
- Wipe, fully reinsert, and remove the dipstick before judging the level.
- Add only the oil grade specified for your exact model year and engine.
- A complete oil-change capacity is not the amount you should add when the dipstick reads low.
- Investigate repeated oil loss, sudden level changes, leaks, milky oil, or a strong fuel smell.
At a Glance
| Time Required | About 5 to 10 minutes after the engine is switched off |
| Difficulty | Easy |
| Tools Needed | Clean lint-free cloth or shop towel; clean funnel if oil must be added |
| Cost | No cost to check; the correct engine oil is needed only if the level is low |
Why Regular Oil Checks Are Essential for Your Toyota Tundra

Regular oil checks help you catch a low level before inadequate lubrication causes excessive heat or engine wear. They can also reveal a leak, recurring oil consumption, an incorrect oil-change fill, or a level that is rising because another fluid may be entering the oil.
Check the level at the frequency recommended in your owner’s manual and before long trips, towing, or heavy use. Checking at regular intervals also gives you a useful baseline. A sudden change matters more than one reading taken on a slope or immediately after shutting off the engine.
Toyota’s instructions can vary slightly by model year, but official Tundra manuals commonly direct owners to warm the engine, switch it off, and wait more than five minutes before checking. Use the procedure in the Toyota manual for your exact model year as the final authority.
Preparing to Check Your Oil Level in a Tundra
Set up the truck correctly before removing the dipstick. A small change in parking angle or waiting time can affect the reading.
- Park on level ground: Avoid a sloped driveway, curb, ramp, or uneven trail surface.
- Warm the engine: Drive normally or let the engine reach normal operating temperature unless your owner’s manual specifies another procedure.
- Switch the engine off: Set the parking brake and wait at least five minutes so oil can drain into the oil pan.
- Prepare a clean cloth: Use a lint-free shop towel or clean paper towel that will not leave debris on the dipstick.
- Confirm the markings: Identify the low and full marks, holes, dimples, or crosshatched range used on your dipstick.
Warning: The engine, exhaust components, and nearby surfaces may remain hot. Keep your hands, clothing, and towel away from hot parts, belts, fans, and other moving components.
[Amazon Products Picked for You]

These bulk shop towels are designed for cleaning up grease, liquids, oils and spills in automotive repairs and garages.

55 Towels/Roll; 12 Rolls of Scott Shop Towels Original/Case; 660 Towels/Case; Original Blue Shop Towels; 9.4"x11" sheets

60 Sheets/Roll; 3 Big Rolls of Scott Shop Towels Original Blue Shop Towels; 1 Pack; Large 11"x9.4" Towels; 180 Sheets Total
How to Find the Dipstick and Oil Filler Cap
Open the hood and locate the engine-oil dipstick. It normally has a loop or handle that can be pulled by hand. The oil filler cap is a separate cap on top of the engine and usually displays an oil-can symbol or an oil-viscosity reference.
Engine layouts differ between Tundra generations and powertrains. Do not rely only on a photograph from another model year. Check the under-hood diagram or the “Do-it-yourself maintenance” section of your owner’s manual if either component is unclear.
Verify the exact model year and engine before buying oil. A first-generation V8, a later 5.7L V8, a twin-turbo V6, and an i-FORCE MAX hybrid may not share the same viscosity requirement or capacity.
Step-by-Step Guide to Checking Your Oil Level
The basic process is simple: remove the dipstick, clean it, reinsert it completely, and inspect the fresh reading. The details below help prevent a smeared or misleading result.
Proper Preparation Steps
- Confirm that the truck is on level ground and the engine is switched off.
- Wait at least five minutes after a warmed engine is shut down.
- Locate the dipstick and place a clean towel under its end.
- Pull the dipstick out without dragging the measuring area against surrounding components.
- Wipe all oil from the measuring end.
- Insert the dipstick fully until it is seated in its normal position.
- Pull it out again and inspect the measuring area immediately.
The 2012 Tundra owner’s manual and the 2021 Tundra owner’s manual both describe checking on level ground after warming the engine, switching it off, and waiting more than five minutes.
Accurate Dipstick Reading Techniques
Look for the highest continuous oil line across the dipstick’s measuring area. A streak far above that line may be oil dragged up the dipstick tube rather than the true level. Check both sides and use the clearer side when one is smeared.
| Step | Action | What to Check |
|---|---|---|
| 1. Remove | Pull out the dipstick | Keep the measuring end from touching dirty surfaces |
| 2. Clean | Wipe off all oil | The measuring area should be clean before reinsertion |
| 3. Reinsert | Seat the dipstick fully | Partial insertion produces an inaccurate reading |
| 4. Inspect | Remove it and check both sides | Use the clear, continuous oil line rather than an isolated streak |
| 5. Assess | Compare the line with the marks | The level should remain within the indicated operating range |
Pro Tip: If one side is heavily smeared, wipe the dipstick and repeat the complete process. Two similar readings are more reliable than trying to interpret one unclear streak.
Oil Level Maintenance Tips
Keep the level within the marked range rather than trying to reach a model-specific capacity number. The dipstick shows the oil currently in the engine. The capacity specification describes an approximate amount used during a complete drain and refill.
If the level is below or close to the low mark, add the oil specified in your owner’s manual through the filler opening. Add a small amount, reinstall the cap, wait briefly, and check the dipstick again. Repeat only as needed. Stop before the level passes the full mark.
Note: The 2012 Tundra manual lists 7.9 quarts with a filter as a drain-and-refill reference for its 4.6L and 5.7L V8 engines. That figure is not the amount to pour into an engine simply because its dipstick reads low.
Oil often becomes darker during normal use, so color alone does not determine whether it needs changing. Follow your maintenance schedule. Arrange an inspection if the oil looks milky or foamy, contains visible metal, smells strongly of gasoline, or changes level without a clear explanation.
How to Troubleshoot Common Dipstick Reading Errors

An unclear reading usually comes from parking angle, insufficient waiting time, incomplete dipstick insertion, or oil smearing inside the tube. Work through the following checks before adding oil:
- Check the parking surface: Move the truck to level ground if it is leaning forward, backward, or sideways.
- Wait longer: Oil that remains in the engine’s upper passages can make the dipstick appear lower immediately after shutdown.
- Clean the dipstick completely: Old oil left on the measuring area can hide the fresh line.
- Reinsert it fully: A partially seated dipstick cannot measure the correct depth.
- Check both sides: Use the side with the cleanest continuous line.
- Repeat the test: Take two or three readings under the same conditions if the first result is inconsistent.
| Problem | Likely Cause | What to Do |
|---|---|---|
| One side reads higher | Oil smeared against the dipstick tube | Clean it and repeat; use the clearer continuous line |
| Reading changes each time | Uneven ground, short waiting time, or incomplete insertion | Correct the conditions and take two matching readings |
| No oil appears | Very low level or an incorrect checking procedure | Repeat correctly; add the specified oil cautiously or obtain assistance |
| Oil appears above full | Overfill, incorrect conditions, or fluid contamination | Repeat the check and arrange service if the high reading remains |
| Oil looks milky | Possible moisture or coolant contamination | Avoid heavy use and have the cause diagnosed |
Troubleshooting Low or High Oil Levels: What to Do Next
Take a second reading before correcting a low or high level. The truck must be level, the dipstick must be fully seated, and the waiting period must be consistent.
- If the oil is slightly low: Add the specified oil in small increments through a clean funnel. Recheck after each addition.
- If no oil appears on the dipstick: Do not assume the engine is empty or pour in its full capacity. Add cautiously, recheck, and seek professional help if the level remains unclear.
- If the level is above full: Do not add more oil. Have the excess removed if a repeat check confirms an overfill.
- If the level keeps dropping: Inspect the parking area and visible engine surfaces for leaks. Record the mileage, date, dipstick position, and amount added.
- If the level rises: Arrange an inspection. Fuel, coolant, or another problem may be affecting the reading.
Frequent oil additions, blue exhaust smoke, fresh oil spots, burning-oil odors, or a sudden change from the truck’s normal pattern deserve professional diagnosis. Do not use an unsupported universal consumption threshold to decide that the loss is normal.
[Amazon Products Picked for You]

WIDE VEHICLE COMPATIBILITY - The set includes 12 color-coded adapters that fit a wide range of vehicles, including Toyota, Lexus, Scion, Mazda, Ford, Volvo, Audi, Volkswagen Group (VAG), Honda, Nissan, Kia, Hyundai, BMW, Mercedes, GM, Chrysler, Subaru, and more.

Compatible Models: Our car oil funnels are compatible with Toyota 2002-2008 Solara, 2002-2025 Camry, 2019-2021 Prius, 2005-2022 Avalon, 2017-2018 Corolla IM, 2007-2014 FJ Cruiser, 2001-2005 Echo, 2005-2025 4Runner, 2005-2022 Rav4, 2005-2019 Hilux, 2003-2014 Matrix, 2008-2022 Sienna, and more

【GREAT COMPATIBILITY】-- Fits for Honda Generator EU1000 EU2000 EU3000 EU1000i EU2000i EU3000i Handi GX110 GX120 GX140 GX160 GX180 Coleman 1850. NOTE THAT DOESN'T FIT for EU2200i.
Best Practices for Oil Maintenance in Your Tundra
Accurate oil-level checks work best as part of a consistent maintenance routine. Use the correct oil, follow the exact service schedule, and keep records of changes and additions.
[Amazon Products Picked for You]

High Mileage for engines 75,000+ miles
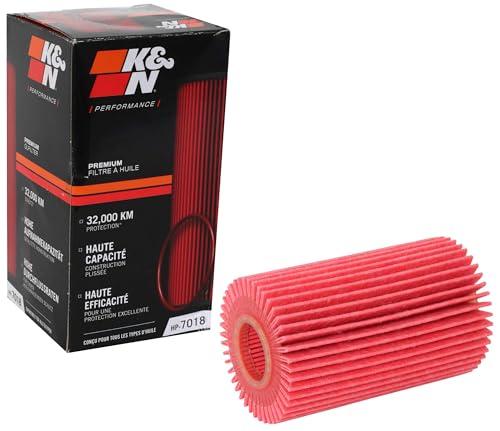
HIGH FLOW RATES: Designed to provide exceptional flow rates and a consistent flow of oil to your engine

Advanced protection against the four main causes of engine breakdown: wear friction heat and deposits
Regular Oil Checks
- Check under similar conditions each time so the readings are comparable.
- Inspect the level before long trips, towing, or extended heavy-duty use.
- Look under the truck for fresh oil spots and inspect the engine bay for wet areas.
- Record oil additions if the level repeatedly drops between services.
- Confirm that the filler cap and dipstick are fully installed after every check.
A written record can help a technician distinguish normal variation from a developing leak or consumption problem. Include the date, mileage, dipstick position, oil type, and quantity added.
Optimal Oil Types
Use the viscosity and performance specification listed for your exact model year and engine. Do not assume that a viscosity recommended for a 2012 5.7L V8 also applies to a newer twin-turbo gas or hybrid Tundra.
Check the owner’s manual, filler cap, or Toyota documentation before buying oil. The American Petroleum Institute Motor Oil Guide explains the certification marks found on licensed oil containers, but the Toyota requirement for your truck remains the controlling specification.
Do not mix in additives unless Toyota specifically approves them for the engine. When topping up, use the same specified viscosity and a compatible oil whenever possible.
Professional Maintenance Services
You can check and top up the oil yourself, but professional service is appropriate when:
- The level repeatedly falls between checks.
- No oil appears after you repeat the procedure correctly.
- The level remains above full.
- The oil smells strongly of fuel or looks milky, foamy, or metallic.
- You see active leakage, blue smoke, or a burning-oil smell.
- An oil-pressure warning appears.
- You are unsure which oil or specification applies to the truck.
Follow the Warranty and Maintenance Guide for the correct oil-change interval. The schedule can vary by model year and may require earlier service under special operating conditions. Keep invoices or maintenance records showing the date, mileage, oil specification, and work performed.
If oil is drained or removed, collect it in a leak-proof container and take it to an appropriate recycling facility. The U.S. Environmental Protection Agency’s used-oil guidance explains safe collection and recycling practices.
Oil-Pressure Warning Light Versus Oil Level
An oil-pressure warning light is not a routine reminder to check the dipstick. It may indicate that the engine is not receiving adequate oil pressure, even when some oil remains in the engine.
If the warning appears while driving, move to a safe location and switch off the engine as soon as it is safe to do so. Check the owner’s manual and obtain assistance. Continuing to run an engine with insufficient oil pressure may cause serious damage.
Related Guides
Frequently Asked Questions
How do you check the oil level on a Toyota Tundra?
Park on level ground, warm the engine, switch it off, and wait at least five minutes. Remove and clean the dipstick, fully reinsert it, pull it out again, and compare the continuous oil line with the low and full marks.
What is the correct method for checking a vehicle’s oil level?
Use the manufacturer’s procedure, level ground, a suitable waiting period, and a clean dipstick. Wipe the dipstick, insert it completely, remove it again, and take the reading before oil has time to run or smear across the measuring area.
Do you check Toyota Tundra oil hot or cold?
Toyota Tundra manuals commonly instruct owners to warm the engine, switch it off, and wait more than five minutes before checking. Follow the procedure in the manual for your exact model year because instructions may differ.
Can you check the oil when the engine is completely cold?
A cold check can help you monitor changes when it is performed consistently, but it may not match Toyota’s official reference procedure. Use the warm-engine method in your owner’s manual when deciding whether oil must be added.
How much oil should you add when the dipstick reads low?
Add the specified oil gradually and recheck the dipstick after each addition. Do not pour in the engine’s complete drain-and-refill capacity. The amount needed depends on the actual level and the dipstick range for that engine.
What should you do if no oil appears on the dipstick?
Confirm that the truck is level, wait long enough, clean and fully reinsert the dipstick, and repeat the check. If the dipstick remains dry, add the correct oil cautiously or obtain professional help. Do not start by adding the full engine capacity.
Sources
- Toyota 2012 Tundra Owner’s Manual — checking procedure, dipstick guidance, oil selection, and model-specific capacity references
- Toyota 2021 Tundra Owner’s Manual — warm-engine oil-level checking procedure
- Toyota Manuals and Warranties — model-year-specific owner’s manuals and maintenance guides
- American Petroleum Institute Motor Oil Guide — engine-oil certification marks and classifications
- U.S. EPA Used Oil Guidance — safe collection and recycling of used engine oil
Conclusion
To check your Toyota Tundra’s oil correctly, park on level ground, follow the warm-engine waiting procedure in the owner’s manual, and take a fresh reading after wiping and fully reinserting the dipstick. Keep the oil within the marked range and add only the specified oil in small amounts.
Never use the engine’s complete drain-and-refill capacity as a top-off instruction. Capacities, viscosity grades, and service intervals vary by Tundra model year and engine. Investigate repeated oil loss, a persistent overfill, contamination signs, active leaks, or an oil-pressure warning before the problem leads to engine damage.