
Toyota Tacoma Radiator Replacement Overview
To replace a Toyota Tacoma radiator, let the engine cool fully, drain and contain the coolant, remove the access covers and fan components required for your truck, disconnect the radiator hoses and any transmission-cooler lines, remove the radiator without stressing the A/C condenser, install a VIN-matched replacement, refill with the specified coolant, bleed trapped air using the exact model-year procedure, and check for leaks after a full heat cycle. The job is best suited to an experienced DIYer because Tacoma cooling layouts vary by generation, engine, transmission, drivetrain, and hybrid configuration.
Last updated: September 11, 2026 — reviewed for current Tacoma generation differences, coolant guidance, and repair safety.
Quick Answer
To replace a Toyota Tacoma radiator, let the engine cool completely, drain and contain the coolant, remove the covers and fan components required for access, disconnect the hoses and any cooler lines, separate the radiator from the condenser, install the correct replacement, refill with specified coolant, bleed trapped air, and inspect for leaks.
Key Takeaways
- Verify the radiator by model year, engine, transmission, drivetrain, towing package, and VIN before installation.
- Never open a hot radiator cap or work beneath a truck supported only by a jack.
- Use the coolant type and concentration specified in your exact Toyota manual and on the coolant label.
- Transmission cooler lines are present only on certain configurations and require model-specific fluid procedures.
- Pressure-test the system when the model-specific procedure or leak diagnosis calls for it, complete a full heat cycle, and recheck the coolant level after the engine cools.
At a Glance
| Time Required | Several hours for an experienced DIYer; first-time repairs may take most of a day |
| Difficulty | Intermediate to advanced, depending on the Tacoma configuration |
| Tools Needed | Socket and wrench set, pliers, trim tool, drain pan, torque wrench, hose pick, funnel or vacuum-fill tool, jack stands when lifting is required, and a cooling-system pressure tester |
| Cost | Varies sharply by model year and location. RepairPal’s Tacoma-wide estimate, updated August 7, 2026, is $819–$926 before taxes and fees; year-specific quotes can differ substantially. DIY cost depends on the radiator, coolant, seals, clips, and any hoses replaced. |
Scope: This is a model-aware workflow, not one universal factory procedure. For 2024–2026 Tacoma trucks, especially i-FORCE MAX models, use the exact Toyota service procedure for radiator access, coolant filling, bleeding, and any electronic cooling-system setup. Do not apply an older-generation bleeding sequence to a newer truck.
Warning: Never remove a radiator or coolant-reservoir pressure cap while the engine is hot. Pressurized coolant can spray out and cause severe burns. Let the engine cool completely before opening the system.
Verify Your Tacoma Before Starting
The name “Toyota Tacoma” covers multiple generations, engines, transmissions, and cooling-system designs. Before ordering a radiator, record your truck’s model year, engine, drivetrain, transmission type, production date, and VIN.
Compare the replacement radiator with the original unit or verify the application through a trusted catalog. Check the following details:
- Overall height, width, and thickness
- Mounting-pin and bracket locations
- Upper and lower hose-neck positions
- Transmission-cooler fittings, when equipped
- Drain-plug location
- Fan-shroud mounting points
- Sensor, reservoir-hose, and vent connections
- Compatibility with towing or heavy-duty cooling equipment
Use your exact Toyota owner’s manual for coolant information. For removal steps, torque values, transmission-fluid procedures, and model-specific precautions, consult the Toyota Technical Information System or a professional repair database. For a focused overview of coolant selection, see this Toyota Tacoma coolant guide.
Note: A radiator described as “high performance” is not automatically correct for your truck. Whether you choose an original-equipment radiator or an aftermarket replacement, application accuracy matters more than branding.
Understanding the Importance of Radiator Maintenance
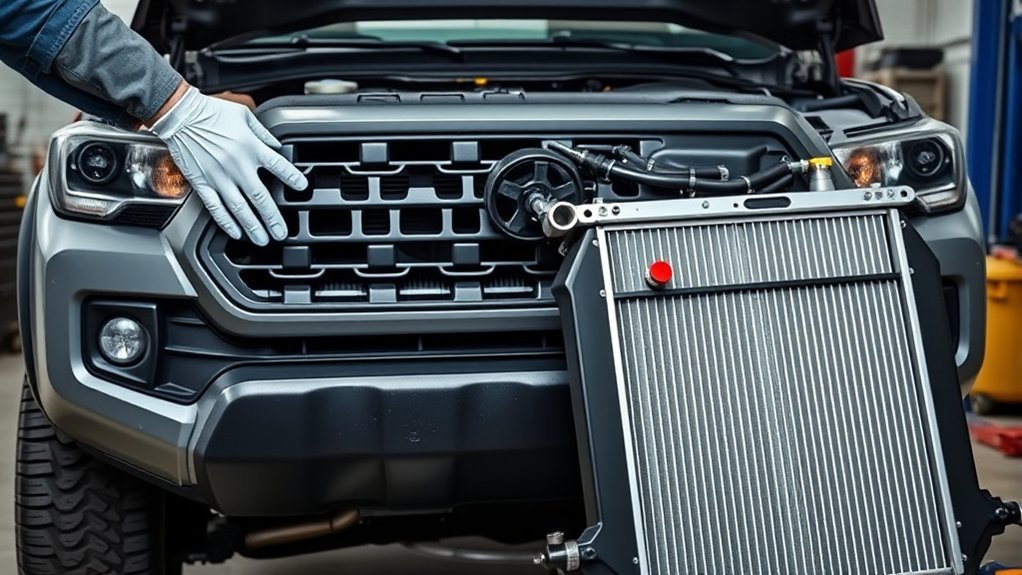
Your Tacoma’s radiator transfers heat from the engine coolant to the surrounding air. Restricted airflow, internal blockage, cracked plastic tanks, corroded seams, damaged fins, or coolant leaks can reduce its ability to control engine temperature.
Routine cooling-system care includes checking the coolant level when the engine is cold, inspecting hoses and clamps, removing debris from the cooling fins, and following the coolant-service schedule in the exact owner’s manual.
Replacing a damaged radiator can restore proper cooling-system operation. However, it will not correct unrelated problems such as a failed water pump, stuck thermostat, leaking head gasket, weak radiator cap, faulty cooling fan, collapsed hose, or combustion gases entering the coolant.
A new radiator will not solve overheating unless the radiator is the actual source of the problem.
[Amazon Products Picked for You]

【TROUBLESHOOTING & SAVING MONEY】28pcs universal radiator pressure tester and vacuum refill kit with functions of leak detection, temperature measurement, liquid filling, etc. If you use the coolant pressure tester, the tester can quickly and easily solve any problems related to radiator pressure, making your job easier and faster.Note: Please select the corresponding adapter according to the user manual; otherwise, leakage may occur. If a suitable adapter is not available, please use a universal adapter, which is suitable for all vehicle models.

[ Multi-function]: Our radiator pressure tester kit can test the leakage in the radiator system, replace the coolant and remove air bubbles. You can use the tester to quickly and easily solve any problems related to radiator pressure, making your work easier and faster.

【33PCS Comprehensive Tool Set】Includes: 17pcs color codes radiator caps, 3pcs aluminum adapters, 2pcs radiator cap test connectors, 1pc universal adapter, 1pc pressure testing pump with gauge, 1pc vacuum purge & refill tool, 2pcs clear hoses, 1pc thermometer, 2pcs EU & US air intake joints,1pc padiator cap wrench, a set of O-rings, 1pc user manual and a storage case.
Diagnose the Problem Before Replacing the Radiator
Do not replace the radiator solely because the temperature gauge moved above normal. First, inspect the complete cooling system.
Common signs of radiator failure include:
- Coolant leaking from a radiator tank, seam, drain plug, or core
- Visible cracks in a plastic end tank
- Heavy corrosion or damaged cooling tubes
- Cold sections across the radiator during a controlled temperature test, which may indicate internal restriction
- Repeated overheating after the thermostat, coolant level, fans, hoses, and water pump have been checked
- Coolant contamination inside an integrated transmission cooler, when equipped
A cooling-system pressure test can help locate an external leak. Do not exceed the system pressure listed for your vehicle or pressure cap. If coolant disappears without an obvious external leak, use a systematic Tacoma coolant-leak diagnosis or arrange professional testing before installing parts.
Pro Tip: Photograph the hose routing, electrical connectors, clips, cooler lines, and mounting cushions before disassembly. Those photos provide a reliable reference during installation.
[Amazon Products Picked for You]

➤ Our radiator repair pliers tool set can be used on most kinds of cars and trucks of radiators and tanks.

[High-Quality Materials]: The automotive coolant funnel kit is made of high-quality plastic, making it sturdy, durable, corrosion-resistant, and long-lasting.

Application: Compatible with Nissan Toyota Lexus Hyundai Engines with overhead camshaft engines using spacer shims. For example: Compatible with 4Runners and 1994 and newer trucks with 3UZE-E 3.0L V-6; Compatible with 1994 and newer T-100 with 3RZ-FE 2.7L 4-cylinder; Compatible with T-100 and Tacoma 1995 and newer with 5UZE-FE V-6 or 2RZ-FE 4-cylinder engines. NOTE: Don't Compatible with Land Cruiser 1993-1997 and Lexus LX400 1994-1997
Tools You’ll Need for Your Tacoma Radiator Replacement
Gather every tool and replacement part before draining the system. Exact socket sizes vary, so inspect your Tacoma rather than relying on one universal list.
[Amazon Products Picked for You]

【Compatibility】: This upper radiator hose and lower radiator hose kit is specifically designed for the Tacoma 1995-2004, 4Runner 1996-2002.
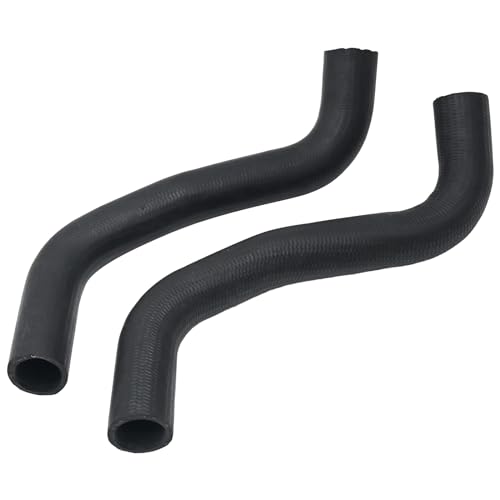
Replace Part Number: 16571-62070 16572-62090 1657162070 1657262090 16571 07030
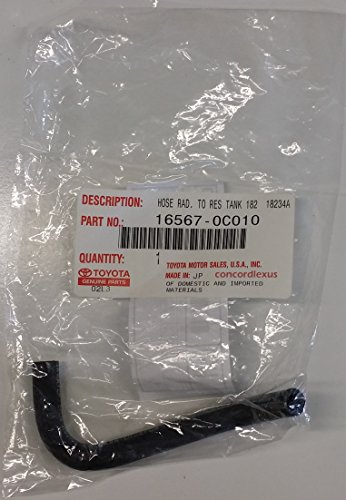
Reservoir hose: TOYOTA 16567-0C010 Engine Coolant Recovery Tank Hose
Essential Tools Overview
- Metric socket and wrench set
- Ratchet extensions
- Torque wrench covering the required fastener range
- Standard pliers and spring-clamp pliers
- Trim-clip tool or suitable plastic-prying tool
- Hose pick used carefully around sealing surfaces
- Large drain pan with a secure lid
- Funnel, spill-free funnel, or compatible vacuum-filling tool
- Cooling-system pressure tester with the correct adapter
- Flashlight and inspection mirror
- Floor jack and rated jack stands if underbody access is required
- Wheel chocks
- Safety glasses and chemical-resistant gloves
Some Tacomas may use fasteners near the sizes listed in the original guide, including 10mm, 12mm, 14mm, and 17mm heads. Treat those only as possibilities. Use the socket that fits securely and obtain the correct torque specification from the repair manual.
Optional Equipment Benefits
- Spring-clamp pliers: Hold constant-tension clamps open while you position the hose.
- Vacuum-filling tool: Helps fill the cooling system while reducing trapped air when shop air and the correct adapter are available.
- Hose pinch-off tools: Can limit fluid loss from certain low-pressure hoses when the hose manufacturer permits their use.
- Line plugs or caps: Keep dirt out of disconnected transmission cooler lines and reduce fluid loss.
- Magnetic work light: Improves visibility around lower hose connections and mounting points.
- Low-range torque wrench: Helps prevent damage to small mounting bolts and plastic components.
Parts and Supplies to Have Ready
In addition to the radiator, you may need:
- The exact specified coolant in the correct quantity
- Upper or lower radiator hoses if swollen, cracked, hardened, oil-soaked, or damaged
- Correct hose clamps or spring clamps
- Radiator mounting cushions, grommets, or brackets
- Transmission-cooler-line seals or clips, when required
- A radiator cap only if the existing cap is damaged, incorrect, contaminated, or fails testing
- Replacement trim clips
- Approved transmission fluid if any fluid is lost from cooler lines
- Absorbent pads and a sealable coolant container
Do not apply general-purpose sealant to hose necks, cooler fittings, or radiator seams unless the exact repair procedure specifically requires it.
How to Safely Drain Your Coolant
Park on a firm, level surface. Apply the parking brake, place the transmission in Park or in gear as appropriate, switch off the ignition, and let the engine cool completely.
If you must raise the truck, chock the wheels, use the approved lifting points, and support the vehicle with properly rated jack stands. Never work beneath a vehicle held only by a hydraulic jack.
Warning: Coolant may contain ethylene glycol. Avoid skin contact, keep it away from children and animals, clean spills immediately, and never leave an open drain pan unattended.
- Remove the skid plate or lower splash shield if it blocks access and your Tacoma is equipped with one.
- Place a large drain pan beneath the radiator drain or lower radiator hose.
- With the engine fully cold, open only the pressure cap or fill point identified by the exact service procedure. Do not assume every Tacoma uses the same radiator-cap layout.
- Open the radiator drain valve if accessible, or disconnect the lower hose according to the repair procedure.
- Allow the coolant to drain without splashing onto belts, wiring, painted surfaces, or the ground.
- Close the drain valve after inspection, or prepare the lower hose connection for reassembly.
Fresh coolant is preferred after a radiator replacement. Drained coolant can contain debris or contamination even when it appears clean. Store used coolant in a labeled, sealed container and follow local household hazardous-waste guidance. Never pour coolant onto the ground, into a storm drain, or down a household drain.
Radiator Replacement: Removing the Old Unit
The exact order varies, but the following sequence reflects the main tasks used on many conventional Tacoma cooling systems.
- Disconnect the battery when required. Follow the owner’s or repair manual, especially if electric fans, sensors, or powered shutters are near the work area. Preserve radio codes or settings when applicable.
- Remove upper covers and intake ducts. Use a trim tool to release plastic clips without breaking them.
- Remove or reposition the fan shroud and cooling fan components. Some models use electric fans, while others may use different fan arrangements. Do not force the shroud past the fan blades.
- Disconnect the overflow or vent hose. Mark its routing if needed.
- Release the upper and lower radiator hoses. Move each clamp back from the sealing bead, twist the hose gently to break the bond, and pull it straight from the neck. Avoid prying against a plastic neck.
- Disconnect transmission cooler lines when equipped. Place absorbent material beneath the fittings, use the correct line tools, and cap the openings immediately. Not every Tacoma has radiator-mounted transmission cooler connections.
- Remove the radiator mounting brackets or upper supports. Save the rubber cushions and note their orientation.
- Separate the radiator from the air-conditioning condenser. Remove the specified clips or bolts while supporting both components. Do not open refrigerant lines or allow the condenser to hang from them.
- Lift the radiator straight upward. Watch the lower locating pins, wiring, condenser fins, fan shroud, and remaining hoses.
After removal, inspect the surrounding area for damaged wiring, bent brackets, leaves, mud, oil contamination, loose condenser mounts, and worn radiator cushions.
Compare the Old and New Radiators
Place the radiators beside each other before transferring any components. Confirm that every connection and mounting feature matches.
Check:
- Core dimensions and thickness
- Hose-neck size, angle, and location
- Drain valve and plug condition
- Lower locating pins
- Upper bracket locations
- Condenser attachment points
- Fan-shroud holes
- Cooler fittings and thread type
- Reservoir or vent connection
- Required plugs, seals, and shipping caps
Remove shipping plugs only when you are ready to connect the related hose or line. Transfer brackets, cushions, fan assemblies, or shields only when the replacement instructions require it.
Installing the New Radiator
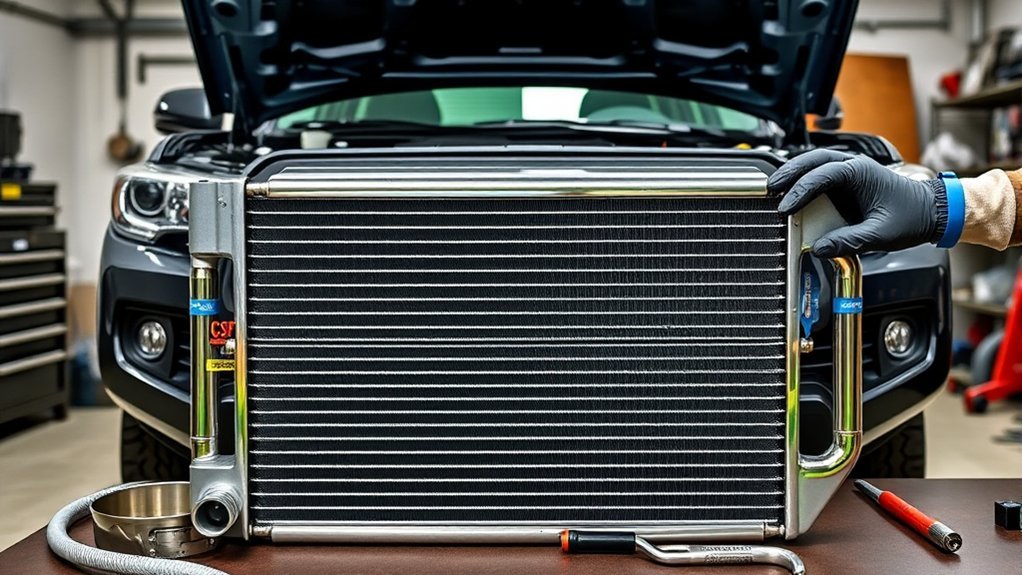
Whether you are installing an original-equipment radiator or a compatible aftermarket replacement, lower it carefully into the engine compartment without striking the condenser or bending the cooling fins.
Proper Radiator Alignment Techniques
- Guide the lower locating pins into their rubber cushions or mounting holes.
- Confirm that the radiator sits squarely without forcing it toward either side.
- Attach the condenser using the original clips, brackets, or bolts.
- Install the upper radiator supports loosely before final alignment.
- Verify clearance around the fan, shroud, hoses, wiring, condenser, and body panels.
- Tighten fasteners to the torque specified for the exact model. Do not assume a crisscross sequence or generic torque value.
The radiator should sit securely while retaining the isolation provided by its rubber cushions. Do not overtighten mounts until the rubber is crushed.
Securing Hoses and Connections
Inspect each hose internally and externally before reuse. Replace a hose that is cracked, swollen, hardened, abraded, oil-contaminated, or deeply marked by an old clamp.
- Clean the hose sealing surfaces without scratching them.
- Push each hose fully over the radiator neck and past the raised sealing bead.
- Return a constant-tension clamp to its original position behind the bead.
- Reconnect the reservoir or vent hose without kinks.
- Reconnect transmission cooler lines with the correct seals, clips, and torque when equipped.
- Route every hose and line away from fan blades, belts, pulleys, exhaust parts, and sharp edges.
- Install the fan shroud, fan connectors, intake ducts, upper covers, skid plate, and trim clips removed for access.
Do not use grease or silicone paste on a hose connection unless the hose, coolant, or vehicle manufacturer approves that product for the application. An incompatible lubricant may affect the rubber or contaminate the cooling system.
Pre-Fill Checks
Before adding coolant, verify the following:
- The radiator drain valve or plug is closed correctly.
- All hoses are fully seated.
- Every clamp is in the correct position.
- Cooler-line fittings are secure when equipped.
- Electrical connectors are attached.
- The fan rotates freely where a manual clearance check is appropriate.
- The radiator and condenser are supported correctly.
- No tools, rags, shipping plugs, or loose hardware remain in the engine compartment.
If automatic-transmission fluid escaped, measure or estimate the loss and follow the exact Toyota procedure for that transmission. Do not use a universal temperature range or assume every transmission uses a drip-style level check.
How to Fill and Bleed Your Coolant System
Use only the coolant specification and concentration listed for your exact Tacoma. Read the container before adding water. If the coolant is sold as a premixed product, do not dilute it. If it is a concentrate, mix it only as directed by the vehicle manual and product label. For example, Toyota’s 2024 Tacoma owner’s manual lists Toyota Super Long Life Coolant or a similar high-quality ethylene-glycol coolant meeting Toyota’s stated chemistry requirements; that example does not override the manual for another model year.
Cooling-system capacity varies, and some coolant remains inside the engine after a radiator drain. Do not assume that the amount removed equals the complete system capacity.
Vacuum-Filling Method
A compatible vacuum-fill tool can reduce trapped air and provide an initial vacuum-hold check.
- Connect the tool using the correct adapter.
- Pull the vacuum specified by the tool manufacturer.
- Close the valves and watch for vacuum loss.
- If the vacuum drops, inspect for an open drain, disconnected hose, loose clamp, or leak.
- Draw the specified coolant into the system according to the tool instructions.
A vacuum-hold check is not the same as a positive-pressure test. Complete a pressure test separately when the repair procedure calls for one.
Manual Filling and Bleeding
Generation note: Do not use the generic sequence below as a substitute for Toyota’s 2024–2026 factory bleeding procedure. Newer Tacoma cooling systems can require generation-specific steps and electronic control states.
- Position the truck as directed by the model-specific procedure.
- Open any factory bleed point only when the repair manual identifies one.
- Add coolant slowly to the designated fill point.
- Fill the overflow or expansion reservoir to the cold-level mark.
- Set the cabin-heater controls as directed for the vehicle’s heating system.
- Start the engine and monitor the temperature gauge, heater output, coolant level, and visible connections.
- Allow the thermostat to open while watching for sudden level changes or escaping air.
- Top up only as directed and keep hands, clothing, and tools away from moving fans and belts.
- Install the pressure cap once the bleeding procedure is complete.
Warning: Stop the engine immediately if the temperature rises rapidly, coolant begins to boil, the system will not accept coolant, the heater suddenly blows cold while the engine is hot, or a major leak appears.
How to Check for Leaks After Installation
Inspect the system during filling, while the engine warms, after it reaches normal temperature, and again after it cools completely.
- Check every connection: Look around the upper hose, lower hose, drain plug, reservoir hose, tank seams, cooler lines, and pressure cap.
- Use a flashlight: Examine the lower corners of the radiator and the space between the radiator and condenser.
- Watch the temperature gauge: The reading should stabilize in its normal range.
- Confirm heater operation: Steady heat can help indicate that coolant is circulating through the heater circuit, although it does not prove the system is completely free of air.
- Check fan operation: Verify operation according to the exact model’s control strategy.
- Perform a controlled pressure test when required: Use the correct adapter, follow the model-specific procedure, and do not exceed the specified pressure.
- Inspect the transmission cooler connections: Look for coolant or transmission-fluid seepage when those fittings are present.
- Recheck after cooling: Confirm the cold coolant level and inspect beneath the truck.
A few drops of clean water from the air-conditioning drain are normal after using the climate-control system. Coolant usually has a distinct color and feel, while transmission fluid has a different color and oily texture. Do not identify a fluid by taste or direct skin exposure.
Reinspect After the First Heat Cycle
After the engine cools fully:
- Check the coolant level at the specified cold fill point.
- Inspect all hose and line connections.
- Look for dried coolant residue around seams and fittings.
- Confirm that the radiator remains seated in its cushions.
- Check that the fan shroud, covers, clips, skid plate, and wiring remain secure.
- Verify the transmission-fluid level using the exact procedure if fluid was lost.
Repeat the cold-level and leak inspection the next day and after a short drive. A falling coolant level may indicate remaining air or an unresolved leak. Do not keep topping off a system that repeatedly loses coolant without finding the cause.
Essential Maintenance Tips for Your New Radiator

Maintain the cooling system as a complete unit rather than focusing only on the new radiator.
- Check the coolant level only when the system is cold.
- Use coolant that meets the exact Toyota specification for your model.
- Do not mix unknown coolant types or colors.
- Inspect hoses for cracks, bulges, softness, hardening, and abrasion.
- Keep leaves, mud, insects, and debris away from the radiator and condenser fins.
- Use low-pressure water and a gentle method when cleaning fins.
- Inspect the pressure cap and sealing surfaces for damage.
- Investigate any sweet odor, visible residue, overheating, or recurring coolant loss.
- Follow the coolant replacement interval listed in your owner’s manual.
Do not bend cooling fins unnecessarily or direct high-pressure water at the radiator. Flattened fins restrict airflow and can damage the tubes beneath them.
Common Issues During Radiator Replacement
- Ordering the wrong radiator: Similar-looking radiators may use different hose locations, cooler fittings, brackets, or core thicknesses.
- Coolant spills: A shallow or poorly positioned drain pan may overflow when the lower hose is removed.
- Broken trim clips: Old clips can become brittle. Use a trim tool and keep replacements available.
- Stuck hoses: Pulling aggressively can crack a plastic neck. Rotate the hose carefully or split a hose that will be replaced.
- Damaged condenser fins: Do not force the radiator against the condenser or hang the condenser by its refrigerant lines.
- Leaking cooler fittings: Reused seals, incorrect clips, cross-threading, or improper torque can cause fluid loss.
- Trapped air: An incomplete bleeding procedure can cause unstable temperatures, weak cabin heat, or coolant loss after cooling.
- Overtightened mounts: Excessive torque can damage brackets, plastic tanks, threads, or rubber cushions.
- Incorrect coolant concentration: Adding water to premixed coolant reduces protection.
- Misdiagnosis: A new radiator will not repair a failed thermostat, pump, fan, cap, hose, or internal engine leak.
When to Use a Professional
Professional service is the safer choice when:
- The engine has severely overheated.
- Coolant contains oil, transmission fluid, or combustion residue.
- The truck repeatedly loses coolant with no visible external leak.
- The air-conditioning system would need to be opened.
- A cooler fitting, mounting bolt, or drain plug is seized or damaged.
- You cannot identify the correct coolant or transmission-fluid procedure.
- The vehicle uses a powertrain or thermal-management layout not covered by a conventional radiator procedure.
- You do not have safe lifting equipment or a suitable work area.
- The temperature remains unstable after filling and bleeding.
Frequently Asked Questions
How long does a Toyota Tacoma radiator replacement take?
An experienced DIYer may finish the job in several hours. A first-time repair can take most of a day because access, seized fasteners, cooler lines, underbody shields, filling, bleeding, and leak testing add time. The exact model and engine layout make a major difference.
Can I replace the radiator without professional help?
You may be able to complete the repair if you have intermediate mechanical experience, safe lifting equipment, the correct service information, and tools for filling and testing the system. Seek professional help when the truck has severe overheating, transmission-fluid contamination, hidden coolant loss, damaged fittings, or a complex thermal-management system.
What are the signs of a failing radiator?
Possible signs include coolant leaking from a tank or seam, cracked plastic, heavy corrosion, damaged tubes, repeated overheating, restricted coolant flow, and persistent cold sections across the core during professional testing. Similar symptoms can come from other cooling-system faults, so diagnosis should come first.
Do I need to replace the radiator cap with the radiator?
Not automatically. Inspect the cap’s seals, spring, locking surfaces, pressure rating, and contact area. Replace it if it is damaged, contaminated, incorrect for the truck, or unable to hold the specified pressure.
How often should I replace my Tacoma’s radiator?
A radiator does not have one universal replacement interval. Replace it when diagnosis confirms leakage, cracking, severe corrosion, internal restriction, damaged fittings, contamination, or another failure that cannot be repaired reliably.
Should I replace the thermostat and hoses at the same time?
Replace hoses that show cracking, swelling, hardening, contamination, abrasion, or damaged sealing surfaces. Replace the thermostat when testing indicates a fault or when the model-specific repair plan recommends preventive replacement. Do not replace unrelated parts without considering their condition and service history.
Can I drive my Tacoma with a leaking radiator?
Driving with a cooling-system leak can cause sudden coolant loss and severe overheating. Shut the engine off if the temperature rises, a warning appears, or steam is visible. Arrange towing when you cannot confirm that the cooling system is full, sealed, and maintaining normal temperature.
How much does Toyota Tacoma radiator replacement cost?
RepairPal’s Tacoma-wide estimate, updated August 7, 2026, is $819–$926 before taxes and fees. That is not a universal quote: model year, radiator design, labor rate, location, coolant, hoses, and related repairs can change the total substantially. Get a year- and ZIP-specific estimate before budgeting.
Do 2024–2026 Tacomas use the same radiator replacement procedure as older trucks?
No single procedure should be assumed across generations. For 2024–2026 trucks, use Toyota’s exact service information for radiator access, coolant filling, bleeding, and any electronic cooling-system setup. Treat the general steps in this guide as planning guidance until the factory procedure for the VIN is confirmed.
Conclusion
A successful Toyota Tacoma radiator replacement depends on preparation, application accuracy, safe coolant handling, and careful testing. Confirm the correct radiator and service procedure before disassembly, protect the air-conditioning condenser, handle transmission cooler lines correctly, use the specified coolant, and remove trapped air using the method required for your truck. For 2024–2026 models, do not rely on an older-generation bleeding routine unless Toyota service information confirms it for the VIN.
After installation, inspect the complete system through a full heat cycle and again after it cools. Stop and diagnose the problem if the temperature becomes unstable or the coolant level continues to fall. Careful verification is more valuable than rushing the repair.
Sources
- Toyota Manuals and Warranties — access to vehicle-specific owner’s manuals and maintenance information.
- Toyota Technical Information System — factory repair manuals, service information, wiring diagrams, and technical procedures.
- Toyota 2024 Tacoma Owner’s Manual: Maintenance Data — current model-specific cooling-system coolant specification and capacity reference.
- RepairPal: Toyota Tacoma Radiator Replacement Cost — current U.S. cost-estimate reference used for the price context above.
- U.S. Environmental Protection Agency: Household Hazardous Waste — safe handling and disposal guidance for potentially hazardous household products.
- CDC/ATSDR Ethylene Glycol ToxFAQs — health and exposure guidance for ethylene glycol used in antifreeze.
