
A vacuum leak and an engine misfire can both make your vehicle idle roughly, hesitate, lose power, or turn on the check engine light. The key difference is that a vacuum leak is an unintended intake-air path, while a misfire means one or more cylinders are not completing combustion normally. Because a vacuum leak can also cause a misfire, the most useful clues are the stored codes, whether the fault is worst at idle or under load, bank-to-bank fuel-trim behavior, and the result of a controlled smoke or cylinder-specific test.
Last updated: September 19, 2026 — diagnostic flow, EGR distinction, OBD-code references, safety sourcing, internal links, and schema reviewed.
Affiliate disclosure: GoMyReview may earn from qualifying purchases when affiliate links or shopping modules appear on this page, at no additional cost to you.
Quick Answer
A vacuum leak is more likely when the engine runs worst at warm idle, fuel trims are strongly positive at idle, and those corrections move noticeably closer to zero at about 2,000 to 2,500 RPM. A misfire is more likely to require cylinder-specific ignition, fuel, or compression testing when a P0301–P0312 code persists or the fault worsens under load. P0300 indicates random or multiple-cylinder misfire. A vacuum leak can cause either pattern, so use scan data and a controlled smoke test instead of symptoms alone.
Key Takeaways
- A vacuum leak is an air-metering or intake-path fault. A misfire is a combustion failure that may be caused by air, ignition, fuel, compression, timing, or mechanical problems.
- P0171 and P0174 indicate lean conditions, while P0300 means random or multiple-cylinder misfire. P0301 through P0312 identify the corresponding misfiring cylinder where that cylinder exists.
- Positive fuel trims that are much higher at warm idle than at 2,000 to 2,500 RPM often support an intake-leak diagnosis, but no universal trim percentage proves a vacuum leak.
- A stuck-open EGR valve can also cause rough idle or misfire, but it does so by allowing exhaust gas into the intake at the wrong time; that is different from a fresh-air vacuum leak.
- A flashing check engine light or severe engine shaking requires immediate attention because an active misfire can overheat the catalytic converter.
- Do not replace a spark plug, coil, injector, oxygen sensor, MAF sensor, or gasket based only on a trouble code. Confirm the fault with testing.
At a Glance
| Time Required | 15 to 30 minutes for basic checks; 30 to 90 minutes for scan-data and smoke testing |
| Difficulty | Basic inspection: beginner; fuel, compression, and circuit testing: intermediate to professional |
| Tools Needed | OBD-II scan tool, flashlight, basic hand tools, automotive smoke machine, and vehicle-specific service information |
| Cost | Basic inspection may cost nothing; professional diagnosis and repairs depend on the vehicle, failed component, access, and local labor rate |
Warning: Stop driving as soon as it is safe if the check engine light is flashing, the engine is shaking severely, or power drops suddenly. The U.S. EPA explains that a flashing malfunction indicator light can indicate a severe level of misfire capable of damaging the catalytic converter in a short period. See the EPA OBD guidance.
What Is a Vacuum Leak and How Does It Affect Your Engine?

A vacuum or unmetered-air leak is an unintended path that lets air enter the intake outside the engine-management system’s expected airflow path. On engines equipped with a mass airflow sensor, this commonly means air entering downstream of the MAF sensor. Leaks downstream of the throttle plate are especially important at idle because the unintended airflow represents a larger share of the engine’s total airflow.
Common leak locations include:
- Cracked, hardened, loose, or disconnected vacuum hoses
- PCV hoses, valves, grommets, and fittings
- Intake manifold and throttle-body gaskets
- Brake-booster hoses and check valves
- EVAP purge valves that are stuck open
- Vacuum hoses or control lines for EGR systems that use vacuum actuation
- Damaged intake boots between the airflow sensor and throttle body on MAF-equipped engines
A stuck-open EGR valve deserves separate treatment. It can cause rough idle, stumbling, stalling, or misfire because exhaust gas enters the intake when the valve should be closed. That is charge dilution from unwanted EGR flow, not the same failure as fresh unmetered air entering through a vacuum leak.
Possible vacuum-leak symptoms include a high or unstable idle, rough running, stalling when stopping, hissing from the engine bay, lean-condition codes, and positive fuel trims. A large shared leak may cause random or multiple-cylinder misfires. A leak close to one intake runner can affect one cylinder more than the others.
A vacuum leak often has its greatest effect at idle because the leaked air represents a larger percentage of total engine airflow.
A check engine light does not prove that a hose or gasket is leaking. It tells you that the engine computer detected a condition outside its expected range. Use the stored codes, freeze-frame data, bank-to-bank fuel trims, and operating conditions to decide what to test next.
Understanding Engine Misfires: Causes and Symptoms
An engine misfire occurs when combustion is weak, incomplete, mistimed, or absent in one or more cylinders. “Misfire” describes what the cylinder is doing, not which part has failed.
Common causes fall into five groups:
- Ignition: worn or fouled spark plugs, weak coils, damaged plug wires, poor electrical connections, or incorrect plug gaps.
- Fuel delivery: restricted or leaking injectors, inadequate pressure or volume, contaminated fuel, or an injector circuit problem.
- Air and mixture control: vacuum leaks, inaccurate airflow readings, a stuck purge valve, excessive EGR flow, or other lean or rich conditions.
- Compression and mechanical condition: leaking valves, worn rings, head-gasket leakage, valve-timing faults, or damaged valvetrain parts.
- Control and sensor faults: wiring problems, crankshaft or camshaft signal issues, incorrect sensor inputs, or timing-control faults.
Typical symptoms include shaking at idle, hesitation, reduced acceleration, an uneven exhaust sound, increased fuel consumption, and a steady or flashing malfunction indicator light. Some ignition faults become worse under load because higher cylinder pressure increases the voltage needed to fire the plug. A vacuum-leak-related problem is often strongest at idle and may become less obvious as airflow rises.
Misfire codes usually begin with P030. P0300 indicates random or multiple-cylinder misfire. P0301 through P0312 identify a detected misfire on the corresponding numbered cylinder where that cylinder exists. SAE J2012 defines the standardized DTC framework used by OBD systems; a cylinder-specific code identifies where misfire was detected, not whether the spark plug, coil, injector, or mechanical condition caused it. See SAE J2012.
Vacuum Leak vs Misfire: Key Differences
| Clue | Vacuum Leak Pattern | Misfire Pattern |
|---|---|---|
| What it means | Unintended air is entering the intake system outside the expected airflow path. | One or more cylinders are not completing combustion normally. |
| Common codes | P0171, P0174, idle-control codes, and sometimes P0300 or multiple P030x codes | P0300 or a cylinder-specific code such as P0301 |
| Idle behavior | Often high, hunting, rough, or prone to stalling | Usually uneven or shaking, especially if one cylinder is weak |
| Under load | The effect of a small intake leak may decrease as total airflow increases. | Weak ignition, fuel delivery, or compression faults may become more obvious. |
| Fuel trims | Often positive, with a larger correction at warm idle than at elevated RPM | May be normal, positive, or misleading because oxygen from a misfiring cylinder can affect exhaust-sensor feedback |
| Distribution pattern | A shared leak can affect both banks; a runner or gasket leak may affect one bank or one cylinder more strongly. | A persistent numbered-cylinder code focuses testing on that cylinder, while P0300 pushes shared causes higher on the list. |
| Best confirming tests | Fuel-trim comparison, bank comparison, circuit isolation, and controlled smoke testing | Misfire counters, spark and coil checks, injector testing, compression, and leak-down testing |
Note: A vacuum leak and a misfire are not mutually exclusive. The leak may be the underlying mixture fault, while the misfire is the combustion result detected by the engine controller.
How Do Fuel Trims Help Separate a Vacuum Leak From a Misfire?
Fuel trims are most useful when the engine is warm and the fuel-control system is operating in closed loop. If short-term and long-term correction are substantially more positive at idle and then move closer to normal as the engine is held at about 2,000 to 2,500 RPM, a small intake leak becomes more likely because the leaked air becomes a smaller percentage of total airflow. Do not use one universal percentage as proof of a leak; normal ranges and diagnostic thresholds vary by vehicle.
Bank distribution also matters. On a V-engine, similar positive corrections on both banks can point toward a shared intake leak, airflow-measurement error, or fuel-supply problem. A much larger correction on one bank shifts attention toward that bank’s intake runners, injector delivery, exhaust leaks ahead of the feedback sensor, and sensor accuracy. A misfire itself can also leave extra oxygen in the exhaust and make fuel-trim interpretation less straightforward.
How Do You Diagnose a Vacuum Leak?
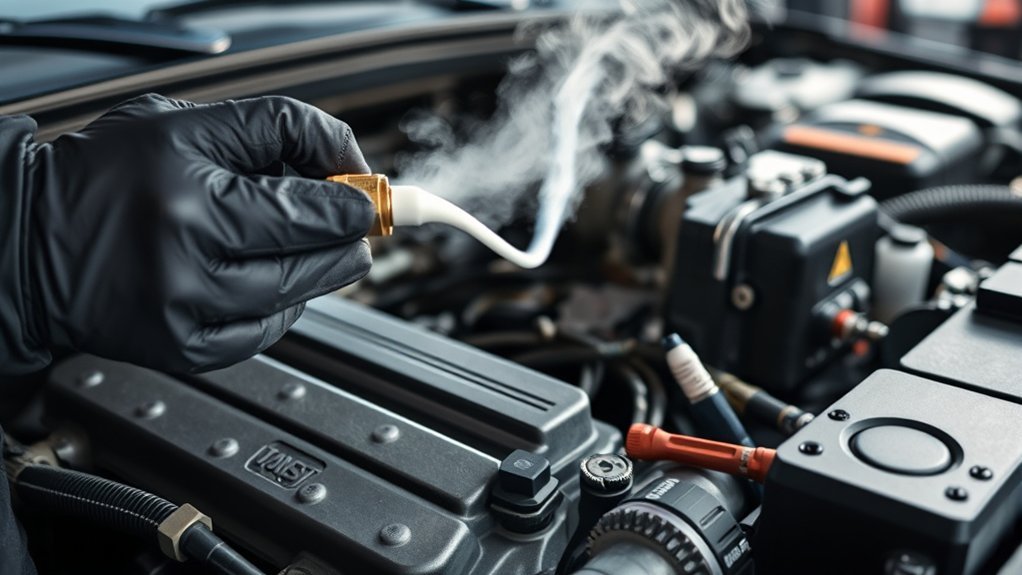
Begin with nonintrusive checks before replacing parts or opening the fuel system. The most useful sequence is evidence first: codes and operating conditions, visible intake faults, warm closed-loop fuel trims, then a controlled smoke or isolation test.
- Scan for codes and freeze-frame data. Record all stored and pending codes before clearing anything. Note engine speed, coolant temperature, calculated load, bank-specific fuel trims, and the conditions present when the fault was detected.
- Inspect hoses and intake plumbing. Look for split elbows, hardened hoses, loose clamps, disconnected fittings, collapsed PCV lines, and damage in the intake boot.
- Listen carefully. A hissing or whistling sound can help narrow the area, although normal airflow and accessory noises can be misleading.
- Compare fuel trims. Once the engine is warm and operating in closed loop, compare short-term and long-term fuel trims at idle with readings at approximately 2,000 to 2,500 RPM. Compare the banks separately on engines that report bank-specific trims.
- Perform a controlled smoke test. Follow the smoke-machine instructions and the vehicle’s service procedure. Escaping smoke can reveal hose, gasket, throttle-body, intake, PCV, or purge-system leaks.
- Test related valves and devices. Check whether the purge valve, PCV valve, brake-booster check valve, or another vacuum-operated component is leaking when it should be sealed.
- Separate EGR faults from air leaks. If the engine uses EGR and symptoms point toward excessive EGR at idle, test commanded-versus-actual valve operation or follow the manufacturer’s EGR diagnostic procedure rather than treating the EGR valve itself as a fresh-air leak.
Pro Tip: If positive fuel trims are high at warm idle but move noticeably closer to zero when the engine is held at 2,000 to 2,500 RPM, an intake leak becomes more likely. If corrections remain high at both conditions, also investigate fuel delivery, airflow measurement, exhaust leaks, injector restrictions, and sensor accuracy.
Warning: Do not spray brake cleaner, carburetor cleaner, starting fluid, propane, or another flammable substance around a hot running engine. A smoke machine designed for automotive intake or EVAP diagnosis is a safer and more controlled method. Never assume a universal test pressure; follow the smoke-machine instructions and vehicle-specific service procedure so the system is not overpressurized.
| Method | What It Checks | Useful Result |
|---|---|---|
| Visual inspection | Hoses, fittings, intake boots, clamps, and wiring | Visible crack, loose fitting, or disconnected line |
| Fuel-trim comparison | How much fuel the controller adds at different airflow levels | Correction is much higher at warm idle than at elevated RPM |
| Bank comparison | Whether a lean pattern is shared or concentrated on one bank | Both banks move together or one bank is substantially more positive |
| Smoke test | Physical openings in the intake and connected circuits | Smoke appears at a hose, gasket, valve, seal, or fitting |
| Vacuum gauge | Overall intake-vacuum behavior and possible mechanical patterns | Reading or needle behavior differs from the vehicle’s expected pattern |
[Amazon Products Picked for You]

[Built-in Air Pump]: Smoke machine features a built-in air pump, eliminating the need for an external air source, allowing you to perform tests anytime, anywhere. Simply add about 20ml of baby oil or Glycerin (oil not included) to start your testing effortlessly

【Very Cost-Effective】This smoke tester automotive is a professional diagnostic machine.The built-in air pump compressor generates 20–25 PSI of air pressure, allowing smoke to be easily introduced into the automotive system under test.It can produce a large volume of smoke within 10 seconds,fast and large smoke output, enabling you to quickly and accurately locate leaks.By rapidly identifying and repairing automotive leaks, it saves you both time and money.You can proactively detect and resolve potential issues before they turn into costly problems

HyperSmoke Technology – Creates Thick Visible Smoke for Easy Leak Testing. Adjustable Pressure. Infinite Smoke. Instant Warmup. Built-In Air Compressor Motor. OEM Approved Smoke Fluid. Designed and Engineered by AutoLine Pro USA, an American Team of Individuals bringing the latest innovation to you.
How Do You Diagnose an Engine Misfire?
Diagnose a misfire in a logical order. Start with codes and operating data, verify basic air and electrical connections, and then test ignition, fuel, and mechanical condition. Avoid replacing several parts at once because doing so can hide the original cause.
Initial Visual Inspection
- Check the warning light. A flashing light or severe shaking means you should shut the engine off as soon as it is safe.
- Record all codes. Note P0300, cylinder-specific P0301–P0312 codes where applicable, lean or rich codes, injector-circuit codes, EGR or purge-related codes, and camshaft or crankshaft correlation codes.
- Review freeze-frame data. Determine whether the fault occurred at idle, during acceleration, at highway speed, while cold, or after the engine warmed up.
- Inspect visible components. Look for loose coil connectors, damaged harnesses, oil or water in plug wells, disconnected hoses, intake damage, and signs of arcing.
- Check maintenance history. Confirm whether the spark plugs are the correct type, gap, and service interval for the engine.
Also inspect the intake manifold, throttle body, PCV system, purge circuit, and vacuum hoses because a mixture fault can trigger a misfire without an ignition component being defective.
Spark and Fuel Check
Use the scan tool’s cylinder-misfire data if the vehicle provides it. A cylinder with a consistently high count gives you a starting point, but the count still does not identify the failed part.
- Inspect the spark plug. Check for wear, cracks, heavy deposits, fuel wetting, oil contamination, overheating, or an incorrect gap.
- Evaluate the ignition coil. Follow the service procedure for coil output or circuit testing. On suitable coil-on-plug engines, moving a suspected coil to another compatible cylinder can be useful. If the misfire follows the coil, the coil becomes a strong suspect.
- Check injector operation. Verify the injector connector, command, resistance where applicable, balance, and flow using the correct vehicle-specific procedure.
- Measure fuel pressure only to specification. There is no universal target such as 58 ±5 psi. Use the factory value and procedure for the exact year, engine, and fuel system.
- Check compression when the fault stays on the cylinder. If ignition, injector, wiring, and local intake checks do not move or explain the misfire, compare compression and use leak-down testing where needed.
- Compare results rather than guessing. A good spark plug and coil do not rule out an injector, vacuum leak, wiring fault, valve problem, timing fault, or other mechanical issue.
Warning: Fuel systems may remain pressurized after the engine is switched off. Direct-injection systems can operate at extremely high pressure. Do not loosen fuel fittings unless you have the correct service procedure, protective equipment, and tools.
| Step | Purpose | Typical Tool or Information |
|---|---|---|
| Read codes and counters | Identify the affected cylinder and operating condition | OBD-II scan tool |
| Inspect spark and coil components | Find wear, contamination, weak output, or circuit faults | Service information, ignition tester, multimeter, or scope |
| Verify fuel delivery | Confirm injector operation and correct pressure or volume | Vehicle-specific procedure and approved test equipment |
| Test compression | Compare the mechanical sealing and contribution of the cylinders | Compression tester or relative-compression test |
| Perform leak-down testing | Locate leakage through valves, rings, an adjacent cylinder, or the cooling system | Cylinder leak-down tester and compressed air |
When Should You Include Vacuum-Leak Testing in a Misfire Diagnosis?
Include vacuum-leak testing when the misfire occurs mainly at idle, several cylinders are affected, lean codes are stored, one bank shows a stronger lean correction, or fuel trims show the engine controller is adding substantial fuel during warm closed-loop operation.
- Inspect: Check the intake duct, manifold, PCV plumbing, purge circuit, brake-booster hose, and smaller vacuum lines.
- Compare: Review fuel trims at idle and at a steady elevated RPM after the engine reaches closed-loop operation, then compare bank 1 with bank 2 where available.
- Smoke test: Introduce smoke only at the pressure and connection point specified by the smoke-machine and vehicle instructions. Watch for leakage without overpressurizing the intake or EVAP system.
- Isolate connected circuits: Test purge, PCV, brake-booster, and other vacuum-operated devices when the service procedure allows.
- Confirm the repair: Repeat the same trim, bank-comparison, and smoke tests after fixing the leak.
How Can You Tell If a Rough Idle Is a Misfire?
A misfire often feels like an uneven pulse or rhythmic shake rather than only a change in idle speed. The exhaust note may sound irregular, the engine may hesitate when you accelerate, and the check engine light may stay on or flash. A scan tool that shows cylinder-specific misfire counts is much more useful than feel alone.
Use the pattern of the symptom to guide testing:
| Component or Pattern | What to Look For | Possible Direction |
|---|---|---|
| Spark plug | Wear, cracks, deposits, oil, fuel, or incorrect gap | Ignition, mixture, oil-consumption, or mechanical issue |
| Fuel injector | Circuit fault, weak flow, imbalance, clogging, or leakage | Incorrect fuel delivery to one cylinder |
| Ignition coil | Cracks, corrosion, damaged boot, weak output, or a misfire that follows a controlled swap | Coil or coil-circuit fault |
| Compression | One cylinder differs substantially from the others or fails the factory limit | Valve, ring, head-gasket, timing, or valvetrain problem |
| Several cylinders at idle | Positive trims, lean codes, unstable idle, or hissing | Vacuum leak, purge fault, PCV fault, airflow-measurement issue, or excessive EGR flow |
| Worse under acceleration | Misfire count rises as load increases | Weak spark, fuel shortage, injector fault, or compression issue |
Engine hesitation and transmission slipping can feel similar from the driver’s seat. If engine speed rises sharply without a matching increase in vehicle speed, have the transmission or clutch evaluated. Do not assume that true slipping is caused by a vacuum leak.
Vacuum Leak Repair Solutions
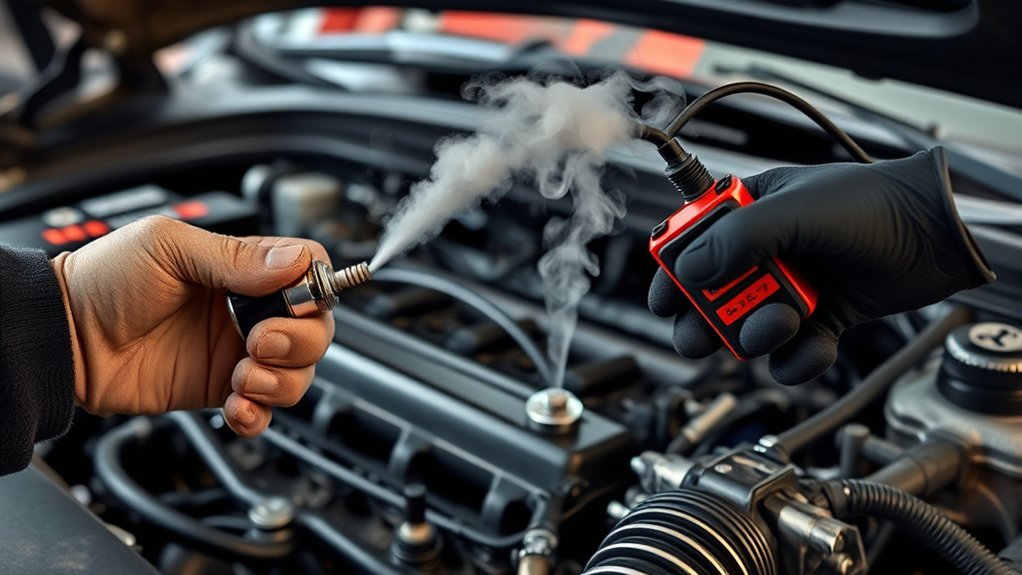
The correct repair depends on where the smoke, inspection, fuel-trim, or isolation test confirms the leak. Common solutions include:
- Replacing cracked vacuum hoses and elbows: Match the hose material, inside diameter, heat resistance, routing, and connection style.
- Repairing PCV plumbing: Replace damaged valves, grommets, separators, fittings, or molded hoses as required.
- Replacing an intake or throttle-body gasket: Clean the sealing surfaces correctly and follow the specified tightening sequence and torque.
- Replacing a leaking purge valve: Confirm that the valve leaks when commanded closed before replacement.
- Repairing a brake-booster vacuum circuit: Test the hose, check valve, and booster separately. Brake-assist concerns require prompt professional attention.
- Repairing a damaged intake boot: Cracks after a MAF sensor can admit unmetered air and may open only when the engine moves under load.
- Repairing vacuum-operated EGR controls where equipped: Replace leaking control hoses or damaged vacuum components only after testing. A stuck-open EGR valve itself requires EGR-system diagnosis rather than treating the valve as a fresh-air intake leak.
A temporary wrap, sealant, or improvised plug may hide a leak without providing a durable or safe repair. Use the correct replacement part and confirm that hoses are routed away from sharp edges, belts, and hot exhaust components.
[Amazon Products Picked for You]

[Complete Package]: This set includes 6 vacuum hose automotive, each with a length of 5 feet and inner diameters of 1/8 inch, 5/32 inch, 3/16 inch, 1/4 inch, 5/16 inch, and 3/8 inch. The set also includes 64 hose connectors. Please check the detailed description of the product for specific contents!

Product Specifications: You will get 6PCS 4.92 ft silicone vacuum hoses and 64PCS Vacuum Line Connectors, the ID of the vacuum hoses are 1/8", 5/32", 3/16", 1/4", 5/16" and 3/8". For more detailes you can refer to the pictures
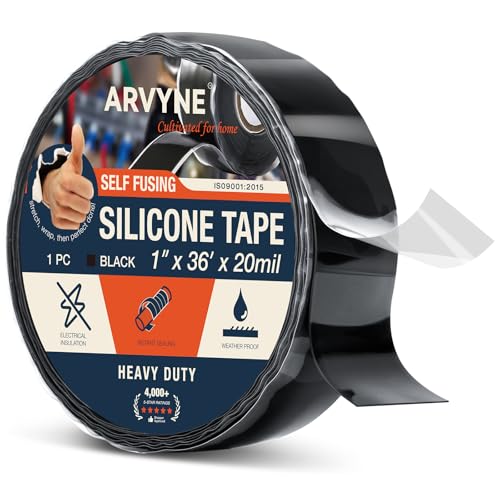
SELF-BONDING & PERMANENT SEAL – ARVYNE self-fusing silicone tape bonds to itself without adhesive, creating a watertight, airtight, and long-lasting seal. Ideal for emergency repairs in seconds—no residue, no mess.
Fixing Engine Misfires and Vacuum Leaks: Common Approaches
Fix the confirmed cause rather than the code description. A P0301 does not automatically mean “replace the cylinder-one coil,” and a P0171 does not automatically mean “replace the oxygen sensor.”
Common confirmed repairs include:
- Replacing worn or contaminated spark plugs with the specified type and gap
- Replacing a coil that fails an output, circuit, or controlled swap test
- Repairing injector wiring or replacing an injector that fails electrical, balance, or flow testing
- Correcting low fuel pressure or volume after testing the pump, power supply, filter where serviceable, regulator, and related controls
- Replacing a leaking hose, gasket, purge valve, PCV component, intake seal, or intake boot
- Repairing an EGR fault that causes unwanted exhaust flow at idle
- Repairing low compression, valve leakage, timing faults, or other mechanical damage
After the repair:
- Reconnect every hose, coil, injector, and sensor securely.
- Clear codes only after recording the original information.
- Allow required idle, throttle, or fuel-trim relearns to occur according to the vehicle procedure.
- Road-test the vehicle under conditions similar to the freeze-frame data.
- Rescan for pending codes and misfire counts.
- Verify that fuel trims, bank balance, idle quality, and acceleration have improved.
- Repeat the smoke test if an intake leak was repaired.
[Amazon Products Picked for You]

Pitch Adjustment Function: The spark plugs tester is equipped with a pitch adjustment valve and a round knob, which can adjust the observation pitch of the spark plugs according to the needs of different car models, and at the same time can effectively avoid the occurrence of misfire and burnt ignition coils

Pitch Adjustment Function: The spark plugs tester is equipped with a pitch adjustment valve and a round knob, which can adjust the observation pitch of the spark plugs according to the needs of different car models, and at the same time can effectively avoid the occurrence of misfire and burnt ignition coils

Use to test spark plug circuits, electronic fuel injection signals and idle air control circuits.
When to Seek Professional Help for Vacuum Leaks or Misfires
Seek professional diagnosis when:
- The check engine light flashes: Reduce load and stop driving as soon as it is safe.
- The engine shakes, stalls, or loses substantial power: Continuing to drive may damage the catalytic converter or leave you stranded.
- You smell raw fuel or see a fuel leak: Switch the engine off, avoid ignition sources, and arrange safe transport.
- The brake pedal becomes unusually hard: A brake-booster vacuum problem may reduce power assist.
- The misfire remains after basic inspection: Injector balance, ignition-waveform, compression, leak-down, valve-timing, and EGR tests may be required.
- Fuel-system testing requires opening pressurized lines: Direct-injection and diesel systems require specialized procedures and equipment.
- The engine speed rises but the vehicle does not accelerate normally: This may indicate transmission or clutch slipping rather than an intake leak.
A technician should diagnose the system before expensive parts are replaced. Good diagnosis usually costs less than replacing multiple coils, injectors, sensors, or gaskets by trial and error.
Cost of Repairing Vacuum Leaks and Misfires
Repair cost depends on the vehicle, engine layout, failed component, diagnostic time, parts quality, local labor rate, and whether other damage has occurred. A small exposed hose can be inexpensive, while an intake manifold, buried injector, internal engine fault, or damaged catalytic converter can require much more labor and parts.
Average Repair Cost Tiers
| Repair Tier | Typical Examples | Main Cost Drivers |
|---|---|---|
| Lower complexity | Accessible hose, fitting, spark plug, connector, or simple gasket | Part price, minimum labor charge, and diagnostic fee |
| Moderate complexity | Ignition coil, purge valve, EGR component, injector, intake boot, or accessible manifold gasket | Component access, testing time, and required disassembly |
| Higher complexity | Buried intake gasket, high-pressure fuel-system fault, wiring repair, valve work, timing fault, or internal engine damage | Specialized testing, extensive labor, calibration, and additional damaged parts |
Ask for an itemized estimate that separates diagnosis, parts, labor, shop supplies, taxes, and any recommended follow-up work. A broad online price range cannot account for the difference between engine designs or regional labor rates.
Factors Affecting Expenses
- Vehicle and engine design: A component under an intake manifold costs more to reach than one mounted at the front of the engine.
- Diagnostic complexity: Intermittent faults may require a cold start, extended road test, scope capture, or repeated smoke testing.
- Number of failed parts: A long-term misfire may damage a plug, coil boot, catalytic converter, or oxygen sensor in addition to the original fault.
- Parts quality: Correct-fit original-equipment or high-quality replacement parts may cost more but reduce compatibility problems.
- Mechanical condition: Low compression, valve leakage, worn timing components, or head-gasket problems involve substantially more labor.
- Local labor rate: Rates vary by region, facility type, and technician specialization.
Frequently Asked Questions
What does a vacuum-leak misfire feel like?
It may feel like a rough or surging idle, occasional sputtering, stalling when you stop, or hesitation from a lean mixture. The problem is often strongest at idle. A scan may show positive fuel trims, lean codes, P0300, or several cylinder-misfire codes.
Can a bad vacuum leak cause a misfire?
Yes. Enough unmetered air can make the mixture too lean for stable combustion. A shared leak may affect several cylinders, while a leak near one intake runner can affect one cylinder more strongly.
Can a vacuum leak cause only one cylinder to misfire?
Yes. A leaking intake-manifold gasket, injector seal, runner, or nearby vacuum connection can lean one cylinder more than the others. If a cylinder-specific code stays on the same cylinder after ignition checks, inspect that runner for a local intake leak before assuming the fault must be the injector or an internal engine problem.
What are the signs of a bad vacuum leak?
Common signs include a high or unstable idle, stalling, hissing, lean-condition codes, positive fuel trims, and rough running that is more noticeable at idle. These symptoms are not proof, so confirm the leak with inspection, scan data, isolation tests, or a smoke test.
Would a vacuum leak set a trouble code?
It can. Common results include P0171 or P0174 lean codes, idle-control codes, P0300, or cylinder-specific misfire codes. A small leak may affect fuel trims before it sets a confirmed code.
Can fuel trims prove that the engine has a vacuum leak?
No. Fuel trims show how the engine controller is correcting the mixture. Positive corrections that are much higher at warm idle and improve at elevated RPM support a vacuum-leak diagnosis, but low fuel pressure, injector restrictions, airflow-sensor errors, exhaust leaks, and some misfires can produce similar data.
Can a stuck-open EGR valve look like a vacuum leak?
It can produce similar rough-idle, stalling, and misfire symptoms, but the mechanism is different. A stuck-open EGR valve allows exhaust gas into the intake when it should be closed, while a vacuum leak admits unintended air. Use EGR command or position data and the vehicle-specific EGR test procedure to separate the faults.
Can I drive with a misfire?
Avoid driving when the check engine light flashes, the engine shakes severely, power drops, or raw fuel is present. A mild intermittent fault with a steady light still needs prompt diagnosis because it can worsen or damage emissions components.
Conclusion
A vacuum leak is an unintended intake-air path, while a misfire means combustion is failing in one or more cylinders. The two faults can occur together, so do not diagnose by feel alone. Start with codes and freeze-frame data, compare warm closed-loop fuel trims at idle and elevated RPM, compare banks where available, inspect the intake, and use a controlled smoke test when a leak is suspected. For a persistent cylinder-specific misfire, test ignition, injector operation, local intake sealing, wiring, and compression before replacing parts.
If you are diagnosing a model-specific Toyota misfire, see the Toyota Tacoma misfire troubleshooting guide, Toyota Tundra misfire guide, or Toyota Camry misfire guide for vehicle-specific context.
Stop driving as soon as it is safe when the check engine light flashes, the engine shakes severely, substantial power is lost, or a fuel leak is present.
Sources
- U.S. Environmental Protection Agency — Frequently Asked Questions About On-Board Diagnostics — OBD warning-light behavior and the catalytic-converter risk associated with severe misfire.
- SAE International J2012 — Diagnostic Trouble Code Definitions — current standardized OBD diagnostic-trouble-code framework.
- NHTSA-hosted Audi Quick Reference Specification Book — OEM examples of P0300 random/multiple-cylinder misfire and numbered-cylinder P030x definitions.
- MOTOR Magazine, “Mysterious Miss” technical diagnosis — discussion of idle-sensitive vacuum leaks, single-cylinder lean misfire, oxygen-sensor feedback, and smoke testing.
- National OBD Clearinghouse — access point for OBD and manufacturer service-information resources.
