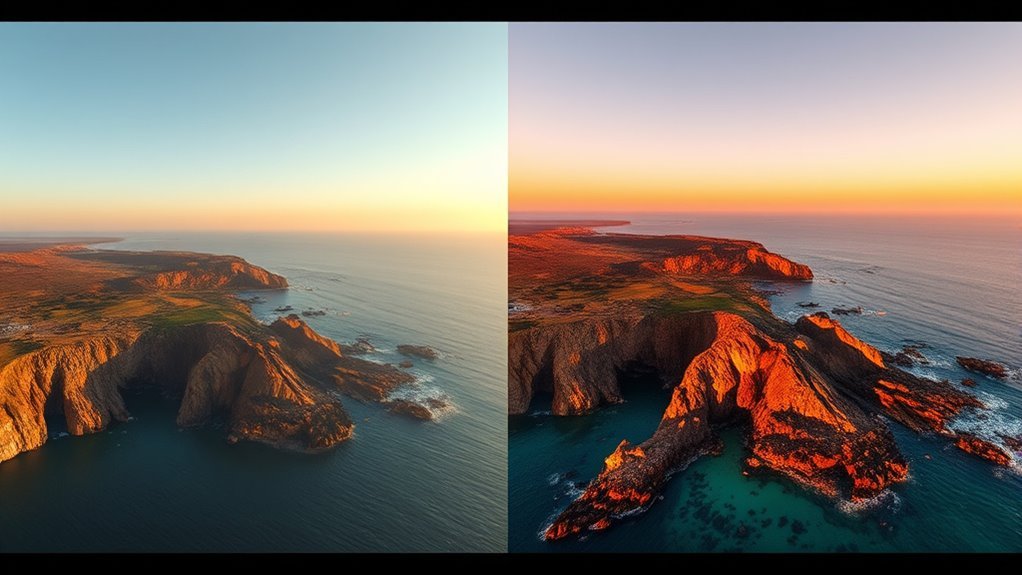
D-Log M and Normal Color Mode serve different needs in drone work. Log is built for high-contrast scenes, preserving highlight and shadow detail for later grading, while Normal Color Mode delivers faster results with stronger color straight from the camera. The choice affects exposure, noise, and workflow in Premiere Pro. Knowing when log helps and when it adds risk can change the final image in ways that are not obvious at first.
D-Log M vs Normal Color Mode
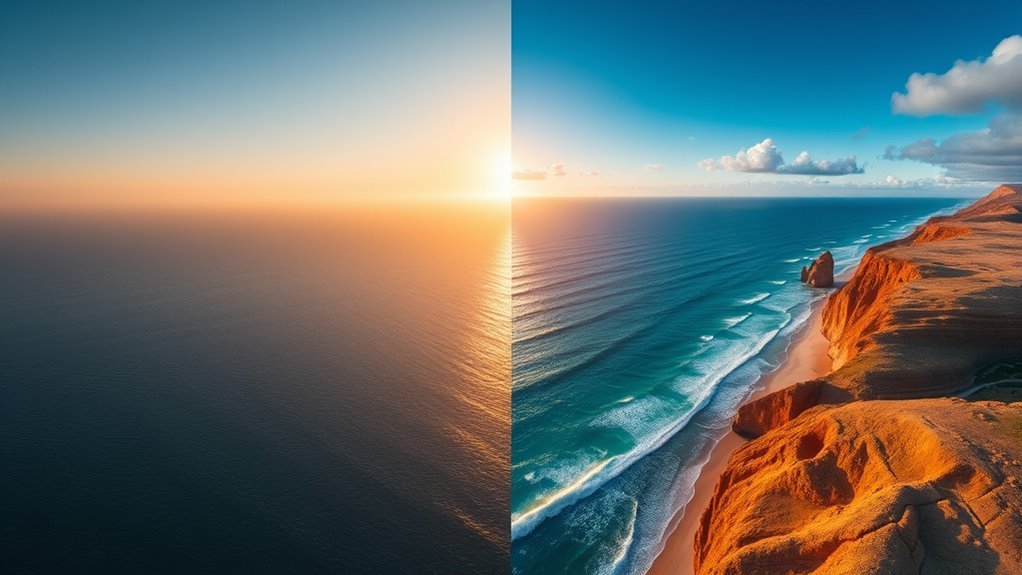
D-Log M offers a flatter color profile than Normal color mode, capturing a wider dynamic range and better preserving detail in both highlights and shadows. This makes D-Log M well suited to high-contrast scenes, where reduced highlight clipping and stronger shadow retention provide more freedom in post-production.
Normal color mode, by contrast, delivers pleasing footage directly from the camera, but its narrower dynamic range can limit adjustment latitude and expose detail loss when exposure is pushed. For projects requiring precision, D-Log M supports color grading with greater flexibility, enabling tailored contrast, tone, and color decisions.
In difficult lighting, it recovers more information than Normal mode, helping avoid crushed shadows and blown highlights. Normal mode remains practical for casual capture, yet D-Log M serves important productions better, delivering a more cinematic baseline and a workflow that expands creative control rather than constraining it.
When to Use D-Log M
D-Log M is most appropriate in high-contrast scenes where preserving detail in both highlights and shadows is essential, reducing the likelihood of clipping.
Its wider dynamic range improves highlight recovery and captures additional tonal information in difficult lighting conditions.
This profile is also well suited to cinematic grading workflows that require substantial post-production color correction and refinement.
High-Contrast Scenes
In scenes with strong contrast between bright highlights and deep shadows, the flat profile is especially useful because it preserves more dynamic range than a standard color mode.
D-Log M is well suited to high-contrast scenes because its high dynamic range reduces highlight clipping and shadow detail loss. The footage arrives with a flatter tonal response, giving editors greater freedom to shape contrast and color without fighting baked-in decisions.
In bright conditions, this helps prevent crushed shadows that can limit visual separation. For best results, exposure should be biased to the right, or ETTR, to maximize usable shadow information while keeping highlights within range.
This approach supports controlled grading and preserves detail for scenes demanding technical precision and expressive freedom.
Highlight Recovery
Highlight recovery is where D-Log M shows its practical advantage, especially in scenes where bright areas are at risk of clipping. Its wider dynamic range gives the sensor more room to hold detail in clouds, reflective surfaces, and sunlit edges than normal color modes.
In practice, this means highlight recovery remains available after capture, with fewer blown areas and more usable tonal information in post-production. D-Log M is often preferred when exposure can be controlled carefully, since ETTR helps preserve bright detail without pushing into clipping.
The image may look flat at first, but that flatness is structural, protecting data for later correction. In difficult lighting, D-Log M also supports shadow recovery, giving the operator greater freedom from irreversible exposure errors.
Cinematic Grading Workflow
For high-contrast scenes where preserving both bright highlights and deep shadow detail is essential, D-Log M provides a practical starting point for a cinematic grading workflow. It captures extra dynamic range, giving editors more freedom to shape tone without crushing detail. Expose to the Right, pushing the histogram safely rightward to retain shadow information while protecting highlights.
- Apply a D-Log M LUT to convert footage to Rec.709.
- Raise contrast to about 125% for stronger separation.
- Increase saturation near 140% for fuller color density.
- Use DaVinci Resolve for precise curves and color-wheel refinement.
This workflow supports liberated creative control: neutral capture first, then deliberate transformation. Manual grading can refine mood, preserve realism, and deliver a polished cinematic finish without relying solely on presets.
Set Up D-Log M on Your Drone
To set up D-Log M on a compatible drone, the camera settings in video mode must be opened and the Color option selected within the DJI GO app. From there, D-Log can be enabled and a custom profile built by lowering sharpness, contrast, and saturation to -3, preserving latitude for video editing and later color freedom.
Compatibility must be verified first, because supported models may expose the menu differently and some interfaces vary slightly. The setup is intended to keep the recorded image restrained and neutral, so the pilot can shape the final look rather than accept a baked-in style.
DJI’s official manuals and community notes should be checked regularly, since firmware updates can alter menu placement or recommended practice. A disciplined workflow also includes understanding exposure tools before flight, so the image remains ready for controlled grading and technically sound results.
Expose D-Log M Without Clipping Highlights
When exposing D-Log M, the objective is to protect highlight detail while using an expose-to-the-right approach to place the histogram as far right as possible without clipping.
This method maximizes shadow information and reduces noise, especially when ISO 500 is maintained for balanced capture.
The histogram should be monitored continuously, since clipped highlights cannot be recovered in post-production.
Protect Highlight Detail
Protecting highlight detail in D-Log M starts with exposing as far to the right as possible without clipping, since recoverable brightness is limited once whites are blown. To protect highlight detail, D-Log M footage should be watched on the histogram, keeping the brightest values inside the safe zone.
- Favor slight overexposure, roughly 0.3 to 1.0 stops.
- Keep ISO near 500 to preserve dynamic range.
- Verify that speculars and clouds remain unblown.
- Treat clipped highlights as largely unrecoverable.
This discipline preserves liberated grading latitude, allowing the scene to remain open in post without sacrificing texture in bright areas.
Careful exposure management creates a cleaner starting point, reduces compromise, and maintains the freedom to shape tonal contrast later with precision.
Use ETTR Exposure
ETTR, or Expose to the Right, shifts D-Log M exposure toward the brightest safe part of the histogram to preserve shadow detail without sacrificing highlight structure.
In practice, ETTR means setting exposure so the histogram reaches the right edge without crossing it, because clipping removes data that cannot be recovered later.
A drone camera often benefits from an ISO near 500, which can support cleaner shadows while keeping noise controlled.
During capture, the histogram must be monitored continuously; right-side contact is acceptable, but overflow indicates overexposure and lost highlight information.
Applied consistently, ETTR with D-Log M expands dynamic range, increases grading latitude, and gives the operator more freedom in post-production without relying on rescue corrections.
Shooting Tips for Normal Color Mode
Normal color mode benefits from a conservative exposure approach, since its vivid, ready-to-share image can clip highlights and crush shadows more readily than D-Log in high-contrast scenes.
A normal color profile suits quick-turnaround flights, but exposure should remain slightly restrained to preserve sky detail and prevent blocked terrain.
- Meter for bright areas first, then verify shadow separation on the histogram.
- Keep contrast moderate in-scene; harsh backlit subjects can lose tonal information fast.
- Use it when immediate viewing and sharing matter more than maximum grading latitude.
- If the scene demands stronger recovery, consider whether to shoot in DLOG instead.
This mode remains efficient for liberated, low-friction workflows, because it delivers pleasing color straight from the drone.
Still, limited dynamic range means less freedom in post, so disciplined exposure is essential. For many daylight sequences, normal mode is sufficient, provided highlights are protected and shadows are not allowed to collapse.
Color Grade D-Log M in Premiere Pro
To grade D-Log M footage in Premiere Pro, the process typically begins with a foundational correction: apply the built-in D-Log to Rec.709 LUT to establish a neutral starting point.
Then refine the image with contrast raised to about 125% and saturation near 140% for greater visual presence. In Premiere Pro, D-Log Color benefits from controlled tone shaping rather than aggressive manipulation, preserving the liberated latitude captured in log.
Curves can then be used to sculpt highlights and shadows with precision, while color wheels correct unwanted casts and rebalance skin or landscape tones.
A subtle sharpening pass may improve detail clarity, but restraint is essential to avoid artifacts. Shadow brightness should be lifted carefully to recover darker detail and maintain depth.
This method produces a disciplined, flexible grade that supports a polished, cinematic result without sacrificing the image’s recoverable range.
Apply LUTs to D-Log M Footage
A proper LUT workflow is essential when working with D-Log M footage, because it converts the flat image into a standard Rec.709 color space and restores usable contrast and saturation.
To apply a LUT, the editor should begin with a built-in D-Log to Rec.709 conversion, then assess whether the scene benefits from a stronger or lighter transform. This first pass establishes a disciplined base for D-Log M material.
- Use a technical LUT as the initial correction.
- Experiment with cinematic options, including Elektra LUTs, after normalization.
- Adjust LUT intensity to match exposure and scene intent.
- Refine the result with curves and color wheels for greater control.
A restrained workflow keeps the image free enough for creative expression while preserving color accuracy.
When the LUT is applied correctly, the footage gains a liberated, polished look without losing the flexibility needed for precise grading.
Fix D-Log M Noise, Flat Color, and Clipping
D-Log M footage often reveals shadow noise when it is underexposed, so maintaining ideal exposure and keeping ISO near 500 can help preserve cleaner detail while retaining usable dynamic range. In D-Log Color work, disciplined exposure protects freedom in post by reducing noise and limiting recovery stress.
| Issue | Correction |
|---|---|
| Shadow noise | Expose properly, avoid underexposure |
| Flat color | Apply D-Log to Rec.709 LUTs |
| Highlight clipping | Use ETTR in bright scenes |
| Weak contrast | Refine curves and color wheels |
A LUT restores baseline contrast and saturation, while curves and color wheels can reshape the image into a more vivid, cinematic grade. Clipping in highlights should be monitored aggressively, especially in high-contrast scenes, because lost detail cannot be recovered. ETTR places more data in the bright regions, improving latitude without sacrificing structure. When exposure, ISO, and grading discipline align, D-Log M becomes a controllable negative rather than a restrictive image.
Frequently Asked Questions
How to Color Grade Dlog M?
D-Log M is graded by first applying a D-Log to Rec.709 LUT, converting the flat image into a usable base.
Then contrast is raised to about 125% and saturation to 140%, revealing D Log benefits in tonal range and flexibility.
Precise Grading techniques use curves and color wheels to balance shadows, midtones, and highlights.
Clarity should be added sparingly.
DaVinci Resolve offers strong tools for a liberated, cinematic result.
What Is the Difference Between DJI DLOG and DLOG M for Color Grading?
DJI D Log and D-Log M differ mainly in tonal encoding and grading latitude.
DJI D Log typically records a broader traditional log response, while D-Log M uses a tuned Color Space and compression curve to preserve more usable midtones and reduce clipping.
For color grading, D-Log M often yields cleaner highlight recovery and faster cinematic shaping, whereas DJI D Log can demand more careful exposure and may be less forgiving in extreme contrast.
How to Color Grade Log Footage?
Color grading log footage begins with a D-Log to Rec.709 LUT, a time-honored yet futuristic first step.
From there, contrast is raised, saturation restored, and color grading techniques refine curves, wheels, and white balance.
Shadows should be examined carefully, because log footage advantages include broader recovery latitude.
Creative LUTs may then be tested, but precision must remain dominant so the image stays natural, liberated, and technically controlled.
Is Log Good for Color Grading?
Yes—log is good for color grading. Its log advantages include preserved dynamic range, reduced highlight clipping, and greater shadow recovery, giving the colorist more control in post.
Effective grading techniques typically start with a LUT to normalize footage to Rec.709, followed by precise contrast, saturation, and shadow adjustments.
For those seeking creative liberation, log supplies a flexible image structure that supports deliberate, cinematic transformation rather than constrained camera-rendered color.
Conclusion
In practice, D-Log M is the stronger choice for scenes with wide dynamic range, where preserving highlight and shadow detail is critical. Normal Color Mode remains efficient for fast-turnaround projects with minimal grading. Industry tests commonly show log footage can retain up to 2–3 stops more usable detail than standard profiles, a difference that can prevent irrecoverable clipping. For drone operators, the decision should be guided by lighting, delivery requirements, and post-production capacity.
