
Coolant flush vs. refill comes down to system condition and service history. A top-off restores a slightly low coolant level, a drain and refill replaces part of the old coolant for routine maintenance, and a flush or exchange removes a larger share when contamination, mixed coolant, or a repair procedure requires it. If coolant keeps disappearing or the engine overheats, diagnose the fault before changing fluid.
Last updated: September 19, 2026 · Maintenance, safety, and disposal guidance re-checked against the cited sources.
Quick Answer
Top off coolant only when the level is slightly low and the correct coolant is known. Choose a drain and refill for scheduled replacement. A flush may be appropriate for contamination, mixed coolant, deposits, or certain repairs, but overheating and repeated coolant loss require diagnosis first.
Key Takeaways
- A top-off adds a small amount of coolant, while a drain and refill replaces part of the old coolant.
- A flush uses additional fluid or equipment to remove more old coolant and contamination.
- Follow your vehicle’s maintenance schedule instead of using a universal three- or five-year rule.
- Match the coolant specification, not just its color.
- Repeated coolant loss, overheating, oil contamination, or bubbling requires diagnosis before service.
- Never open a hot cooling system or dispose of used coolant on the ground or down a drain.
At a Glance
| Time Required | Vehicle-dependent. A simple top-off is usually brief; draining, refilling, bleeding, and final checks can take substantially longer depending on access and the required bleed procedure. |
| Difficulty | Easy for a top-off; moderate to advanced for draining, flushing, and bleeding |
| Tools Needed | Correct coolant, drain pan, funnel or spill-free funnel, gloves, eye protection, hand tools, and rated jack stands if lifting is required |
| Cost | Varies by coolant specification, system capacity, access, required equipment, and local labor rates |
Decision Rule: If the coolant is only slightly low once and the correct specification is known, top it off. If routine replacement is due and the system is clean, use the manufacturer-specified drain-and-refill procedure. If coolant is mixed, contaminated, or a repair procedure calls for more complete removal, use the approved flush or exchange procedure. If the engine overheats or coolant keeps disappearing, diagnose the fault before changing fluid.
Coolant Flush vs. Refill: What Each Service Means

Service shops and product labels do not always use the same terms. Before approving work or starting a do-it-yourself repair, confirm how much coolant will be removed and whether the system will be rinsed, vacuum-filled, or chemically cleaned.
Coolant Top-Off
A top-off adds a small amount of compatible coolant to bring the cold level back between the minimum and maximum marks. It does not remove old coolant, clean the system, renew all corrosion inhibitors, or repair a leak.
A one-time top-off may be reasonable after recent service or when the level is only slightly low. If the level drops again, inspect the system instead of repeatedly adding coolant.
Coolant Drain and Refill
A drain and refill opens the radiator drain, engine-block drain, hose connection, or another approved drain point. The old coolant that flows out is collected, and the system is refilled with the specified coolant.
Some old coolant normally remains in the engine, heater core, hoses, and other passages. Even so, a drain and refill may be the exact scheduled service required by the manufacturer.
Coolant Flush
A flush removes more old coolant than a basic drain and refill. Depending on the vehicle and shop, it may involve repeated draining, a manufacturer-approved water rinse, a cleaning product, or specialized exchange equipment.
A flush may be useful when the system contains the wrong coolant, visible contamination, heavy deposits, or debris from a failed component. It should not be used as a substitute for diagnosing an overheating engine or active leak.
| Service | What It Does | When It Fits | What It Does Not Fix |
|---|---|---|---|
| Top-off | Raises a slightly low level | Correct coolant is known and the level is only slightly low | Leaks, contamination, old coolant, or trapped air |
| Drain and refill | Replaces the portion that drains naturally | Scheduled coolant replacement when the system is otherwise clean | Mechanical faults or severe internal deposits |
| Flush or exchange | Removes a larger share of old coolant and may rinse contamination | Mixed coolant, contamination, deposits, or a procedure required after certain repairs | Leaks, failed pumps, thermostats, fans, head gaskets, or damaged radiators |
Which Coolant Service Does Your Vehicle Need?
Use the condition of the system and the manufacturer’s maintenance schedule to choose the service.
- Top off: The cold level is slightly low, the correct coolant is known, and there is no evidence of an ongoing leak.
- Drain and refill: The scheduled replacement interval has arrived, the coolant is not heavily contaminated, and the manufacturer specifies ordinary coolant replacement.
- Flush or exchange: The wrong coolant was added, different coolant types were mixed, deposits are present, or a repair procedure specifically requires more complete removal.
- Diagnose before servicing: The engine overheats, the level keeps falling, coolant enters the oil, exhaust gas enters the cooling system, or the heater repeatedly blows cold air.
Note: Coolant intervals vary widely. For example, the 2024 Toyota Camry Warranty & Maintenance Guide lists the first engine-coolant replacement at 100,000 miles or 120 months and later replacements every 50,000 miles or 60 months. Your vehicle may use a different schedule.
Signs Your Cooling System Needs Attention
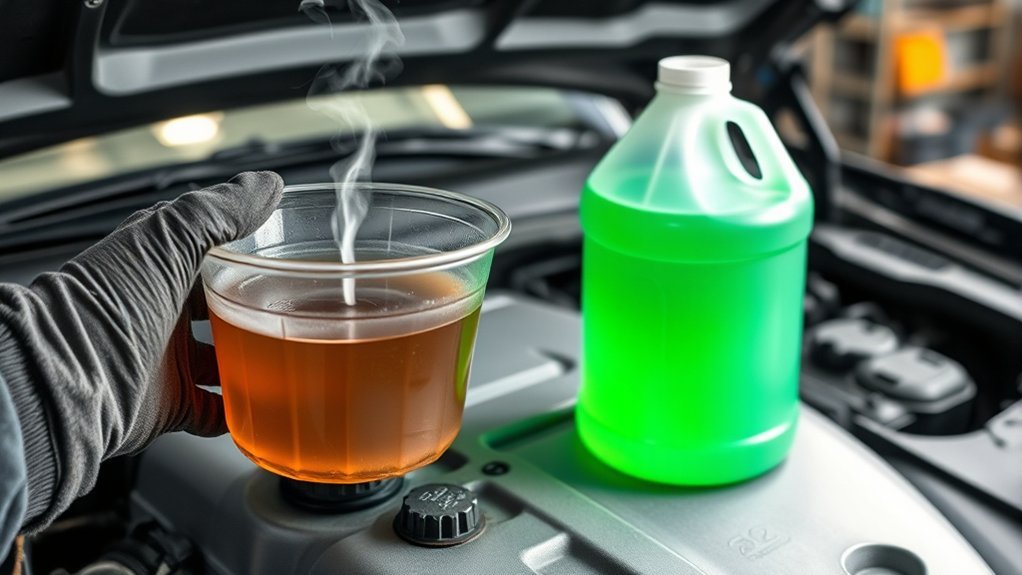
Coolant condition can help you decide whether replacement is due, but symptoms do not always identify the exact repair.
- Rusty, muddy, oily, or unusually cloudy coolant: The system may contain corrosion, incompatible fluid, oil, stop-leak material, or other contamination.
- Floating particles or sludge: Deposits may restrict small passages in the radiator, heater core, or engine.
- Repeated low coolant: Look for external leaks, a weak pressure cap, water-pump seepage, heater-core leakage, or an internal engine problem.
- Overheating: Possible causes include low coolant, trapped air, a thermostat fault, failed fan, restricted radiator, damaged water pump, or combustion-gas intrusion.
- No cabin heat or fluctuating heat: The system may be low or air may be trapped in the heater circuit.
- Sweet odor, residue, or puddles: These often point to a coolant leak that should be located and repaired.
A flush replaces coolant and removes contamination. It does not repair the fault that caused coolant loss or overheating.
Is It Safe to Open the Cooling System?
Warning: Never remove a radiator cap, pressure cap, bleed screw, hose, or drain plug while the system is hot. Wait until the engine and coolant are completely cold. Hot coolant and steam can escape under pressure and cause severe burns.
- Park on a stable, level surface and apply the parking brake.
- Wear gloves, eye protection, closed shoes, and clothing that covers exposed skin.
- Keep children and animals away from the work area.
- Use a wide drain pan that can hold the vehicle’s full coolant capacity.
- If the vehicle must be raised, support it with rated jack stands at the approved lift points. Never work beneath a vehicle supported only by a jack.
- Clean spills immediately and store coolant in a closed, labeled container.
Many coolants contain ethylene glycol. The Agency for Toxic Substances and Disease Registry advises minimizing skin contact, keeping antifreeze away from children, avoiding spills on the ground, and obtaining prompt medical attention after suspected ingestion.
How to Check and Top Off Coolant Safely
- Let the vehicle cool completely. Check the level only under the conditions stated in the owner’s manual.
- Identify the correct reservoir. Some vehicles have more than one cooling circuit. Do not confuse the engine-coolant reservoir with an inverter, battery, intercooler, brake-fluid, or washer-fluid reservoir.
- Read the cold-level marks. The coolant should normally sit between the low and full marks when cold, but the markings vary by vehicle.
- Confirm the required specification. Use the owner’s manual, underhood label, service information, or coolant specification printed on the original container.
- Add a small amount at a time. Use premixed coolant unless you are certain that concentrate is required and know the correct dilution.
- Do not overfill. Coolant expands as it heats, so space in the reservoir is necessary.
- Recheck the level. If it drops again after normal driving, inspect for leaks or trapped air instead of repeatedly topping it off.
Pro Tip: Photograph the coolant label and record the product specification, date, mileage, and quantity added. That record helps prevent accidental mixing during future service.
How to Drain, Refill, and Flush Coolant Safely
The following process is general guidance. Your service manual controls the drain points, capacity, bleed procedure, heater settings, electric-pump activation, and whether rinsing is allowed.
1. Confirm the Coolant, Capacity, and Procedure
Find the exact coolant specification and approximate system capacity before opening anything. Determine whether the vehicle has bleed screws, an electric water pump, multiple cooling loops, a rear heater, or a manufacturer-required vacuum-fill procedure.
2. Prepare the Vehicle and Work Area
Allow the engine to become completely cold. Remove any underbody panel only after the vehicle is safely supported. Position a large drain pan under the approved drain point.
3. Drain the Old Coolant
Open the approved drain valve, plug, or hose connection slowly. Some vehicles also have an engine-block drain. Do not force a fragile plastic radiator drain valve. Replace damaged sealing washers, O-rings, clamps, or drain plugs as required.
4. Inspect What Comes Out
Check the old coolant for oil, rust, grit, rubber fragments, metallic particles, unusual thickness, or separated layers. Significant contamination may justify further diagnosis before fresh coolant is installed.
5. Rinse Only When the Procedure Allows It
Do not automatically fill every vehicle with tap water or bottled drinking water. If the manufacturer permits a water rinse, use the specified water quality and follow the exact circulation and draining process. A rinse leaves some water behind, so account for that remaining water when calculating the final coolant concentration.
A system with heavy oil contamination, stop-leak material, chemical deposits, or corrosion may need professional cleaning or component replacement rather than repeated driveway flushing.
6. Close the Drains and Refill
Close and tighten all drain points to the specified torque. Fill slowly with the correct premixed coolant or properly prepared concentrate mixture. Stop periodically to let trapped air move upward.
7. Bleed Air From the Cooling System
Follow the vehicle-specific bleeding procedure. Depending on the design, this may require bleed screws, a raised fill funnel, a vacuum-fill tool, scan-tool commands, an electric-pump routine, or a particular heater-control setting.
Do not assume that idling alone will remove all air. Some engines can develop hot spots or false low-level readings when air remains trapped.
8. Check Temperature, Leaks, and Coolant Level
- Watch the temperature gauge or warning display during warm-up.
- Confirm that the cabin heater operates normally when the procedure calls for it.
- Inspect drains, hoses, clamps, the thermostat housing, radiator, reservoir, and water-pump area for leaks.
- Make sure the cooling fans cycle when expected.
- Turn the engine off immediately if the temperature rises abnormally.
- After the vehicle cools completely, recheck the level and correct it without overfilling.
- Inspect the level again after the next few normal drive cycles.
How Do You Choose the Right Antifreeze?

Match the Specification, Not the Color
Coolant color is a dye choice, not a universal compatibility code. A pink, blue, green, orange, or yellow coolant may meet one manufacturer specification but not another.
Check the owner’s manual for the required chemistry, performance specification, or manufacturer approval. The product label should state that it meets that exact requirement. “Universal” wording alone is not enough when the vehicle requires a specific approval.
As one example, Toyota specifies a high-quality ethylene-glycol coolant that is non-silicate, non-amine, non-nitrite, and non-borate and uses long-life hybrid organic acid technology. That is far more specific than selecting coolant by color.
Premixed vs. Concentrated Coolant
- Premixed or ready-to-use coolant: Already contains water at the labeled concentration. Do not dilute it unless the product and vehicle instructions say otherwise.
- Concentrated coolant: Must be mixed in the correct ratio with the water type approved for the vehicle.
Premixed coolant reduces measuring errors and is useful for topping off. Concentrate may be useful after a water rinse because some water remains inside the system, but the final concentration must still be calculated correctly.
Coolant Dilution Ratio
A 50/50 mixture is common, but it is not universal. Climate, coolant formulation, and manufacturer requirements can change the permitted range. Use the concentration specified for the vehicle and coolant product rather than assuming that adding more concentrate provides more protection.
Use distilled or deionized water only when the manufacturer and coolant instructions permit it. Do not assume that bottled drinking water is mineral-free.
Note: When the existing coolant type is unknown, do not guess based on color. Identify the required specification and consider a complete service performed with the correct product.
Why Does the Coolant Level Keep Dropping?
A sealed system should not require frequent top-offs. A small change after recent service may come from trapped air leaving the system, but continued loss needs investigation.
| Possible Cause | Clues | Next Step |
|---|---|---|
| Loose clamp or damaged hose | Wet connection, dried residue, or drip after driving | Repair the connection and pressure-test the system |
| Radiator or reservoir leak | Cracks, stained seams, or coolant beneath the front of the vehicle | Repair or replace the leaking component |
| Weak pressure cap | Residue near the cap, overflow, or pressure loss | Test the cap and confirm the correct pressure rating |
| Water-pump leak | Residue near the pump, bearing noise, or leakage from a vent hole | Inspect and replace the pump if faulty |
| Heater-core leak | Sweet odor inside, damp carpet, or window film | Inspect the heater circuit and HVAC housing |
| Internal engine leak | Persistent bubbles, persistent white exhaust after warm-up, misfire, oil contamination, or unexplained pressure | Perform combustion-gas, pressure, compression, or leak-down testing |
Benefits of Correct Coolant Maintenance
Coolant does more than prevent freezing. Engine coolant provides corrosion protection, lowers the coolant’s freezing point, and raises its boiling point while serving as the cooling system’s heat-transfer fluid. The SAE engine-coolant guidance identifies corrosion protection, freeze-point reduction, and boiling-point elevation as fundamental coolant properties.
Replacing coolant at the specified interval helps renew the corrosion-inhibitor package. Inspecting the system at the same time can also reveal aging hoses, loose connections, radiator damage, pump leakage, and contamination before they lead to overheating.
More service is not always better. An unnecessary flush can introduce the wrong coolant concentration, disturb fragile parts, or leave air trapped in the system. The best maintenance follows the manufacturer’s schedule and corrects the cause of any abnormal condition.
When to Seek Professional Help for Coolant Issues
Professional service is the safer choice when:
- The temperature gauge rises, a warning appears, or steam is visible.
- The cooling system loses coolant repeatedly.
- Oil is present in the coolant or coolant is present in the engine oil.
- The reservoir bubbles continuously after the engine reaches operating temperature.
- The vehicle requires vacuum filling, scan-tool pump activation, or a complicated bleed sequence.
- The radiator drain, block drain, thermostat housing, or bleed screws are difficult to access.
- The system contains heavy rust, sludge, oil, stop-leak material, or an unknown coolant mixture.
- The vehicle has multiple cooling circuits for a hybrid system, traction battery, turbocharger, inverter, or charge-air cooler.
- You cannot verify the correct coolant specification or final concentration.
A qualified shop can pressure-test the system, test the cap, inspect coolant concentration, check for combustion gases, operate electric pumps, and vacuum-fill the system to reduce trapped air.
How to Dispose of Used Coolant
Collect used coolant in a clean, sealable container. Label it clearly and keep it away from children, animals, food, and drinking-water containers.
- Do not pour coolant onto the ground.
- Do not empty it into a storm drain, sink, toilet, or septic system.
- Do not mix it with engine oil, fuel, brake fluid, solvents, or other chemicals.
- Take it to a local household-hazardous-waste collection site, approved recycling facility, or repair shop that accepts used coolant.
- Follow state and local rules, which may be stricter than federal household-waste requirements.
The U.S. Environmental Protection Agency recommends contacting your local environmental, health, or solid-waste agency for approved collection and disposal options.
Frequently Asked Questions
Do I need to flush my coolant before refilling?
Not always. If the coolant has reached its scheduled replacement interval and the system is clean, a manufacturer-specified drain and refill may be enough. A more complete flush may be appropriate for contamination, mixed coolant, deposits, or a repair procedure that requires it.
Can I refill coolant without flushing?
Yes. You can top off a slightly low system with the exact compatible coolant, or perform a scheduled drain and refill without flushing when the manufacturer permits it. If the level keeps dropping, locate the leak instead of continuing to add coolant.
Is a coolant fluid exchange the same as a flush?
The terms are not used consistently. One shop may call a machine-assisted exchange a flush, while another may reserve “flush” for a water or chemical cleaning process. Ask what fluid will be used, how much old coolant will be removed, and whether the procedure follows the vehicle manufacturer’s instructions.
How often should coolant be changed?
Use the mileage and time interval listed in your owner’s or maintenance manual. Intervals vary by model, year, and coolant specification. Replace coolant sooner when testing, contamination, repairs, or manufacturer instructions require it.
Can I mix coolants that are the same color?
Do not assume that matching colors are compatible. Color is not a universal formula code. Compare the manufacturer specification or approval on both product labels and in the vehicle manual.
Why is the coolant low again after I topped it off?
A small drop after recent service may come from trapped air leaving the system. Continued loss can indicate a leaking hose, radiator, cap, reservoir, heater core, water pump, or internal engine problem. Have the system inspected and pressure-tested.
Will a coolant flush fix overheating?
No. A flush can replace old or contaminated coolant, but overheating can be caused by low coolant, trapped air, thermostat, fan, pump, radiator, or internal-engine faults. Diagnose the cause before flushing an overheating vehicle.
What should I do if I added the wrong coolant?
Do not keep topping off based on color. Verify the coolant specification required by the vehicle. If incompatible coolant may have been mixed, follow the manufacturer’s service procedure; a more complete exchange or flush may be required.
Conclusion
A coolant top-off corrects a slightly low level, a drain and refill performs routine coolant replacement, and a flush removes a larger share of old coolant or contamination. None of these services repairs a leak or mechanical failure.
Check the vehicle’s maintenance schedule, use the exact coolant specification, keep the system closed until it is completely cold, and follow the manufacturer’s bleeding procedure. If the engine overheats, the level keeps falling, or the coolant contains oil or heavy deposits, diagnose the problem before adding more fluid.
Sources
- Toyota 2024 Camry Warranty & Maintenance Guide — coolant replacement intervals, coolant specification, inspections, and qualified-service guidance
- ATSDR Ethylene Glycol ToxFAQs — antifreeze exposure, ingestion, storage, spill, and skin-contact precautions
- U.S. EPA Household Hazardous Waste Guidance — safe handling and local disposal options for household chemical waste
- SAE Engine Coolant Guidance — coolant corrosion protection, freezing-point reduction, and boiling-point elevation
