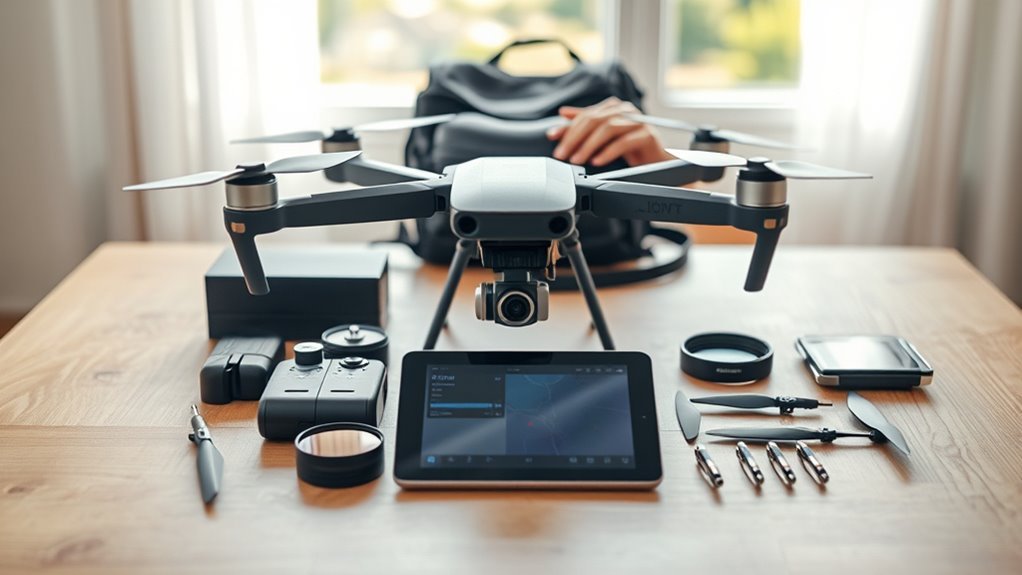
A drone pre-flight checklist is a practical control measure for reducing avoidable risk before takeoff. It helps operators confirm airspace status, weather conditions, airframe integrity, control settings, crew readiness, and payload security. Each step supports safer and more compliant operations. The full 20-point process reveals checks that are often missed under time pressure, and the final items can determine whether a flight proceeds or stops.
Drone Preflight Checklist Overview

A thorough drone preflight checklist is a critical safety measure that verifies airspace authorization, aircraft condition, and prevailing weather before launch.
This preflight checklist functions as a safety checklist that standardizes inspection, reduces variance, and supports disciplined decision-making by the Pilot in Command. It requires confirmation of propeller orientation, battery charge levels, GPS signal strength, and other physical indicators of airworthiness.
It also requires review of wind speed and visibility to determine whether conditions remain within operational limits. Airspace authorization and applicable NOTAMs must be confirmed before departure.
Wind speed, visibility, airspace authorization, and NOTAMs must all be verified before departure.
When completed methodically, the checklist lowers exposure to avoidable hazards and strengthens compliance with operational requirements. For pilots seeking liberation through competent autonomy, the process preserves freedom by replacing guesswork with verified control, ensuring each flight begins from a documented position of readiness, accountability, and measured risk management.
Check Airspace Before You Fly
Before flight, the airspace classification must be verified to confirm whether the area is Red, Yellow, or Green and to identify any no-fly restrictions.
Temporary Flight Restrictions and NOTAMs should also be reviewed, especially near airports and populated areas where unauthorized incursions pose elevated risk.
If authorization is required, tools such as B4UFLY or Aloft Air Control should be used to confirm status, obtain approval, and document compliance.
Airspace Zones
Airspace must be verified before every flight to confirm the area’s classification and avoid regulatory violations. The pilot should review airspace classification in advance, then set Flight Mode and confirm a stable GPS signal before takeoff.
Red zones denote prohibited operations and demand strict avoidance. Yellow zones permit flight only with authorization or waiver, often after coordination with aviation authorities. Green zones are generally suitable for operations, yet local rules and temporary advisories still apply.
Real-time tools such as B4UFLY or Aloft Air Control should be consulted to review NOTAMs and current status for the planned area. This disciplined check preserves operational freedom by replacing guesswork with verified, lawful access to the sky and reducing the risk of interruption, enforcement, or unsafe decisions.
No-Fly Restrictions
Once the airspace classification has been confirmed, the next check is for no-fly restrictions that can override otherwise permissible operations. The Remote Pilot should review B4UFLY or Aloft Air Control, then scan NOTAMs for TFRs, airport events, or other advisories. Compare the intended route against military areas, wildlife preserves, and published no-fly zones. Verify the flight remains lawful before arming; battery levels do not justify entering prohibited airspace.
| Source | What to Verify | Action |
|---|---|---|
| App map | No-fly zones | Reroute |
| NOTAMs | Temporary restrictions | Delay |
| Local charts | Military or preserve limits | Avoid |
If a waiver or authorization is required, confirm it exists before takeoff. A disciplined check preserves operational freedom while reducing legal and safety exposure.
Authorization Checks
With the route selected, the Remote Pilot should verify the airspace classification and any required authorization or waiver before arming the aircraft.
Red, Yellow, and Green zones must be assessed to confirm the legal operating envelope.
B4UFLY or Aloft Air Control can identify required authorization checks, active TFRs, NOTAMs, and nearby no-fly zones, including airports, military sites, and other restricted spaces.
Compliance with local regulations and laws is essential; freedom in flight depends on disciplined execution, not improvisation.
A visual observer may support situational awareness, but does not replace airspace verification.
Before departure, the pilot should record the authorization status on the SD card or logbook to preserve traceability.
Clear confirmation before takeoff prevents avoidable disruption, preserves access, and supports safe, lawful operations.
Read the Weather for Safe Flying
Weather conditions should be verified before takeoff, with particular attention to wind speed, gusts, rain, and any active weather alerts.
Wind above roughly 10–15 mph can reduce stability, while precipitation or thunderstorms can make flight unsafe.
Visibility and cloud cover must also meet operational limits to guarantee reliable navigation and safe control.
Check Wind Speed
Before takeoff, wind speed should be checked against the drone’s operating limits, since most models perform best in conditions around 15–20 mph or lower.
A disciplined checklist helps the Pilot verify whether the airframe can hold position, track a safe route, and return to the landing pad without excess correction.
- Confirm live wind speed through a weather app or local meteorological service.
- Compare sustained winds to the model’s maximum rating.
- Evaluate gusts; avoid flight when they exceed 10 mph.
- Assess crosswinds, which can deflect the flight path and reduce control.
If conditions are marginal or unstable, the safest decision is postponement.
Freedom in flight depends on precise limits, not optimism, and control remains strongest when wind is measured before launch.
Watch For Rain
Rain should always be checked in the forecast before flight, because precipitation can damage drone electronics and degrade performance. A disciplined rain impact assessment helps determine whether conditions remain within safe operating limits.
Weather monitoring tools should be used to verify precipitation timing, intensity, and nearby alerts, since thunderstorms can develop rapidly and alter risk. Heavy rain often brings gusty airflow and cloud cover that can reduce GPS stability and complicate control inputs.
These drone maintenance tips support operational freedom by preventing avoidable equipment stress, moisture intrusion, and mission loss. If rain is expected or already forming, the flight should be postponed rather than forced.
Careful weather review before launch preserves system integrity and keeps the aircraft available for later sorties.
Confirm Visibility Limits
Once precipitation risk has been ruled out, visibility must be verified against safe operating limits before launch. Aviation guidance requires at least 3 miles (5 kilometers) of visibility, with cloud cover ideally above 500 feet (150 meters) to preserve visual line of sight.
Field crews should apply visibility assessment techniques and local weather condition monitoring to confirm that no fog, rain, or snow advisories are active. Drone operation regulations should be treated as operational boundaries, not suggestions.
- Check local weather apps and services.
- Confirm current and forecast visibility.
- Verify cloud ceiling remains above minimum.
- Reassess continuously during flight.
Because visibility can shift rapidly, the operator must keep evaluating conditions throughout the mission. When limits erode, the safer choice is to delay launch and preserve autonomous movement within lawful airspace.
Inspect the Drone’s Airframe
The drone’s airframe should be inspected for any structural defects before flight, with particular attention to the canopy, which must be securely fixed to prevent detachment and possible structural failure.
Airframe materials should be examined for cracks, deformation, or fatigue that could reduce drone durability and compromise impact resistance after prior use or minor mishandling.
The GPS mount should remain tight, with no looseness, so navigation integrity is not degraded by vibration or movement.
All arms must be fully closed and locked to preserve frame rigidity during operation and to prevent in-flight separation.
Visible screws should be checked for correct tension, since any fastening loss can propagate vibration and weaken the structure.
The airframe should also be assessed for misalignment or damage that may indicate hidden stress.
Any defect, however small, warrants correction before takeoff.
A secure frame supports safe, autonomous flight and protects the operator’s ability to move with confidence.
Check Propellers, Screws, and Arms
Propellers should be inspected for cracks, damage, and correct orientation per manufacturer specification to guarantee safe, efficient operation.
All visible screws must be checked for secure tightness to reduce the risk of loosening during flight.
The arms should be fully closed, locked, and verified through functional engagement to preserve structural integrity and flight safety.
Propeller Orientation Check
A proper propeller orientation check begins with verifying that each propeller is installed according to the manufacturer’s specifications and that its rotation direction matches the marked layout on the drone, ensuring stable lift and responsive control. This disciplined step protects autonomy and reduces preventable failure.
- Confirm each blade matches the labeled front or rear position.
- Compare clockwise and counterclockwise rotation against the airframe markings.
- Inspect propellers and arms for cracks, bends, or deformation.
- Apply propeller maintenance tips, note propeller balance importance, and consider propeller upgrade options only when compatibility is certified.
All arms should appear fully deployed and structurally sound before flight. Careful orientation preserves safe performance and supports liberated operation without unnecessary interruption.
Screw Tightness Inspection
Securing all visible screws is essential before takeoff, since even minor loosening can lead to structural failure during flight. A disciplined inspection should confirm that each fastener on the frame, propeller mounts, and arm joints remains snug and undamaged. This supports reliable screw maintenance practices and strengthens structural integrity assessments before launch.
Propellers should be examined for correct orientation per manufacturer specifications, because improper installation can degrade stability and safety. The arms should be fully closed and secured, with no visible gaps, deformation, or play.
Regular checks, grounded in sound drone assembly techniques, help prevent mid-flight failures caused by loose components. Such routine discipline preserves control, protects equipment, and supports the freedom to fly with confidence.
Arm Lock Verification
Before takeoff, arm locks should be verified to confirm the drone’s arms are fully closed, properly engaged, and unable to disassemble during operation.
Inspect arm lock mechanisms and locking mechanisms for positive engagement and resistance to unintended release. Confirm arm stability at each hinge and attachment point, free from cracks, deformation, or play.
- Verify each arm seats completely in the folded or extended position.
- Test each lock for firm retention without abnormal movement.
- Check propellers for secure attachment and damage.
- Confirm visible screws are tightened and frame joints remain intact.
Any defect near the arm mount can reduce control authority and compromise flight safety. A disciplined preflight preserves operational freedom by preventing avoidable mechanical failure.
Verify Battery Health and Secure Fit
The battery should be inspected for any physical damage, including dents or swelling, before flight. This basic check supports battery safety practices and helps preserve operational freedom by reducing avoidable failures.
Battery maintenance tips include verifying charge status above 40% or 23V, since battery performance indicators below that threshold may not support a full mission. The pack should be tightly strapped to the battery plate so vibration, turbulence, or abrupt maneuvering cannot shift it.
The battery plate itself should be firmly fixed and locked to the airframe, maintaining a stable mount through the entire sortie. Any looseness in the assembly can introduce power interruption, reduce control authority, or force an unnecessary landing.
A secure, intact battery setup improves reliability, protects the aircraft, and allows the pilot to focus on mission objectives with confidence.
Confirm Battery Connectors Are Locked
Battery connectors should be fully locked before flight to maintain a secure electrical path and prevent in-flight disconnection.
A visual and tactile check for gaps, looseness, or incomplete seating helps confirm a tight fit.
Any connector that does not lock cleanly should be treated as a flight-risk condition and corrected immediately.
Secure Connector Fit
A pre-flight inspection verifies that battery connectors are fully seated and locked to prevent separation during flight and the resulting loss of power.
Secure connector fit supports safe launch and preserves control authority, allowing the pilot to operate without avoidable electrical risk. Before power-up, the connector should be checked for positive engagement and resistance to movement.
- Confirm the latch or locking mechanism is engaged.
- Apply connector maintenance tips: keep contacts clean and dry.
- Use troubleshooting connector issues to identify loose or intermittent fit.
- Follow connector compatibility guidelines to match the battery system.
A secure connection reduces the chance of arcing, dropout, or sudden shutdown.
When the fit is verified, the aircraft can be powered on with greater confidence and freedom from preventable failure.
Check For Gaps
Visual inspection confirms whether battery connectors are fully seated and locked, with no visible gaps between mating surfaces. Any separation suggests incomplete engagement, wear, or contamination that can interrupt current flow.
The operator should verify locking tabs, pins, and housings before arming the aircraft. Loose connectors elevate the risk of mid-flight power loss, so check for damage, deformation, and heat marks as part of routine connector maintenance tips.
Proper seating supports stable energy transfer and reinforces power delivery importance across every system. Battery testing techniques should include a brief tactile check for tightness and function, with faulty components removed from service immediately.
Reliable flight depends on disciplined inspection, because secure connections preserve control, efficiency, and the freedom to operate safely.
Power On the Ground Control Station
Power on the Ground Control Station (GCS) and verify that the unit is fully operational before flight. This step supports disciplined GCS power management and prevents avoidable loss of control authority.
Confirm battery reserve is at least 25 percent for the planned sortie; lower levels compromise mission duration and safety margins. Review GCS software updates before arming the aircraft, because outdated firmware or applications can degrade communication integrity.
Use these GCS troubleshooting tips if startup anomalies appear: reset the unit, inspect connections, and relaunch the control application. Open the IDS app and clear any notifications that could affect launch readiness.
- Verify power status and charge level.
- Confirm the control interface responds normally.
- Check app alerts and resolve them.
- Ascertain onboard camera functions are ready.
Check the GCS Screen and Camera
The Ground Control Station screen should be verified as operational and touch-responsive before takeoff to guarantee reliable navigation and control throughout the flight.
A brief GCS functionality review should confirm that the display reacts without lag, the battery exceeds 25%, and flight interface usability remains intact under direct interaction.
Any unresponsive zones or visual faults should be corrected before launch, since dependable command input supports autonomous operation without unnecessary constraint.
The IDS app may be opened on the GCS to confirm the system is current, while excluding the Hardware Safety Switch from this step.
The camera should then be tested by checking the preview feed for signal integrity and image stability.
The camera should be tested by confirming the preview feed remains stable, clear, and free of signal disruption.
Camera settings optimization requires confirming resolution and frame rate match mission requirements before departure.
Proper configuration reduces rework, preserves situational awareness, and helps guarantee the aircraft can serve the operator’s intent with minimal friction and maximum operational freedom.
Review IDS App Notifications
Open the IDS app on the Ground Control Station and review all notifications before flight, with immediate attention to any hardware safety switch warnings, firmware update alerts, or airspace restriction notices, including temporary flight restrictions (TFRs).
The operator should treat IDS app notifications as a mandatory preflight control point. Any unresolved alert can degrade drone performance, violate airspace rules, or compromise mission continuity. Safety precautions must be verified before arming systems.
- Inspect hardware safety switch messages and clear required interlocks.
- Review firmware update notices that may alter drone performance or compatibility.
- Confirm airspace restriction and TFR alerts match the planned route.
- Resolve every active notification before takeoff to preserve compliance.
A clean notification panel indicates that the system is prepared for controlled flight. If any warning persists, launch should be delayed until the condition is corrected.
This disciplined review supports safe, compliant, and operationally free use of the aircraft.
Confirm GPS Signal and Satellite Count
Next, the operator confirms that the GPS signal is strong and stable, with at least 10 satellites acquired for ideal positioning performance. This threshold supports dependable navigation, geofencing, and return-to-home logic before the aircraft leaves the ground. The antenna LEDs should flash green, indicating reliable contact with multiple satellites.
If the count is low or unstable, GPS signal troubleshooting should begin immediately by moving away from metal structures, power lines, and nearby electronic devices that can produce satellite connectivity issues. The flight controller should also be inspected for alerts related to reception quality.
A compass calibration may be required before takeoff, since orientation errors can degrade positional data and compromise safe flight. Operators should note any HDOP accuracy concerns if the system reports reduced positional quality, but deeper assessment belongs to later checks.
This disciplined verification preserves autonomy, limits preventable drift, and supports safe, liberated operation.
Check HDOP and Signal Stability
HDOP is checked to confirm that horizontal positional accuracy remains within an acceptable range, ideally below 1.5 for best navigation performance. This verification supports disciplined GPS accuracy techniques and helps preserve stable control before takeoff.
Signal stability should be reviewed alongside satellite reception, since fluctuating strength can introduce navigation error and reduce operational freedom.
- Confirm HDOP remains below 1.5 before arming.
- Verify signal stability shows no rapid drops or spikes.
- Prefer 10 or more satellites; 18+ improves reliability.
- Assess nearby interference sources and apply signal interference solutions.
These HDOP monitoring strategies are essential when operating near tall buildings, dense foliage, or other obstructions that can degrade readings.
Consistent preflight review strengthens situational confidence, reduces risk, and supports precise flight execution. When HDOP and signal stability remain steady, the aircraft is better positioned to respond accurately to commands and maintain safe, liberated movement through the environment.
Calibrate the Compass Before Takeoff
Compass calibration is a critical preflight step that guarantees the drone can interpret its heading accurately relative to the Earth’s magnetic field.
Compass importance is central to stable navigation, position hold, and course correction, especially when autonomous functions are engaged. The operator should use approved calibration techniques, typically a slow figure-eight rotation, so the sensors can collect representative magnetic data from multiple orientations.
Calibration should not be attempted until the ground control station shows a reliable GPS lock, ideally with at least 10 satellites, because accurate satellite data supports better heading validation. Before launch, the calibration status must read ready or success on the GCS interface.
Regular recalibration is advised whenever the aircraft is operated near sources of magnetic interference, including metal structures and high-voltage lines. This disciplined procedure protects flight control integrity and preserves the freedom to operate with precision, confidence, and minimal risk during every mission.
Clear the Launch and Landing Zone
The launch and landing zone should be cleared of debris, obstacles, and unnecessary personnel before any takeoff or recovery operation. This supports launch zone safety by reducing collision, rotor wash, and prop strike hazards.
A clear area of 15 to 20 feet around the aircraft should be maintained so every person remains outside the operational envelope.
Landing zone preparation should include a visual inspection for uneven terrain, loose objects, and overhead obstructions that could disrupt descent or recovery. When available, a landing pad provides a stable, clean surface and limits contamination of sensitive components.
Effective debris removal techniques include hand clearing, sweeping, and relocating lightweight materials before power-up.
- Confirm the area is empty.
- Remove debris and obstacles.
- Mark a 15–20 foot safety perimeter.
- Communicate the designated zone to all personnel.
Confirm Pilot Readiness With IMSAFE
After the launch and landing zone is secured, pilot readiness must be verified before power-up and takeoff. IMSAFE provides a disciplined screen: Illness, Medication, Stress, Alcohol, Fatigue, and Emotion.
This safety gate supports Pilot health awareness by forcing a direct assessment of body and mind before the aircraft is armed. Any recent illness or medication that can slow judgment, blur vision, or reduce coordination should delay the flight.
Personal stressors must also be weighed, because distraction weakens control and response time. Alcohol use should be excluded for at least 8 hours before flight, consistent with FAA limits.
Fatigue demands equal attention; tired operators react slowly and make poorer decisions. Emotion should be checked for agitation or overload.
As part of Mental readiness strategies, IMSAFE can be folded into Pre flight rituals, creating a repeatable, liberation-minded habit that preserves autonomy through disciplined self-screening and safer operation.
Review NOTAMs and Airspace Authorizations
Before arming the aircraft, the operator should review current NOTAMs to identify temporary flight restrictions, hazards, or airspace changes that could affect the flight plan. This step establishes NOTAM significance and prevents inadvertent conflicts with airspace regulations.
The operator should then verify whether the route enters controlled airspace and complete the authorization process before launch. Real-time tools such as B4UFLY or Aloft Air Control can streamline status checks and expose updates faster than manual sources.
Verify controlled airspace early and secure authorization before launch to avoid delays and compliance risks.
- Check NOTAMs for closures, advisories, and restricted zones.
- Confirm airspace class using Red, Yellow, or Green indicators.
- Secure required permissions, waivers, or LAANC-style approvals.
- Review recent incidents or advisories that may indicate elevated risk.
When the airspace picture is current, the operator can act with greater freedom and reduced exposure to enforcement or collision risk. Precision in this review supports lawful, safe, and autonomous drone operation.
Set Flight Mode and Geofence
Before takeoff, the flight mode should be selected to match the mission profile, with Loiter or another appropriate mode configured as required.
Geofence limits should then be established in the control app to define the allowable operating boundary and account for local hazards or obstacles.
Mission boundaries must be verified after power-up and before arming to confirm that geofence protection is active and functioning correctly.
Select Flight Mode
Select the appropriate flight mode according to the mission profile, choosing options such as Loiter for stable hovering or Waypoint for automated route execution, and verify that the selected mode aligns with the intended control responsiveness and altitude constraints.
Effective mission planning depends on understanding flight mode advantages and drone automation limits before takeoff.
- Confirm the mode matches the task.
- Check responsiveness against operator intent.
- Verify altitude behavior under the chosen mode.
- Ascertain firmware supports the selected functions.
Review geofence settings before launch so the aircraft remains within authorized boundaries and current regulatory limits.
This controlled setup preserves operational freedom by reducing preventable risk, maintaining compliance, and enabling precise execution in complex airspace.
Configure Geofence Limits
Configure geofence limits to establish the drone’s safe operational boundary and prevent entry into restricted airspace, while setting the flight mode to match mission demands such as Loiter for stable hover or Waypoints for automated route following.
Geofence technology should be configured to reflect the drone’s performance envelope and the mission’s intended radius, preserving drone safety without constraining lawful operation. The boundary settings must support airspace compliance by excluding prohibited zones and aligning with current restrictions and NOTAMs.
During preflight checks, the system should be tested to confirm a controlled response as the aircraft nears the limit. Properly tuned geofence parameters protect operational freedom by enabling precise, accountable flight within defined limits and reducing exposure to regulatory or navigational errors.
Verify Mission Boundaries
With geofence limits established, mission boundaries should be verified to guarantee the drone remains within a defined, legal operating area. This step supports mission planning strategies by aligning route, altitude, and mode with the task profile.
- Confirm the flight mode matches mission intent, such as Loiter or Follow Me.
- Verify geofence activation and test boundary enforcement techniques before arming.
- Inspect updated airspace data and recalibrate limits when regulations or terrain change.
- Review geofence technology advancements that improve constraint accuracy and warning response.
A properly configured boundary system reduces drift into restricted zones and preserves safe, autonomous operation.
The operator should confirm all settings are active, current, and internally consistent before takeoff, ensuring disciplined control without unnecessary constraint.
Verify Crew Roles and Visual Observers
Before takeoff, the crew’s responsibilities must be clearly assigned and confirmed, including the Pilot in Command (PIC), Remote Pilot (RP), and Visual Observer (VO), so communication and control remain unambiguous during flight operations.
Crew communication strategies should be established before launch, with direct call signs, concise acknowledgements, and a single chain of command that supports disciplined execution.
Visual observer positioning must preserve continuous Line of Sight (LOS) with the drone and avoid obstructions that reduce situational awareness.
A preflight safety briefing should review mission intent, assigned duties, and emergency response protocols, ensuring each member can identify hazards and react without delay.
The crew should confirm understanding of contingency actions, lost-link handling, and abnormal conditions within their assigned scope.
Any change to personnel or role assignments should be entered in the flight log before departure, creating accountability and a reliable record for future review.
Run the Final Arming Safety Callout
Once crew roles, communications, and observer positions are confirmed, the final arming safety callout can be performed. The PIC or RP should restate the mission overview, then issue a clear announcement to begin arming procedures. This step reinforces communication protocols and keeps every person accountable to the same safety standard.
The launch area should remain clear, with all personnel held at least 15 to 20 feet away.
Keep the launch area clear, with all personnel positioned at least 15 to 20 feet away.
- Verify the area is free of bystanders.
- Announce, “CLEAR TO ARM!”
- Confirm propellers are balanced and spinning properly.
- Check for at least 10 GPS satellites and flashing green GPS LEDs.
These safety reminders reduce ambiguity before power-up and support disciplined, controlled flight initiation. A concise callout preserves operational freedom by preventing avoidable error, protecting personnel, and ensuring the aircraft is ready for a stable, deliberate launch.
Check Payload or Gimbal Readiness
The payload or gimbal should be confirmed secure, calibrated, and free of damage before flight. The mounting interface should be inspected for proper lock engagement, and the system should be moved through its full range to verify unobstructed motion.
Cameras and sensors should be clean, powered, and responsive, since degraded optics or faulty electronics compromise mission data. Payload weight considerations must be checked against the airframe limit to prevent reduced endurance, control lag, or loss of lift.
Stabilization mode settings and tilt angles should match the task profile, whether mapping, inspection, or filming, so the aircraft can operate with disciplined precision. Gimbal maintenance tips include checking fasteners, cable routing, damping elements, and firmware status before every sortie.
Any crack, wobble, or binding should trigger repair or replacement before takeoff. Proper readiness protects reliable flight and preserves the freedom to execute the mission without avoidable risk.
Frequently Asked Questions
What Does a Drone Checklist Include Before Flying?
A drone checklist includes airspace verification, required authorizations, and inspection of the airframe, screws, and structural integrity.
It also covers battery levels, secure connections, and battery safety precautions, plus GPS lock with sufficient satellites.
Weather considerations must be reviewed for wind and visibility.
These drone maintenance tips support safe, lawful flight while protecting operational autonomy and reducing preventable failures before takeoff, ensuring disciplined, independent control in the field.
Can FAA Know You Flew a DJI Drone?
Yes, the FAA can know a DJI drone flew, like a lighthouse beam cutting through fog.
Under DJI regulations, Remote ID may broadcast identity and location, while Flight logs can preserve altitude, path, and time.
If the aircraft is registered, records can be linked to an operator.
For any investigation, FAA compliance tools and geofencing data may help confirm who flew, when, and where, supporting safe, accountable, and lawful use.
What Is the 1:1 Rule for Drones?
The 1:1 rule for drones requires maintaining at least one foot of horizontal separation from obstacles for every foot of altitude gained.
This Drone safety practice supports precise obstacle clearance, line-of-sight control, and safer maneuvering in confined airspace. It aligns with Flight regulations and should be part of Pre flight preparation, especially in urban environments where structures, trees, and hazards can appear suddenly, limiting risk and preserving operational freedom.
What Is the Pre-Flight Checklist?
A pre-flight checklist is a structured, safety-critical sequence: verify airspace, verify weather, verify battery status, verify GPS lock. It supports drone safety by combining flight preparation and equipment inspection before takeoff.
The operator confirms airframe integrity, propeller orientation, and secure electronic connections, then checks regulatory compliance and mission readiness. This disciplined process reduces failure risk, preserves autonomy, and enables lawful, controlled, and confident aerial operation.
Conclusion
In practice, the checklist proves a simple theory: disciplined pre-flight inspection reduces preventable failure. When airspace, weather, airframe, propellers, flight modes, crew roles, and arming calls are verified in sequence, risk becomes measurable rather than assumed. The drone enters service only after each control is confirmed and each hazard is addressed. That methodical rhythm supports safer launches, cleaner operations, and stronger compliance, making every flight less a guess and more a controlled procedure.
