Last updated: September 22, 2026
[VERIFY: Add the real author/byline and relevant hands-on drone-filming credentials before publication.]
To reduce drone video jitter, first identify what kind of problem you are seeing: physical vibration, jerky flight or gimbal movement, choppy playback, or rolling-shutter “jello.” Inspect the propellers and gimbal before changing settings, then test smoother stick inputs and model-specific control tuning. If the recorded file is smooth on another device, the problem is playback rather than the drone. Calibrate the gimbal or IMU when the app, manual, or a specific symptom points to calibration—not as a universal before-every-flight routine. Use post-production stabilization only after fixing the source of the shake.
Quick Answer
Drone video jitter usually comes from vibration, abrupt control inputs, strong or gusty wind, gimbal problems, camera-motion settings, or playback limitations. Start by checking the original file, propellers, gimbal movement, and app warnings. For smoother motion, use gentle inputs, Cine/Normal flight modes where supported, and model-specific yaw and gimbal tuning. If footage only looks choppy on one device, test playback before changing the aircraft.
Key Takeaways
- Diagnose the symptom first: true shake, rolling-shutter jello, jerky camera movement, and choppy playback need different fixes.
- Inspect propellers, gimbal movement, dampers, accessories, and the recording card before changing advanced settings.
- Use your drone’s default Gain/Expo values as the baseline; adjust yaw, braking, and gimbal controls in small, model-specific steps.
- Calibrate the gimbal when it is skewed or the app requests calibration, and calibrate the IMU when the app or manufacturer guidance indicates it is needed.
- Use the 180-degree shutter rule and ND filters when appropriate for motion rendering, then apply only light stabilization in editing.
At a Glance
| Time Required | Usually one inspection-and-settings session plus a short test flight; the exact time depends on the drone and the cause. |
| Difficulty | Easy to moderate, depending on your drone model and app settings. |
| Tools Needed | Drone app, charged batteries, undamaged propellers, a stable level surface when calibration is required, a manufacturer-approved memory card, optional ND filters, and editing software. |
| Cost | Often free if the issue is settings or playback. Replacement propellers, approved memory cards, ND filters, dampers, or repair service may add cost. |
[VERIFY: Add one genuine hands-on test note before publication—name the drone tested, the default vs. adjusted yaw/gimbal setting, the flight condition, and the observed footage difference. Do not invent this experience.]
Understanding Drone Video Jitter
Drone “jitter” is not one single fault. It can look like tiny shakes, rapid high-frequency vibration, sudden camera steps, uneven pans, rolling-shutter waves, or simple playback stutter. Identifying the pattern prevents you from applying the wrong fix.
Physical shake can come from damaged propellers, motor or airframe vibration, strong wind, a damaged gimbal, worn vibration dampers, or an accessory that interferes with the gimbal. Jerky motion is more often caused by abrupt stick inputs, aggressive braking, fast yaw, or fast gimbal tilt. Choppy-looking motion can also come from a very fast shutter speed, frame-rate or timeline mismatch, or playback hardware that cannot decode a high-bitrate 4K file smoothly.
A separate artifact is the jello effect: wavy or rippling distortion associated with camera vibration and rolling-shutter readout. DJI’s current troubleshooting guidance treats jello as a symptom to investigate for gimbal condition, vibration damping, wind, aggressive flight, or aircraft damage.
When high-resolution footage looks rough only on a phone, tablet, or older computer, test the original file on a stronger device or with a lower-resolution proxy. If the same source file plays smoothly elsewhere, changing flight settings will not solve the playback bottleneck.
The best workflow is diagnosis first, mechanical inspection second, model-specific tuning third, and editing last. That sequence fixes the cause instead of hiding it.
Note: Before changing advanced settings, confirm whether the jitter is visible in the original recorded file or only during playback. Test the clip on another capable device or create a lower-resolution proxy to rule out decoding lag.
Common Causes of Drone Video Jitter
Before you adjust settings, match the visible symptom to the likely source. These are the most common categories:
- Damaged or misshapen propellers: Chips, bends, cracks, or deformation can introduce vibration that reaches the camera.
- Gimbal interference or damage: A protector, debris, damaged damper, or damaged gimbal can prevent normal stabilization.
- Rough stick inputs: Fast yaw turns, hard braking, large roll/pitch inputs, and rapid gimbal tilts can create jerky movement.
- Aggressive control tuning: High angular velocity, short braking response, or fast gimbal tilt settings can make motion look abrupt.
- Strong or gusty wind: Wind can shake the aircraft or force frequent corrections; respect your model’s wind limits and app warnings.
- Motion-rendering settings: A very fast shutter speed can make movement look staccato, while frame-rate or timeline mismatches can make playback look uneven.
- Rolling-shutter jello: High-frequency vibration can appear as wavy or rippling distortion rather than ordinary shake.
- Recording-media limits: Use a memory card that meets your drone manufacturer’s required speed class for the recording mode.
- Playback limitations: A device that struggles with the codec, resolution, or bitrate can make a good recording look choppy.
When Gimbal and IMU Calibration Helps
Gimbal calibration is useful when the camera is skewed, the horizon will not stay level, the app requests calibration, or troubleshooting points to a gimbal alignment problem. It is not a substitute for replacing damaged propellers or repairing a physically damaged gimbal.
For DJI camera drones, the manufacturer’s current gimbal calibration guide specifically addresses a skewed gimbal or a “Gimbal Calibration Required” warning. Follow the instructions for your own brand and model because menu names and procedures differ.
IMU calibration should also be symptom- or prompt-driven. DJI’s current IMU calibration guide is built around IMU calibration warnings and data errors, not a requirement to recalibrate before every normal flight.
Calibrate to solve a documented symptom or app warning; inspect mechanical vibration first when the footage shows high-frequency shake or jello.
When calibration is required, use the manufacturer’s procedure and the surface/orientation conditions it specifies. Keep the aircraft still when instructed and remove any gimbal protector that must be removed for normal gimbal movement.
If the gimbal visibly shakes or makes abnormal noise while the aircraft is stationary, or if the aircraft has suffered a collision, stop troubleshooting in the air and use the manufacturer’s support or repair process.
Pre-Flight Inspection Before Changing Settings
Settings can improve your footage, but they cannot fix a drone with damaged parts. Before you adjust sensitivity or gimbal speed, perform a quick inspection.
- Check each propeller: Look for chips, cracks, bends, dirt, or loose mounting points. Replace damaged propellers instead of trying to keep using them.
- Inspect the gimbal: Make sure the gimbal clamp or cover is removed and nothing blocks the camera’s movement.
- Clean the camera and sensors: Dust, fingerprints, and debris can affect image quality and flight behavior.
- Confirm battery fit: A loose battery or accessory can create vibration during flight.
- Use an approved memory card: Match the card to the speed class and capacity your manufacturer specifies. DJI, for example, publishes a current recommended storage-card list by drone model.
- Update only when you can test afterward: Follow the manufacturer’s update process with adequate battery power and a stable connection, then perform a short test before an important shoot.
Warning: Do not fly with cracked propellers, a stuck gimbal, loose accessories, or warning messages in the drone app. These issues can cause shaky footage and may also create a safety risk.
Adjusting Sensitivity Settings
To make drone motion look smoother, tune controls from the manufacturer’s default values rather than copying a fixed number from another aircraft. Current DJI models can expose settings such as maximum angular velocity, yaw smoothness, brake sensitivity, expo, gimbal maximum tilt speed, and tilt smoothness, but the available controls and ranges vary by model.
Start with one symptom. If yaw pans snap too quickly, reduce rotational speed or angular velocity. If stops look abrupt, adjust braking so the aircraft decelerates over a longer distance. If camera tilts start or stop too suddenly, reduce gimbal tilt speed and add smoothness where your app supports it.
Make one change at a time and record the same short test move after each adjustment. This is safer and more useful than applying a generic preset.
EXPO Settings Adjustment
EXPO changes how stick movement is translated into aircraft response. The exact scale and curve are model-specific, so a value copied from an older DJI GO aircraft or a different brand may not behave the same way on your drone.
DJI’s current camera-drone gimbal-shake troubleshooting guide recommends resetting EXP values during troubleshooting and explains that, on supported DJI aircraft, a larger EXP value produces a stronger response for the same physical stick input.
For smooth filming, begin at the default setting, make a small change, and test near-center stick response. The goal is predictable fine control without making the aircraft too sluggish for safe flight.
Sensitivity Settings Optimization
Separate yaw speed, braking, and expo instead of treating “sensitivity” as one control. On current DJI manuals that expose Gain and Expo Tuning, lower brake sensitivity increases braking distance, while higher brake sensitivity shortens it.
For cinematic moves, reduce excessive rotational speed and tune braking gradually so the aircraft does not snap to a stop. Keep enough responsiveness for obstacle avoidance and recovery.
Do not use universal numeric ranges for yaw, EXPO, or gimbal speed. Your drone’s manual and app labels are the source of truth, and the safest baseline is the manufacturer default.
Yaw Movement Control
Yaw is one of the easiest ways to make otherwise stable footage look jerky because the whole frame rotates at once.
If your app offers maximum angular velocity or a similar yaw-speed control, reduce it for filming and test a slow pan. If it offers yaw smoothness, tune it until acceleration and deceleration look gradual without making control unpredictable.
Use gentle stick pressure and combine only as many axes as you can control consistently. On supported DJI aircraft, Cine mode also reduces flight speed and makes braking and rotation more fluid than Sport mode.
Optimizing Gimbal Pitch Speed
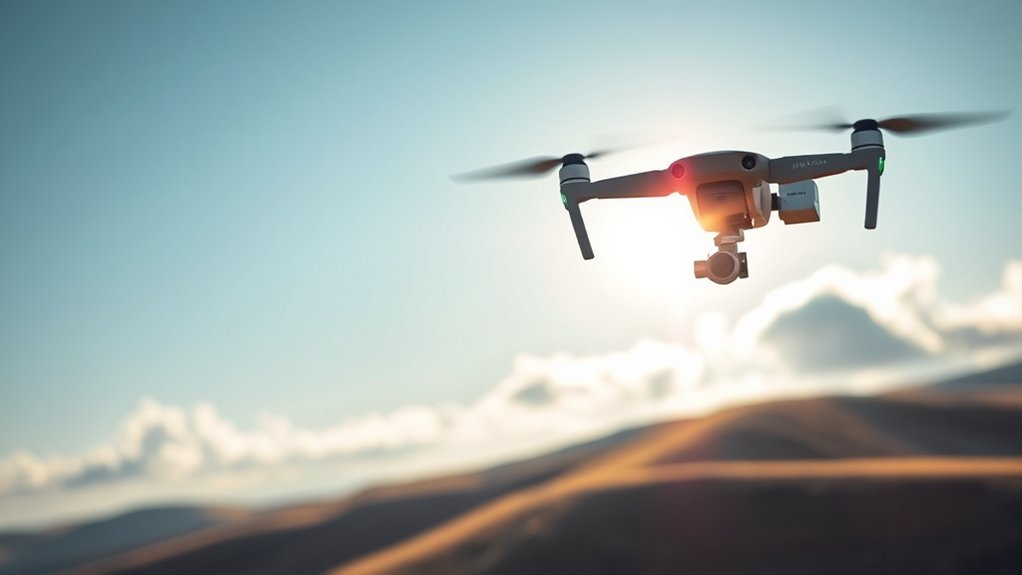
Gimbal pitch speed controls how quickly the camera tilts up or down. Too fast can make a reveal look mechanical; too slow can make it hard to reframe before the moment passes.
Because gimbal ranges differ by drone and app, use the default value as your reference instead of a universal number. Then:
- Reduce tilt speed gradually: Lower the maximum gimbal tilt speed until normal up/down moves stop looking abrupt.
- Add smoothness carefully: If the app has tilt smoothness, increase easing only enough to create a gentle start and stop.
- Test the same move: Record a short tilt reveal after each change so you can compare the result.
- Keep control authority: Do not make the gimbal so slow that you cannot frame safely or react to a changing subject.
Pro Tip: Use a steady gimbal wheel input and begin the tilt before the key moment. Smooth footage usually comes from predictable acceleration and deceleration, not from chasing the subject with repeated corrections.
Camera Settings That Help Reduce Choppy Footage
Drone footage can look jerky even when the aircraft and gimbal are stable. Motion rendering depends on frame rate, shutter speed, playback cadence, and whether the recording device can keep up with the selected bitrate.
For normal-speed cinematic footage, 24 fps or 30 fps are common choices; 60 fps is useful when you need smoother fast motion or plan to slow footage in a matching timeline.
The 180-degree shutter rule is a useful starting point: set exposure time to roughly twice the frame rate. That is about 1/48 second at 24 fps (often rounded to 1/50), 1/60 at 30 fps, and 1/120 at 60 fps. DJI explains the same 180-degree relationship in its current ND-filter guidance.
In bright daylight, an ND filter can reduce incoming light so you can keep a slower shutter speed without overexposing the image. DJI’s current Air 3 ND filter explanation gives a manufacturer example of this shutter-angle relationship.
Finally, use a recording card approved for your drone and verify that the editing timeline matches the intended frame rate. If only one playback device stutters, test the source file elsewhere before changing the camera or flight settings.
Using Cine Mode and Intelligent Flight Modes
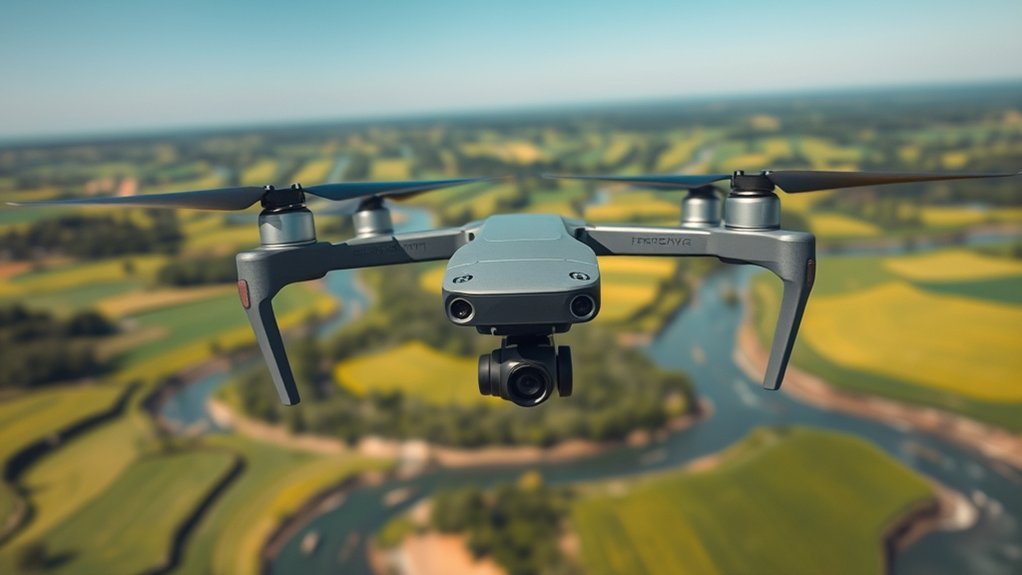
Automated and reduced-speed flight modes can help you create repeatable movement, but the names and capabilities are model-specific. On current DJI camera drones, Cine mode is designed for slower, more fluid movement, while supported FocusTrack systems can include Spotlight, ActiveTrack, and Point of Interest.
Use these modes only when your aircraft supports them and after reading the model-specific limits. Tracking behavior, supported subjects, obstacle sensing, and minimum operating distances vary by drone.
ActiveTrack Capabilities Explained
ActiveTrack is a DJI feature on supported aircraft that automatically follows a selected subject. It can reduce the need for constant manual yaw and framing corrections, but it does not remove the pilot’s responsibility to keep the flight path safe.
DJI’s current tracking-function guide states that supported DJI Fly aircraft can use FocusTrack modes including Spotlight, ActiveTrack, and Point of Interest, while specific behavior differs by model.
- Confirm model support: Check your manual for the available tracking modes and supported subject types.
- Use an open environment: Keep the aircraft clear of obstacles and stay within the operating conditions described by the manufacturer.
- Plan the exit: Know how to pause or cancel tracking immediately if the subject changes direction or the flight path becomes unsafe.
Watch the aircraft and surrounding airspace, not just the phone or controller screen.
Orbiting With Point of Interest
Point of Interest (POI) can automate an orbit around a selected subject on supported drones. The aircraft maintains an orbit while the system tries to keep the target framed, which can produce more consistent motion than manually combining yaw and lateral flight.
Before starting, choose a safe radius, altitude, direction, and speed that leave enough clearance for the entire orbit. A wider, slower orbit usually creates gentler apparent motion than a tight, fast orbit.
Do not assume every POI implementation has the same obstacle behavior. Verify your drone’s sensing coverage and the mode’s limitations before relying on automation.
Benefits of Cine Mode
On supported DJI camera drones, Cine mode reduces flight speed and makes braking and rotation more fluid than more aggressive modes. That can help when smooth footage matters more than fast repositioning.
- Gentler rotation: Slower yaw makes pans easier to control.
- Longer deceleration: More gradual braking can reduce the visible jolt at the end of a move.
- More repeatable inputs: Reduced-speed movement gives you more time to make small corrections.
Cine mode improves control feel; it does not fix damaged propellers, a faulty gimbal, strong wind, or poor camera settings.
Implementing Smooth Flight Techniques
Smooth footage starts with predictable inputs. Apply gentle stick pressure and give the aircraft time to accelerate, turn, and decelerate instead of making repeated corrections.
Keep the shot simple. Flying forward while yawing, climbing, and tilting the gimbal at the same time can look impressive when controlled well, but it also multiplies the chances of a visible jerk. Practice one or two axes first, then add complexity.
Do not rely on a universal “minimum altitude” to reduce jitter. Fly only at a safe and legal altitude for the shot, and avoid takeoff areas where dust, grass, or loose debris can be blown into the propellers or gimbal.
Use Cine mode or another reduced-speed mode when your drone supports it and the shot benefits from slower response. Normal mode can also be smoother than Sport mode when large stick inputs would otherwise create aggressive aircraft attitude.
If the footage still contains high-frequency vibration after your inputs are smooth, return to mechanical checks: propellers, gimbal freedom, dampers, accessories, and any damage from a previous impact.
Practice repeatable moves such as slow push-ins, pullbacks, lateral tracks, gradual yaws, gimbal reveals, and wide orbits. Plan the start and end of each move before recording.
Choosing the Right Flying Environment
Choose an open area with enough clearance for the entire planned shot. Trees, buildings, cliffs, wires, and other obstacles can create both collision risk and turbulent airflow.
Three checks matter most:
- Wind: Strong or gusty wind can shake the aircraft and make stabilization work harder. Follow your model’s published wind limits and any strong-wind warning in the app.
- People, traffic, and obstacles: Keep a safe buffer so you are not forced into abrupt corrections. Follow the drone rules that apply where you are flying.
- Light and visibility: Choose conditions that let you see the aircraft and expose the image properly. Early or late light can look attractive, but calmer wind is not guaranteed—check the actual forecast.
Use a stable, clean takeoff surface. Tall grass, dust, sand, or loose gravel can interfere with propellers, motors, sensors, or the gimbal.
Before takeoff, decide where the move begins, where the subject should sit in frame, and where the aircraft will stop. A planned flight path reduces last-second corrections.
Firmware Checks and IMU Calibration
Keeping firmware current can deliver bug fixes and manufacturer improvements, but an update is not a guaranteed cure for video jitter. Read the release notes, update when you have time to test, and avoid changing critical software immediately before a time-sensitive job.
IMU calibration is different from a firmware update. Do not treat it as routine maintenance that must be performed before every shoot. Calibrate when the app reports an IMU problem, the status page indicates calibration is needed, or your manufacturer’s troubleshooting procedure calls for it.
Use firmware updates proactively, but use calibration diagnostically: follow the app and the model-specific manual instead of a fixed schedule.
If the aircraft was dropped, collided with something, or now shows abnormal gimbal shaking or flight behavior, inspect for physical damage before assuming calibration will solve it.
After any update or corrective calibration, perform a short test flight in a safe area and review the original recorded file before relying on the drone for important footage.
Techniques for Post-Production Stabilization
Post-production stabilization works best on footage that is already close to usable. Severe vibration, rolling-shutter distortion, or a large mid-shot lurch can force heavy cropping or warping.
Use stabilization as a finishing step:
- Start with a conservative pass: Apply your editor’s stabilizer and keep the intended camera motion rather than trying to lock every shot completely.
- Watch crop and warping: Increase stabilization only until the distracting shake is controlled. Straight lines and frame edges reveal over-stabilization quickly.
- Use a simpler method if needed: In software that offers multiple stabilization models, a less complex transform can sometimes reduce warped edges.
- Trim unrecoverable bumps: Cutting a severe jolt can look better than forcing the software to repair it.
- Review at delivery resolution: Check sharpness, crop, and motion after stabilization before final export.
Adobe’s current Warp Stabilizer documentation notes that higher smoothness can require more cropping and that complex methods can introduce unwanted warping. Those trade-offs apply conceptually to other stabilization tools as well.
If the result looks rubbery, wavy, or excessively cropped, reduce stabilization strength or cut the problem section. A little natural motion often looks better than aggressive digital correction.
Troubleshooting Drone Video Jitter
Use this order so you do not change flight settings to solve a playback problem—or recalibrate sensors to solve a damaged-propeller problem.
- Check the original file on another capable device: If it plays smoothly elsewhere, troubleshoot playback, codec support, or timeline settings first.
- Identify the symptom: Ordinary shake, jerky movement, and rolling-shutter jello point to different causes.
- Inspect propellers and gimbal hardware: Replace damaged or misshapen propellers and make sure the gimbal protector, debris, or a loose accessory is not interfering.
- Test in light wind: If high-frequency shake appears only in strong or gusty conditions, wind may be the trigger. Stay within the aircraft’s rated limits.
- Return tuning to defaults: If previous Gain/Expo changes are unknown, reset them, then retest before making one model-specific adjustment at a time.
- Calibrate only when indicated: Use gimbal calibration for skew/alignment warnings or the manufacturer’s troubleshooting flow; use IMU calibration when the app or manual calls for it.
- Check camera motion settings: Match frame rate and timeline cadence, use an appropriate shutter speed, and use ND filters when necessary to control shutter in bright light.
- Verify the recording card: Use a manufacturer-approved card for the selected resolution and bitrate.
- Use support for persistent hardware shake: If the gimbal visibly shakes or makes abnormal noise while the drone is stationary, or the aircraft was damaged in a crash, stop flying and arrange inspection or repair.
Related Guides
Frequently Asked Questions
How do I stop choppy drone videos?
First separate playback stutter from recorded motion. Play the original file on another capable device and confirm the editing timeline matches the recording frame rate. If the source itself looks staccato, review shutter speed and use the 180-degree rule as a starting point. If the image physically shakes, inspect propellers and the gimbal instead of treating it as a frame-rate problem.
How do I fix shaky drone footage?
Inspect damaged or misshapen propellers, gimbal movement, dampers, loose accessories, and wind conditions first. Then return unknown tuning changes to defaults and test smoother stick inputs or Cine/Normal mode. Calibrate the gimbal or IMU only when the app, manual, or a specific symptom calls for it. Use light post-production stabilization after the source of the shake is under control.
How do I get smooth drone footage?
Plan the shot before takeoff, fly in suitable wind, use slow and predictable stick inputs, reduce excessive yaw and gimbal speed using model-specific controls, and use Cine mode where supported. Match frame rate and shutter speed for natural motion, and keep the aircraft mechanically sound.
What is the 180 rule for drones?
The 180-degree shutter rule uses an exposure time of roughly twice the frame rate: about 1/48 second at 24 fps, 1/60 at 30 fps, and 1/120 at 60 fps. In bright light, an ND filter can help you hold that slower shutter speed without overexposing the image.
Can wind cause drone video jitter?
Yes. Strong or gusty wind can shake the aircraft, increase correction activity, and expose gimbal limits. Test again in lighter wind and stay within your drone’s published wind-resistance limits and app warnings.
Why does my 4K drone footage look jittery on my phone?
The phone may be struggling with the file’s codec, resolution, or bitrate. Test the original clip on another capable device or create a lower-resolution proxy. If the same source file is smooth elsewhere, troubleshoot playback rather than changing drone calibration or flight settings.
Should I calibrate the IMU before every flight?
No universal before-every-flight IMU calibration rule applies. Follow your manufacturer’s status screen and manual. For current DJI camera drones, the support workflow calls for IMU calibration when the app reports an IMU calibration or data error, not as a routine step before every normal flight.
What causes the jello effect in drone footage?
Jello is a wavy or rippling distortion associated with camera vibration and rolling-shutter readout. Check propellers, gimbal condition, vibration dampers, wind, aggressive flight inputs, and impact damage before trying to hide the effect in editing.
Conclusion
To reduce drone video jitter, diagnose the symptom before changing settings. Playback stutter, jerky yaw, physical vibration, and rolling-shutter jello can look similar but require different fixes.
Start with the recording and the hardware: test the original file, inspect the propellers and gimbal, and check wind and app warnings. Then use model-specific control tuning from the default values, with slower rotational and gimbal movement when the shot needs it.
Use calibration when your manufacturer’s app or troubleshooting guidance points to it, not as a blanket routine. Finish with appropriate shutter/frame-rate choices and conservative post-production stabilization. If abnormal gimbal shake persists while the aircraft is stationary, stop flying and have the hardware inspected.

