
A drone field scouting checklist is a preflight site-assessment routine for confirming mission goals, airspace, property access, weather, obstacles, takeoff and landing zones, visual line of sight, equipment readiness, and emergency options before launch. Use the same sequence for every mission, then record anything that could change the flight plan. For U.S. operations, also verify current FAA airspace information, temporary restrictions, and any authorization required for the exact place and time you plan to fly.
Last updated: September 21, 2026 — refreshed for current FAA B4UFLY, LAANC, Remote ID, and preflight-planning guidance.
Quick Answer
Before every drone mission, confirm the objective, legal flight area, property access, weather, obstacles, takeoff and landing zones, visual line of sight, aircraft condition, battery plan, emergency landing options, and post-flight records. Do not launch when a required permission or authorization is missing, an aircraft warning is unresolved, or site and weather conditions exceed your safe or legal limits.
Key Takeaways
- Start every scouting session by defining the mission goal, required shots, data needs, and flight boundaries.
- Check airspace, local rules, temporary flight restrictions, privacy concerns, and property access before flying.
- Inspect the site for trees, buildings, wires, people, vehicles, wildlife, slopes, water, and safe emergency landing areas.
- Review wind, rain, temperature, visibility, cloud cover, and light direction because weather can quickly change flight safety and footage quality.
- After the flight, review footage, log issues, clean equipment, back up files, and update your checklist for the next mission.
At a Glance
| Time Required | No fixed duration. Continue until airspace, access, weather, hazards, flight paths, and contingency plans are confirmed for the mission. |
| Difficulty | Varies by site. Controlled airspace, crowds, complex terrain, signal obstructions, and changing weather increase planning complexity. |
| Tools Needed | Drone, controller, charged batteries, memory cards, checklist, weather app, airspace app, map, measuring tool, camera, and safety gear. |
| Cost | Variable. Permit, insurance, parking, access, or location fees may apply depending on the site and operation. |
Printable Drone Field Scouting Checklist
Use this condensed checklist as a go/no-go gate before launch. A checked box means the item has been confirmed for this specific mission, not assumed from a previous flight.
| Phase | Confirm Before Flight | Do Not Launch If |
|---|---|---|
| ☐ Mission & access | Objective, deliverables, site boundary, access point, and required property/client permission are clear. | Required access or permission is missing or the operating area is not clearly defined. |
| ☐ Airspace & rules | Current airspace, altitude limits, TFRs/NOTAMs, local launch rules, and any required authorization are checked. | A restriction applies, required authorization is absent, or the applicable operating rules are unclear. |
| ☐ Weather | Wind, gusts, visibility, precipitation, temperature, cloud conditions, and forecast changes are within aircraft and regulatory limits. | Conditions exceed a limit or leave too little margin for a safe return and landing. |
| ☐ Site hazards | Wires, trees, buildings, cranes, people, vehicles, animals, water, slopes, and emergency landing areas are identified. | You cannot maintain a clear launch/landing area, safe separation, or visual line of sight. |
| ☐ Aircraft & power | Propellers, airframe, battery seating, controller, storage, camera/payload, positioning status, and required broadcasts or settings are ready. | There is damage, an unexplained warning, insufficient power/storage, or a required system is not working. |
| ☐ Contingencies | Return-to-home behavior, lost-link response, low-battery trigger, alternate landing area, and crew roles are understood. | The contingency plan would route the aircraft into an obstacle, restricted area, people, or an unsafe landing zone. |
| ☐ Post-flight record | Plan to review key footage/data, note hazards or anomalies, back up files, and save permissions/authorization records. | Mission-critical coverage cannot be confirmed before leaving the site. |
Importance of Location Scouting
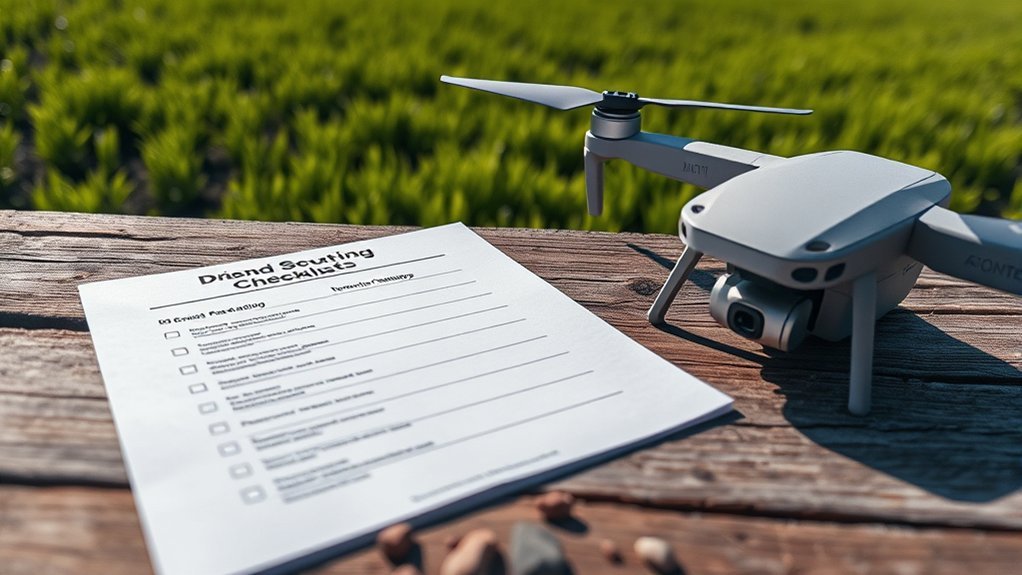
When you scout a location before a drone operation, you’re not just checking a box. You’re improving safety, efficiency, compliance, and mission quality. Location scouting helps you identify obstacles, plan clean flight paths, choose safe takeoff and landing areas, and avoid conditions that could put people, property, wildlife, or your drone at risk.
A good scouting process also helps you stay aligned with local regulations, airspace limits, privacy expectations, and property access rules. That matters whether you fly for real estate, inspections, mapping, agriculture, construction, events, social media, or personal footage.
When you assess environmental factors before the flight, you improve your chances of capturing usable footage or accurate data. Terrain, vegetation, sun angle, wind direction, nearby water, reflective surfaces, and moving obstacles can all affect the mission. Planning ahead reduces surprises once the drone is in the air.
Proper location scouting also supports efficient data collection. You can reduce redundant passes, avoid unnecessary battery drain, and spend more flight time capturing what you actually need. This is especially useful when you have a short flight window, limited batteries, a client on-site, or changing weather.
Warning: Never rely only on what a location looks like from the ground. Power lines, restricted airspace, people, wildlife, emergency activity, and temporary flight restrictions can create risks that are easy to miss without a full checklist.
Key Components of Location Scouting

When scouting a location for drone operations, focus on three core areas: environmental evaluation techniques, obstacle identification strategies, and airspace compliance analysis. These areas help you decide whether the location is safe, legal, practical, and worth flying.
You should also think beyond the flight itself. A strong scouting plan includes where you will park, where you will set up, where you will stand during the operation, how you will maintain visual line of sight, and how you will respond if conditions change.
Environmental Evaluation Techniques
Environmental evaluation techniques help you assess terrain, vegetation, light, weather, wildlife, water, and nearby activity. Before your drone flight, study the area from both a map view and an on-site view. Online scouting gives you a broad picture, while physical inspection helps you catch details that maps may not show.
Start with the terrain. Look for slopes, uneven ground, loose gravel, mud, tall grass, cliffs, fences, ditches, and bodies of water. These features may affect your launch point, recovery area, walking path, and emergency landing options. If the ground is unstable, choose a landing pad or another firm, level area.
Next, assess vegetation density. Trees, brush, tall crops, and forest edges can block line of sight or hide obstacles. They can also create turbulence when wind moves across the site. If you fly near trees, leave extra clearance and avoid tight maneuvers unless the mission truly requires them.
Light conditions also matter. Check the direction of the sun, the strength of shadows, reflective surfaces, and the best time of day for your shots. Early morning and late afternoon often create softer, more dramatic light, while midday sun may produce harsh contrast. For inspections or mapping, consistent lighting can be more useful than dramatic lighting.
Wildlife and livestock deserve special attention. Birds, nesting areas, horses, cattle, pets, and protected habitats can all affect flight planning. Avoid disturbing animals, and keep extra distance when you notice signs of stress or movement toward the drone.
Obstacle Identification Strategies
To support safe drone operations, obstacle identification strategies should be part of every location scouting checklist. You need to catalog fixed structures and dynamic elements so you understand what could interfere with takeoff, landing, flight paths, or signal strength.
Use online mapping tools, satellite imagery, street-level views, and on-site inspection together. Online tools can reveal buildings, roads, tree lines, water bodies, parking areas, and property boundaries. On-site inspection helps you identify smaller hazards such as wires, poles, signs, antennas, fences, cables, construction equipment, and moving vehicles.
| Obstacle Type | Examples | Identification Method |
|---|---|---|
| Physical Structures | Buildings, Trees | Visual Inspection, Mapping |
| Dynamic Elements | Wildlife, Vehicles | Real-time Monitoring |
| Environmental Hazards | Terrain, Vegetation | Satellite Imagery, Surveys |
| Risk Assessment | Thorough Review | Checklists, Data Analysis |
Pay special attention to power lines. They can be hard to see from a distance and may not appear clearly in aerial imagery. If you see utility poles, assume wires may be nearby and inspect the area carefully before launching.
Pro Tip: Walk the takeoff area in a full circle before launching. Look up, down, and behind you. Many pilots notice wires, branches, signs, and people only after changing viewing angles.
What Airspace and Legal Checks Should You Make?
Airspace compliance analysis means confirming what rules apply to the mission, whether the planned location is in controlled or restricted airspace, what altitude limits apply, and whether a current authorization is required. Check before traveling and check again shortly before launch because TFRs, NOTAMs, emergency activity, and event restrictions can change.
For U.S. operations, use official FAA resources rather than relying only on a manufacturer geofence. The FAA’s B4UFLY service provides airspace awareness, while LAANC and FAADroneZone are used for controlled-airspace authorization when applicable. Also review Temporary Flight Restrictions and relevant NOTAMs. A manufacturer’s drone geofencing map can be a useful secondary check, but it is not a substitute for official airspace information or authorization.
Determine the operating rule set before flight. In the United States, recreational flyers must meet the recreational rules, including TRUST and visual-line-of-sight requirements; registration applies when required, and a drone that requires FAA registration generally must comply with Remote ID unless an exception such as operation in a FRIA applies. Most non-recreational small-drone flights fall under Part 107, which has separate pilot, registration, operating, and preflight requirements.
Property access is a separate question from airspace access. A flight may be permissible in the airspace while launch, landing, parking, or site access is restricted by a landowner, park, campus, venue, or local rule. Confirm both before setting up. Outside the United States, use the national aviation authority and local land-access rules for the exact jurisdiction.
Note: An airspace map is not the same as an authorization. If controlled airspace or another restriction requires approval, obtain that approval before flight and keep the authorization details with the mission record.
How Do You Scout a Drone Location Before Flying?
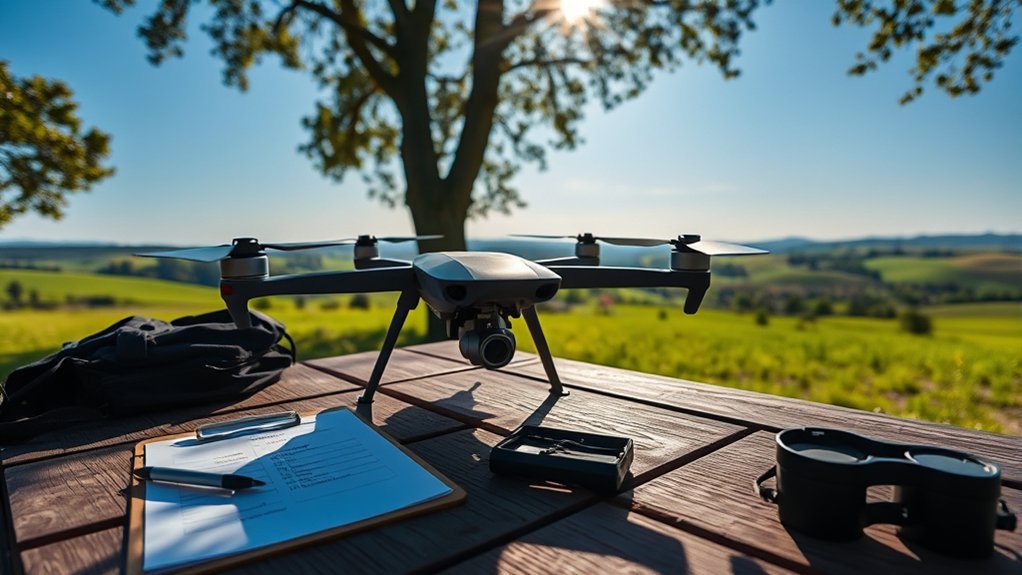
Use a repeatable location scouting process so each flight starts with the same decisions instead of memory. For U.S. Part 107 operations, this workflow complements the required preflight assessment of the operating environment and aircraft readiness; it does not replace any rule, authorization, waiver, or manufacturer procedure.
- Define Mission Objectives: Clearly outline your goals, required shots, data needs, subject area, deliverables, and success criteria. Decide whether you need video, photos, mapping passes, inspection images, or simple site awareness.
- Research Regulations: Determine which operating rules apply, then review airspace limits, authorization needs, TFRs/NOTAMs, property restrictions, privacy requirements, permit needs, and local launch or landing rules before you visit the site.
- Review the Site Online: Use maps, satellite imagery, terrain tools, weather forecasts, and sun-position planning to understand the location before arriving.
- Conduct Site Inspections: Visit potential locations to assess ground conditions, obstacles, traffic, people, animals, light, noise, and emergency landing options.
- Choose Takeoff and Landing Zones: Select a clear, level area with enough room around the drone. Avoid loose dirt, tall grass, crowds, roads, and obstacles.
- Plan Flight Paths: Mark intended routes, camera angles, altitude ranges, turns, orbit paths, and backup routes. Keep enough clearance from obstacles and people.
- Confirm Communication and Visual Line of Sight: Decide where the pilot and any visual observer will stand. Make sure you can see the drone during the operation.
- Prepare an Emergency Plan: Identify safe landing areas, return-to-home behavior, battery thresholds, lost-signal steps, and people to contact if needed.
- Document the Scouting Results: Save notes, screenshots, maps, photos, coordinates, weather details, authorization or permission records, and your final go/no-go decision with the project.
This process may seem detailed, but it becomes fast with practice. The goal is not to make every flight complicated. The goal is to build habits that help you avoid preventable mistakes.
Conducting Online Location Scouting

Online location scouting should happen before you arrive at the site. It helps you screen locations, compare options, spot obvious hazards, and decide whether an in-person inspection is worth your time.
Start by using satellite imagery to assess topography, land use, nearby roads, trees, buildings, parking areas, and possible launch zones. Then review local regulations and airspace requirements that could affect your operation. Finally, gather local knowledge from drone communities, property managers, clients, or people familiar with the site.
Satellite Imagery Utilization
As you prepare for drone operations, satellite imagery can greatly improve your location scouting. High-resolution images provide helpful clues about terrain, access, obstacles, nearby structures, and safe setup areas.
Here are three ways to use satellite imagery effectively:
- Analyze Terrain: Use online mapping tools like Google Earth to assess elevation changes, open areas, slopes, roads, and land use patterns.
- Evaluate Environmental Conditions: Look for vegetation density, water bodies, exposed ground, reflective surfaces, and nearby activity that could affect flight paths or image quality.
- Complement Local Data: Compare satellite views with street-level views, airspace tools, weather forecasts, and input from local drone operators.
Satellite imagery is useful, but it is not perfect. Images may be outdated, seasonal conditions may change, and temporary obstacles may not appear. Always confirm important details on-site before flight.
Local Regulations Review
Before launching, separate three questions: what airspace rules apply, what land-access rules apply, and what mission-specific privacy or client requirements apply. They may come from different authorities, and satisfying one does not automatically satisfy the others.
For U.S. airspace, use official FAA information to check controlled airspace, altitude limits, airport-related restrictions, TFRs, and authorization requirements. Then check the rules for the place you will physically use, such as a park, campus, event venue, roadside, or private property.
Plan camera angles and data collection so the mission captures only what is needed. If people, homes, private yards, sensitive facilities, or client-controlled information may be recorded, review the applicable privacy, consent, contract, and local requirements before flight rather than assuming one rule fits every location.
Keep the results with the mission record: the operating rule set, airspace check, authorization or waiver details if applicable, property permission, site restrictions, and any client instructions that affect where or how you can fly.
Community Engagement Strategies
Understanding local regulations sets the foundation for effective drone operations, but community engagement can improve your scouting results. Local pilots, property owners, event staff, farmers, construction managers, and nearby businesses may know details that maps do not show.
- Join Online Forums: Connect with local drone operators to gather insights and firsthand experiences about specific locations.
- Use Community-Driven Platforms: Access drone mapping websites and local groups to understand airspace concerns, access issues, and practical flying conditions.
- Participate in Discussions: Talk with local businesses, land managers, or organizations to learn about hazards, schedules, sensitive areas, and environmental factors.
When you speak with people on-site, keep it professional and simple. Explain what you plan to do, how long you expect to fly, where you will stand, and how you will protect safety and privacy.
Essential Items to Bring
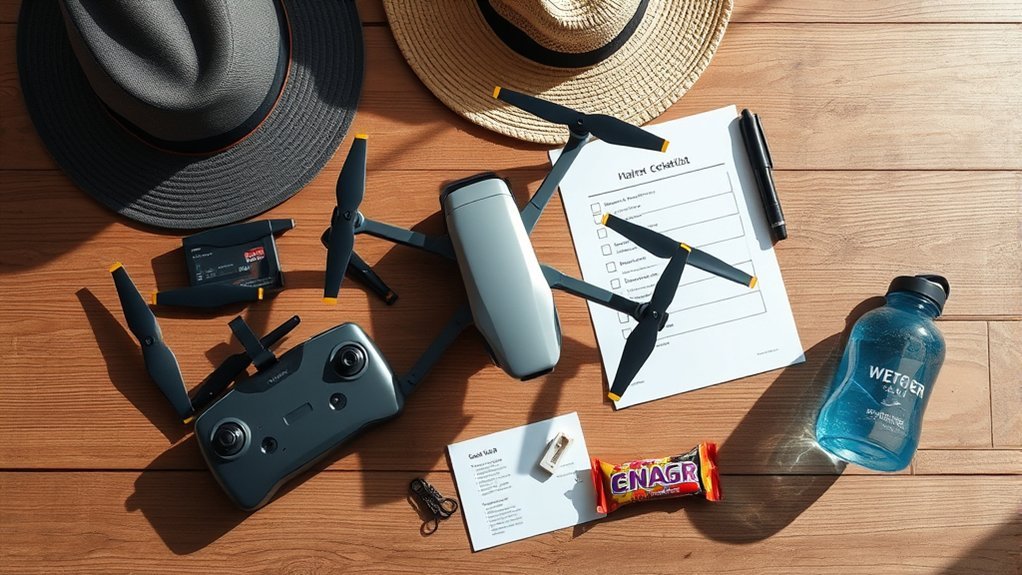
When preparing for drone field scouting, the right tools help you make better decisions before and during the mission. Your kit should cover flight safety, site documentation, weather review, power needs, and emergency response.
Bring a measuring tape or laser tool when the mission depends on documented clearances or setup dimensions; it is optional for many basic scouting flights. A camera or phone helps document the location, test framing, record obstacles, and capture reference images for later planning.
Bring a computer or tablet if you need to verify connectivity, review maps, update mission files, or confirm equipment compatibility with local internet access. Keep offline copies of your route, permission notes, and client requirements in case service is poor.
Print or save a field checklist so you can cover all important questions. A checklist keeps your process consistent and reduces the chance of forgetting something under pressure.
Useful items for drone field scouting include:
- Drone and controller with stable app/firmware versions and mission settings checked before arrival; avoid an unplanned update on-site unless it is required for safe or legal operation.
- Fully charged batteries for the drone, controller, phone, tablet, and any accessories.
- Extra memory cards with enough space for the full mission.
- Landing pad for dusty, wet, grassy, sandy, or uneven surfaces.
- High-visibility vest to help others identify you as the drone operator.
- Printed or digital checklist for regulations, weather, obstacles, and equipment.
- Weather app for wind speed, gusts, temperature, rain, visibility, and cloud cover.
- Airspace app for restrictions, altitude limits, and authorization needs.
- Map or GPS tool for coordinates, boundaries, and access points.
- Light meter or sun-tracking app for exposure planning and best shooting times.
- Basic cleaning kit for propellers, lens surfaces, sensors, and the landing area.
- First-aid kit and emergency contact details for longer or remote missions.
These essential items create a practical guide for an effective scouting mission. They also help you adapt when the site looks different from what you expected online.
What Weather Should You Check Before a Drone Flight?
To support a successful drone field scouting mission, you must account for weather conditions that can affect flight performance, safety, battery life, and image quality. Weather can change quickly, so check it during planning, before travel, and again before launch.
- Rain: Avoid scheduling flights during wet conditions unless your drone and mission plan are designed for that environment. Moisture can affect electronics, sensors, lens clarity, and battery performance.
- Wind: Check sustained wind and gusts. Strong or shifting wind can reduce control, shorten flight time, and make smooth footage harder to capture.
- Temperature: Cold can reduce battery efficiency, while extreme heat can stress batteries and electronics. Let batteries stay within their safe operating range.
- Visibility: Fog, haze, smoke, glare, and low light can reduce line of sight and image quality.
- Cloud Cover: Clouds affect shadows, contrast, exposure, and color consistency. For mapping, consistent cloud cover may be helpful. For cinematic footage, moving clouds can create uneven exposure.
Wind deserves extra attention during scouting. A site may feel calm at ground level while wind is stronger above trees, buildings, ridges, or open water. Watch vegetation movement, flags, dust, and birds for clues about wind behavior.
For U.S. Part 107 flights, the FAA’s operating limitations include at least 3 statute miles of flight visibility and cloud clearance of at least 500 feet below and 2,000 feet horizontally from clouds unless an applicable waiver changes the requirement. These are regulatory limits, not a promise that conditions are safe for your specific aircraft or mission; use the more conservative limit when the aircraft, authorization, site, or operating plan requires it.
Also consider how weather affects people and property around you. Wet ground may limit access, heat may increase crowding in shaded areas, and wind may blow debris into the takeoff zone. Adjust your launch point and flight plan when conditions change.
A safe drone mission starts before takeoff. If the weather, airspace, obstacles, or people on-site do not match your plan, pause and reassess before flying.
Building Your Drone Field Scouting Checklist
A useful drone field scouting checklist should be simple enough to use every time, but detailed enough to catch important risks. You can keep it on your phone, print it, or add it to your project management workflow.
Pre-Scouting Checks
- Define the mission goal and required deliverables.
- Confirm the address, coordinates, property boundaries, and access points.
- Check official airspace information, altitude limits, TFRs/NOTAMs, and authorization needs.
- Review local rules for parks, roadsides, campuses, venues, and private property.
- Confirm client permission, landowner permission, site access, and permit requirements.
- Review weather forecast, wind direction, sun angle, and expected flight window.
- Prepare batteries, memory cards, stable app/firmware versions, maps, authorization records, and backup equipment.
On-Site Scouting Checks
- Identify safe takeoff, landing, and emergency landing zones.
- Check for trees, wires, poles, buildings, antennas, fences, signs, and cranes.
- Look for people, vehicles, animals, construction activity, and moving equipment.
- Confirm visual line of sight from the pilot position.
- Check ground conditions, slope, dust, mud, grass, water, and debris.
- Confirm control-link quality and identify structures, terrain, or RF-heavy areas that could block, reflect, or interfere with the signal.
- Review light direction, shadows, glare, and best camera angles.
- Set battery return thresholds and return-to-home behavior before takeoff.
Flight Readiness Checks
- Inspect propellers, arms, gimbal, camera lens, sensors, and battery seating.
- Confirm positioning status, compass/sensor status, home point if applicable, storage space, camera settings, flight mode, and Remote ID status when required.
- Announce your takeoff area if people are nearby.
- Start with a short hover check to confirm stability and control response.
- Monitor battery, wind, aircraft position, people, and obstacles throughout the flight.
Emergency Planning Checks
- Choose at least one safe emergency landing area before launch.
- Know what you will do if the control link drops, positioning degrades, or the drone starts drifting.
- Set a conservative low-battery return point.
- Keep people clear of the landing zone.
- Stop the flight if aircraft, emergency activity, crowds, or unsafe weather appear.
Common Field Scouting Mistakes to Avoid
Many drone problems come from small planning gaps. Avoiding these mistakes can make your scouting process safer and more reliable.
- Treating a manufacturer geofence as legal clearance: A drone app may show a warning or unlock zone, but official airspace restrictions and required authorizations still control whether the flight is allowed.
- Only checking the location online: Maps may be outdated and may not show temporary obstacles, people, wires, or construction.
- Ignoring property permission: Open airspace does not always mean you can launch from the land below it.
- Forgetting wind at altitude: Wind often feels different once the drone climbs above trees or buildings.
- Launching too close to obstacles: Leave more room than you think you need, especially near trees, wires, and walls.
- Skipping battery planning: Scouting missions can take longer than expected, especially when you need repeated passes.
- Not planning emergency landings: Always know where you can safely land if the drone cannot return to the original launch point.
- Overlooking people and privacy: A quiet location can become busy quickly. Pause when people enter your operating area.
- Failing to review footage on-site: Check key clips or images before leaving so you can refly while you still have access.
Post-Flight Actions
After completing your drone flight, take specific post-flight actions to maximize the value of your mission. First, review the captured footage to assess its quality and confirm it meets your objectives. Check focus, exposure, framing, motion smoothness, coverage, and any required data points.
Pay attention to the flight time and battery performance. Note whether the drone used more power than expected, struggled in wind, or needed extra time for a specific route. These details help you improve future mission planning.
Next, properly store your equipment. Turn off the aircraft and controller, remove batteries if appropriate, clean dust or moisture from the drone, inspect the propellers, and protect the camera and gimbal. Keep components clean and dry to maintain their condition and longevity.
Analyze any issues you encountered during the flight. Identify technical malfunctions, unexpected obstacles, signal problems, lighting issues, wildlife activity, or people entering the flight area. Add these notes to your scouting report so you can avoid repeating the same problems.
Back up your files as soon as possible. Use a clear folder structure with the date, location, client or project name, and flight notes. Keep the completed checklist, authorization or waiver details if applicable, property permission, weather notes, anomalies, and delivery records with the project so the next flight starts with a documented site history.
Finally, share your results and insights when appropriate. Feedback from clients, team members, or the drone community can help you improve your techniques and make your next scouting session more efficient.
Related Guides
Frequently Asked Questions
How can I improve my drone piloting skills for location scouting?
Practice regularly in different environments, including open fields, tree-lined areas, slopes, and controlled obstacle courses. Study aerial composition, review your footage after each flight, learn local rules, and use simulation software to improve stick control, spatial awareness, and emergency decision-making.
Are there specific apps for drone location scouting?
Yes. Mapping tools such as DroneDeploy, Pix4D, and Google Earth can help with terrain review, route planning, and site context. In the United States, use FAA B4UFLY services for airspace awareness and an FAA-approved LAANC service when controlled-airspace authorization is required. Planning apps do not replace official authorization or an on-site hazard check.
What are the legal regulations for flying drones in certain areas?
Drone rules depend on the country, operating purpose, airspace, aircraft, and local land-use rules. In the United States, first determine whether the flight is recreational or governed by Part 107, then check registration and Remote ID requirements, pilot or TRUST requirements, controlled-airspace authorization, TFRs/NOTAMs, visual-line-of-sight and operating limits, plus local launch or property rules. Verify the exact place and time before flight.
How do I choose the best time of day for scouting?
Choose the time based on your mission goal. Early morning and late afternoon often provide softer light and better-looking footage. Midday may work better for reducing long shadows during mapping or inspections. Always factor in wind, visibility, site access, and nearby activity.
Can I use drones for scouting in urban environments?
Yes, drones can support urban scouting, inspections, and aerial photography, but urban environments require extra caution. Watch for buildings, people, vehicles, power lines, signal interference, privacy issues, restricted areas, and local launch rules. Keep your operation conservative and compliant.
What should I check before launching a drone at a new location?
Check the applicable operating rules, official airspace information, required authorization, property access, weather, obstacles, people, animals, takeoff and landing space, aircraft condition, battery levels, storage, positioning status, return-to-home behavior, Remote ID when required, and emergency landing options. Do not launch with an unexplained warning or unresolved no-go item.
How long should drone field scouting take?
There is no universal required duration. A familiar, uncomplicated site may be checked quickly, while controlled airspace, crowds, complex terrain, multiple flight paths, or new access requirements can make scouting much longer. Finish only after the legal flight area, hazards, weather, aircraft readiness, and contingency plan are confirmed.
Conclusion
A strong drone field scouting checklist turns preflight planning into a repeatable go/no-go decision. Confirm the mission, applicable rules, airspace, property access, weather, obstacles, visual line of sight, aircraft readiness, emergency landing options, and records before launch.
If any required authorization is missing, an aircraft warning is unresolved, or the site no longer matches the plan, stop and reassess instead of trying to make the flight fit. After landing, review the footage or data while you still have site access, record what changed, and save the completed checklist with the project.
Use the same sequence on the next mission. Consistent records make repeat sites easier to plan and help you catch hazards, access changes, and operational assumptions before they become in-flight problems.
Sources
- Federal Aviation Administration: Recreational Flyers & Community-Based Organizations — current U.S. recreational requirements, including TRUST, registration, visual line of sight, controlled-airspace authorization, and Remote ID applicability.
- Federal Aviation Administration: B4UFLY — official airspace-awareness service information and approved provider access.
- Federal Aviation Administration: LAANC — controlled-airspace authorization process and FAA-approved UAS service suppliers.
- Federal Aviation Administration: Temporary Flight Restrictions — current TFR/NOTAM checking guidance for drone pilots.
- Federal Aviation Administration: Remote Identification of Drones — Remote ID requirements and compliance options.
- Federal Aviation Administration: Part 107 Waivers — Part 107 operating limitations, including visibility, cloud clearance, altitude, and waiverable provisions.
