Clunks, loose steering, or unusual tire wear can make you suspect a worn ball joint on your Toyota RAV4. You can perform a careful visual and movement screening at home, but the final test must follow the repair procedure and allowable play specification for your exact model year.
Quick Answer
Check your RAV4’s ball joints for split dust boots, escaping grease, corrosion, clunks, and visible movement between the ball-joint stud and housing. Wheel rocking can reveal looseness, but it cannot identify the faulty part by itself. Confirm suspected play using the correct Toyota procedure or have a qualified mechanic inspect it.
Last updated: July 13, 2026
Key Takeaways
- Clunks, wandering steering, and uneven tire wear justify an inspection, but none proves that a ball joint is faulty.
- Use only the lift and support points listed for your exact RAV4 model year.
- Never work beneath a vehicle supported only by a hydraulic or emergency tire jack.
- Watch the ball-joint stud and housing directly while a helper rocks the wheel.
- Do not grease a sealed joint. Lubricate only a serviceable joint with a grease fitting, following its manufacturer’s instructions.
- Confirmed excessive play, joint separation, or unstable steering requires immediate professional attention.
At a Glance
| Time Required | About 20 to 40 minutes for a preliminary inspection |
| Difficulty | Intermediate; final measurement is best handled by a qualified technician |
| Tools Needed | Flashlight, wheel chocks, rated floor jack, rated jack stands, gloves, eye protection, and a helper |
| Cost | No additional cost if you already own safe lifting equipment; professional inspection rates vary |
Warning: Work on a hard, level surface. Chock the wheels, apply the parking brake, and use rated jack stands at the support points specified for your RAV4. Never place any part of your body beneath a vehicle supported only by a jack.
Common Symptoms of Worn Ball Joints to Watch For
A worn ball joint can affect steering and suspension movement, but its symptoms often overlap with other faults. Treat the following signs as reasons to inspect the complete front suspension rather than proof of one failed part.
- Clunking over bumps: A loose joint may knock as the suspension changes direction. Sway-bar links, control-arm bushings, strut mounts, and loose fasteners can make a similar sound.
- Noise while turning: A clunk or pop during steering may involve a ball joint, tie-rod end, strut bearing, CV joint, or another steering component.
- Loose or wandering steering: Steering that feels vague requires prompt inspection of the ball joints, tie rods, wheel bearings, tires, alignment, and control-arm bushings.
- Uneven tire wear: Feathering, inside-edge wear, or outside-edge wear may result from alignment, tire-pressure, steering, or suspension problems.
- Visible boot damage: A split or missing dust boot can allow water and grit into the joint and cause rapid wear.
- Grease around the joint: Escaping grease may indicate a damaged boot or clamp.
- Abnormal wheel movement: Movement while rocking a raised wheel needs further diagnosis because the source may be a ball joint, tie rod, wheel bearing, or mounting point.
A wheel that moves does not automatically have a bad ball joint. Watch the joint itself and isolate the component before ordering parts.
Understanding the Importance of Ball Joints in Your RAV4
Ball joints connect suspension and steering components while allowing the wheel assembly to move through steering and suspension travel. Their exact role depends on the RAV4 generation and joint location.
Some joint designs carry suspension load, while others mainly guide movement. This difference affects whether the suspension must be loaded or unloaded during testing. A procedure that works on one vehicle may hide looseness or create a false reading on another.
The rubber dust boot is a critical part of the assembly. It keeps lubricant inside and blocks water, road salt, and grit. Once contamination enters the joint, the ball stud and bearing surface can wear quickly.
Note: Toyota recommends checking suspension and steering ball joints for looseness and damage and checking their dust covers for deterioration. Toyota also states that a qualified technician should perform these operations.
Step-by-Step Ball Joint Inspection
The following process is a preliminary screening inspection. It helps you identify visible damage or suspicious movement, but it does not replace the Toyota repair procedure or an allowable-play measurement for your exact RAV4.
1. Check the Vehicle Before Lifting
Begin with the RAV4 on the ground. Confirm that all tires have the correct cold pressure and inspect the tread for irregular wear, bulges, or damage.
With the windows open and the radio off, drive slowly over a familiar uneven surface. Listen for clunks during braking, turning, and low-speed suspension movement. Avoid aggressive testing if the steering already feels unstable.
2. Prepare a Safe Work Area
- Park on hard, level concrete or another surface approved by the lifting-equipment manufacturer.
- Shift to Park and apply the parking brake.
- Chock the wheels that will remain on the ground.
- Keep passengers and pets away from the work area.
- Check that the floor jack and stands have adequate load ratings and are undamaged.
- Find the correct floor-jack and stand positions in the owner’s or repair manual for your model year.
3. Lift and Support the RAV4
Raise the vehicle only at the specified floor-jack point. Position the stands at the specified support points, then lower the vehicle gently until its weight is fully supported.
Confirm that each stand sits squarely and that the vehicle cannot rock. Do not crawl underneath the RAV4 during this screening inspection.
Do not place the jack or stands under a control arm, plastic shield, battery enclosure, drivetrain component, or an unmarked body seam unless the model-specific Toyota procedure identifies that point.
4. Inspect the Ball Joint and Dust Boot
Use a flashlight to examine each visible ball-joint assembly. Look for:
- Cracks, splits, punctures, or missing pieces in the dust boot
- A loose or missing boot clamp
- Grease leaking from the boot
- Rust around the joint housing or stud
- A bent control arm or damaged steering knuckle
- A loose or displaced fastener
- A visible gap or separation between parts that should remain seated
Do not squeeze, puncture, or pry against the boot. A damaged boot may allow contamination into an otherwise tight joint.
5. Check Wheel Movement With a Helper
Ask a helper to watch the ball-joint stud, housing, control arm, steering knuckle, and nearby connections while you move the wheel.
- Hold the tire near the 12 and 6 o’clock positions.
- Push at the top while pulling at the bottom, then reverse the force.
- Repeat with controlled pressure instead of jerking the wheel.
- Have the helper identify the exact point where movement occurs.
- Repeat at 3 and 9 o’clock to screen the steering linkage and other lateral movement.
Movement at 12 and 6 o’clock can involve a ball joint or wheel bearing. Movement at 3 and 9 o’clock commonly requires inspection of the tie rods and steering linkage. Either test can involve more than one component.
6. Observe the Joint Directly
Focus on the ball stud where it enters the housing. Movement of the complete control arm is not the same as looseness inside the joint. Rubber bushings may flex normally while the stud remains tight.
Suspicious signs include a visible click between the stud and housing, a gap that opens and closes, or independent movement that does not occur in the surrounding components.
7. Use a Pry Bar Only With the Correct Procedure
A pry-bar test may be part of a professional ball-joint inspection, but the correct contact point and suspension loading condition vary. Do not assume that placing a bar between the control arm and steering knuckle is safe for every RAV4.
If the Toyota repair procedure calls for a pry bar, follow its exact placement and force direction. Keep the tool away from the dust boot, axle seal, brake hose, wiring, and plastic shields.
Borderline movement normally requires a dial indicator and the allowable clearance listed in the model-specific repair information. Do not guess at an acceptable amount of play.
8. Lower the Vehicle Safely
Clear all tools from beneath and around the vehicle. Raise the RAV4 enough to remove the stands, then lower it slowly at the approved jack point. Remove the wheel chocks only after the vehicle is fully on the ground.
Pro Tip: Record a short close-up video while your helper rocks the wheel. Slow playback can help you distinguish joint movement from normal bushing flex and gives a mechanic useful evidence.
Tools You’ll Need for a Successful Inspection
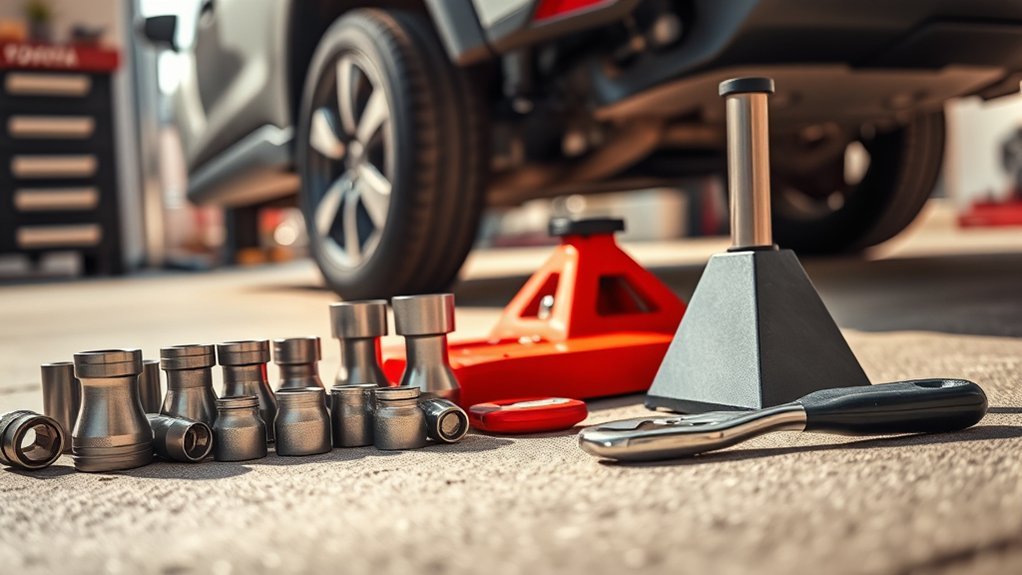
Safe lifting equipment matters more than having a large tool collection. Use equipment that is rated for the vehicle and in good working condition.
Essential Inspection Tools
- Wheel chocks: Prevent the tires on the ground from rolling.
- Rated floor jack: Lifts the RAV4 at the approved floor-jack point.
- Rated jack stands: Support the vehicle at the approved support points.
- Flashlight: Helps reveal boot splits, leaking grease, rust, and movement.
- Gloves and eye protection: Protect you from dirt, rust, and falling debris.
- Helper: Watches the joint while you apply controlled movement at the wheel.
- Dial indicator: Used by an experienced technician when the repair procedure provides a measurement method and limit.
- Pry bar: Used only when the correct Toyota procedure identifies a safe contact point and test direction.
Lubrication Equipment and Sealed Joints
Do not assume your RAV4’s ball joints require periodic greasing. A joint without a grease fitting is normally treated as a sealed assembly and should not be drilled, punctured, or injected with grease.
If an aftermarket ball joint has a grease fitting, use the grease type and interval specified by that part’s manufacturer. Stop adding grease if the boot begins to swell. Overfilling can unseat or damage the boot.
A grease gun is unnecessary for a sealed joint. The correct maintenance is inspecting the boot and replacing a worn or contaminated assembly.
Safety Gear Requirements
- Safety glasses: Shield your eyes from rust, dirt, and falling debris.
- Work gloves: Protect your hands from sharp edges and hot or dirty surfaces.
- Closed-toe footwear: Protects your feet if a tool falls.
- Wheel chocks: Help stop the vehicle from rolling while raised.
- Correctly rated stands: Support the vehicle after lifting.
Avoid loose clothing, jewelry, or anything that can catch on suspension parts. Never perform the inspection beside moving traffic or on a soft, sloped, cracked, or unstable surface.
Safely Lifting Your RAV4 for Inspection
Your owner’s manual is the authority for jack positioning on your specific vehicle. Toyota publishes separate manuals because lifting points and underbody layouts can vary by generation, powertrain, and equipment.
Before lifting, inspect the jack and stands for cracks, bent parts, fluid leaks, damaged locking mechanisms, or missing components. Do not exceed their rated capacities.
Use the parking brake and wheel chocks, but do not rely on either as the vehicle’s only protection. Once raised, transfer the load to properly positioned stands.
The emergency tire jack supplied with a vehicle is intended for roadside wheel changes under the instructions in the owner’s manual. It is not a substitute for stable workshop lifting and support equipment.
Warning: Stop immediately if a stand tilts, the vehicle shifts, the surface sinks, or the support point begins to deform. Lower the vehicle and correct the setup before continuing.
Assessing Ball Joint Play: Effective Techniques
The location and direction of movement matter more than how much the entire wheel seems to move. Use the following table to avoid blaming the wrong part.
| Observation | What It May Suggest | Next Check |
|---|---|---|
| Movement at 12 and 6 o’clock | Ball-joint, wheel-bearing, or mounting looseness | Watch the joint and hub separately while a helper moves the wheel |
| Movement at 3 and 9 o’clock | Tie-rod, steering-linkage, wheel-bearing, or other lateral play | Observe the inner and outer tie rods and steering knuckle |
| Control arm moves but the stud stays seated | Normal or excessive bushing flex rather than ball-joint play | Inspect control-arm bushings for tears, separation, or contact marks |
| Stud clicks or shifts independently inside the housing | Possible internal ball-joint wear | Measure using the Toyota repair procedure or obtain professional confirmation |
| Clunk with no visible joint movement | Sway-bar link, strut mount, bushing, brake hardware, CV joint, or loose fastener | Inspect the surrounding suspension and steering system |
A dial indicator is the best way to evaluate borderline movement when Toyota provides a measurement point and limit. The indicator base must be fixed to a stable component, and the tip must follow the specified direction of movement.
Do not use a guessed tolerance. Some joints allow little or no measurable play, while other designs use a defined service limit.
Is It Time to Replace Your Ball Joints or Call a Mechanic?
Call a qualified mechanic when you cannot isolate the movement, do not have safe lifting equipment, or do not have the correct repair specification. Toyota recommends that a qualified technician perform ball-joint looseness and damage inspections.
Stop Driving and Arrange a Tow When
- The joint appears separated or partly pulled from its mounting point.
- The wheel visibly changes position when braking, steering, or moving slowly.
- Steering is unstable, unpredictable, or difficult to control.
- A heavy clunk is accompanied by obvious suspension movement.
- The ball-joint stud moves independently inside the housing by a clearly visible amount.
- A fastener is missing, loose, or displaced.
Schedule an Inspection Promptly When
- The dust boot is split or leaking grease, even if no looseness is obvious.
- You hear a recurring clunk over bumps or while turning.
- The tire develops unexplained uneven wear.
- You feel mild steering looseness or wandering.
- You find movement but cannot identify its source.
A torn boot does not always mean the joint already has excessive play. However, replacing only the boot may not be appropriate after water or grit has entered the assembly. The technician should evaluate the complete joint.
Do not continue driving to “see whether it gets worse” when the wheel position, steering control, or ball-joint seating has visibly changed.
Ball Joint Maintenance Tips for Longevity and Safety
Ball joints are normally replaced according to condition rather than a universal mileage limit. Protecting the boot and finding looseness early are the most useful maintenance steps.
Regular Lubrication Practices
Inspect the installed joint before reaching for a grease gun. If it has no grease fitting, treat it as sealed and do not attempt to add lubricant.
For a serviceable aftermarket joint, follow the part manufacturer’s grease type and service interval. Clean the fitting before attaching the grease gun so dirt does not enter the joint.
Add grease slowly and watch the boot. Stop before the boot becomes stretched or swollen. Wipe away excess grease so future leaks are easier to identify.
Routine Inspection Schedule
Use the Warranty and Maintenance Guide for your exact RAV4 year. As one current example, the 2025 Toyota RAV4 Warranty and Maintenance Guide lists ball-joint and dust-cover inspections at 15,000-mile intervals under its normal-service chart.
The same guide calls for more frequent inspections when most driving occurs on dirt or dusty roads. Other RAV4 model years may use different schedules, so do not copy the 2025 interval without checking your own guide.
Inspect sooner after a hard curb strike, pothole impact, collision, suspension modification, or unexplained alignment change.
Quality Replacement Components
Confirm replacement-part fitment using the VIN, model year, trim, drivetrain, and exact joint location. Do not rely only on a broad “fits RAV4” description.
Depending on the model year and replacement design, the ball joint may be available separately or as part of a control-arm assembly. The best choice depends on the condition of the bushings, arm, mounting holes, and surrounding hardware.
Installation requires the correct fasteners, tightening sequence, torque specifications, and any specified cotter pins or locking hardware. Do not reuse a one-time-use fastener when the repair procedure calls for replacement.
Have the wheel alignment checked after replacement when the repair affects suspension position or when tire wear, pulling, or steering-wheel misalignment is present.
Related Guides
Frequently Asked Questions
How often should I check my RAV4 ball joints?
Follow the maintenance guide for your exact model year. For example, Toyota’s 2025 RAV4 normal-service chart lists ball-joint and dust-cover inspections at 15,000-mile intervals. Dirt or dusty-road operation can require more frequent checks.
Can I drive with a worn ball joint?
Do not drive when looseness is confirmed, the joint appears separated, the wheel changes position, or steering feels unstable. Arrange a tow. A damaged boot without obvious play still needs prompt inspection because contamination can accelerate wear.
What does ball-joint replacement cost?
The total depends on your RAV4’s model year, whether the joint is separate or part of a control arm, local labor rates, corrosion, fastener condition, and alignment needs. Request an itemized estimate after the faulty component has been confirmed.
How long do RAV4 ball joints normally last?
Toyota does not publish one universal replacement mileage. Joint life depends on boot condition, road impacts, corrosion, dirt exposure, vehicle loading, tire and wheel changes, and driving conditions. Replace the joint according to its measured and observed condition.
Are aftermarket RAV4 ball joints available?
Yes. Confirm fitment using the VIN and exact joint location. Check whether the part is sealed or greaseable, whether new mounting hardware is included, and whether the manufacturer provides installation and lubrication instructions.
Can a bad wheel bearing feel like a worn ball joint?
Yes. Both can create wheel movement or noise. Watch the hub and ball joint separately while a helper rocks the wheel. A mechanic may use additional bearing checks and a dial indicator to identify the source.
Does my RAV4 need an alignment after ball-joint replacement?
An alignment check is sensible when the repair changes suspension position or when the vehicle has pulling, uneven tire wear, or an off-center steering wheel. Follow the repair manual and the technician’s measurements for your model.
Conclusion
A safe Toyota RAV4 ball-joint inspection starts with symptoms, correct lifting, and a close look at the joint and dust boot. Rocking the wheel can expose looseness, but you must watch where the movement occurs instead of assuming the ball joint is responsible.
Use your model-year Toyota manual for lifting points, inspection intervals, test conditions, and allowable play. Stop driving when the joint appears separated, wheel position changes, or steering becomes unstable. When the result is uncertain, a specification-based inspection by a qualified mechanic is the safest next step.
Sources
- Toyota 2025 RAV4 Warranty and Maintenance Guide — ball-joint inspection intervals, special operating conditions, and Toyota’s inspection guidance
- Toyota Manuals and Warranties — model-specific owner information and jack-positioning guidance
- NIOSH: Be an Ace With Jacks — wheel chocking, rated lifting equipment, jack stands, and safe support practices
- NHTSA TireWise — tire inspection, tread wear, and tire-safety guidance
- MOOG Ball Joint Inspection Procedures — loaded and unloaded joint testing, wheel movement, pry-bar use, and dial-indicator measurement

