Replacing your Toyota Tundra’s cabin air filter is usually a simple glove-box-area job, but the exact access method varies by model year. The filter helps keep dust, pollen, leaves, and other debris from moving through the HVAC vents. Before removing any trim, confirm filter fitment and compare your glove-box layout with the owner’s manual for your exact truck.
The filter is commonly serviced from the passenger-side glove-box area, but the panel, damper, shelf, cover, and filter-case arrangement can differ. If your truck does not match the procedure you are following, stop rather than forcing a clip or panel.
Quick Answer
Turn off the ignition and HVAC fan, empty the glove box, and open the model-specific filter access area. Record the old filter’s position and arrow wording, remove the filter without spilling debris, clean accessible loose material, and install a compatible replacement in the marked direction. Refit every panel or glove-box component you removed and test the fan. Stop if your Tundra’s layout does not match the instructions for your model year.
Key Takeaways
- Buy the filter by model year, engine, trim, or VIN instead of relying on size alone.
- Record the old filter’s orientation before removal because an UP arrow and an AIR FLOW arrow do not mean the same thing.
- Toyota’s 2025 U.S. Tundra maintenance chart lists cabin-air-filter replacement at the 30,000-mile scheduled service and notes that certain dusty, urban, desert, dirt-road, or heavy-traffic conditions can shorten filter life.
- Weak airflow, visible dirt, persistent vent odors, or unusual blower noise can justify an earlier inspection.
- Never force a glove-box stop, damper, cover, hinge, panel, or clip. Use the instructions for your exact model year when the layout differs.
At a Glance
| Time Required | About 10 to 20 minutes for most glove-box-access layouts |
| Difficulty | Easy, provided the access layout matches your model-year instructions |
| Tools Needed | Replacement filter, clean cloth, small vacuum, gloves, and an optional plastic trim tool |
| Cost | The replacement filter only; price varies by model year and filter type |
Last updated: September 22, 2026. This guide covers common glove-box-area Tundra cabin-filter layouts. Always follow the instructions for your exact model year and market.
Why You Need to Change Your Cabin Air Filter

Your Tundra’s cabin filter sits in the HVAC air path and captures debris before air reaches the vents. As the filter loads with dust, pollen, leaves, and road debris, resistance can increase and vent airflow may feel weaker. A dirty or damp filter can also contribute to musty odors, although odors may come from the evaporator, drain, or another HVAC problem.
A fresh filter can restore airflow that was lost because of a restricted filter. It does not increase engine power, and you should not expect a measurable fuel-economy gain from the filter change alone.
For a verified U.S. reference, Toyota’s 2025 Tundra Warranty and Maintenance Guide lists cabin-air-filter replacement at the 30,000-mile scheduled service. Toyota also notes that heavy traffic, dirt roads, and urban, desert, or dusty conditions can shorten filter life. Use the maintenance guide for your exact model year because schedules can change.
Tools and Materials Needed for Replacement
Most Tundra cabin-filter changes require few tools. Gather everything first so you do not leave the glove box open while looking for supplies.
- A new cabin air filter confirmed for your exact Tundra model year and configuration
- Clean gloves, especially if the old filter is dusty or damp
- A clean microfiber cloth
- A small vacuum with a narrow nozzle
- An optional plastic trim tool
- A small flathead screwdriver only when your model-specific instructions require one
Avoid using a metal screwdriver as a pry bar on visible trim. It can scratch the panel or break a clip. Many glove-box access covers release by hand.
Confirm Filter Fitment and Glove-Box Layout
Do not buy a replacement filter from a generic size chart alone. Match the filter to the truck’s model year, trim, engine or hybrid configuration when listed, and market. A VIN-based parts lookup or Toyota dealer parts catalog offers the safest fitment check.
Next, compare the glove-box area with the procedure below. Toyota has used different access arrangements across Tundra model years. Toyota’s 2007 owner’s manual, for example, shows a glove-box damper and side stops that are released before the filter cover is reached. Other layouts use an internal shelf, access panel, filter cover, or removable filter case. Toyota’s manuals and warranties portal lets you select the vehicle and retrieve the matching owner’s information.
| Layout You Find | Typical Access Pattern | What to Do |
|---|---|---|
| Glove box with damper and side stops | The glove box may need to swing down before the filter cover is accessible | Release only the damper and stops identified in your model-year instructions |
| Internal shelf or removable access panel | The filter may be reached through the glove box without removing the complete box | Remove the shelf or panel only in the direction shown by Toyota |
| Filter case or tray behind the access cover | The filter may sit in a removable case rather than sliding directly from the HVAC housing | Record the case and filter orientation before removal |
Note: If your truck does not have the shelf, sliding panel, damper, stops, cover, or filter case described by the instructions you are using, do not force the glove box. Use the procedure for your exact model year.
Which Way Should the Tundra Cabin Air Filter Arrow Point?
Read the wording beside the arrow before deciding which way the filter goes. An UP arrow identifies the physical top of the filter and should point upward. An AIR FLOW arrow identifies the direction air moves through the media, so it is not automatically the same as an UP arrow.
Toyota owner and service information for applicable Tundra layouts instructs installers to keep Toyota filters or filter cases marked UP facing upward. An aftermarket filter may instead use an AIR FLOW marking. In that case, follow the filter manufacturer’s instructions and the verified airflow direction for your exact housing. Photographing the old filter before removal gives you another reference, but do not copy an old installation if you already know it was incorrect.
Accessing Your Cabin Air Filter: Step-by-Step Guide
- Park safely. Set the parking brake, switch off the ignition, and turn the HVAC fan off.
- Empty the glove box. Remove papers and loose items so they cannot fall behind the dashboard.
- Identify your access layout. Compare the glove box, damper, stops, shelf, panels, and filter cover with the instructions for your exact model year before releasing anything.
- Open the access area. Lower the glove box, remove an internal shelf, or open the access panel only when your model-specific procedure calls for that step.
- Open the filter cover or case. Release its clips, claws, or tabs in the direction shown by the manual. Do not pry harder if it does not release normally.
- Photograph the filter. Capture its position, printed arrows, filter case, and which side faces outward before moving it.
The cabin filter should now be visible or removable with its filter case. Work slowly because leaves and dust may be resting on top of the filter.
How to Remove Your Old Cabin Air Filter Safely
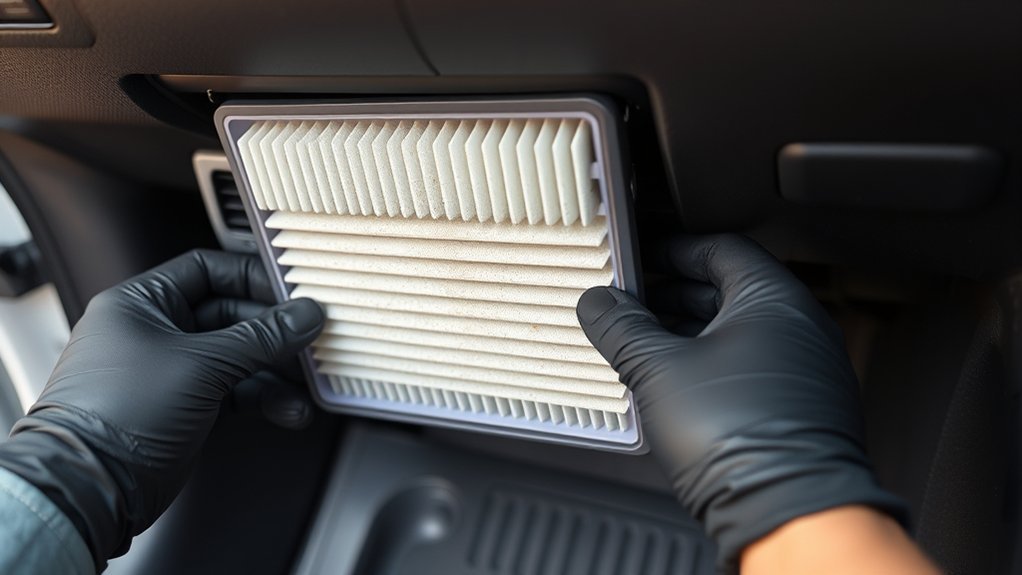
Grip the filter frame, filter case, or exposed edge and pull it out slowly while keeping it as level as possible. Tilting a heavily loaded filter can spill leaves and grit into the blower housing. Place the used filter directly into a bag if it is very dusty, damp, or contaminated.
- Do not run the fan while the filter is removed.
- Do not reach deep into the blower opening.
- Do not blast the housing or a disposable replacement filter with compressed air. If Toyota’s instructions for your exact truck specify a cleaning method for its filter, follow that model-specific procedure instead.
- Vacuum loose material near the opening without contacting the blower wheel.
- Wipe the accessible cover, case, panel, or shelf with a dry or lightly damp cloth.
Warning: Stop if you find rodent nesting, chewed wiring, standing water, a damaged blower wheel, or heavy mold-like growth. Those conditions need more than a routine filter change.
What to Inspect on Your Old Cabin Air Filter
Inspecting the old filter can reveal whether the scheduled interval suits your driving conditions. It can also point to water entry or debris problems that a new filter alone will not solve.
| Condition | What It May Mean | What to Do |
|---|---|---|
| Dry dust and leaves | Normal loading, especially on dirt roads or during pollen season | Replace the filter and inspect sooner next time if airflow was weak |
| Tears, gaps, or a crushed frame | Incorrect fitment, rough installation, or a damaged filter | Confirm the part number and install a correctly sized filter |
| Wet media or water stains | Possible cowl-drain, seal, or water-entry problem | Correct the water source before installing another filter |
| Heavy dark growth or strong musty odor | Persistent moisture or biological growth may be present | Bag the filter and have the HVAC system inspected if the odor remains |
| Unusual seeds, insulation, or nesting material | Possible rodent activity | Inspect wiring and ducts before operating the fan |
Record the mileage, date, filter condition, and driving environment. That note makes the next inspection interval easier to judge.
Installing Your New Cabin Air Filter: Complete Guide
Compare the new and old filters before installation. The outer dimensions, frame shape, pleat direction, sealing edges, and any filter-case fit should match. Do not compress an oversized filter into the opening because gaps or a distorted frame can let air bypass the media.
- Check the label. Identify whether the arrow says UP or AIR FLOW.
- Use the correct orientation. An UP arrow points upward. An AIR FLOW arrow points in the direction air moves through the filter. Follow the model-year manual and filter-maker instructions rather than assuming both arrows mean the same thing.
- Seat the filter correctly. Slide the filter in evenly or place it squarely in its filter case without folding the pleats.
- Check the seal. Confirm that the filter sits flat with no visible gap around the frame.
- Reinstall the filter cover or case. Align its guides, claws, tabs, or clips and press only as required by the model-specific procedure.
Pro Tip: Write the installation date and mileage on the filter frame only if the manufacturer provides a safe writing area. Do not puncture or crush the filter media.
Reassembling the Glove Box After Filter Replacement
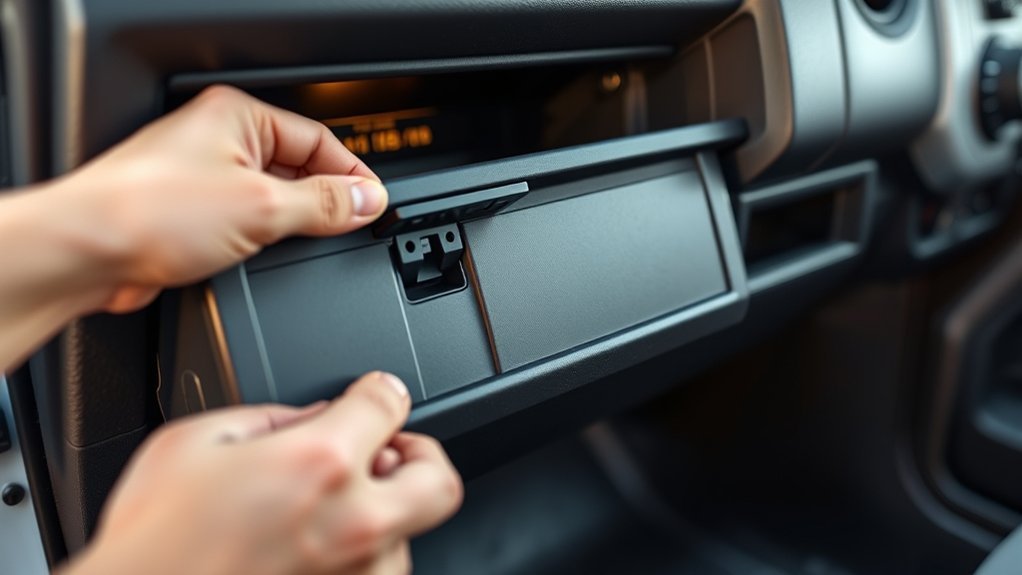
Reinstall the filter case or cover first, then refit any access panel, shelf, damper, glove-box stops, or other pieces you removed. Reverse the model-specific removal sequence and confirm every tab, claw, clip, and guide is fully engaged without forcing it.
Open and close the glove box several times. It should move freely without rubbing, rattling, binding, or dropping unexpectedly. Return its contents only after every stop, damper, shelf, panel, and cover is secure.
Test the HVAC System and Troubleshoot Problems
Start the truck, select fresh-air mode, and run the fan through each speed. Listen for rubbing or ticking and compare airflow from several vents. A normal filter change should not create a new noise.
| Problem After Replacement | Likely Check |
|---|---|
| Filter cover will not close | Verify the filter size, frame or case position, and tab alignment. Do not force the cover. |
| New ticking or scraping sound | Turn the fan off and check for dropped leaves, a loose cover, or contact near the blower. |
| Airflow remains weak | Check that the filter is not crushed or incorrectly installed, then consider a blower, duct, evaporator, or mode-door problem. |
| Musty odor remains | The source may be moisture, the evaporator, or a blocked drain rather than the filter alone. |
| Glove box rattles | Recheck any shelf, stops, damper, access panels, covers, and stored items. |
How to Maintain Your Cabin Air Filter
A fixed mileage number cannot account for every Tundra model year or driving environment. Use Toyota’s schedule for your exact truck as the baseline, then inspect earlier when operating conditions load the filter quickly.
Follow the Model-Year Maintenance Interval
The 2025 U.S. Tundra maintenance chart lists cabin-air-filter replacement at the 30,000-mile scheduled service. Toyota notes that heavy traffic, dirt roads, and urban, desert, or dusty conditions may shorten filter life, so earlier replacement can be necessary.
For a deeper schedule-focused explanation, see Toyota Tundra Cabin Air Filter: Replacement Interval + Signs. This page remains focused on the replacement procedure.
Keep the Housing Clean and Dry
Vacuum accessible loose debris during replacement, but do not push a nozzle deep into the blower case. Do not wash a disposable cabin filter unless its manufacturer specifically labels it reusable. Do not blast a disposable filter or the open housing with compressed air; if Toyota’s model-specific instructions describe a cleaning procedure for the original filter, follow those instructions instead.
If the old filter is wet, solve the water-entry problem before installing another filter. A new filter will not correct a blocked drain, leaking seal, or contaminated evaporator.
Choose the Right Filter Type
Start with exact fitment and a frame that seals correctly. A standard particulate filter targets dust, pollen, and debris. An activated-carbon filter may also help reduce some odors and gaseous contaminants, but it cannot remove every pollutant or repair an existing HVAC odor source.
Do not rely on a generic “HEPA,” efficiency, or MERV-style marketing claim unless the filter maker provides vehicle-specific fitment and a clear test method. More restrictive media can affect airflow if it is not designed for the Tundra’s HVAC system.
Related Guides
Frequently Asked Questions
How often should I change the cabin air filter on my Toyota Tundra?
Use the maintenance guide for your exact model year. As a verified example, Toyota’s 2025 U.S. Tundra guide lists cabin-air-filter replacement at the 30,000-mile scheduled service and notes that heavy traffic, urban, desert, dusty, or dirt-road conditions can require earlier replacement.
What are three symptoms of a clogged cabin air filter?
Common signs include weaker airflow from the vents, visible heavy dirt on the filter, and odors that appear when the fan starts. These signs are not exclusive to the filter, so inspect the HVAC system if a new filter does not correct them.
Where is the cabin air filter on a Toyota Tundra?
On Tundras with a serviceable glove-box-area layout, the filter is reached from or behind the passenger-side glove box. The exact panel, damper, stop, cover, and filter-case arrangement varies by model year, so compare your truck with its owner’s manual before removing trim.
Does every Toyota Tundra use the same cabin-filter access layout?
No. Toyota owner and service information shows different glove-box access arrangements across model years. Some procedures release a glove-box damper and side stops, while other layouts use an internal access panel, shelf, cover, or removable filter case. Use the procedure for your exact model year.
Can I change my Toyota Tundra cabin air filter myself?
Usually, yes. The job is suitable for many beginners when the filter can be reached through the glove-box area without special service tools. Use model-specific instructions and stop if a panel, damper, stop, retaining clip, or filter case does not release normally.
Which way should the cabin air filter arrow point?
Follow the wording beside the arrow. An UP arrow points upward. An AIR FLOW arrow follows the direction air moves through the filter and is not automatically an upward arrow. Photograph the old filter before removal and confirm the correct orientation in the model-year manual and filter instructions.
Can I clean and reuse the old cabin air filter?
Replace a disposable filter instead of washing it. Do not blast a disposable replacement filter clean unless its manufacturer specifically permits that procedure. If Toyota’s instructions for your exact truck describe a cleaning method for the original filter, follow those model-specific instructions. Reuse a washable aftermarket filter only when its manufacturer clearly identifies it as reusable and provides cleaning instructions.
Conclusion
Replacing a Toyota Tundra cabin air filter is usually straightforward once you have the correct filter and the correct access procedure for your model year. Work gently, record the old filter’s position and arrow wording, keep loose debris out of the blower area, reinstall every glove-box component securely, and test the HVAC system afterward.
Record the replacement mileage and date when you finish. If airflow, odor, water, rattling, or blower-noise problems remain after the new filter is installed correctly, continue diagnosing the HVAC system instead of assuming another filter will solve the problem.
How This Guide Was Checked
This guide was updated using Toyota owner and maintenance information plus current model-year-aware replacement references. The maintenance interval stated here is tied specifically to Toyota’s verified 2025 U.S. Tundra maintenance guide rather than being presented as a universal interval for every Tundra. This article does not claim hands-on servicing of your individual truck; your exact owner’s or service instructions remain the controlling reference for trim removal and filter orientation.
Sources
- Toyota 2025 Tundra Warranty and Maintenance Guide: verified U.S. cabin-air-filter schedule and early-replacement conditions
- Toyota 2007 Tundra Owner’s Manual: glove-box access example, cabin-filter location, and UP-mark orientation guidance
- Toyota Manuals and Warranties: model-specific owner’s manuals and maintenance-guide lookup