To update drone firmware safely, charge the aircraft, remote controller, and phone or tablet, read the release notes, confirm the firmware is for your exact model, and start the update only through the manufacturer’s official app, support page, or desktop tool. Keep every required device powered and connected until the app reports completion. Then restart the system, verify the firmware versions, and do a short, low-risk pre-flight check before normal flying.
Last updated: September 11, 2026 — refreshed against current manufacturer update and recovery guidance.
Scope: This guide covers consumer camera drones and manufacturer-managed firmware. Custom FPV flight controllers running Betaflight, ArduPilot, PX4, or similar firmware use different backup, flashing, and recovery procedures.
Quick Answer
Use only the update method listed for your exact drone model. A full charge is the safest preparation because minimum battery requirements vary by manufacturer and model. Keep the aircraft, controller, app, network, and any required cable connected during installation. After the update, confirm the aircraft, controller, and smart batteries show compatible firmware before you fly. If the update fails, use the maker’s official retry, refresh, reinstall, recovery, or rollback option only when that option is specifically supported.
Key Takeaways
- Use only official firmware from your drone maker’s app, support page, or desktop assistant tool.
- Charge the aircraft, remote controller, and mobile device before starting; follow your model’s documented minimum if it differs.
- Do not power off, unplug, close the app, or remove storage during installation unless the official instructions tell you to.
- Verify the aircraft, controller, battery, camera, and accessory firmware after the update when those components are listed separately.
- Do not force unofficial firmware or an older version onto the drone. Use rollback only when the manufacturer’s official tool offers it.
At a Glance
| Time Required | Varies by model, file size, connection speed, and whether the controller, batteries, or accessories also need updates. Leave enough time to finish, verify, and test before an important flight. |
| Difficulty | Usually straightforward through the official app. A failed update may require a supported desktop tool, refresh, reinstall, or service process. |
| Tools Needed | Drone, remote controller, charged batteries, the official app or supported desktop software, stable internet when required, and a reliable data cable if the update uses USB. |
| Power Rule | A full charge is the safest universal preparation. Do not rely on a generic percentage; follow the minimum battery level in the current manual or support page for your exact model. |
This guide covers preparation, choosing the correct update method, installation, version checks, a controlled post-update test, and recovery when an update stalls. Menu names, supported update tools, battery thresholds, and rollback options vary by model, so your drone’s current manual and official support page always take priority over generic instructions.
Importance of Safe Firmware Updates
A firmware update changes the software that coordinates the drone’s core systems. If an installation is interrupted, the aircraft, remote controller, battery, gimbal, camera, or another connected component may fail to start or may report a version mismatch.
Firmware can affect flight control, obstacle sensing, GPS behavior, camera functions, battery communication, signal stability, safety alerts, and accessory compatibility. Manufacturers release updates to fix bugs, improve compatibility, add supported features, and address known reliability or security issues.
The biggest avoidable risks are simple: starting with too little battery power, losing the required connection, using firmware for the wrong model, or interrupting the installation. That is why preparation matters more than speed.
Warning: Never install unofficial or modified firmware from a random forum or file-sharing site. It can make the drone unusable, break compatibility or safety functions, and make official recovery or support more difficult.
Current manufacturer guidance confirms that the update path is model-specific. DJI documents app-based updates and DJI Assistant 2 for supported products and tells users not to power off the aircraft or exit the app during the update. Its troubleshooting guide also lists low battery and user interruption as causes of failed updates. See the DJI firmware update guide and DJI firmware update failure guide.
Before starting, place the drone on a stable surface, charge every required device, confirm the exact model, and read the current release notes. If the release also covers the controller, smart batteries, goggles, camera, or other accessories, plan time to verify those components too.
Preparing Your Drone for an Update
Good preparation prevents most avoidable update problems. Use this checklist before you tap or click the update button.
| Step | Action | Purpose |
|---|---|---|
| Read the Release Notes | Check what the update changes and whether it also applies to the controller, batteries, app, camera, goggles, or accessories. | Prevents missed companion updates and unexpected behavior. |
| Charge Everything | Fully charge the aircraft, controller, and phone or tablet when practical, then confirm your model’s documented minimum. | Reduces the risk of a shutdown during installation. |
| Verify the Exact Model | Match the firmware and update tool to the exact aircraft and controller model. | Avoids incompatible firmware or software. |
| Prepare the Connection | Use stable internet when required and a reliable data cable for USB updates. Remove storage or accessories only when the manual tells you to. | Reduces download, transfer, and connection failures. |
| Choose Safe Timing | Update where you have enough time to finish, restart, verify, and test the drone. | Avoids rushing before a trip, job, or important flight. |
Close unused apps on the phone or computer if they may interrupt the update process. Keep the update app in the foreground when the manufacturer instructs you to do so.
Do not delete, rename, unzip, move, or replace firmware files unless the official instructions require that step. Likewise, do not format or remove a memory card during an update unless your model’s procedure specifically tells you to.
Finally, note the current firmware version before you begin. If something fails, that version record makes it easier to tell whether the aircraft, controller, or battery updated successfully.
Can You Disable Automatic Drone Firmware Updates?

Do not assume every drone app has a universal switch that silently installs aircraft firmware. Current DJI support documentation describes a user-confirmed update prompt: the app detects new firmware, downloads it, and then the user starts the update. Other brands and app versions can behave differently.
Phone app-store automatic updates are also separate from aircraft firmware. Turning off automatic updates for the mobile app does not necessarily disable firmware prompts for the drone, controller, batteries, or accessories.
If you want more control over update timing, use these rules:
- If your exact app offers an automatic-download or update setting, change only the option shown in the current manual or support page for your version.
- Manage iOS or Android app-store auto-updates separately if you intentionally want to control when the drone app itself changes.
- Do not begin a firmware installation immediately before an important flight unless the update is required and you still have time to verify the system afterward.
- Check the manufacturer’s release notes and firmware status manually before travel, paid work, or another flight where a version mismatch could create delays.
Note: Controlling update timing is different from ignoring updates. Review official release notes so you can act on safety, compatibility, battery, controller, or accessory updates that affect your model.
When Should You Update Drone Firmware?
There is no single schedule that fits every drone. Update when the manufacturer prompts you, when the release notes fix a problem that affects your aircraft, when a supported accessory requires a newer version, or when the app reports a firmware mismatch. The best time is usually at home or on a bench with charged devices and enough time for a restart and short test afterward.
How to Update Drone Firmware Safely

The exact process varies by brand and model, but consumer drones usually update through an official mobile app, supported desktop software, or a removable-media method such as microSD when the manufacturer provides one.
Choose the Correct Update Method
Use only the method listed for your exact aircraft. Common paths include:
- App or over-the-air update: Connect the aircraft and controller, open the official app, download the offered firmware, then start the installation when prompted.
- Desktop or USB update: Connect the supported device to a computer with a reliable data cable and use the manufacturer’s official assistant or service software.
- SD or microSD update: Use this only when your model’s manual provides a file-based procedure. Follow the required filename, folder, card format, and restart steps exactly.
For example, DJI currently lists app updates and DJI Assistant 2 as common methods for supported camera drones. Autel’s current documentation also describes official-app online updates and model-dependent local update flows. See Autel’s firmware upgrade documentation.
Installation Steps Overview
Once you have confirmed the correct firmware and method, follow this sequence:
- Set up safely: Place the drone on a flat, stable surface with good ventilation. Keep it away from children, pets, water, and anything that could interfere with the aircraft or gimbal.
- Connect only what the manual requires: Pair or cable the aircraft, controller, phone, or computer exactly as directed. Use a known-good data cable for USB updates.
- Download from the official source: Use the manufacturer’s app, support page, or desktop software. Do not rename, edit, unzip, or move the file unless the instructions require it.
- Start the update and leave it alone: Keep required devices powered, connected, and stationary. Do not close the app, unplug the cable, remove storage, or power off equipment while installation is in progress.
- Wait for the success message or supported restart: Some drones restart automatically after installation. Follow the on-screen prompt instead of guessing when the process is finished.
- Verify every listed component: Reopen the firmware or device-information screen and confirm the aircraft, controller, batteries, camera, goggles, or other accessories show compatible versions.
Pro Tip: If your drone uses smart batteries, insert each battery after the aircraft update and check whether the app prompts for a battery firmware update. Some models require each battery to be updated separately.
Verifying Successful Firmware Installation
An update is not finished until you confirm the version and check that the drone behaves normally. Do this before a long-distance, over-water, or mission-critical flight.
Firmware Version Confirmation
Start with the firmware or device-information screen.
- Open the “About,” “Device Info,” “Firmware,” or equivalent page in the official app or controller.
- Compare the displayed version with the version you intended to install.
- Check whether the aircraft, remote controller, smart batteries, camera, goggles, or accessories are listed separately and whether any item still shows an update prompt.
- Look for the app’s success message or update log when your platform provides one.
If the versions do not match, do not assume the update is complete. Retry through the official tool or follow the manufacturer’s model-specific troubleshooting steps.
Device Functionality Check
After version confirmation, check camera operation, gimbal movement, GPS status, battery status, signal strength, obstacle sensors, storage status, home-point behavior, and control inputs. Watch the app for new warnings before takeoff.
Do not automatically recalibrate every sensor just because firmware changed. Calibrate the IMU, compass, vision system, or controller when the manufacturer or app tells you to, or when a valid warning or abnormal behavior gives you a reason. DJI’s current compass and IMU guidance, for example, is prompt-driven for supported camera drones.
If you see persistent IMU or compass warnings, use the app’s model-specific instructions. For additional background, see IMU and compass errors on drones and drone compass calibration.
For the first flight after an update, choose an open, controlled area. Keep the drone close, use simple inputs, and confirm stable hover, normal control response, camera operation, battery reporting, and Return-to-Home status before flying farther away.
Troubleshooting Installation Issues
Match the symptom to the safest next check instead of changing several things at once.
| Symptom | Check First | Next Step |
|---|---|---|
| Download will not start or verify | Internet connection, app status, available storage, and correct model | Reconnect to a stable network, reopen the official app or desktop tool, and retry the official package. |
| Progress stalls or the app reports failure | Battery level, cable or wireless connection, and whether the device was interrupted | If the progress indicator is still active, do not interrupt it. If the official tool reports failure, charge the devices, restart once, reconnect, and retry through the supported method. |
| Aircraft and controller versions do not match | Whether only one component updated | Update the missing component through the official tool and verify both versions again. |
| One smart battery still shows an update prompt | Whether that battery has separate firmware | Update that battery when the app specifically prompts you, then repeat the check for the other batteries you use. |
| Drone will not power on, connect, or appear in the update tool | Power, cable, app or desktop detection, and official recovery options | Stop repeated random retries and move to the manufacturer’s recovery instructions or support process. |
DJI’s current failure guide specifically advises checking battery level and avoiding operation of the aircraft during an update. Other brands use different thresholds and recovery flows, so use the exact documentation for your model.
Recovery Options in Case of Issues
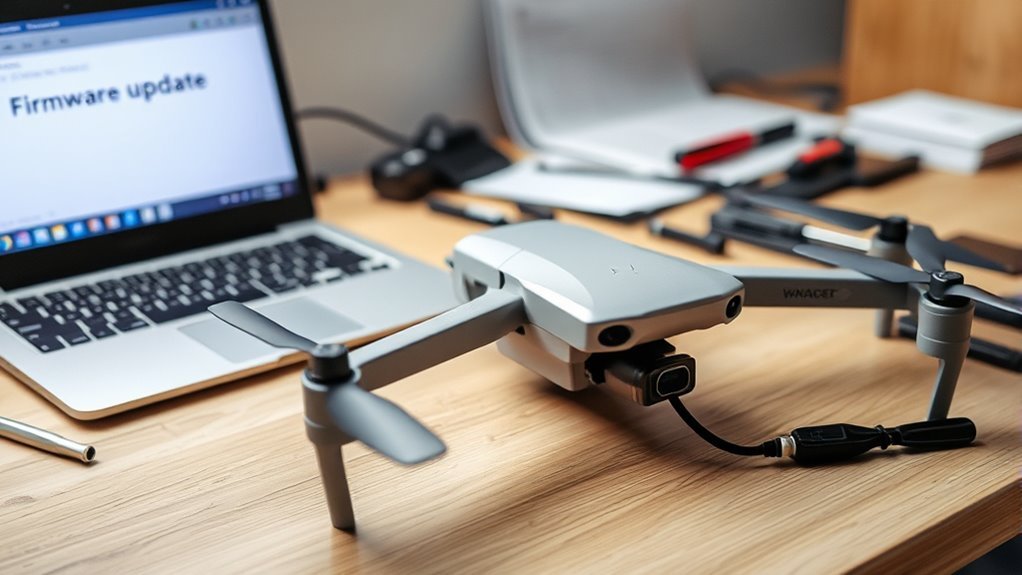
If a firmware update fails, first decide whether the update is still progressing or has actually ended with an error. If the progress indicator is still moving or the official tool still shows an active installation, do not interrupt it.
If the update clearly fails, use this recovery order:
- Read the exact error message and confirm which component failed: aircraft, controller, battery, camera, goggles, or accessory.
- Charge the affected devices above the minimum required for your model.
- Restart the aircraft, controller, app, and phone or computer once the failed process has ended.
- Reconnect with the official app, supported desktop assistant, or required data cable.
- Use “refresh,” “repair,” “reinstall,” or recovery mode only if the manufacturer’s official tool or manual provides that option for your model.
- Use rollback only when the official tool offers the older version. Do not force an archived or third-party firmware file onto the drone.
- Contact manufacturer support if the aircraft will not power on, connect, appear in the update tool, or return to a normal ready-to-fly status.
Rollback support is model-dependent. Some firmware versions can be downgraded through an official tool, while others cannot. The safe rule is simple: if the manufacturer does not offer the older version in its supported workflow, do not try to force it.
Warning: Do not fly after a failed or partial update while the app shows a firmware mismatch, sensor error, battery warning, or another unresolved system alert.
Best Practices for Future Updates

A repeatable update routine is safer than treating every firmware prompt as an emergency. Use the same checklist each time.
- Read the release notes first: Check what changed, what devices are affected, and whether the update has special instructions.
- Update with time to test: Do it at home or on a bench when possible, not minutes before a trip, client job, or important flight.
- Record the versions: Note the date, aircraft firmware, controller firmware, app version, battery updates, and any warning that appeared.
- Check every smart battery and accessory: If the app treats them as separate firmware components, verify each one before normal flying.
- Run a short post-update check: Confirm status messages, controls, camera, gimbal, GPS, battery reporting, and basic flight behavior before flying farther away.
Avoid updating in the field unless the update is required before flight. Weak mobile data, low battery, weather, heat, and time pressure can turn a simple update into a troubleshooting problem.
Note: Firmware updates do not replace normal flight-safety checks. You still need to inspect the aircraft, confirm battery health and home-point status, check airspace and local rules, and fly within your skill level.
Official Manufacturer Firmware Resources
Exact battery minimums, supported update tools, file-handling rules, and recovery options differ by model. Use your own manufacturer’s current support page first. These official resources show the kinds of instructions you should look for:
- DJI: Updating Your Drone Firmware
- DJI: Aircraft Firmware Update Failure
- Autel Robotics: Firmware Upgrade Tutorial
- Potensic: Support Troubleshooting
Frequently Asked Questions
How do I update drone firmware safely?
Charge the aircraft, controller, and phone or tablet, read the release notes, confirm the firmware is for your exact model, and use only the manufacturer’s official app, support page, or desktop tool. Keep required devices powered and connected until the update finishes, then restart, verify all listed firmware versions, and do a short low-risk test before normal flying.
How much battery do I need before updating drone firmware?
There is no universal minimum for every drone. A full charge is the safest preparation. For example, DJI’s current firmware-failure guidance says the aircraft or remote controller should be above 50%, while other manufacturers may specify different thresholds. Follow the current requirement for your exact model.
What are the main ways to update drone firmware?
Common methods are an over-the-air update through the manufacturer’s app, a USB update through supported desktop software, and an SD or microSD file-based update on models that support removable media. Use only the method listed in your drone’s current manual or support page.
What should I do if a drone firmware update gets stuck or fails?
If the official tool still shows active progress, do not interrupt it. If the update ends with an error, read the message, charge the devices, restart once, reconnect through the official app or supported desktop tool, and retry. Use refresh, reinstall, recovery, or rollback only when your manufacturer provides that option for your model.
Can a firmware update brick a drone?
Yes. A failed or interrupted update can leave a drone or one of its components unresponsive. The risk increases when power is lost, the wrong firmware is used, a required connection is broken, or the installation is interrupted. Using the official update method and adequate battery power reduces that risk.
Should I update my drone right before a flight?
Avoid starting a non-urgent firmware update immediately before an important flight. Leave enough time to finish the installation, restart the system, update any batteries or accessories that are prompted, verify the versions, and complete a short test. If the manufacturer requires the update before flight, follow the official instructions and verify the system before takeoff.
Do I need to update every drone battery?
Some smart batteries have separate firmware. If the official app prompts for a battery update, check each battery you use with the aircraft and update it as directed. This helps prevent version-mismatch warnings and inconsistent battery behavior.
Conclusion
A safe firmware update is mostly about controlling avoidable failure points: use the correct official package, start with enough battery power, keep the required connection stable, and do not interrupt the installation.
Afterward, verify every listed firmware version and check the drone’s status before a normal flight. If an update fails, use the manufacturer’s supported retry or recovery path rather than forcing random files or repeated power cycles.
Before your next update, open the official support page for your exact model, read the release notes, charge the required devices, and leave enough time for a restart and short test flight.
