
Replacing an HID headlight on a Toyota RAV4 starts with identifying the headlight system, not removing parts. RAV4 lighting varies by model year, trim, and market. Toyota’s 2007 RAV4 owner’s manual lists replaceable halogen bulbs. A 2014 Toyota New Zealand RAV4 brochure lists HID headlights on one grade. The 2026 U.S. RAV4 brochure lists standard dual-beam projector LED headlights. Do not buy an HID bulb by “RAV4” or model year alone.
Use this guide only after the owner’s manual, headlamp label, existing bulb or ballast, or Toyota parts information confirms that your vehicle has a serviceable factory or otherwise approved HID/xenon system. If your RAV4 has halogen or integrated LED headlights, use the procedure for that system instead.
Last updated: September 19, 2026
Quick Answer
First confirm that your RAV4 has a serviceable HID/xenon bulb. Switch off the headlights and ignition, let the lamp cool, and isolate the ballast’s low-voltage supply according to the vehicle-specific procedure. Remove the rear cover, release the connector or igniter and retainer, install the exact matching HID bulb without touching the glass, restore the seal, reconnect the system, and test from the driver’s seat. Check headlight aim if the assembly, mounting points, suspension height, or leveling system was disturbed.
Key Takeaways
- Verify the exact model, market, trim, headlamp type, and bulb designation. Toyota has sold RAV4s with halogen, HID, and integrated LED headlamps in different configurations.
- Match the complete HID designation, including the suffix, base, wattage, voltage, connector, and approved control gear. D1S, D2S, D3S, and D4S are not universal substitutes for one another.
- HID ballasts generate dangerous ignition voltage. Never probe the high-voltage output or work with the lamp energized.
- Do not cut the dust cap, splice wires, add generic capacitors, or place an HID source in a housing designed for a halogen bulb.
- If flickering continues after a correct bulb replacement, inspect the fuse, low-voltage supply, ground, connector, and ballast before buying more parts.
- Use Toyota’s model-specific procedure or professional aiming equipment after disturbing the headlamp assembly or leveling system.
At a Glance
| Time Required | About 30 to 90 minutes for an accessible bulb; longer if trim or the headlamp assembly must be removed |
| Difficulty | Intermediate because the system includes high-voltage components and model-specific retainers |
| Tools Needed | Safety glasses, clean gloves, flashlight, microfiber cloth, trim tool, appropriate sockets or screwdrivers, and the exact replacement bulb |
| Cost | Varies by bulb designation and whether the bulb, ballast, leveling component, or complete headlamp requires replacement |
Warning: Toyota’s HID safety material states that approximately 20,000 to 30,000 volts can be generated instantly when HID headlights are switched on. Turn off the headlights and ignition, keep the key away from the vehicle, let the lamp cool, and isolate the ballast’s low-voltage supply according to the vehicle-specific service procedure before touching HID components. Never probe the ballast output, igniter, or high-voltage bulb connection. Use a qualified technician if wiring is damaged, wet, burned, or unfamiliar.
Understanding HID Headlights: What You Need to Know
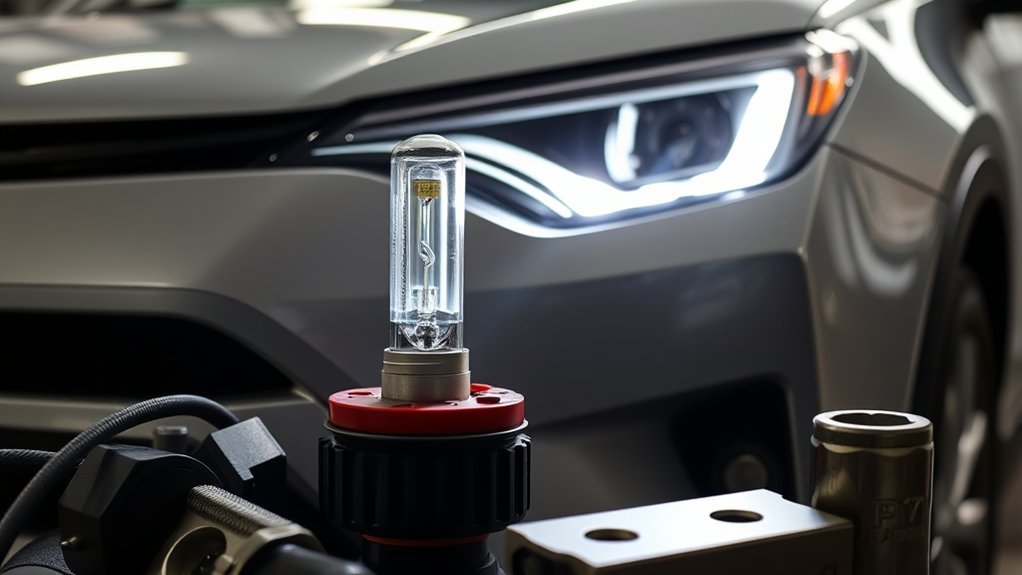
HID means high-intensity discharge. An HID or xenon bulb produces light through an electrical arc rather than a glowing filament. The system uses a ballast to create the starting voltage and then control the lamp during operation.
According to HELLA’s automotive-lighting technical guide, xenon systems use a high-voltage ignition stage before the ballast regulates the lamp during operation. Toyota’s own HID safety material places the instantaneous starting voltage at approximately 20,000 to 30,000 volts. That is why an HID headlamp requires more caution than an ordinary halogen-bulb replacement.
An HID headlamp may be supplied by the vehicle’s 12-volt electrical system, but its control gear can generate tens of thousands of volts to start the arc.
Many original-equipment xenon bulbs use a D-series designation, such as D1S, D2S, D3S, or D4S. These bulbs are not interchangeable simply because they look similar. HELLA notes that D3 and D4 lamps use different electrical parameters from D1 and D2 lamps—42V rather than 85V arc voltage—and that D3/D4 are mercury-free. The base, igniter design, optical application, and approved control gear also matter.
A common original-equipment HID bulb may be rated at 35 watts, but that does not make every 35W kit compatible. For example, the current OSRAM XENARC Original D1S specifications list 35W nominal power, 85V nominal voltage, 4500K color temperature, a PK32d-2 base, and D1S approval. Your replacement must match the specifications assigned to your headlamp.
Confirm Your RAV4 Headlight Type Before Buying Parts
Do not rely on the appearance or color of the beam. White-looking halogen bulbs, HID bulbs, and LED headlamps can look similar from outside the vehicle. Confirm the system using the owner’s manual, headlamp label, existing bulb designation, ballast or igniter markings, or Toyota parts information based on the vehicle identification number.
Toyota documentation shows why a single “RAV4 HID bulb” answer is unreliable. The U.S.-market 2007 RAV4 manual lists 9006/HB4 low-beam and 9005/HB3 high-beam halogen bulbs. A 2014 Toyota New Zealand RAV4 brochure lists HID headlights with automatic leveling on one grade. The current 2026 U.S. RAV4 uses standard dual-beam projector LED headlights. Treat year-only fitment charts as a starting point, not proof of your exact lamp type.
| Headlight type | How to identify it | Correct action |
| Halogen | A designation such as 9005, 9006, H11, or another filament-bulb number; no HID ballast | Use the exact specified halogen bulb. Do not install an HID conversion bulb in the halogen housing. |
| Factory or approved HID | A D-series bulb designation, ballast or igniter, and HID warning labels | Replace the bulb with the exact matching HID type and follow the vehicle-specific procedure. |
| Integrated LED | The manual lists LED headlights and no removable low-beam bulb is provided | The LED module, driver, or complete headlamp may need professional diagnosis or replacement. |
| Aftermarket HID conversion | Added ballast, non-factory wiring, adapters, or a drilled rear cover on a headlamp labeled for a filament bulb | Restore the approved original light source or install a complete compliant headlamp designed for the intended source. |
Note: Toyota manuals often cover several trims and optional systems. Confirm that the bulb information applies to your exact vehicle before ordering a part.
In the United States, NHTSA has concluded that the type of HID conversion source designed to replace a regulated filament bulb in an existing replaceable-bulb headlamp could not be certified as conforming to FMVSS No. 108. The agency’s HID conversion-kit interpretation explains that the replacement source must conform to the dimensions and electrical specifications filed for the original light-source type. NHTSA regulates manufacture and sale of motor-vehicle lighting equipment; state law can also affect modifications made by individual vehicle owners.
[Amazon Products Picked for You]

Each bundle contain 2 bulbs, 2 ballast, and installation accessories
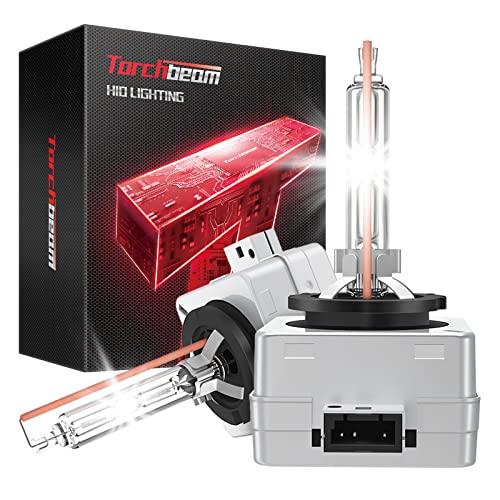
Safer Night Driving: Torchbeam d3s bulbs made with German xenon gas. Replacement OEM Part Number: 42302C1, 42302(WX/XV), 42403(C1), 66340, 66340CBH, 66340CBI, ect.
What Tools Do You Need to Replace Your HID Headlights?
The exact tools depend on the model year and whether you can reach the rear of the headlamp without removing trim or the complete assembly. Gather the correct bulb and basic access tools before disconnecting anything.
[Amazon Products Picked for You]

Each bundle contain 2 bulbs, 2 55W Platinum ballast, and accessories
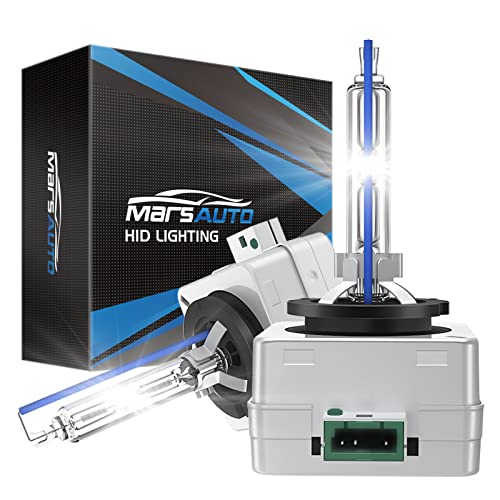
Replace Only HID Bulbs: Fit for stock D3S HID Xenon bulbs only, NOT ADAPT if your auto has stock Halogen/LED lights

Each bundle contain 2 bulbs, 2 ballast, and installation accessories
Essential Tools Required
- Exact replacement HID bulb: Match every letter and number printed on the old bulb or specified for the headlamp.
- Clean nitrile or mechanic’s gloves: Keep skin oils away from the glass capsule and protect your hands.
- Safety glasses: Protect your eyes if a damaged bulb, clip, or brittle connector breaks.
- Flashlight: Use it to inspect connectors, retainers, seals, and bulb orientation.
- Microfiber cloth: Clean the housing area without leaving lint around the seal.
- Trim-removal tool: Remove plastic clips without using excessive force.
- Socket set and screwdrivers: Use only the sizes required by the year-specific access procedure.
- Toyota owner’s or repair information: Confirm access, connector locks, retainers, torque values, and aiming requirements.
Do not plan to use wire cutters, generic crimp connectors, pliers on electrical terminals, or electrical tape as part of a normal bulb replacement. A correct bulb should connect through the original keyed connector and allow the original rear cover to close fully.
Safety Gear Precautions
Park on a firm, level surface, engage the parking brake, switch off the headlights and ignition, and remove the key. Keep a smart key away from the vehicle so the lighting system cannot be activated accidentally.
Let the headlamp cool before touching the bulb or housing. HID lamps and nearby components can become hot during operation. Do not work on a cracked lamp, wet ballast, burned connector, exposed conductor, or damaged igniter.
Toyota’s HID safety material warns against touching, cutting, or breaching HID bulbs, sockets, circuits, and related components because of electric-shock risk. Follow the vehicle-specific service procedure to isolate the ballast’s low-voltage supply. If Toyota’s procedure for your model also requires disconnecting the negative 12-volt battery terminal, follow that instruction and review any initialization steps that may be needed afterward.
Step-by-Step Guide: Removing the Old HID Bulb
The bulb-removal method is not identical across all HID systems. Some bulbs have an integrated igniter, while others connect to a separate igniter or retaining ring. Do not force a connector or assume that every bulb twists counterclockwise.
1. Confirm the Exact Bulb
Check the owner’s manual, headlamp label, existing bulb, and vehicle-specific parts information. Match the full designation, including letters such as S or R. These suffixes can identify different optical applications and bases.
Inspect the new bulb before opening the headlamp. Compare its base, locating tabs, connector, and printed specifications with the old part information. Stop if the replacement requires an adapter, wire splice, or modification.
2. Power Down the Lighting System
Switch off the headlights and ignition. Remove the key and keep it away from the vehicle. Let the lamp cool, then disconnect the ballast’s low-voltage supply connection according to the vehicle-specific procedure.
Do not turn the headlights on with an HID bulb, igniter, or high-voltage connector disconnected unless an approved diagnostic procedure specifically requires it.
3. Gain Access to the Rear Cover
Open the hood and inspect the rear of the headlamp. Depending on the RAV4 model, access may be direct or may require removal of an intake duct, trim panel, washer-fluid neck, fastener, or headlamp assembly.
Do not remove the complete headlamp automatically. Unnecessary removal can disturb the aim, damage clips, or create alignment gaps. Follow the Toyota procedure for your exact model year.
4. Remove the Dust Cover
Clean loose dirt from around the rear cover before opening it. Release or rotate the cover using its intended locking method. Inspect the gasket for flattening, cracks, dirt, or previous modifications.
Keep the cover and seal clean. The cover prevents water, dust, and engine-compartment vapor from reaching the bulb, reflector, connectors, and ballast.
5. Release the Connector and Retainer
Identify the connector lock, igniter, retaining clip, or retaining ring before applying force. Release it as shown in the service procedure. Pull on the connector housing, not the wires.
Note the bulb’s orientation before removal. A quick photo can help you confirm the connector routing and locating-tab position during installation.
6. Remove the Old Bulb
Hold the bulb by its base and lift it straight out once the retainer is released. Avoid striking the glass capsule against the housing or metal retainer.
Inspect the removed bulb for clouding, dark deposits, a damaged base, corrosion, or an unusual color. Also inspect the connector and housing for moisture, discoloration, melted plastic, or overheated terminals.
Installing a New HID Bulb Without Modifying the Housing
A correct replacement should fit the original locating features, connector, retainer, and dust cover. Do not alter the headlamp to make an unsuitable part fit.
1. Clean and Inspect the Bulb Opening
Use a clean, dry microfiber cloth around the accessible sealing surface. Do not place cleaners, grease, or loose fibers inside the reflector or projector.
If water is pooled inside the lamp, the connector is green with corrosion, or the seal is torn, correct the moisture problem before installing another bulb. A new lamp can fail quickly if the housing remains wet.
2. Insert the Exact Replacement Bulb
Wear clean gloves and handle the bulb only by its base. Align the locating tabs with the socket and seat the bulb without tilting or forcing it.
If you accidentally touch the glass, follow the bulb manufacturer’s cleaning instructions. Do not install a bulb with a scratched, chipped, cloudy, or contaminated capsule.
3. Secure the Retainer and Connector
Lock the original clip, ring, igniter, or connector using the specified method. The connector should seat fully without pliers, wire-color matching, splicing, or tape.
Confirm that the wiring follows its original route and will not rub against a sharp edge, hot surface, moving component, or rear cover.
4. Restore the Rear Cover and Seal
Clean the cover gasket and reinstall the cover in its original position. Verify that it is fully locked around the entire opening.
Do not drill, cut, notch, or leave the rear cover loose. If the cover cannot close with the bulb and connector installed, stop and recheck the part number and installation.
5. Reconnect and Test the Headlamp
Reconnect the ballast supply and any 12-volt battery connection removed under the service procedure. Keep your hands and tools away from the lamp, then switch on the low beams from the driver’s seat.
Confirm that both lights start, remain steady, and produce similar color and output. HID lamps can change color and brightness briefly during startup, but they do not require a 15-to-20-minute warm-up before you can check basic operation.
Pro Tip: If both HID bulbs are the same age and one has failed or changed color, replacing them as a pair can reduce left-to-right color and brightness differences. Keep the working old bulb as an emergency spare only if it remains clean and undamaged.
Should You Replace the Bulb, Ballast, or Headlamp?
A dark headlamp does not automatically mean that the bulb has failed. The fuse, low-voltage supply, ground, connector, igniter, ballast, leveling system, or complete lamp can also cause the problem.
| Finding | Possible cause | Next step |
| One bulb is dim, discolored, or intermittent | Aging bulb, poor connector contact, or ballast fault | Inspect the bulb and connector. Have matching bulbs cross-tested only under a safe diagnostic procedure. |
| No ignition attempt and one side is dark | Fuse, supply, ground, connector, control signal, or ballast | Check the specified fuse and low-voltage circuit before condemning the ballast. |
| The ballast attempts ignition but the lamp stays dark | Failed bulb, poor bulb connection, igniter fault, or ballast fault | Use a qualified diagnostic sequence with the exact bulb type and safe isolation. |
| Water, burned terminals, or melted plastic is present | Seal failure, overheating, corrosion, or electrical damage | Stop using the lamp and repair the damaged housing, connector, wiring, or assembly before fitting another bulb. |
| An integrated LED headlamp is dark | LED module, driver, control circuit, or complete headlamp fault | Do not follow an HID-bulb procedure. Obtain LED-system diagnosis for the specific RAV4. |
HELLA’s diagnostic guidance recommends checking whether the ballast attempts to ignite the bulb, followed by the fuse, low-voltage supply, ground, bulb, and ballast. Do not open a ballast or attempt to repair its internal high-voltage electronics.
[Amazon Products Picked for You]

【KDLT003 Ballast replacement】Also known as Headlight Control Unit, a crucial part of HID lighting system, provides the voltage needed to start the lamp and regulates the electrical current of the light once it is lit. A failed ballast will cause your bulb to burn. It is a perfect solution for 2004 2005 2006 2007 2008 2009 2010 2011 2012 2013 2014 Lexus SC430 ES350 ES350h LS460 LS460L LS600h RX350 RX450h GX460 GS300 GS350 GS430 GS450h Gs460 IS250 IS350 IS350F IS250C

【NEED ATTENTION】If your xenon HID headlight bulb is buzzing, dimming/losing brightness, flickering, randomly going out, changing colors, or not lighting at all, it could be that your ballast is bad.A failed ballast kit will cause your bulb to burn.If you notice any of the above symptoms, PLEASE NOTE that order ballast from the KERBIY to avoid further loss.

DIRECT REPLACEMENT — This aftermarket ballast is 100% compatible and a direct replacement for your existing part. Designed to meet or exceed OEM specifications. Plug-and-play installation with no need to program or code the car. Fits either the left or right headlight.
How to Check HID Headlight Alignment
Replacing only a correctly seated bulb usually should not require a major aim change. However, aim should be checked if you removed the headlamp assembly, changed suspension height, replaced leveling components, disturbed mounting points, or noticed an uneven beam pattern.
You can perform a preliminary check by parking on a level surface in front of a flat wall, loading the vehicle normally, setting tire pressures correctly, and confirming that both low-beam patterns appear stable and reasonably even. This check can reveal a bulb that is not seated correctly or a lamp aimed obviously too high.
Do not use a universal “two to four inches” drop without a specified wall distance and vehicle procedure. Do not intentionally aim the driver’s lamp lower simply because it is on the driver’s side. The approved beam pattern, headlamp markings, aiming distance, vehicle loading, and leveling system determine the correct position.
Use Toyota’s model-specific aiming instructions or have a shop use calibrated headlamp-aiming equipment. Professional aiming is especially important for projector HID systems, automatic-leveling systems, and adaptive headlamps.
What Are Common Troubleshooting Tips for HID Headlights?
Start troubleshooting on the low-voltage side of the system. Do not test an HID ballast by touching or probing its high-voltage output.
| Symptom | Likely areas to inspect | Safe response |
| One lamp flickers | Aging bulb, loose connector, corrosion, poor ground, low supply voltage, or failing ballast | Inspect the connector and low-voltage circuit. Do not add a generic capacitor to hide the symptom. |
| Lamp turns pink, purple, or noticeably different in color | Bulb aging or incorrect bulb pairing | Confirm both bulb designations and consider replacing an aged pair with matching approved bulbs. |
| One lamp does not turn on | Bulb, fuse, supply, ground, connector, igniter, or ballast | Check the specified fuse and low-voltage connections, then use a controlled bulb and ballast diagnostic sequence. |
| Both lamps fail together | Shared fuse, relay, control circuit, power supply, switch input, or vehicle fault | Diagnose the shared low-voltage circuit before buying two bulbs or ballasts. |
| Flicker occurs after a conversion kit was installed | Incompatible light source, pulse-width-modulated supply, adapters, altered wiring, or unsuitable ballast | Restore the approved original light source or install a compliant complete headlamp rather than adding resistors or capacitors. |
| Condensation returns after replacement | Loose cover, damaged gasket, cracked housing, blocked vent, or previous dust-cap modification | Repair the seal or housing. Do not seal active vents or rely on tape around a damaged cover. |
A multimeter can help a trained person check the ballast’s low-voltage supply and ground. It should not be used on the high-voltage bulb output unless the equipment and service procedure are specifically designed for that measurement.
HID Bulb Maintenance and Disposal
Keep the headlamp lens clean with products intended for automotive lenses. Avoid strong solvents, abrasive pads, or coatings that damage the lens. A cloudy or damaged lens can reduce useful light even when the bulb and ballast work correctly.
Check the rear cover and housing after the first wet drive or car wash following replacement. Persistent droplets, pooled water, or recurring condensation indicate a seal, vent, or housing problem that needs correction.
Do not place an unidentified used HID bulb directly in household trash. Automotive xenon chemistry varies by bulb family: HELLA notes that D3 and D4 lamps are mercury-free, while those families were developed from earlier D1/D2 designs that used mercury. Identify the exact bulb before disposal. For lamps that contain mercury, the U.S. Environmental Protection Agency recommends using available recycling or household hazardous-waste options rather than ordinary trash where local programs accept them.
Keep the old bulb intact, place it in the replacement bulb’s protective packaging, and check local disposal rules. Requirements can vary by state and municipality.
Related Guides
Frequently Asked Questions
Which Toyota RAV4 models use HID headlights?
There is no single model-year answer that applies to every market and trim. Toyota’s U.S. 2007 RAV4 documentation lists halogen headlight bulbs, a 2014 Toyota New Zealand RAV4 brochure lists HID headlights on one grade, and the current 2026 U.S. RAV4 uses LED projector headlights. Verify your exact vehicle by owner’s manual, headlamp label, existing bulb or ballast, and VIN-specific parts information.
How often should Toyota RAV4 HID headlights be replaced?
Do not replace them on a universal two-to-three-year schedule. Replace a bulb when it fails, becomes noticeably dim or discolored, or testing confirms that it is faulty. Service life varies by bulb family, operating conditions, and use. An OSRAM D1S example lists B3 life at 2,000 hours and Tc life at 3,000 hours, but those figures do not apply to every HID bulb.
Can I replace a Toyota RAV4 HID bulb with an LED bulb?
Do not treat an LED bulb as a universal plug-in replacement for an HID source. The headlamp optics, light-source geometry, electrical controls, cooling, and certification must be designed for LED operation. In a 2024 interpretation, NHTSA stated that LEDs may be used in compliant integral-beam headlamps but were not permitted as replaceable LED sources in replaceable-bulb headlamps as of the date of that letter. State law can also affect owner modifications. Use a complete compliant LED headlamp only when it is approved for the vehicle and allowed by applicable law.
What is the average lifespan of an HID headlight bulb?
Lifespan depends on the bulb design and operating conditions. One current OSRAM D1S original-equipment-style bulb lists B3 life at 2,000 hours and Tc life at 3,000 hours. Treat those figures as product-specific data, not a guarantee for every RAV4 or every HID bulb.
Are aftermarket HID conversion kits reliable for a Toyota RAV4?
Reliability is only one concern. Installing an HID source in a headlamp designed for a halogen filament can change the beam pattern, increase glare, damage the housing seal, and create compliance problems. In the United States, NHTSA determined that the type of filament-to-HID replacement discussed in its interpretation could not conform to FMVSS No. 108. Use the original approved light source or a complete compliant headlamp.
Do I need to reset the vehicle computer after replacing an HID bulb?
A bulb-only replacement normally does not require a general computer reset. However, disconnecting the 12-volt battery can affect stored settings or require initialization on some models. Adaptive lighting, automatic leveling, or a stored lighting fault may also require diagnosis or calibration. Follow the instructions for your exact model year.
How can I tell whether my RAV4 has HID, halogen, or LED headlights?
Check the owner’s manual, headlamp label, existing bulb designation, ballast or igniter markings, and Toyota parts information for the vehicle identification number. A D-series bulb plus HID control gear indicates an HID system. A filament-bulb designation such as 9005 or 9006 indicates a replaceable halogen source. An integrated LED headlamp may have no removable low-beam bulb.
Should I replace one HID bulb or both bulbs?
You can replace one confirmed failed bulb if the other remains healthy and matches its output. Replacing both can be helpful when the bulbs are the same age or the remaining lamp has changed color or brightness. Always use matching approved bulb designations on both sides.
Conclusion
Replacing a Toyota RAV4 HID bulb safely depends on identifying the exact headlamp first. RAV4 lighting differs by year, trim, and market, so confirm a serviceable HID/xenon system before ordering parts. Then isolate the ballast supply according to the vehicle-specific procedure, handle the bulb by its base, preserve the original connector and rear cover, and inspect operation and beam aim afterward.
Do not solve compatibility problems by cutting the dust cap, splicing wires, adding capacitors, or installing a different light-source technology in the existing housing. If the lamp contains moisture, damaged wiring, burned terminals, an adaptive-leveling fault, or an uncertain high-voltage connection, have a qualified technician diagnose it before you drive at night.
Sources
- Toyota 2007 RAV4 Owner’s Manual, Toyota New Zealand 2014 RAV4 Brochure, and Toyota 2026 RAV4 Brochure — demonstrate that RAV4 headlight technology varies by model year, trim, and market.
- Toyota High Intensity Discharge (HID) Headlights Safety Material — supports the approximately 20,000-to-30,000-volt startup warning and electric-shock precautions.
- NHTSA HID Conversion Kit Interpretation — explains why the discussed filament-to-HID replacement source could not conform to FMVSS No. 108.
- NHTSA 2024 LED Headlight Interpretation — distinguishes compliant integral LED headlamps from replaceable LED sources in replaceable-bulb headlamps and notes the role of state law for owner modifications.
- HELLA Automotive Lighting Technology Guide — supports xenon ballast operation and the D1/D2 versus D3/D4 electrical and mercury differences.
- OSRAM XENARC Original D1S Specifications — supports the product-specific 35W, 85V, 4500K, base, and lifespan data used in this guide.
- U.S. EPA Lamp Recycling and Disposal Guidance — supports local recycling or hazardous-waste handling for lamps that contain mercury.
