A Toyota Camry rear defroster can fail in several ways. The entire window may stay fogged, one or two horizontal bands may remain cloudy, or the switch may not respond. Each symptom points toward a different fault. Start by identifying your exact model year and equipment, then inspect the fuse information, glass grid, side terminals, power supply, and ground in a safe order.
Quick Answer
Check the switch indicator, but do not treat it as proof of a good circuit. Use the exact Camry owner’s manual to identify the fuse, inspect the glass tabs and every grid line, then test DC voltage at the window. Repair small breaks only; use a technician for repeated fuse failures, wiring faults, detached tabs, or damaged glass.
Key Takeaways
- The rear defroster uses an electrical grid on the glass. It does not depend on the heater core or an HVAC blend-door actuator.
- A dark switch indicator may point to a fuse, switch, wiring, control-panel, or power-supply problem, but the indicator alone cannot identify the failed part.
- If only one or two horizontal bands stay fogged, a broken grid line is more likely than a main fuse failure.
- Use DC-voltage mode for powered testing. Use resistance or continuity only after the circuit is switched off and isolated.
- Never bridge the two powered terminals with a meter set to amperage or with its red lead connected to a current jack.
- Replace a fuse only with the specified type and rating. A second blown fuse or a non-owner-serviceable high-current fuse requires professional diagnosis.
At a Glance
| Time Required | About 15–30 minutes for visual and fuse checks; approximately 45–60 minutes for careful voltage testing |
| Difficulty | Easy for visual checks; moderate for electrical testing and grid repair |
| Tools Needed | Exact owner’s manual, flashlight, fuse puller if specified, digital multimeter, soft cloth, low-tack tape, and an optional grid repair kit |
| Cost | Usually low for inspection, an owner-serviceable fuse, or a small grid repair; substantially higher for wiring, controls, terminal bonding, tint removal, or rear-glass replacement |
How the Camry Rear Defroster Works and What the Symptoms Mean
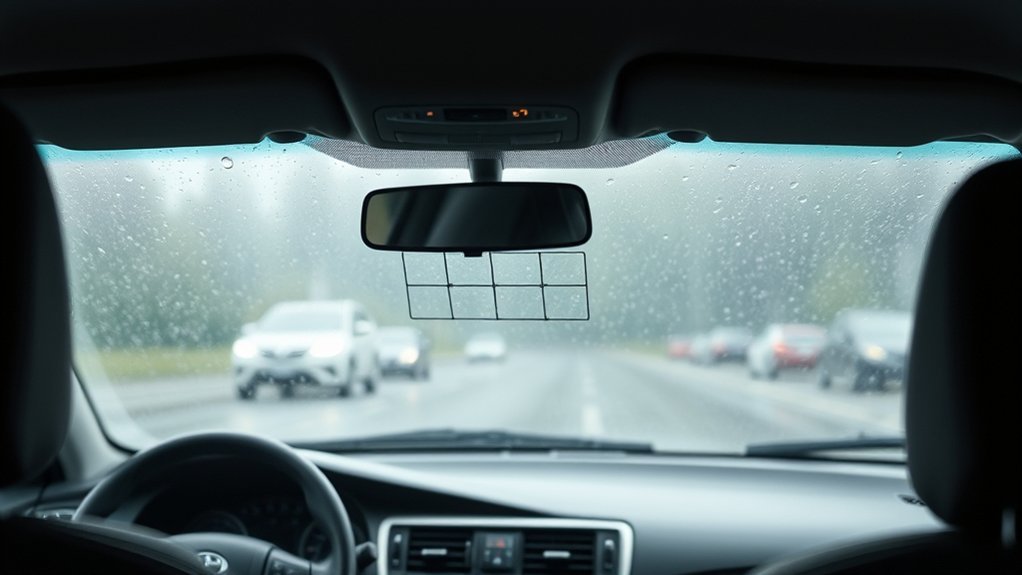
Your Camry’s rear window defogger works differently from the front windshield defroster. The front system directs heated or dehumidified air through the dashboard vents. The rear system sends electrical current through thin conductive heating lines bonded to the inside of the glass.
A failed heater core or blend-door actuator can affect the front windshield defroster, but it does not normally stop the rear window’s electrical grid from heating.
The wider conductive strips at the sides of the window are commonly called bus bars. They distribute current among the horizontal heating lines, which are connected in parallel. That is why one damaged line can stop heating while the lines above and below it continue to work.
Use the Symptom as Your First Diagnostic Clue
| Symptom | More Likely Causes | Best Next Check |
|---|---|---|
| No indicator and no clearing | Operating-condition, fuse, power, switch, wiring, or control fault | Verify vehicle mode and test the model-specific fuse |
| Indicator on, entire glass stays fogged | Loose connector, detached tab, damaged bus bar, missing power or ground, or widespread grid damage | Inspect the terminals and measure voltage across the two sides |
| One or several bands remain fogged | Scratched or open horizontal grid lines | Inspect and voltage-test each affected line |
| One side clears slowly | High resistance at a tab, connector, bus bar, or ground | Compare connections and voltage behavior at both sides |
| Replacement fuse blows again | Shorted wiring, connector, relay, control, or grid circuit | Stop replacing fuses and obtain circuit diagnosis |
Common rear-defroster faults include:
- A blown fuse: The entire grid may stop working, although switch-indicator behavior depends on the model year and circuit design.
- A damaged grid line: One or more narrow strips remain fogged while the rest of the window clears.
- A loose connector: A wire may have slipped off one of the electrical tabs at the edge of the glass.
- A detached glass tab: The metal terminal may have separated from the conductive surface on the window.
- A damaged bus bar: A break in one of the wider side conductors can disable several lines or a large section of the grid.
- A poor ground or damaged wire: The grid may heat slowly, unevenly, or not at all.
- A switch, relay, or integrated control fault: The system may receive no command or power even when the fuse is intact.
- Tint-related damage: Tint installation, removal, scraping, or probing can lift or cut the conductive coating.
Do not assume the fuse is bad because the indicator does not light. The indicator is only one clue. A complete diagnosis checks the operating conditions, fuse, switch response, connectors, grid, power supply, and ground.
How to Diagnose a Toyota Camry Rear Defroster Step by Step
Work through the following checks in order. Beginning with model-specific and visual checks reduces the chance of replacing a good part, opening the wrong fuse box, or damaging the fragile grid.
Warning: Do not let a probe bridge the two rear-defroster terminals. For a powered test, put the black lead in COM, the red lead in the V/Ω jack, and select DC volts. Never connect a meter set to amps across the terminals. Switch the circuit off and isolate it before using resistance or continuity mode. Stop if you are not comfortable working around automotive wiring.
[Amazon Products Picked for You]
【1. ✅ Pro Guidance & Easy DIY—Save Time & Money! 】:Our professional coolant tester(antifreeze tester automotive) features a smart 2-in-1 design: the front side...
1. Identify the Exact Vehicle and Operating Conditions
Fuse labels, fuse types, switch behavior, mirror-heater operation, and control logic vary by Camry year and equipment. Select your exact vehicle on Toyota’s official Manuals and Warranties page before opening a fuse box or assuming a particular timer or fuse rating.
Place the Camry in Park and apply the parking brake. Start a gasoline model or place a hybrid in its normal READY mode so the 12-volt system remains supported during testing. Turn on the rear defroster and watch the indicator.
On some equipped models, the same control also operates the outside-mirror defoggers. Toyota’s 2025 Camry Quick Reference Guide, for example, shows both rear-window-only and combined rear-window/outside-mirror controls depending on equipment. Observe whether mirror condensation begins clearing, but do not touch a heated mirror surface.
2. Confirm the Failure Pattern
Give the grid a few minutes to begin working. Observe whether the whole glass stays fogged, only individual horizontal bands remain unclear, or one side clears more slowly. Partial clearing usually points toward individual grid-line damage rather than failure of the main power feed.
A rear defogger is intended to clear condensation and light frost. Remove heavy snow or thick exterior ice safely rather than expecting the electrical grid to melt all of it. Keep metal scrapers and sharp tools away from the inside conductive lines.
3. Find and Test the Correct Fuse
Turn the defroster and vehicle off before removing a fuse. Use only the fuse-box location, label, type, and rating shown for the exact vehicle. The rear-defogger circuit may use a high-current cartridge fuse rather than a small blade fuse.
If the owner’s manual identifies the fuse as owner-serviceable, remove it with the specified puller or method. A visual check may reveal a broken element, but a continuity test with the fuse removed provides a more reliable result.
If the manual does not describe owner replacement, the fuse is difficult to reach, or it is part of a high-current fusible assembly, have a qualified technician service it. Never install a higher-amperage fuse.
If a correctly rated replacement fuse blows again, stop replacing it. A shorted wire, connector, grid, relay, or control component may be drawing excessive current.
4. Inspect the Grid, Bus Bars, Tabs, and Connectors
Look closely at every horizontal heating line from one side of the window to the other. A flashlight held at an angle can make a scratch, missing coating, or break easier to see. Mark a suspected break beside the line with low-tack tape; do not place tape directly over a damaged section.
Inspect the wider vertical bus bars and the metal tabs near the edges of the rear glass. Both wire connectors should fit securely. Do not pull, twist, solder, or pry a tab because its bond to the glass can be fragile and concentrated heat may damage the glass or conductive coating.
A household adhesive may hold a loose tab physically but fail to conduct electricity. A detached terminal requires a conductive product designed for heated rear glass or professional auto-glass repair.
If the window has aftermarket tint, use extra care. A sharp probe can puncture the film or scratch through the grid. Test at exposed contacts when possible, or use a rounded probe with very light pressure.
5. Check DC Voltage Across the Grid
Confirm that the meter’s red lead is in the voltage/resistance jack, not a current jack. Set the meter to DC volts. With the rear defroster switched on, place one probe on each grid terminal or accessible connector contact without allowing the probes to touch each other.
A functioning 12-volt circuit commonly shows approximately 12–14 volts across the two bus-bar terminals while the vehicle is running or in READY mode. The exact reading depends on operating conditions, so treat voltage near the vehicle’s current electrical-system voltage as the key comparison. Defroster-testing guidance from Frost Fighter uses the same general range.
Little or no voltage across the terminals points toward a power-feed, ground, fuse, switch, relay, connector, wiring, or control problem. A normal voltage difference across the tabs confirms that voltage reaches the glass, but it does not prove that the grid is carrying current. If the glass still does not heat, inspect the tab-to-grid bonds, bus bars, and grid continuity more closely.
Note: If equipped outside mirrors begin clearing but the rear glass does not, the shared switch command may be working and the fault may be closer to the rear glass, its connector, or its dedicated wiring. If neither function works, a shared supply or control fault becomes more likely. Treat this only as a clue because circuit layouts vary.
6. Locate a Break in an Individual Grid Line
Keep the system on and the meter in DC-voltage mode. Connect the black probe to the ground-side bus bar or a verified vehicle ground. Move the red probe carefully along a suspect heating line.
Near the powered side, the reading should be close to system voltage. It should decrease as you move toward the grounded side. A sudden step or abrupt change between two nearby points can reveal an open section.
Use a rounded probe and light pressure. A small piece of aluminum foil wrapped smoothly around a sharp probe tip can create a broader contact surface, but it must not bridge neighboring lines. Do not pierce tint film or scrape the conductive coating.
Note: Factory wiring, relay, control-panel, and connector tests differ by year. Toyota’s Technical Information System provides model-specific repair manuals and wiring diagrams for advanced diagnosis.
7. Select the Correct Repair
- Confirmed owner-serviceable blown fuse: Replace it once with the exact specified type and rating after checking for obvious connector or wire damage.
- Small grid-line break: Use a purpose-made conductive grid repair kit. Clean, mask, apply, and cure the repair exactly as directed.
- Detached electrical tab: Use a tab-bonding system intended for heated rear glass or have an auto-glass specialist repair it.
- No power at the glass: Diagnose the switch, relay or integrated control, wiring, connectors, power feed, and ground.
- Widespread grid, bus-bar, tint, or glass damage: Professional repair or rear-glass replacement may be more dependable than multiple small patches.
Repair-product instructions take priority over a universal waiting period. For example, the current Permatex Window Defogger Repair Kit specifies a 24-hour cure before activating the system. Do not reconnect a repaired terminal or power a repaired line before the chosen product allows it.
8. Verify the Repair
After the full cure time, reconnect only the components removed for testing. Start the engine or place the hybrid system in READY mode, switch on the defroster, and confirm that the repaired area clears with the surrounding lines.
Check that the connectors remain secure, the switch operates normally, and the fuse does not fail again. Stop immediately if you smell hot insulation, see arcing, notice a rapidly heating connector, or the replacement fuse opens.
Symptom-Based Troubleshooting for a Camry Rear Defroster
Your Camry’s symptoms can help narrow the fault before you begin detailed circuit testing.
[Amazon Products Picked for You]
Precise Repair of Defrosting Lines: When a line breaks due to scratches or aging, causing the window defrosting function to fail, simply use a brush to trace the break to rebuild the conductive path and restore the function of the entire defrosting grid

Highly Efficient Conductivity: After drying, the rear window defroster repair kit film achieves extremely low surface resistance, easily transforming non-conductive surfaces into conductors.

Easy-to-use: LOCTITE Rear Window Defogger kit allows you to replace your defogger tab yourself with no special tools required.
The Defroster Button Does Not Light
Check the operating conditions listed in your owner’s manual and inspect the correct fuse. If the fuse is good, the switch, climate-control panel, connector, wiring, power supply, or integrated control may be at fault. Do not replace the rear glass based on the indicator alone.
The Button Lights but the Entire Window Stays Fogged
Inspect both glass terminals and their wire connectors. Test DC voltage across the two tabs while the system is on. No or unusually low voltage points toward the supply or ground circuit. Voltage near the supported 12-volt-system level with no heating points toward a poor tab bond, damaged bus bar, open grid network, or other glass-side fault.
Only One or Several Strips Stay Fogged
A partial failure usually indicates a break in one or more horizontal grid lines. Inspect the boundary between the clear and fogged areas, then use careful voltage testing to locate each open section. There may be more than one break.
One Side Clears More Slowly Than the Other
Check the bus bars, tabs, connectors, and ground connection for looseness, corrosion, heat damage, or missing conductive material. Excess resistance at a connection can reduce heating performance without shutting down every line.
The Heated Mirrors Work but the Rear Window Does Not
On a Camry where the same switch controls both functions, working mirror heaters suggest that at least part of the switch command and shared control path is operating. Focus next on the rear-glass connector, dedicated wiring branch, tabs, bus bars, and grid. Confirm the exact wiring diagram before treating this observation as proof.
Neither the Heated Mirrors nor Rear Window Works
If both functions are fitted and both remain inactive, inspect the operating conditions, shared switch command, relevant fuses, power supply, and control circuit. Separate mirror and window fuses or branches may still exist, so use the exact diagram.
The Replacement Fuse Blows Again
Do not install a larger fuse or continue replacing the same fuse. Repeated failure may indicate a shorted wire, damaged connector, faulty relay or integrated control, or a grid-related circuit problem. A technician should trace the circuit with the correct wiring diagram.
The Defroster Turns Off by Itself
Automatic shutoff may be normal. Many rear defoggers operate for a timed cycle to limit electrical load and glass heating. The cycle length and operating conditions differ by model year, so compare the behavior with the instructions for your exact Camry before treating it as a malfunction.
When to Call a Professional for Rear-Defroster Trouble
Basic inspection and owner-manual fuse checks are reasonable DIY tasks. More complex problems need factory wiring information, controlled electrical testing, or specialized glass-repair materials.
Arrange professional diagnosis when:
- The correctly rated replacement fuse blows again.
- The fuse is a high-current or non-owner-serviceable type.
- No power reaches the rear glass even though the identified fuse tests good.
- A terminal has pulled away from the glass.
- Several grid lines, a bus bar, or a large section of conductive coating is damaged.
- The rear glass is cracked, delaminated, or affected by a previous glass or tint installation.
- The switch or control panel does not respond correctly.
- A connector shows melting, discoloration, arcing, or excessive heat.
- You cannot identify a reliable ground or safely reach the connectors.
A technician can compare voltage, ground integrity, current flow, control commands, and wiring continuity with the factory diagram. An auto-glass specialist can determine whether a damaged grid or detached tab can be repaired without replacing the window.
[Amazon Products Picked for You]

Quickly and easily bonds defogger tab to grid on rear window

RELIABLE BONDING: Securely bonds metal tabs back to rear window defrosters and defoggers. Our high-silver content ensures MAXIMUM ELECTRICAL CONDUCTIVITY for an efficient defroster repair. Quick and easy self-repair solution for restoring your rear window defroster functionality.

Replacement connector for rear window defrosters / defogger connectors
What the Repair May Involve
An owner-serviceable fuse or loose connector is usually the simplest repair. A small grid break may require several coats of conductive material and a full curing period. Detached tabs need a specialized conductive bond. Wiring, switch, relay, or control faults require electrical diagnosis, while extensive grid or glass damage may require rear-window replacement.
Because those repairs differ greatly, a single universal price range is not reliable. Ask the shop to identify the failed component and explain whether it plans to repair the grid, bond a tab, repair the wiring, replace a control component, or replace the glass before approving the work.
Best Practices for Protecting the Camry Rear-Defroster Grid
The rear grid does not require scheduled electrical maintenance, but careful cleaning, cargo placement, and inspection can prevent accidental damage.
- Follow the cleaning instructions in the owner’s manual for your exact Camry.
- Many Toyota manuals recommend a soft cloth dampened with lukewarm water for the inside rear glass.
- Wipe gently in strokes parallel to the horizontal heater lines rather than scrubbing across them.
- Do not use glass cleaner on the grid unless the exact manual permits it; Toyota’s instructions differ among generations.
- Avoid razor blades, metal scrapers, abrasive pads, and harsh rubbing on the inside conductive coating.
- Do not attach tape, stickers, suction mounts, adhesive accessories, or cargo directly over the lines or terminals.
- Make sure luggage and rear-deck items cannot strike a glass terminal or rub against the grid.
- Tell a tint installer that the glass contains a defogger grid, and use care if old tint must be removed.
- Clear heavy snow and thick exterior ice safely instead of relying on the grid to melt it.
- Inspect both electrical tabs before winter or a rainy season.
- Do not replace the fuse as preventive maintenance. Test it only when a fault occurs.
Pro Tip: Test the rear defroster before cold weather arrives. A few minutes of inspection in dry conditions is easier than tracing an electrical fault while the rear window is covered with frost or condensation.
Running the front defroster and air conditioning may lower cabin humidity and reduce general window fogging. However, that does not repair a failed rear grid, fuse, connector, tab, ground, or power circuit.
Frequently Asked Questions
What can cause a Toyota Camry rear defroster not to work?
Possible causes include an incorrect operating condition, blown fuse, loose wire connector, detached glass tab, broken grid line, damaged bus bar, poor ground, faulty switch, relay or integrated-control problem, damaged wiring, or rear-glass and tint damage. The symptom pattern helps identify which part to test first.
What is the most common rear-defroster problem on a Toyota Camry?
No single failure applies to every Camry model year. Partial clearing often points to a scratched or open grid line. A completely dead window can involve the fuse, tabs, connectors, ground, wiring, switch, relay, or control circuit.
Is there a fuse for the Toyota Camry rear defroster?
Yes, the rear-defogger circuit is fuse-protected, but the fuse label, type, rating, location, and associated circuits vary by model year. Use the diagram for the exact vehicle, and do not attempt to replace a high-current fuse unless the owner’s manual describes it as an owner-serviceable procedure.
How much does it cost to fix a rear defroster?
The cost depends on the failure. An owner-serviceable fuse or loose connector is usually less involved than a tab repair, wiring diagnosis, switch or control replacement, tint work, or complete rear-glass replacement. Request a component-level diagnosis rather than relying on a universal price estimate.
Why do only some rear-defroster lines work?
The horizontal lines are arranged so individual lines can continue operating independently. A scratch or open section can stop current through one line while the remaining lines continue to heat. A purpose-made conductive repair may restore a small, accessible break.
Why does the rear defroster turn off automatically?
A timed shutoff can be normal and helps manage electrical load and glass heating. The cycle length and operating conditions vary, so compare the behavior with the instructions for your Camry’s model year.
Can I test a Camry rear defroster with a multimeter?
Yes. Use DC-voltage mode for powered tests, with the black lead in COM and the red lead in the V/Ω jack. Never bridge the terminals in amperage mode. Turn the circuit off and isolate it before testing resistance or continuity.
What does it mean if the heated mirrors work but the rear window does not?
On models where the functions share a switch, working mirror heaters suggest that part of the command circuit is operating. The fault may be closer to the rear-glass wiring, connector, tabs, bus bars, or grid. Confirm the exact circuit because mirror and rear-window branches can differ.
Conclusion
If your Toyota Camry’s rear defroster is not working, use the symptom to guide the diagnosis. A completely dead window calls for model-specific fuse, tab, connector, power, ground, and control checks. A few fogged strips usually point toward damaged grid lines.
Use the exact model-year manual, confirm that your multimeter leads are in the correct jacks, test live circuits only in DC-voltage mode, and never install a larger fuse. Small grid breaks may be repairable, but repeated fuse failures, detached tabs, control faults, overheated connectors, and widespread glass damage are better handled by a qualified technician.
Sources
- Toyota Manuals and Warranties — model-specific operating instructions, cleaning guidance, fuse information, and equipment details
- 2025 Toyota Camry Quick Reference Guide — current-generation rear-window and outside-mirror defogger control configurations
- Toyota Technical Information System — factory repair manuals, wiring diagrams, service bulletins, and diagnostic information
- Permatex Window Defogger Repair Kit Instructions — conductive grid and terminal repair preparation, application, and curing guidance
- Frost Fighter Defroster Troubleshooting Guide — tab-to-tab voltage testing and grid-break location procedures
- Fluke Multimeter Inputs and Measurement Functions — correct voltage-jack selection and meter-safety guidance
