
Creating a drone hyperlapse means combining time-lapse photography with controlled drone movement so traffic, clouds, water, shadows, lights, or other changing elements move rapidly while the camera also travels through space. For a reliable result, choose a scene with visible change, confirm a safe and legal flight path, plan your interval and final clip length, keep exposure consistent, use the Hyperlapse mode that matches the shot, and finish the sequence with careful editing and light stabilization.
Last updated: September 21, 2026 — reviewed against current DJI Hyperlapse guidance and FAA recreational-flight guidance.
Quick Answer
To create a drone hyperlapse, choose a scene with visible movement, confirm a safe flight route, calculate how long the sequence needs to run, and select a stable flight mode such as Free, Circle, Course Lock, or Waypoints when your drone supports it. Keep exposure and white balance consistent, save the original photos when available, maintain a smooth route, then batch-edit the sequence, apply only the stabilization it needs, and export at the correct aspect ratio for your platform.
Key Takeaways
- A strong hyperlapse needs visible change, such as traffic, boats, clouds, crowds, shadows, lights, or moving water.
- Calculate frames and capture time before takeoff so the planned sequence fits your available battery and route.
- On supported DJI drones, Free, Circle, Course Lock, and Waypoints create different camera paths; available settings vary by model and app version.
- Fixed exposure and white balance help prevent frame-to-frame flicker, while original photos provide more editing flexibility when your drone can save them.
- Safe airspace, visual line of sight, obstacles, weather, battery reserve, and the return route matter as much as the creative settings.
At a Glance
| Time Required | Several minutes per sequence, plus flight setup and editing time; exact capture time depends on interval and final frame count |
| Difficulty | Beginner to intermediate, depending on route complexity and editing |
| Tools Needed | Drone with Hyperlapse or interval shooting, suitable memory card, charged batteries, planned location, and editing software if you want to process the original image sequence |
| Best Subjects | Traffic, clouds, boats, changing light, moving shadows, coastlines, city activity, and other scenes with visible change |
What Is a Drone Hyperlapse and When Should You Use It?
A hyperlapse combines time compression with controlled camera movement. A conventional time-lapse normally keeps the camera in one position, while a hyperlapse changes the camera’s position as the sequence progresses.
The technique works best when the scene contains movement that becomes more obvious after time is compressed. Traffic can turn into streams of light, clouds can sweep through a skyline, boats can cross a harbor quickly, and long shadows can move across buildings while the drone advances through the scene.
Choose a location where drone movement and subject movement support each other. Roads, bridges, waterfronts, coastlines, construction sites, train corridors, and changing skies can all work when you have a legal and unobstructed route.
Do not use Hyperlapse simply because the mode is available. If the scene is almost completely static, a normal aerial video or still photograph may communicate the subject more clearly.
For broader composition and movement techniques outside Hyperlapse, see the site’s cinematic drone shots guide.
What Drone Hyperlapse Settings Matter Most?
Before takeoff, set the capture around five decisions: interval, final duration, flight path, exposure consistency, and image storage. Exact controls vary by drone, app, and firmware, so confirm your aircraft’s current manual rather than assuming every Hyperlapse menu is identical.
Plan the finished clip before the flight. Knowing the frame count, interval, route, and return margin prevents a creative idea from becoming a sequence your battery cannot safely complete.
On DJI aircraft covered by DJI’s current Hyperlapse guidance, supported modes include Free, Circle, Course Lock, and Waypoints. Some DJI Fly implementations expose interval times from 2 to 15 seconds, generated-video durations from 2 to 30 seconds, and maximum flight-speed controls from 0.1 to 3 m/s. These ranges are model-dependent, so use the values shown by your own aircraft rather than treating them as universal specifications.
Use manual exposure and fixed white balance when your drone allows it and the light is reasonably stable. Automatic changes between frames can create visible brightness or color jumps after the sequence is accelerated.
Keep ISO as low as practical for the available light. Choose shutter speed according to the look you want and the conditions you can safely fly in. A longer exposure can add motion blur, but wind and aircraft movement make long exposures harder to keep sharp. If bright light prevents the shutter speed you want, a compatible ND filter can reduce incoming light.
For deeper guidance on ISO, shutter speed, and ND filters, use the drone camera settings guide.
If the aircraft can save the original Hyperlapse photos, keep them when you want maximum editing control. Built-in generated video is faster, while an original image sequence gives you more control over exposure, color, cropping, deflicker, and stabilization in post-production.
Warning: Camera settings never override flight safety. Stop or abandon the sequence if wind, obstacles, aircraft traffic, signal conditions, battery warnings, people, vehicles, or changing airspace conditions make the route unsafe.
How Many Photos Does a Drone Hyperlapse Need?
For a Hyperlapse you assemble manually from still images, calculate the required frame count before you fly:
- Required frames = final video duration in seconds × playback frame rate.
- Approximate capture time = required frames × shooting interval.
For example, a 10-second final clip at 24 frames per second needs 240 images. With a 2-second capture interval, those 240 images take about 480 seconds, or 8 minutes, to capture.
A longer interval makes the real-world capture take longer for the same final frame count. It also increases the change between individual frames. A shorter interval records the scene more frequently and usually creates smaller changes from frame to frame.
If your drone’s built-in Hyperlapse mode asks for interval and final video duration, use the app’s calculated shooting time and required image count. Keep enough battery reserve for the route home instead of treating the displayed capture duration as your entire usable flight time.
| Example | Frames Needed | 2-Second Interval |
|---|---|---|
| 5 sec at 24 fps | 120 frames | About 4 minutes |
| 10 sec at 24 fps | 240 frames | About 8 minutes |
| 15 sec at 24 fps | 360 frames | About 12 minutes |
Which Hyperlapse Flight Mode Should You Use?
On supported DJI drones, the four common Hyperlapse modes solve different movement problems. Pick the path first, then choose the mode that creates it with the least unnecessary control input.
| Mode | Best Use | Main Planning Concern |
|---|---|---|
| Free | Manual movement and flexible framing | Avoid abrupt stick or gimbal changes |
| Circle | Orbiting a clearly defined central subject | Confirm the entire orbit is obstacle-free |
| Course Lock | Straight movement along a road, river, coastline, or skyline approach | Plan the complete locked direction and return route |
| Waypoints | Preset routes with planned framing changes | Inspect every segment for terrain and obstacles before starting |
Understanding Flight Modes
Free Mode gives you the most direct control over aircraft movement and gimbal angle. It is flexible, but every unnecessary correction can become visible when the sequence is accelerated.
Circle Mode keeps a selected point of interest at the center of an orbit. It fits towers, landmarks, buildings, boats, or landscapes with one dominant subject, provided the full circular path is safe.
Course Lock Mode locks a flight direction. The aircraft can continue along that direction while its orientation or subject framing changes according to the supported implementation, making it useful for linear features such as roads, rivers, bridges, and coastlines.
Waypoints Mode follows a preset path. It is useful when the shot needs deliberate changes in position or framing, but the planned route should be inspected carefully because an automated path does not make obstacles disappear.
How to Match the Mode to the Subject
Use the simplest mode that creates the intended camera movement. A straight road rarely needs a complicated waypoint route if Course Lock can produce the shot. A monument that needs a controlled orbit is usually easier to frame with Circle than with constant manual input.
Keep enough separation between the drone and nearby foreground objects. Small position changes are much more obvious when a close object crosses the frame than when the foreground is farther away.
Adjust the Movement Before the Camera
Run a short rehearsal before starting the full sequence. Confirm that the route, height, framing, obstacle clearance, gimbal direction, and return path make sense at normal speed. If a route looks confusing during a rehearsal, speeding it up will rarely fix it.
Pro Tip: Record a short normal-speed test of the planned movement. Review the horizon, foreground motion, and framing before committing several minutes of battery to the Hyperlapse.
How Do You Plan a Safe Hyperlapse Flight?
Scout the route before takeoff. Identify the takeoff and landing area, the complete camera path, obstacles, terrain changes, wind exposure, signal concerns, emergency landing options, and the distance needed to return safely.
For U.S. recreational flying, current FAA guidance requires pilots to keep the drone within visual line of sight, pass TRUST and carry proof, obtain authorization before flying in controlled airspace, and fly at or below 400 feet in Class G airspace. Recreational drones weighing 250 grams or more generally require FAA registration. Drones that are required to be registered or are registered must comply with Remote ID unless an applicable exception such as eligible FRIA operation applies. Pilots outside the United States should check their own aviation authority’s current rules before flight.
DJI geofencing or an in-app unlock is not a substitute for legal airspace authorization. For a deeper explanation, see how to unlock drone geofencing safely and legally.
Choose the time of day around both light and movement. Golden hour can create changing shadows; blue hour can emphasize traffic and city lights; daytime can provide simpler exposure when the light remains stable.
Before starting a long moving sequence, confirm your Return-to-Home settings and home point. The site’s Return-to-Home setup guide covers the broader RTH workflow.
How Do You Capture the Hyperlapse?
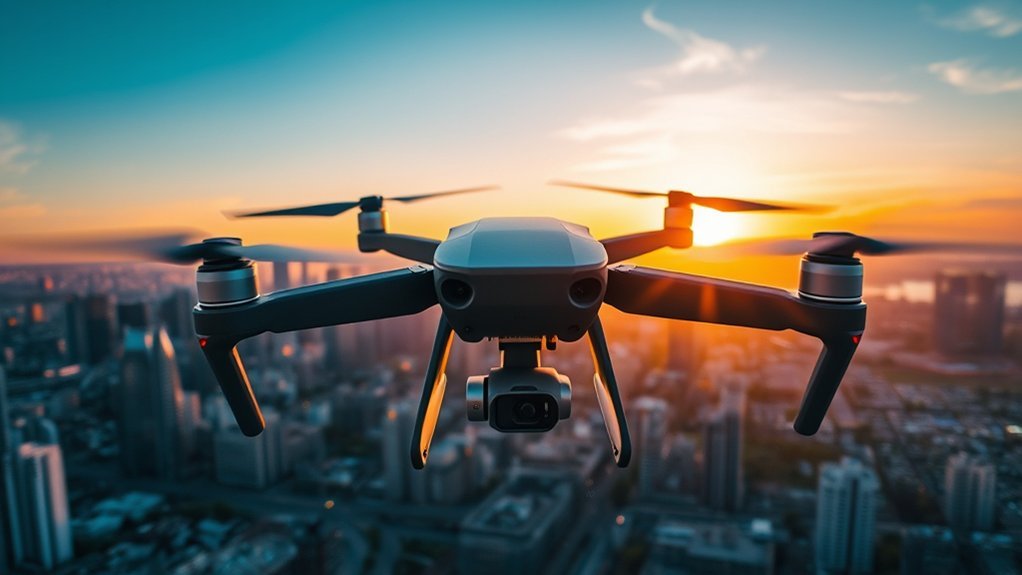
Before starting the sequence, confirm that the memory card has enough free space, the battery is adequately charged for the planned capture plus a safe return, the home point and route are correct, and the intended Hyperlapse mode is active.
Set the interval and desired final duration or image count. Review the app’s estimated shooting time when the aircraft provides one. Do not start a sequence that consumes the battery margin needed to return and land safely.
Start the Hyperlapse only after the aircraft is stable and the framing matches the rehearsal. During capture, monitor the route, battery, wind, other aircraft, people, obstacles, and app warnings instead of concentrating only on the screen.
Avoid unnecessary gimbal movements and sudden course corrections. Consistent motion gives the editor cleaner frames and reduces the amount of stabilization or cropping required later.
Keep the Flight Path Predictable
For straight movement, Course Lock can reduce steering corrections. For a central subject, Circle can automate an orbit. Waypoints can create a preset route when your model supports it, while Free remains useful when the shot genuinely requires manual control.
Automated flight does not transfer responsibility to the aircraft. Be prepared to interrupt the capture if the planned route becomes unsafe.
Plan Battery Reserve, Not Just Capture Time
Hyperlapse capture can consume several uninterrupted minutes. Wind, temperature, battery condition, route length, and the return flight all affect usable flight time.
Start with a healthy battery and use the aircraft’s battery information and warnings throughout the operation. If the remaining margin becomes uncomfortable, abandon the sequence and return safely rather than trying to complete a few extra frames.
For repeat attempts, carry suitable spare batteries and allow them to cool or warm as required by the manufacturer’s operating guidance before reuse or charging.
How Should You Organize Hyperlapse Files?
A Hyperlapse can produce hundreds of still images plus one or more generated preview videos. Separate the source sequence from exports so a missing, duplicated, or out-of-order frame does not become an editing problem.
Treat the original image sequence as the master. Keep it intact, copy it before major edits, and export finished videos to a separate folder.
- Organize by Date and Location: Use a clear folder name such as “2026-09-21_Downtown_Bridge_Hyperlapse.”
- Preserve Originals: Keep the original photos exactly as captured before batch processing.
- Keep Frame Order: Avoid renaming or moving individual frames in a way that breaks sequence order.
- Back Up Before Editing: Copy important source sequences to a second storage location.
- Separate Exports: Keep previews and final videos away from the source-photo folder.
If a flight produces unusual behavior or warnings, the site’s drone flight-log guide explains what flight logs can show after the operation.
How Do You Edit a Drone Hyperlapse From Photos to Video?
Begin by selecting a representative image in Lightroom or another photo editor. Correct exposure, white balance, highlights, shadows, contrast, and color, then apply compatible settings across the full sequence.
Check frames from the beginning, middle, and end after synchronizing the edit. Light can change during a long capture, so one adjustment may not look equally natural across the entire sequence.
Import the ordered images into Final Cut Pro, Premiere Pro, DaVinci Resolve, After Effects, or another editor that can turn a sequential image set into video. Set the project frame rate before judging the final speed.
After the image sequence is playing correctly, crop or reframe only as much as necessary. Apply stabilization conservatively. Stabilization works by compensating for frame-to-frame movement and can require scaling or cropping, so excessive correction can reduce the usable frame or distort motion.
Watch the complete clip after stabilization and look for brightness flicker, color shifts, sudden position jumps, tilted horizons, excessive crops, and motion that is difficult to follow.
Note: If brightness or color flickers from frame to frame, check whether exposure or white balance changed during capture before trying to hide the problem with heavier stabilization or grading.
How Do You Export a Drone Hyperlapse?
Export only after reviewing the entire sequence at normal playback speed. Check the beginning and end of the movement, horizon, crop, color consistency, and whether stabilization has introduced warping or distracting edge movement.
Choose the aspect ratio for the destination rather than cropping blindly. A 9:16 vertical project fits platforms such as Instagram Reels, TikTok, and YouTube Shorts, while 16:9 fits conventional landscape video and YouTube viewing.
- Re-center the Main Subject: Crop only as much as required by stabilization or the target aspect ratio.
- Check the Start and Finish: Trim setup frames, abrupt corrections, or unwanted aircraft movement.
- Use Stabilization Carefully: Increase correction only until distracting movement is controlled.
- Check Color and Exposure: Look for frame-to-frame changes that became more obvious after time compression.
- Export a Test Version: Check the result on the type of screen where viewers are likely to watch it before publishing the final master.
What Drone Hyperlapse Mistakes Should You Avoid?
- Choosing a static scene: If nothing changes with time, the speed-up effect has little to reveal.
- Skipping capture-time math: A sequence can require far more real-world time than its final duration suggests.
- Using changing exposure or white balance: Frame-to-frame changes can become obvious flicker.
- Flying too aggressively: Sharp turns, sudden altitude changes, and abrupt gimbal movement make motion harder to stabilize.
- Planning only the outbound path: Leave sufficient battery and route clearance to return and land safely.
- Putting foreground objects too close: Small aircraft movements appear larger against nearby objects.
- Skipping file organization: Missing or out-of-order frames interrupt an otherwise usable image sequence.
- Overusing stabilization: Excessive correction can crop too tightly or distort lines and motion.
Frequently Asked Questions
How long does a drone hyperlapse take to capture?
For a manually assembled sequence, multiply the required number of frames by the shooting interval. A 10-second final clip at 24 fps needs 240 frames. At a 2-second interval, capturing those frames takes about 8 minutes. Built-in Hyperlapse modes may calculate the shooting time automatically after you choose the interval and final duration.
What settings matter most for a drone hyperlapse?
The key settings are the capture interval, desired final duration or frame count, flight path or Hyperlapse mode, exposure, white balance, and original-photo saving options. Keep exposure and white balance consistent when conditions allow, and use the interval and duration controls shown by your specific drone because available ranges vary by model and app.
Which DJI Hyperlapse mode should I use?
Use Free for manual movement, Circle for an orbit around a central subject, Course Lock for a controlled direction such as a road or coastline, and Waypoints for a preset route when your DJI model supports those modes. Choose the simplest mode that creates the camera path you need and verify the entire route is safe before starting.
Do I need RAW photos for a drone hyperlapse?
No. A drone can create a usable Hyperlapse without RAW source files when its built-in mode generates the final video. Saving original photos, especially RAW when supported, gives you more control over exposure, color, cropping, deflicker, and sequence processing during post-production.
Why does my drone hyperlapse flicker?
Flicker often appears when brightness, white balance, or lighting changes between frames. Use consistent manual exposure and fixed white balance when conditions allow, inspect the sequence before export, and batch-process related frames consistently. Changing natural light may still require gradual corrections during editing.
Why does my drone hyperlapse look shaky?
Wind, abrupt control input, aggressive route changes, changing gimbal angles, and close foreground objects can make frame-to-frame movement more obvious. Use a smoother route, keep more distance from nearby foreground objects, fly only in suitable conditions, and apply moderate stabilization during editing when needed.
Sources
- DJI Support — Using the Hyperlapse with Your Drone — supports current DJI Hyperlapse modes, model applicability, interval/duration controls, route behavior, and generated-video workflow.
- FAA Recreational Flyers & Community-Based Organizations — supports current U.S. recreational requirements including TRUST, visual line of sight, controlled-airspace authorization, and Class G altitude guidance.
- FAA Remote ID — supports current Remote ID applicability and compliance methods.
- FAA — How to Register Your Drone — supports recreational registration thresholds and Remote ID applicability for registered/registration-required aircraft.
- Adobe Lightroom Classic Help — supports copying and batch-applying edit settings across multiple photos.
- Apple Final Cut Pro User Guide — Correct Shaky Video — supports adjustable video stabilization and its effect on frame movement.
Conclusion
A smooth drone hyperlapse starts before the aircraft leaves the ground. Choose a scene with visible change, calculate the frame count and capture time, inspect the entire route, confirm the legal and battery margins, and select the simplest flight mode that creates the movement you want.
For your first attempt, keep the sequence short. Rehearse the route, capture one controlled Hyperlapse, review its flicker, framing, motion, and stabilization needs, then use what you learned to plan a longer or more complex route on the next flight.
