
To color grade drone footage for free, first identify whether your clip was recorded in a standard color profile, a flat profile, or a log profile such as DJI D-Log or D-Log M. In DaVinci Resolve, correct exposure and white balance with scopes, apply the correct technical transform when log footage needs one, then add a restrained creative grade and match your shots before export. Stable capture and clean exposure still matter, because editing cannot recreate detail that was clipped or never recorded.
Last updated: September 21, 2026
Quick Answer
To color grade drone footage for free, identify the recording profile first. Correct exposure and white balance in DaVinci Resolve with the waveform, RGB Parade, and vectorscope. If you shot DJI D-Log or D-Log M, use the correct profile-specific technical transform or official LUT before building the creative look. Keep shadows and highlights within usable range, match neighboring shots, and use effects such as vignette or glow only when they improve the scene.
Key Takeaways
- Identify the footage profile before grading. Standard footage, DJI D-Log, and D-Log M do not all use the same conversion workflow.
- Use color correction first to balance exposure, white balance, contrast, and shot-to-shot consistency; use grading afterward to create the mood.
- DaVinci Resolve is a strong free grading option, but test your source media first because current Free and Studio codec/bit-depth support is not identical.
- A technical LUT converts a camera profile; a creative LUT creates a look. Do not treat them as the same thing or double-apply a log conversion.
- Cinematic effects should support the story. Heavy glow, intense saturation, crushed blacks, and strong vignettes usually make aerial footage look less natural.
At a Glance
| Time Required | 20 to 60 minutes for a short drone clip, depending on stabilization, profile conversion, color work, shot matching, and export settings |
| Difficulty | Beginner to intermediate |
| Tools Needed | Drone footage, DaVinci Resolve or another current free editor, a consistent display, and the correct manufacturer LUT when your recording profile requires one |
| Cost | Free with compatible footage and a free editor; test high-bit-depth log clips before building the project around a specific free application |
Identify Your Color Profile Before You Grade
Do not start by adding contrast or dropping a cinematic LUT onto every clip. First determine what the camera recorded. A standard color profile may already contain normal-looking contrast and saturation, while log footage is intentionally encoded for a different post-production workflow.
DJI currently provides separate official conversion LUTs for profiles such as D-Log and D-Log M. Use the transform intended for the profile you actually recorded. A D-Log M clip should not be treated as full D-Log simply because both files look flat.
| Footage Type | Starting Workflow | Avoid |
|---|---|---|
| Standard / normal color | Correct exposure, white balance, contrast, and saturation directly. Add a creative look only if needed. | Applying a log-to-Rec.709 conversion to footage that is already displayed normally. |
| DJI D-Log | Use the correct D-Log technical transform or DJI’s profile-appropriate official LUT, then build the creative look separately. | Using a D-Log M transform just because the names look similar. |
| DJI D-Log M | Use the correct D-Log M technical transform or official model/profile LUT before creative styling. | Treating D-Log M as full D-Log or stacking two conversion transforms. |
| Unknown flat/log profile | Check the camera’s recording setting, metadata, manual, and manufacturer documentation before choosing a LUT or transform. | Guessing the profile based only on how washed-out the picture looks. |
A technical LUT or color transform changes footage from its camera/log encoding into a suitable viewing or working space. A creative LUT changes the style. Keep those two jobs separate. If Resolve Color Management is already handling your input and output transforms, do not add another log-to-Rec.709 LUT on top.
DJI’s current official LUT library can be checked at DJI LUT downloads.
What Is Cinematic?

For post-production, cinematic quality means making the footage feel intentional rather than simply making it darker or more saturated. The grade should support composition, movement, pacing, lighting, and sound instead of fighting them.
For drone footage, controlled motion remains important because grading cannot hide poor flight technique. Smooth reveals, slow push-ins, steady tracking shots, and clean horizon lines usually give the editor more usable material than random fast movements. For detailed shooting and flight techniques, see the site’s cinematic drone shots guide.
Color correction and color grading serve different jobs. Color correction fixes or balances exposure, white balance, contrast, saturation, and consistency. Color grading then shapes those corrected images into a deliberate visual mood.
A sunrise landscape, coastal flyover, forest sequence, and urban FPV flight should not automatically receive the same look. The grade should fit the scene and keep important colors believable.
Tools like DaVinci Resolve can help you refine exposure, color relationships, shot matching, and depth. The goal is not maximum processing. It is a sequence in which every adjustment has a reason.
Choosing a Video Editor
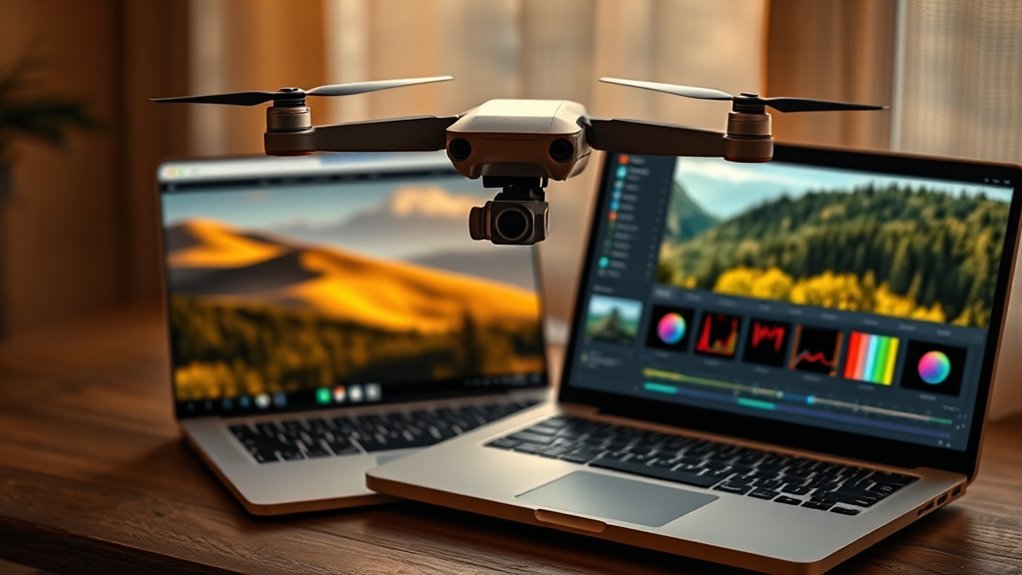
Choose a video editor that can handle your source files and gives you scopes, color controls, stabilization, LUT support, and suitable export options. DaVinci Resolve remains a strong free choice because its Color page includes professional grading tools and a node-based workflow.
Blackmagic currently states that Resolve Free can edit and finish up to 60 fps at Ultra HD 3840 × 2160 and includes extensive grading tools. It also describes the free version as working with virtually all 8-bit video formats, while Resolve Studio adds support for professional 10-bit formats and other advanced features. Check the current details on Blackmagic Design’s DaVinci Resolve page.
Compatibility Check: If your drone records 10-bit log footage, test-import one representative clip into Resolve Free before organizing the whole project. Codec and bit-depth support can differ between Free and Studio. If the file does not decode correctly, check Blackmagic’s current supported-format guidance rather than assuming every drone file will work identically.
Resolve’s node-based workflow lets you separate jobs. You might use one node for exposure and white balance, another for a technical transform when required, another for the creative look, and another for final balancing. Keeping these stages separate makes corrections easier to undo or refine.
If Resolve is not a fit, Kdenlive and Shotcut are actively maintained free alternatives. Kdenlive provides LUT support, waveform, RGB Parade, vectorscope, histogram, and proxy workflows. Shotcut provides color wheels, LUT support, stabilization, white balance, color grading, and other video filters.
When working with high-resolution videos, use proxies or optimized media if playback becomes slow. This lets you work with lighter editing copies while preserving the original source for the final render workflow.
Note: Free editing software can still be demanding. If playback stutters, use proxies or optimized media, reduce playback resolution, and close unnecessary applications before detailed grading.
Capture Settings That Make Grading Easier
Editing works best when the source footage is already usable. Whether you are recording with a drone’s built-in camera or an action camera such as a GoPro on an FPV rig, protect highlights, keep exposure consistent, and avoid unnecessary noise.
If your camera provides manual or advanced controls such as GoPro’s Protune, use them when they help you keep shutter speed, white balance, ISO, sharpness, and the recording profile consistent during the shot.
Use a flat or log-style profile when the camera supports it, the scene benefits from the extra grading flexibility, and you are prepared to use the correct post-production workflow. Do not select log simply because it sounds more professional. A standard profile can be easier when the scene does not require extensive grading.
For natural-looking motion blur, the 180-degree shutter guideline is a useful starting point: a shutter near twice the frame rate, such as about 1/60s for 30fps or 1/120s for 60fps. It is a creative guideline rather than a rule that must override correct exposure or the needs of the shot.
Keep ISO as low as practical while maintaining a usable exposure. Do not underexpose important shadows simply to force a low ISO value. If bright conditions prevent you from using the shutter speed you want, an appropriate ND filter can reduce incoming light.
Set white balance manually or lock it when consistent color across a planned shot matters. Automatic white balance can visibly shift as the camera moves between sky, trees, water, snow, and buildings.
If wide-angle distortion bends buildings or horizon lines, use an appropriate camera mode or correct lens distortion during editing when your software and footage support it.
For a deeper capture guide covering ISO, shutter speed, ND filters, frame rates, and manual exposure, see Drone Camera Settings: ISO, Shutter Speed & ND Filters.
Pro Tip: Before an important flight, record a short test clip and inspect the histogram, exposure warning, or recorded file. A capture problem is easier to correct before takeoff than after the highlights have been clipped.
How Do You Correct Drone Footage Before Grading?

Color correction is the technical cleanup stage. Before adding a warm sunset look, cool shadows, or stylized contrast, create a balanced image and make neighboring clips feel like they belong in the same sequence.
Use the Waveform, RGB Parade, and Vectorscope instead of judging everything by eye. Room lighting and display brightness can change your perception; scopes provide a repeatable reference for luminance and color balance.
| Adjustment | Useful Scope / Tool | Purpose |
|---|---|---|
| Exposure | Waveform | Checks overall luminance and highlight/shadow placement |
| Lift / Shadows | Waveform + RGB Parade | Balances darker regions without unnecessarily crushing detail |
| Gamma / Midtones | Waveform + RGB Parade | Controls important midtone brightness and color balance |
| Gain / Highlights | Waveform | Controls brighter regions while watching for clipping |
| Saturation | Vectorscope | Shows color intensity and helps prevent exaggerated skies or foliage |
Start with exposure. Protect important sky, cloud, snow, and water detail while keeping the ground readable. Reduce highlights that still contain recorded information. If a highlight channel is genuinely clipped in the source, lowering it can reduce brightness but cannot recreate missing texture.
Next, correct white balance. If the image is too blue, orange, magenta, or green, adjust temperature and tint until neutral objects and known scene colors look believable. The RGB Parade can help identify channel imbalance.
Then refine contrast. A modest curve can add depth, but excessive contrast quickly turns foliage, mountains, streets, or building interiors into featureless dark areas. Preserve texture unless a deliberate silhouette is part of the shot.
Warning: Do not grade only by how a clip looks on one bright phone or laptop display. Use scopes and review the finished file on another screen when possible. Crushed shadows and truly clipped highlights are difficult or impossible to repair after export.
How to Color Grade Drone Footage for Free
Once you know the source profile and have a technically sound starting point, build the creative grade. Keep each stage easy to isolate so one adjustment does not force you to rebuild the entire look.
- Import and identify the footage. Confirm whether each clip is standard, D-Log, D-Log M, or another flat/log profile before adding transforms.
- Build the rough cut. Select the strongest shots and establish the sequence before spending time grading footage you may later remove.
- Stabilize only where needed. Fix small shake when it improves the shot, but avoid excessive stabilization that introduces cropping or warping. For the difference between capture stabilization methods, see Drone Stabilization: Gimbal Vs Electronic.
- Correct exposure and white balance. Use the waveform, RGB Parade, and vectorscope to create a consistent technical baseline.
- Apply the correct technical transform when required. Use the appropriate manufacturer LUT, validated Color Space Transform, or color-managed input workflow for the profile you actually recorded. Do not transform normal footage as if it were log.
- Add contrast and saturation carefully. Make small changes and protect natural-looking skies, foliage, water, roads, and buildings.
- Create the look. Warm highlights, cool shadows, soften contrast, or adjust selected colors only when the treatment suits the scene.
- Match shots. Compare clips from the same scene and align their exposure, white balance, sky color, foliage, and overall contrast.
- Review and export. Toggle the grade on and off, watch the sequence from beginning to end, and inspect the exported file on another display before publishing.
Simple Node Order for Beginners
A practical Resolve node structure is: Node 1 — exposure and white balance; Node 2 — technical transform when required; Node 3 — creative look; Node 4 — final balancing and shot matching. This is a simple starting structure, not a mandatory universal pipeline. If Resolve Color Management is already performing the input/output transformation at project level, do not add a second technical conversion LUT.
Do You Need a LUT for Drone Footage?
No. A LUT is useful only when it has a defined job. Standard-color footage can often be corrected and creatively graded without any LUT. Log footage may need a technical transformation before normal viewing, and manufacturers such as DJI provide official profile-specific conversion LUTs for supported cameras.
Separate technical LUTs from creative LUTs. A technical LUT converts a camera profile such as D-Log or D-Log M toward a display or working space. A creative LUT changes the visual style. Do not apply a random cinematic LUT as a substitute for the correct log conversion.
If you use a creative LUT, treat it as a starting point rather than a finished grade. Reduce its mix or intensity if the result becomes too contrasty or saturated, then recheck highlights, shadows, skies, greens, and any people in the frame.
Adding Cinematic Effects
Cinematic effects can support a finished grade, but they should be optional. Strong source footage, correct color, consistent shot matching, and good pacing matter more than an effects stack.
Start with a subtle vignette only when it helps direct the viewer toward the subject. Feather it broadly and keep the exposure change small enough that the viewer does not notice an obvious dark ring around the frame.
If your free editor provides a glow or bloom effect without a paid-only restriction, a small amount can soften very bright reflections, sunsets, lamps, or water highlights. Keep the threshold focused on bright areas. If the effect requires a paid feature in your editor, skip it; a good free grade does not depend on glow.
Use color customization to support the subject rather than to force every clip into the same palette. Warm golden-hour footage can remain warm, while a cooler mountain or city scene may benefit from more restrained blues and neutral shadows.
Toggle individual nodes or effects on and off while grading. If an effect only looks impressive because it is stronger than the original, reduce it and reassess the sequence as a whole.
The finished image should feel deliberate without making viewers think first about the effect that created it.
Common Color Grading Mistakes to Avoid
Many drone edits look artificial because the grade is too aggressive or the wrong transform was applied. Check these problems before export.
- Wrong log conversion: D-Log, D-Log M, standard color, and other profiles should not automatically receive the same input transform.
- Double conversion: Do not apply a log-to-Rec.709 LUT if color management has already transformed the footage.
- Oversaturated skies: Deep blue can look attractive, but excessive saturation makes clouds, water, and horizons appear synthetic.
- Crushed shadows: Drama does not require removing all texture from trees, buildings, mountains, or roads.
- Blown highlights: If information was clipped during capture, lowering the highlight control cannot recreate it.
- Too much sharpening: Some drone and action-camera footage already contains substantial in-camera sharpening. Extra sharpening can emphasize noise, halos, and hard edges.
- Inconsistent white balance: Clips from the same scene should not jump noticeably from cool to warm unless the change is intentional.
- Overused creative LUTs: A creative LUT cannot replace correct exposure, white balance, or the proper technical transform.
Export Settings for Cinematic Drone Video
After editing and grading, export in a way that preserves the timeline’s intended resolution, frame rate, and color appearance. If you shot and edited a 4K project and the destination accepts 4K, exporting the finished master at the timeline’s 4K resolution can preserve more detail than unnecessarily reducing the project first.
H.264 remains a widely compatible delivery format, while H.265 can provide efficient compression where your editor, device, and destination support it. Codec availability can vary by software edition and system, so use an option your current editor can reliably encode and your destination accepts.
Match the export frame rate to the timeline unless you have a specific conversion requirement. Exporting a 30fps timeline at 60fps does not create genuinely new motion information by itself.
Detailed aerial scenes containing foliage, water, grass, rooftops, or city textures can show compression damage quickly. Use a high-quality export setting appropriate to the platform, create a clean master first, and avoid repeatedly re-encoding the same already-compressed file.
Frequently Asked Questions
How do you color grade a drone video?
Identify the recording profile first. Correct exposure and white balance with scopes, apply the correct technical transform if the footage is log, then adjust contrast and saturation, build a creative look, and match neighboring shots so the sequence remains consistent.
Where can you color grade a video for free?
DaVinci Resolve is a strong free choice for dedicated color work. Kdenlive and Shotcut are also actively maintained free editors with useful color tools. Test your actual source files before choosing an editor, especially when your drone records high-bit-depth log footage.
Which free software is best for color grading?
DaVinci Resolve is a strong first choice for most desktop color-grading workflows because it combines scopes, color wheels, curves, node-based grading, LUT support, and editing in one application. Check your media compatibility first because the Free and Studio editions do not have identical professional codec and bit-depth support.
What is the best software to edit drone footage?
DaVinci Resolve is a strong free option when your footage is compatible because it combines editing, stabilization, color tools, audio, and export controls. Kdenlive and Shotcut are useful free alternatives when their workflow or format support fits your system better.
Should you use LUTs on drone footage?
Use a LUT only when you know its purpose. A technical LUT can convert a specific log profile toward a normal viewing space, while a creative LUT adds style. Standard footage may not need a technical LUT at all. Avoid applying the wrong profile LUT or converting footage twice.
What should you do with DJI D-Log or D-Log M footage?
Confirm whether the clip is D-Log or D-Log M, then use the correct profile-specific technical transform, such as the appropriate DJI official Rec.709 LUT or a validated color-management workflow. Do not use a D-Log transform on D-Log M footage or apply a second conversion after color management has already transformed the clip.
Why does drone footage look flat before editing?
Drone footage can look flat when it was recorded in a log or flat profile designed for post-production. Low contrast and muted color are intentional parts of that encoding. Apply the correct technical workflow for the recorded profile, then correct and grade the image. Flat-looking footage does not automatically mean the file contains recoverable detail if highlights or shadows were clipped during capture.
Conclusion
Color grading drone footage works best when you separate technical correction from creative styling. Identify the camera profile first, balance the footage with scopes, use the correct transform for log material, and only then shape the mood.
DaVinci Resolve provides a capable free grading environment for compatible media, while Kdenlive and Shotcut provide current free alternatives. Whichever editor you choose, protect highlights, keep shadows useful, match clips carefully, and avoid using heavy effects to hide weak source footage.
The next time you edit a flight, start with one representative clip and build a repeatable correction-and-grade structure before copying the look across the sequence. That produces more consistent results than testing a different LUT on every shot.
Sources
- Blackmagic Design DaVinci Resolve — current Free and Studio capabilities, resolution, frame-rate, grading, and format-support context.
- Blackmagic Design DaVinci Resolve Color — supports the discussion of scopes, grading tools, nodes, and Resolve color/effects workflows.
- DJI Official LUT Downloads — supports profile-specific D-Log and D-Log M conversion guidance for supported DJI cameras.
- Kdenlive — supports Kdenlive as an actively maintained free editor with LUT, grading, scope, and proxy capabilities.
- Shotcut Features — supports Shotcut’s current free editing, color-grading, LUT, white-balance, stabilization, and effects capabilities.
- GoPro HERO13 Black Support — supports current GoPro Pro Controls and Protune context.
