
Replacing the serpentine belt on a stock 2013 Toyota Tacoma 4.0-liter V6 is a manageable DIY job when you use the correct belt, control the spring-loaded tensioner, and follow the original routing. This guide covers the standard accessory drive. Four-cylinder, supercharged, or modified Tacomas may use a different belt and routing.
Quick Answer
Photograph the original belt routing, rotate the spring-loaded tensioner to release pressure, and remove the old belt without loosening the tensioner pulley bolt. Route the replacement with its ribs in grooved pulleys and its smooth side on smooth pulleys, release the tensioner slowly, and inspect alignment before starting the engine.
Key Takeaways
- Confirm that the replacement belt matches your Tacoma’s VIN, engine, and accessory configuration.
- Rotate the tensioner through its designated tool point. Do not loosen the tensioner pulley bolt.
- Place the ribbed side in grooved pulleys and the smooth side against smooth pulleys.
- Inspect the tensioner, idlers, accessory pulleys, and surrounding area before installing the new belt.
- Never apply WD-40, grease, or belt dressing to cure accessory-drive noise.
At a Glance
| Time Required | About 30 to 60 minutes for a first-time DIY replacement |
| Difficulty | Moderate due to tight access and spring tension |
| Tools Needed | Safety glasses, gloves, 10 mm socket, long-handled ratchet or breaker bar, suitable tensioner socket, flashlight, and phone or camera |
| Cost | Varies by belt brand, VIN, and whether the tensioner or idler pulleys also require replacement |
Confirm This Guide Matches Your Tacoma
This procedure is intended for a stock 2013 Toyota Tacoma equipped with the 4.0-liter V6. The TRD Sport or TRD Off-Road package does not by itself confirm which belt you need. Engine type and accessory configuration determine belt fitment.
A 2.7-liter four-cylinder Tacoma, a truck with an aftermarket accessory, or a V6 fitted with a supercharger may have different routing and belt dimensions. Check the routing label under the hood, the removed belt, and the applicable 2013 Toyota Tacoma manuals and maintenance information.
Use your full VIN when selecting parts through the official Toyota parts catalog or another reliable fitment catalog. Do not install a belt solely because its listing mentions “Tacoma” or “TRD.”
Note: If the routing decal is missing or the accessory drive has been modified, use configuration-specific service information instead of copying a diagram from a different Tacoma.
Why You Should Replace Your Serpentine Belt
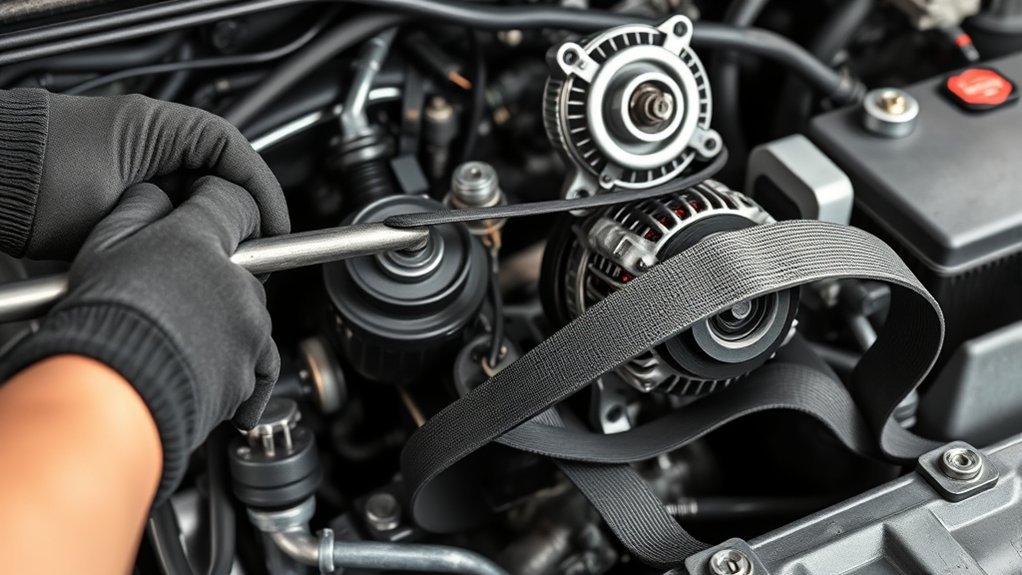
The serpentine belt transfers engine power to important accessories, including the alternator, power-steering pump, water pump, and air-conditioning compressor on the stock V6 accessory drive. A failed or displaced belt can therefore cause a charging warning, rising coolant temperature, heavy steering, and loss of air conditioning.
Do not depend on a claimed universal lifespan. Heat, age, oil or coolant exposure, pulley alignment, tensioner condition, and driving environment all affect belt life. Follow Toyota’s maintenance information and inspect the belt whenever you notice noise, visible damage, or abnormal tensioner movement.
Signs the Belt Needs Attention
- Frayed edges, separated ribs, missing material, cuts, or exposed reinforcement
- A shiny or glazed belt surface
- Oil, coolant, or power-steering fluid on the belt
- Repeated squealing or chirping after startup
- A belt that rides near the edge of a pulley
- Excessive tensioner bouncing or pulley wobble
- A battery warning light, rising temperature gauge, or suddenly heavy steering
If the battery warning light, overheating, or heavy steering begins while driving, move to a safe location and shut off the engine. Continuing to drive can discharge the battery or overheat the engine.
Tools and Parts Needed for the Job
Gather the tools and parts before placing your hands near the belt path:
- A replacement serpentine belt confirmed for your VIN and engine
- Safety glasses and fitted work gloves
- A 10 mm socket and ratchet for the engine cover, when fitted
- A long-handled ratchet, breaker bar, or belt-tensioner tool
- The socket that fits the tensioner’s designated tool point securely
- A flashlight
- A phone or camera for recording the original routing
- A clean cloth for wiping pulley surfaces
You do not have to buy a genuine Toyota belt, but you should use either a genuine part or a reputable OE-equivalent belt with verified fitment. Compare the new and old belts before installation. They should have the same rib count and closely matching effective length.
Rotate the spring-loaded tensioner to unload the belt. Do not loosen the tensioner pulley’s retaining bolt as part of normal belt removal.
Safety and Preparation
- Park on a level surface, shift into Park or neutral as appropriate, set the parking brake, and remove the ignition key.
- Let the engine cool fully. The fan, radiator, pulleys, and nearby engine parts may remain hot after driving.
- Disconnect the negative battery terminal before placing your hands in the belt path.
- Remove loose jewelry and secure long hair or clothing.
- Keep fingers clear of the tensioner’s travel path and pinch points.
Warning: The tensioner stores considerable spring force. Use a fully seated tool, maintain control throughout its travel, and release it slowly. Stop if the tool slips, the tensioner binds, or you cannot hold it securely.
Step-by-Step Guide to Removing the Old Serpentine Belt
1. Remove the Engine Cover
Remove the fasteners holding the engine cover, when fitted, using a 10 mm socket. Lift the cover carefully and place the hardware somewhere safe.
2. Record the Belt Routing
Take several clear photographs before moving the belt. Capture every pulley and the point where the belt passes around the mechanical fan. Compare your photos with the underhood routing label.
Mark which pulleys are grooved and which are smooth. This detail is more reliable than trying to remember the belt’s path after removal.
3. Release Belt Tension
Place the correct socket and long-handled tool on the tensioner’s designated tool point. Rotate the tensioner only far enough to remove pressure from the belt. Maintain steady control and do not force the tensioner against its stop.
Do not loosen the center bolt holding the tensioner pulley. The objective is to move the spring-loaded arm, not disassemble it.
4. Remove the Old Belt
While holding the tensioner in its released position, slide the belt off an accessible pulley. Slowly return the tensioner to its resting position.
Work the belt away from the remaining pulleys. If it must pass around the fan, guide it carefully between the stationary fan blades. Do not pull against the radiator or bend the belt sharply.
5. Inspect the Old Belt
Look for frayed edges, missing ribs, glazing, separation, cuts, and contamination. Uneven edge wear can point to misalignment. Oil or coolant on the belt means the leak should be repaired before the new belt is installed.
6. Inspect the Pulleys and Tensioner
With the belt removed, turn accessible idler and accessory pulleys by hand. They should rotate smoothly without grinding, rough spots, looseness, or side-to-side wobble. Do not force a pulley that is not designed to freewheel.
Check the tensioner for binding, weak return action, excessive movement, damage, or a pulley that sits out of line. Replacing only the belt will not correct a failed bearing, seized accessory, weak tensioner, or misaligned pulley.
How to Install Your New Serpentine Belt

1. Compare the New and Old Belts
Lay the belts beside each other without stretching them. Confirm the rib count and general length. A noticeably different belt may be incorrectly cataloged even if the package lists your model.
2. Route the New Belt
Guide the new belt around the stationary fan when required, then route it around the crankshaft and accessory pulleys according to your photographs and routing label.
The ribbed side must sit inside every grooved pulley. The smooth side must contact only smooth idler or tensioner surfaces. Leave one accessible pulley until last so the belt can be slipped into place while the tensioner is released.
3. Check Every Pulley
Run your fingers along the stationary belt and visually inspect each pulley. Every rib must sit inside a matching groove. The belt must not hang over a pulley edge or cross the wrong side of an idler.
Pro Tip: Route the hardest-to-reach pulleys first and leave the easiest smooth pulley or accessible accessory pulley for the final placement. This reduces the time you must hold the tensioner open.
4. Apply Tension
Rotate the tensioner to its released position, slip the belt over the final pulley, and confirm that it remains seated everywhere else. Slowly release the tensioner. Never let it snap back against the belt.
5. Complete a Final Static Check
Before reconnecting the battery, compare the finished routing with your photographs and the underhood diagram. Inspect the crankshaft pulley from more than one angle because a belt can appear seated from above while one rib remains outside a groove.
Check That Your New Belt Works Right
- Remove every tool, cloth, loose fastener, and personal item from the engine compartment.
- Reinstall the engine cover and reconnect the negative battery terminal.
- Stand clear of the fan, belt, and pulleys.
- Start the engine and observe the belt from a safe distance for several seconds.
- Confirm that the belt tracks near the center of every pulley without walking, fluttering, or jumping.
- Listen for squealing, chirping, grinding, or knocking.
- Switch on the air conditioning and turn the steering wheel slightly while stationary to confirm normal accessory operation.
- Shut off the engine and perform another visual inspection after the belt stops completely.
Warning: Never reach toward, press, or attempt to reposition a belt while the engine is running. Shut off the engine immediately if the belt moves toward a pulley edge or begins to come off.
Troubleshooting After Installation
The belt squeals: Shut off the engine and check for misrouting, fluid contamination, an incorrect belt length, a weak tensioner, or a pulley that does not turn freely.
The belt chirps once per revolution: Look for pulley misalignment, debris in a groove, edge damage, or an accessory pulley that sits at an angle.
The tensioner moves excessively: Confirm the belt length and routing. Continued bouncing may indicate a worn tensioner, damaged pulley, or accessory problem.
The belt walks off a pulley: Do not drive the truck. Check every pulley for alignment, wobble, damaged grooves, incorrect installation, or bearing failure.
The battery warning light appears, steering becomes heavy, or temperature rises: Shut off the engine. The belt may be slipping, misrouted, damaged, or no longer driving an accessory correctly.
The noise continues after a correct installation: Do not spray the belt or tensioner. A persistent noise requires inspection of the tensioner, idlers, accessory bearings, pulley alignment, and possible fluid leaks.
Frequently Asked Questions
Is It Easy to Replace a Serpentine Belt by Yourself?
It is a moderate DIY job rather than an effortless one. You need enough strength and leverage to control the tensioner, plus the patience to verify the routing in a tight engine bay. Stop and use professional service if the tensioner cannot be controlled safely.
How Much Does It Cost to Replace a Serpentine Belt on a Toyota Tacoma?
The total depends on the belt brand, local labor rate, engine configuration, and whether the tensioner or idler pulleys also need replacement. A DIY belt-only repair mainly involves the belt cost. A shop repair costs more because it includes labor and any additional failed components.
Can I Spray WD-40 on a Belt Tensioner?
No. Do not spray WD-40, grease, belt dressing, or another general lubricant on the belt or tensioner. These products can contaminate the belt and will not repair a worn sealed bearing, weak tensioner spring, alignment problem, or fluid leak.
Do You Need a Special Tool to Replace a Serpentine Belt?
A dedicated serpentine-belt tool is helpful but may not be required. A long-handled ratchet or breaker bar can work when it accepts the correct socket and provides safe clearance. The tool must fit the tensioner securely without contacting nearby components.
How Often Should a Tacoma Serpentine Belt Be Replaced?
Use Toyota’s maintenance information and replace the belt when inspection shows wear, damage, contamination, or another accessory-drive problem. Do not rely on a universal mileage promise because belt condition varies with age, temperature, leaks, pulley condition, and vehicle use.
Can I Drive With a Squealing Serpentine Belt?
A brief moisture-related sound may disappear, but repeated squealing needs prompt inspection. Stop driving if the noise occurs with a charging warning, rising temperature, belt misalignment, smoke, burning odor, or heavy steering.
Conclusion
A successful Toyota Tacoma serpentine belt replacement depends more on correct routing and tensioner control than speed. Confirm the belt by VIN, record the original path, inspect every pulley, and verify that the ribs are fully seated before startup. If the belt will not track correctly or a pulley feels rough or loose, correct that fault before driving.
Sources
- Toyota 2013 Tacoma Manuals and Warranties — owner and maintenance resources for the model.
- Toyota Technical Information System — factory repair manuals and model-specific service information.
- Official Toyota Parts Store — VIN-based parts and fitment lookup.
