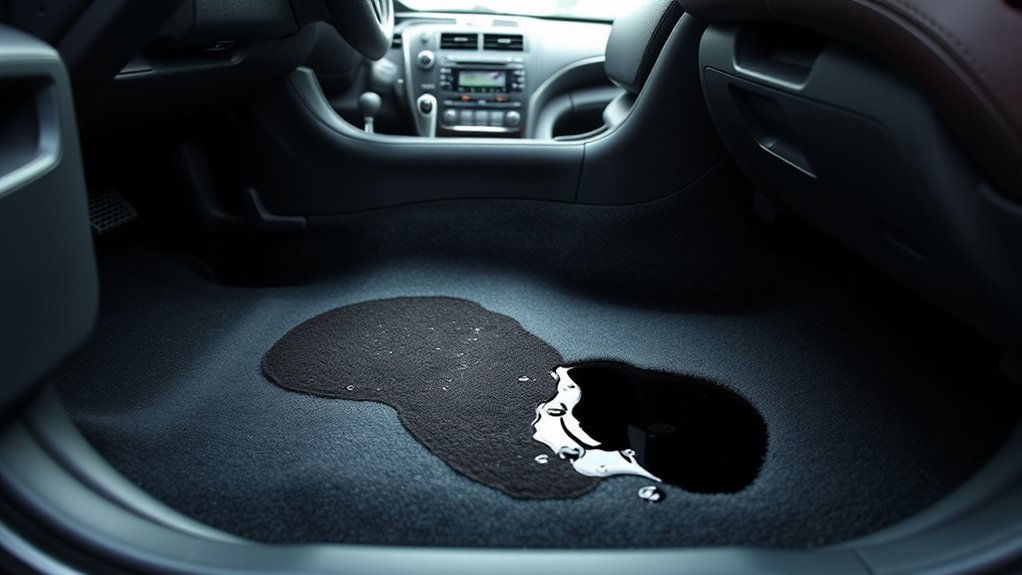
Wet carpet in your Toyota Camry can come from a leaking windshield, blocked cowl or moonroof drainage, a damaged door moisture barrier, an HVAC drain problem, or a rear body leak. Because water can travel behind trim and beneath carpet padding, the wettest area may be far from the entry point. Note when the leak occurs, record the Camry’s model year and recent repair history, protect the interior, and test one exterior zone at a time.
Quick Answer
To find a Toyota Camry rainwater leak, confirm the liquid is plain water, note whether it appears after rain, washing, or A/C use, and trace the highest damp point. Inspect the windshield, cowl, doors, moonroof drains, trunk, and body seams one zone at a time, then repair the source and dry the padding promptly.
Key Takeaways
- Water appearing only after rain or a car wash usually points to a body, glass, door, cowl, moonroof, or trunk leak.
- Clear water beneath the vehicle after air-conditioner use may be normal condensate, while wet passenger carpet during A/C use can indicate an HVAC drain problem; a missing visible drip alone does not prove a blockage.
- Do not use sharp wire, high-pressure compressed air, or a pressure washer to clear drains or test seals.
- Dry the carpet and underlying padding quickly because trapped moisture can cause odor, corrosion, and mold.
- Use the owner’s manual and model-specific repair information for your Camry’s exact year, equipment, and VIN because drain routing, trim, airbags, cameras, and electrical components vary.
At a Glance
| Time Required | About 30–60 minutes for an initial inspection and water test; drying and repairs may take longer |
| Difficulty | Beginner for visual checks; intermediate for accessible drain cleaning; professional service for glass, wiring, trim, or body-seam repairs |
| Tools Needed | Flashlight, clean towels or absorbent paper, gloves, phone or camera, low-pressure garden hose, helper, wet/dry vacuum, and plastic trim tools only when the repair procedure permits |
| Cost | Visual inspection and debris removal may cost little; glass resealing, HVAC work, electrical repairs, or body-seam repairs vary |
How to Identify and Fix Rainwater Leaks in Your Toyota Camry
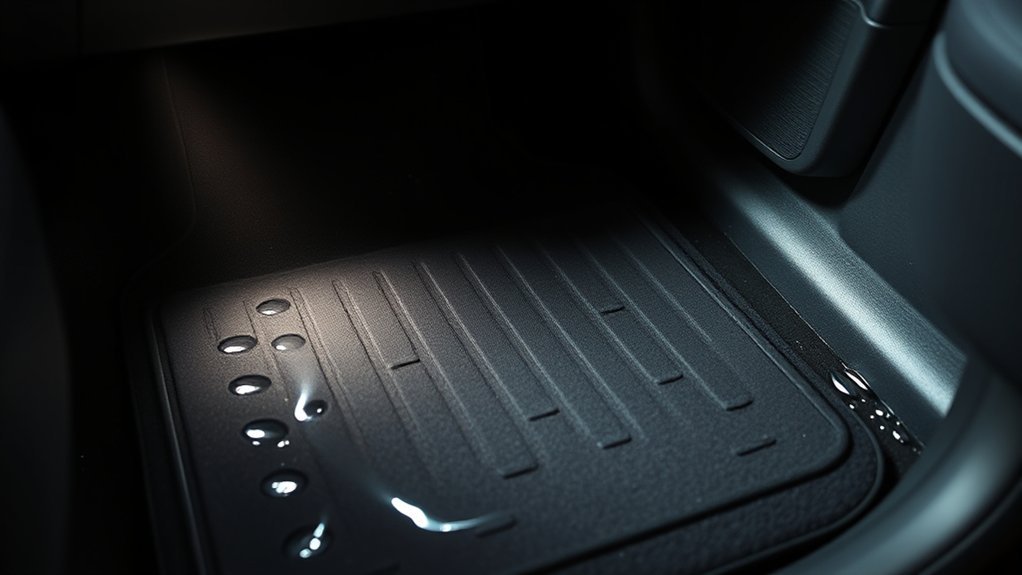
Start by noting exactly when the carpet becomes wet. Record the model year, trim, whether the car has a moonroof, the direction of the rain, the parking angle, and any recent windshield, body, roof, audio, alarm, or collision work. Water that appears after rain or a car wash usually enters through the body, glass, doors, roof, or trunk. Moisture that appears after running the air conditioner may involve the HVAC evaporator drain instead.
Next, determine whether the liquid is plain water. Rainwater and A/C condensate are normally clear and have little odor. A sweet smell, oily feel, unusual color, falling coolant level, engine overheating, or persistent windshield film may indicate a heater-core or cooling-system leak rather than rainwater.
Warning: Turn the vehicle off and arrange an inspection if the liquid appears to be coolant, the engine overheats, a warning light appears, electrical equipment behaves abnormally, or water has reached exposed modules or connectors. Do not probe wiring, airbag components, driver-assistance cameras, or hybrid-system parts beneath wet trim.
Use the location and timing of the moisture to narrow the search:
| Wet Area or Timing | Possible Sources | First Checks |
|---|---|---|
| Front passenger floor after rain | Windshield edge, cowl, fresh-air intake, door, or moonroof drain if equipped | Inspect the cowl, windshield perimeter, door seal, and upper trim for a water trail |
| Front passenger floor after A/C use | Restricted or disconnected HVAC evaporator drain | Check whether condensate drips beneath the vehicle and have the drain inspected |
| Driver floor or kick panel | Windshield, cowl seam, door moisture barrier, or roof drain | Look above the wet area for staining, damp insulation, or a trail behind trim |
| Rear floor | Rear door barrier, roof drain, rear glass, trunk, or water migrating from the front | Check rear doors, seat edges, trunk side panels, and the spare-wheel well |
| Trunk or spare-wheel well | Tail-lamp seal, trunk weatherstrip, rear glass, body seam, or pressure vent | Remove loose cargo and inspect for the highest visible water trail |
| Headliner or roof pillar | Moonroof drain, roof seam, antenna seal, or windshield upper edge | Avoid removing pillar trim near airbags unless you have the correct repair procedure |
| Leak occurs only when parked nose-up, nose-down, or on one side | Water overflowing a channel or reaching a seam only at a particular angle | Record the parking angle and repeat the test safely on level ground before changing one variable at a time |
| Wet cabin air filter or fresh-air intake area after rain | Cowl drainage, cowl seal, intake cover, or nearby body seam | Inspect only the filter and intake areas that the owner’s manual makes safely accessible |
Consult the Toyota manual for your exact Camry year before removing trim or accessing a drain. Drain routing, airbag locations, clips, cameras, electrical modules, and interior components vary among generations. A VIN-based check is especially important when the leak began after prior repair work or while warranty coverage may apply.
Note: The amount of visible A/C condensate depends on humidity, temperature, run time, and parking angle. Little or no puddle beneath the car is only a clue; it is not proof that the evaporator drain is blocked.
Symptoms of Water Buildup in Your Vehicle
Wet carpet is the most obvious symptom, but water often collects beneath the carpet padding before the upper surface feels soaked. Press a dry paper towel firmly against the carpet near the seat mounts, kick panels, and floor edges. Compare several areas to identify the wettest zone.
| Symptom | What It May Indicate | Action |
|---|---|---|
| Damp carpet or padding | Active leak or retained moisture | Extract water and begin drying while locating the source |
| Musty odor | Long-term moisture or microbial growth | Inspect beneath the carpet and arrange professional cleaning if contamination is extensive |
| Fogging that returns after the glass is wiped | High cabin moisture or possible coolant vapor | Check for wet materials and identify the liquid before continuing |
| Water stains on pillars or headliner | Roof, moonroof, windshield, antenna, or seam leak | Trace the stain upward without disturbing airbag trim |
| Rust on seat hardware or floor seams | Repeated or long-standing water intrusion | Arrange a thorough inspection for hidden corrosion and wiring damage |
| Dampness after every car wash | Exterior seal, glass, cowl, door, or body opening | Perform a controlled water test by exterior zone |
| Intermittent electrical faults, warning messages, or damp connectors | Water may have reached wiring, a module, a ground point, or a connector | Stop invasive testing and arrange model-specific electrical inspection |
Immediate Damage-Control Steps
- Move the vehicle to a dry, ventilated location and remove wet floor mats and loose items.
- Photograph the wet areas, visible trails, warning messages, and recent repair zones before drying.
- Blot or extract standing water with towels or a wet/dry vacuum.
- Lift only carpet edges and trim that the model-specific procedure identifies as safe to access.
- Use fans or a dehumidifier in a secure, dry location; avoid concentrated high heat that can damage trim or wiring.
- Keep checking the padding beneath the carpet because its surface can feel dry while the lower layer remains saturated.
Dry the interior as soon as possible. The EPA’s building-moisture guidance uses 24–48 hours as a mold-prevention benchmark; it is not vehicle-specific, but it supports prompt drying of wet carpet and padding. If visible mold, sewage-contaminated water, extensive saturation, or health concerns are present, use a qualified remediation or automotive-interior professional.
Could Your Windshield Be Causing Water Leaks?
A windshield leak is more likely if water appeared after glass replacement, collision repair, rust repair, or work near the windshield opening. You may see dampness at an A-pillar, behind the dashboard, at the top of the headliner, or along the front edge of the carpet. On Camrys equipped with a windshield-mounted driver-assistance camera, glass work may also require model-specific inspection or calibration procedures.
However, water visible near the windshield does not prove that the windshield is responsible. A blocked cowl drain, leaking body seam, roof leak, or moonroof drain can send water along hidden metal panels before it reaches the carpet.
Windshield Replacement Quality
The windshield must be installed with the correct preparation, adhesive, bead shape, glass position, and curing process. Gaps, contamination, corrosion on the bonding flange, or disturbed urethane can allow water to enter.
Windshield bonding also has a safety function. Federal windshield-mounting requirements address retention of the glass during a crash. For that reason, have suspected bonding defects inspected by a qualified automotive-glass technician instead of covering the edge with household silicone or another surface sealant that may hide the true entry path. See 49 CFR 571.212 for the federal windshield-retention standard.
Water Testing Methods
Use a low-pressure garden hose rather than a pressure washer. Begin below the suspected area and move upward gradually. Testing from low to high helps prevent water from running over several possible leak points at once.
- Park on level ground and dry the interior around the suspected entry point.
- Place dry paper towels along the windshield edge, kick panel, dashboard side, or carpet seam.
- Ask a helper to remain inside with a flashlight.
- Run a gentle stream over one small exterior section for several minutes.
- Pause and inspect before moving to the next section.
- Mark the first damp point and repeat the test to confirm it.
Do not direct water into cabin vents, open windows, electrical openings, or damaged trim. Do not assume the windshield is sealed simply because one short test produces no water.
Why a Controlled Test Matters
Soap-bubble or forced-air methods can produce unclear results and may not recreate the path that rain follows while the vehicle is parked or moving. A controlled hose test limits the test area and makes the first interior moisture easier to identify. It also lets you repeat the same zone before moving to the next possible source.
A professional may use specialized leak-detection tools, remove trim according to the repair manual, or inspect the windshield bond from inside. Professional diagnosis is appropriate when water enters behind the dashboard, the glass has been replaced recently, rust is visible at the glass edge, or the leak cannot be reproduced safely.
Step-by-Step Guide to Inspecting and Cleaning Drainage Areas

Your Camry does not have one universal rainwater drain. Inspect each relevant system according to the vehicle’s model year and equipment.
- Confirm the trigger. Determine whether the moisture follows rain, washing, moonroof use, or air-conditioner operation.
- Inspect the cowl and fresh-air intake. Remove loose leaves and debris from the area below the windshield without forcing material into openings. If the owner’s manual provides safe access, check whether the cabin air filter or intake housing is wet after rain.
- Check door drainage. Look for blocked openings along the lower door edge. Water inside a door should drain outside rather than pass behind the interior trim.
- Inspect the moonroof channels if equipped. Look for standing water and visible debris. Confirm the drain routing in the model-year repair information before inserting anything into a tube, and use only a small amount of test water so an overflow does not create a new interior leak.
- Observe A/C condensate drainage. After the air conditioner has operated in warm, humid conditions, clear water often drips beneath the vehicle. Wet passenger carpet, reduced drainage under comparable conditions, or water near the HVAC case may justify professional drain inspection; the absence of a puddle by itself is not conclusive.
- Check the trunk and rear body. Inspect the spare-wheel well, tail-lamp areas, weatherstrip, rear glass, and body seams for a high water trail.
- Retest gently and record the outlet. After removing accessible debris, apply a small amount of water to the relevant drainage area and confirm that it exits outside without entering the cabin. Photograph or note the outlet so later tests use the same baseline.
Pro Tip: Before testing, place clean paper towels at several possible entry points. The first towel to become damp is usually more useful than the area where water eventually pools.
Watch for These Signs of a Clogged Drain
A restricted drain may cause standing water in a channel, sloshing sounds, damp pillars, water around a door sill, or moisture that appears after the air conditioner runs. The exact symptom depends on which drainage system is affected, and parking angle can change where the water overflows or pools.
- Cowl drainage: Leaves or mud collect below the windshield, and water appears near the front footwell after rain.
- Door drainage: Water sloshes inside a door, drains slowly from the lower edge, or passes behind the interior door panel.
- Moonroof drainage: Water stands in the roof channel or dampens the headliner or a pillar after rain.
- HVAC evaporator drainage: Passenger-side carpet becomes wet during A/C use, and normal condensate dripping beneath the car is reduced or absent.
- Trunk or body drainage: Water collects in the spare-wheel well or rear side compartments.
Water can travel beneath carpet, along wiring channels, and behind trim. A wet rear floor does not automatically mean the leak began at the rear, and a wet passenger floor does not automatically identify the HVAC drain.
How to Perform a Water Test on the Windshield and Body
Perform the test on a dry vehicle in a shaded area, preferably with the car on level ground. Remove loose items from the cabin and trunk, document the starting condition, and do not remove safety-related trim without the correct procedure. If the leak happens only on a slope, first establish a level-ground baseline, then have a professional reproduce the angle safely if needed.
- Dry the suspected interior area completely.
- Protect electronics and place dry towels or absorbent paper along likely entry paths.
- Close all doors, windows, the trunk, and the moonroof.
- Begin with the lowest suspected exterior area.
- Apply a gentle stream for several minutes without spraying directly into gaps.
- Inspect the interior before moving upward or sideways.
- Test the cowl, lower windshield, side windshield edges, upper windshield, roof, doors, and trunk as separate zones.
- Repeat the zone that produced moisture to confirm the result.
- After the repair, repeat the same test for the same duration and check again after a natural rain or normal wash.
Note: Avoid a pressure washer. High-pressure water can force its way past seals that do not leak during normal rain and may create a false diagnosis.
If water appears behind the dashboard, upper pillar trim, or headliner, stop before removing additional trim. These areas may contain airbags, wiring, fragile clips, driver-assistance cameras, microphones, antennas, or bonded components.
Why Regular Drainage Maintenance Matters
Maintenance helps prevent debris-related overflow, but it does not diagnose every leak. Leaves, pine needles, dirt, and deteriorated sealant can interfere with water flow. Periodic visual checks reduce the chance that water will overflow into the cabin or remain trapped against painted metal.
Inspect the cowl and lower door openings after heavy leaf fall, storms, body repairs, or windshield replacement. If your Camry has a moonroof, keep its visible channels clean and watch for water that drains slowly or appears inside a pillar.
Drainage maintenance does not replace repair of a damaged weatherstrip, separated door moisture barrier, failed windshield bond, loose drain hose, cracked seam sealer, or leaking tail-lamp seal. Cleaning helps only when debris is the actual obstruction.
The first repair is stopping the water. The second is drying everything the water reached, including the padding beneath the carpet.
Troubleshooting a Toyota Camry Water Leak by Location
Use the highest and earliest damp point rather than the deepest pool of water. Gravity can move water far from the opening, especially beneath carpet padding. Compare both sides of the vehicle and recheck after changing only one variable.
Clues to Record Before Testing
- Model year, trim, powertrain, and whether the Camry has a factory or aftermarket moonroof.
- Recent windshield, body, roof, audio, alarm, remote-start, or collision repair.
- Whether the leak follows heavy rain, light rain, a car wash, A/C use, or only one parking angle.
- The first damp point, not only the largest puddle.
- Any warning messages, electrical changes, musty odor, or visible corrosion.
- Photos of stains and water trails before the interior is disturbed.
Common Symptoms Detected
- Passenger floor wet after rain: Check the windshield edge, cowl, fresh-air intake, passenger door, and moonroof drain if equipped.
- Passenger floor wet after A/C use: Compare interior moisture with condensate dripping beneath the vehicle.
- Driver floor wet: Check the driver-side windshield, cowl seam, door barrier, and roof drainage.
- Rear carpet wet: Check both rear doors, roof pillars, the trunk, and the front carpet for migrated water.
- Trunk wet: Check the weatherstrip, tail lamps, rear glass, body seams, and spare-wheel well.
- Headliner wet: Check the roof, antenna area, upper windshield, moonroof channels, and drain connections.
Inspection Steps Required
| Inspection Step | Purpose |
|---|---|
| Record the exact vehicle and repair history | Connects the symptom to model-year routing, equipment, warranty, or recent work |
| Identify when the leak occurs | Separates rain, wash, moonroof, and A/C-related problems |
| Confirm the liquid | Prevents coolant or another fluid from being mistaken for rainwater |
| Find the highest wet point | Narrows the entry path before water spreads across the floor |
| Inspect visible drains and seals | Finds debris, displaced seals, damage, and prior repair problems |
| Conduct a zone-by-zone water test | Confirms the source without wetting the entire vehicle |
| Check model-specific service information and VIN campaigns | Finds repair procedures, service bulletins, recalls, or campaigns that may change the diagnosis |
| Retest after repair | Confirms that the corrected area no longer leaks |
Prevention Tips
- Remove leaves from the cowl and door openings by hand before they break down into mud.
- Keep door and trunk weatherstrips clean and inspect them for cuts, flattening, or displacement.
- Check the interior after windshield, body, roof, accessory, or collision repairs and keep the invoice in case the leak is related.
- Do not apply household silicone over an unidentified leak.
- Investigate repeated window fogging, musty odor, or rust instead of masking the smell.
- Check the spare-wheel well periodically because trunk leaks can remain hidden beneath the floor panel.
Effective Tips for Cleaning Clogged Drainage Areas
Begin with the least aggressive method. Remove loose material by hand or with a soft brush. A wet/dry vacuum may help pull debris from an accessible drain outlet without pushing the obstruction deeper.
Do not force a metal coat hanger, screwdriver, or other rigid object into a drain. It can puncture a hose, damage paint, or separate a hidden connection. Avoid high-pressure compressed air because a drain hose may detach behind trim.
If the repair information for your exact model permits access, a flexible nonmetal line may be used gently to loosen soft debris. Work only from the documented access point, stop at the first resistance, and never continue until you know the drain’s routing and outlet location. Pushing from the wrong end can compact debris or separate a hidden hose.
After cleaning, add a small amount of water to the correct inlet and confirm that it exits outside. Stop immediately if water appears inside the cabin or does not drain normally.
Prevent Future Water Damage in Your Toyota Camry
Inspect common collection points before the rainy season and after severe weather. Keep the cowl clear, confirm that door-bottom openings remain unobstructed, and clean visible moonroof channels if your Camry has a moonroof.
After any leak, remove as much water as possible from the carpet and padding. Run ventilation in a safe, dry location, use fans or a dehumidifier where practical, and keep checking hidden padding until it is fully dry. Avoid using concentrated heaters, open flames, or unapproved chemicals inside the vehicle. Replace material that cannot be cleaned or dried effectively.
Regular Drainage Inspections
Include these checks in routine cleaning:
- Look beneath the cowl area for leaves and dirt.
- Inspect the lower edges of all doors.
- Check roof channels and moonroof tracks if equipped.
- Inspect trunk weatherstripping and the spare-wheel well.
- Watch for stains near the windshield, pillars, headliner, and rear glass.
- Confirm that A/C condensate can drain beneath the vehicle during humid operation.
Timely Debris Removal
Remove debris before it becomes compacted. Wet leaves can hold moisture against painted surfaces and block narrow drainage paths. Clean gently and avoid pushing dirt into an opening you cannot see through.
If a drain blocks repeatedly, the problem may involve a collapsed hose, disconnected fitting, damaged seal, body alignment, or debris deeper in the system. Repeated blockage deserves a model-specific inspection rather than increasingly aggressive cleaning.
When to Get Professional Help
Arrange professional diagnosis when:
- The windshield or rear glass may require removal, rebonding, resealing, or camera calibration.
- Water enters behind the dashboard or near electrical modules.
- Pillar, headliner, seat, or dashboard trim must be removed.
- Airbag components or hybrid-system wiring may be nearby.
- The carpet padding remains saturated or mold is visible.
- Rust, failed seam sealer, collision damage, or a body-panel leak is present.
- The source cannot be reproduced with a controlled test.
- The leak began during a warranty period or after dealer, glass, or body repair.
Toyota’s Technical Information System contains model-specific repair manuals, wiring diagrams, and service bulletins. Check your VIN through the Toyota recall and service-campaign lookup. The NHTSA search can show recalls, investigations, complaints, and manufacturer communications by year, make, model, or VIN; remember that a VIN search does not display every non-safety service bulletin or already-completed campaign.
Related Guides
Frequently Asked Questions
Why is my Toyota Camry leaking water?
Possible causes include a windshield or body-seam leak, blocked cowl drainage, a damaged door moisture barrier, a moonroof drain problem, an HVAC evaporator drain issue, or a trunk or rear-body leak. The timing and location of the moisture help narrow the source.
What is the most common source of wet carpet in a Camry?
No single source applies to every Camry. Front passenger moisture after rain may involve the cowl, windshield, passenger door, or moonroof drainage. Moisture appearing during air-conditioner use may involve the HVAC evaporator drain. Diagnose the trigger before choosing a repair.
Why does my car leak only when it rains?
A rain-only leak usually points to an exterior entry path such as the windshield, cowl, door, roof, moonroof drain, trunk weatherstrip, rear glass, tail-lamp seal, or body seam. Test each exterior zone separately with a gentle water stream.
How often do Toyota Camry moonroofs leak?
There is no reliable brand-wide leak frequency. A Camry moonroof may leak when debris blocks a drain, a drain hose becomes damaged or disconnected, a seal is displaced, or the roof has been repaired or damaged. Regular visual cleaning can reduce debris-related problems.
Is clear water beneath my Camry normal after using the air conditioner?
A small amount of clear, odorless water beneath the vehicle can be normal A/C condensate. Wet carpet inside the passenger compartment is not normal and may indicate restricted drainage, a disconnected drain, or another leak source.
Can I seal a leaking windshield with household silicone?
Household silicone can conceal the entry point, interfere with proper automotive urethane repair, and fail to correct corrosion or bonding defects beneath the glass. Have a suspected windshield-bond leak inspected by a qualified automotive-glass technician.
How quickly should I dry wet carpet?
Begin immediately. Extract standing water, expose wet padding when it is safe to do so, and use ventilation or drying equipment. EPA building-moisture guidance uses 24–48 hours as a mold-prevention benchmark, although vehicle carpet may require professional removal or replacement when heavily saturated.
Does no A/C puddle under the car prove the evaporator drain is blocked?
No. Condensate volume changes with humidity, temperature, run time, airflow, and parking angle. Wet passenger carpet during A/C use, water near the HVAC case, or reduced drainage under comparable conditions is more meaningful than one missing puddle.
Can parking on a slope change where a Camry leaks?
Yes. Vehicle angle can move water toward a different drain, seam, or channel and can change where it overflows. Record whether the leak occurs nose-up, nose-down, or with one side lower, but reproduce steep angles only in a safe setting.
Why is the carpet still damp after the leak was repaired?
The padding beneath automotive carpet can hold much more water than the surface reveals. Extract the moisture, expose only safely accessible edges, use ventilation or a dehumidifier, and keep checking the lowest padding until it is dry.
Should I disconnect the 12-volt battery before removing wet trim?
Do not disconnect the battery or remove trim around airbags, cameras, hybrid components, or electrical modules unless you are following the exact Toyota repair procedure for your model year. Incorrect power-down or trim removal can create safety problems and diagnostic trouble codes.
Conclusion
A Toyota Camry rainwater leak is easiest to solve when you separate diagnosis into four tasks: identify the liquid, determine when the moisture appears, record the exact vehicle and recent repair history, and trace the highest wet point. Check the windshield, cowl, doors, moonroof drains, HVAC drain, trunk, and body seams according to the symptoms and your Camry’s model year.
Use a gentle, zone-by-zone water test rather than flooding the entire vehicle. Change one variable at a time, repeat the zone that first becomes damp, and retest after the repair. Clear only accessible debris with low-pressure methods, repair the actual entry point, and dry the carpet and padding promptly. Seek professional help when bonded glass, body seams, cameras, airbags, wiring, hidden mold, or extensive trim removal is involved.
Sources
- Toyota Manuals and Warranties — year- and model-specific owner information
- Toyota Technical Information System — Toyota repair manuals, service bulletins, wiring diagrams, and diagnostic information
- Toyota Recall and Service Campaign Lookup — VIN-based Toyota campaign information
- National Highway Traffic Safety Administration Recall Search — recalls, investigations, complaints, and manufacturer communications
- EPA Guide to Mold and Moisture — general prompt-drying and moisture-control guidance; not vehicle-specific
- 49 CFR 571.212, Windshield Mounting — federal windshield-retention requirements
