
An oil spot under your Toyota Tacoma can come from a simple service issue or a seal that requires major disassembly. The key is to confirm the fluid, check the oil level, and trace the leak from the highest wet point before replacing parts. Because Tacoma engines and layouts differ by year, use your exact model’s factory procedure for any repair.
Last updated: September 19, 2026
Quick Answer
A Toyota Tacoma can leak engine oil from the oil filter, drain plug, valve cover, timing or front cover, oil pan, crankshaft seals, or other engine-specific sealing points. Check the dipstick first, inspect from the top down, clean the area, and confirm fresh leakage before approving a repair. Toyota also distinguishes an active fluid leak from seepage, so a damp film is not automatically treated the same as an active drip.
Key Takeaways
- Do not assume the lowest wet component is the source. Oil often runs downward from a higher gasket or seal.
- A red oil-pressure warning, rapid oil loss, smoke, or engine noise calls for immediate shutdown and professional help.
- Confirm the Tacoma’s year, engine, and drivetrain before ordering parts or using torque specifications.
- Clean-and-recheck diagnosis or an engine-oil-compatible UV dye is more reliable than blindly tightening bolts or smearing sealant outside the engine.
- Toyota service information distinguishes fluid seepage from an active leak; that distinction can affect whether the condition is monitored or repaired.
- Repair cost depends mainly on access. A filter or drain-plug issue may be simple, while a rear main seal can require transmission removal.
At a Glance
| Time Required | Varies; a basic visual inspection may be quick, while cleaning, rechecking, or UV-dye diagnosis takes longer |
| Difficulty | Beginner for inspection; intermediate to advanced for gasket or seal replacement |
| Tools Needed | Gloves, flashlight, shop towels, cardboard, safe cleaner, and optionally an oil-compatible UV dye kit |
| Cost | Basic inspection supplies are inexpensive; repair cost varies widely by leak location, engine, drivetrain, labor rate, and related damage |
Common Sources of Oil Leaks in Toyota Tacoma Models
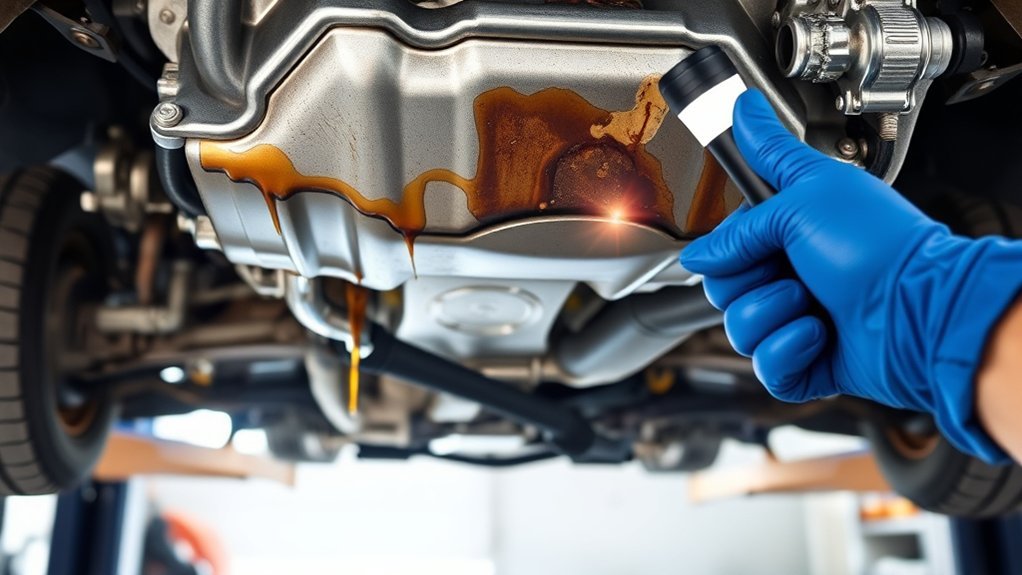
No single leak point is the most common across every Tacoma generation. Start with places affected by recent service, then inspect higher engine seals before blaming the oil pan or rear main seal.
| Possible Source | Typical Clues | What to Check |
|---|---|---|
| Oil filter or filter sealing surface | Fresh oil after a recent oil change; wetness around the filter or housing | Correct filter, damaged or doubled gasket, housing condition, and factory tightening method |
| Drain plug, washer, or oil-pan threads | Drip centered near the drain plug, often after service | Correct gasket, damaged threads, cracked pan, and model-specific torque |
| Valve-cover gasket or related upper-engine seals | Oil near the top of the cylinder head, burning smell, or oil reaching the exhaust side | Gasket edges, bolt grommets, cam plugs, and other seals listed for that engine |
| Front cover or front crankshaft area | Oil at the front of the engine or behind pulleys and covers | Trace from above and rule out oil thrown by rotating parts |
| Oil pan or lower-engine sealing surface | Wet pan flange or oil collecting along the bottom of the engine | Confirm that oil is not running down from a higher source |
| Rear main seal or rear engine area | Oil between the engine and transmission after upper leaks are excluded | Professional confirmation is important because access is extensive |
Note: Engine design changed across Tacoma generations. The same stain location can point to different components on different engines, so identify the engine before buying a gasket or seal.
Is It an Oil Leak or Just Seepage?
Toyota’s T-SB-0008-20 Oil Leak Diagnosis and Repair bulletin applies to Tacoma among many Toyota models and distinguishes a fluid leak from a fluid seep. Toyota directs technicians to repair conditions classified as leaks when applicable, while seepage is documented and inspected again at the next service interval.
For an owner, the practical lesson is not to judge the problem only by whether the engine looks damp. Clean the area and watch what returns. A light film that does not produce drops or measurable oil loss is different from fresh oil that forms drops, reaches another component, or causes the dipstick level to fall.
Known 2016–2018 2GR-FKS Oil-Leak Bulletin
Toyota issued T-SB-0073-18 for some 2016–2018 Toyota Tacoma models equipped with the 2GR-FKS engine. The bulletin addresses an engine-oil leak from one or more cam-sensor bolt holes and provides a factory repair procedure after the condition is confirmed.
This bulletin should not be treated as proof that every oil stain on a 2016–2018 V6 Tacoma has the same cause. Toyota’s procedure first requires confirming that the leak actually comes from the specified cam-sensor bolt-hole area. If it does not, diagnosis continues under the applicable repair manual.
Identifying Oil Leaks in Your Tacoma: Step-by-Step Guide
1. Check the Oil Level and Warning Lights
Park on level ground, switch off the engine, and follow the owner’s manual procedure for checking the dipstick. If the oil level is below the safe range, do not continue driving until you know how much oil was lost and why.
Warning: Toyota identifies a red low-engine-oil-pressure warning as a condition requiring immediate attention. Follow the instructions in your exact owner’s manual and stop the engine when directed. Do not treat an oil-pressure warning as a simple oil-level reminder. See Toyota’s warning-light guidance.
2. Confirm the Fluid Type
Engine oil usually feels slick and may look amber, brown, or black depending on age. Other Tacoma fluids can be mistaken for oil, including transmission fluid, differential oil, power-steering fluid on applicable models, coolant, brake fluid, and clear water from the air-conditioning drain.
Do not identify fluid by tasting it. If the color, smell, or location is unclear, place clean cardboard under the truck overnight and have a technician confirm the fluid.
3. Inspect From the Top Down
Use a bright flashlight and begin at the highest visible point of the engine. Look around the oil-fill cap, valve-cover edges, filter or filter housing, front cover, oil-pressure sender area, drain plug, and oil pan. Follow wet trails downward rather than assuming the lowest oily part is leaking.
Also inspect for oil spread by airflow or rotating pulleys. A leak may travel rearward while driving and coat several components.
4. Clean the Suspected Area
With the engine cool, remove loose dirt and clean the suspected area with a product that is safe for automotive components. Keep cleaner away from electrical connectors, belts, hot exhaust parts, and painted surfaces unless the product label allows contact.
After the area dries, run the engine only as needed or take a short drive if the oil level is safe and no severe symptoms are present. Reinspect for the first point that becomes wet.
5. Use UV Dye When the Source Is Hidden
An engine-oil-compatible fluorescent dye and UV lamp can help locate a slow or concealed leak. Use only the amount specified by the dye manufacturer. A repair shop can also perform this test if you do not want to add diagnostic dye yourself.
Pro Tip: Photograph the engine before cleaning and again when fresh oil appears. The comparison helps you distinguish old residue from active leakage and gives a technician useful evidence.
6. Rate the Severity Before Driving
- Seepage: A damp film without dripping or a measurable drop in oil level. Document it, schedule inspection, and monitor it.
- Active drip: Fresh drops or a measurable level change. Limit driving and arrange repair promptly.
- Severe leak: A growing puddle, rapid level loss, smoke, oil on a hot exhaust surface, a red oil-pressure warning, or engine noise. Shut the engine off and tow the truck.
Replacing Valve Cover Gaskets on a 5VZ-FE Tacoma
The original procedure applies specifically to a Tacoma equipped with the 5VZ-FE V6. Other Tacoma engines use different layouts, sealing materials, torque values, and disassembly steps. Confirm the engine code and obtain the factory procedure through the Toyota Technical Information System before starting.
- Prepare safely. Let the engine cool, disconnect power when required by the factory procedure, and label hoses, connectors, and brackets before removal.
- Remove the required upper-intake components. Access may require removing the intake duct, throttle-body connections, upper plenum, ignition components, and brackets. Do not assume the complete intake manifold must always come off.
- Remove the valve covers. Work evenly and avoid prying against soft aluminum sealing surfaces.
- Inspect the complete sealing system. Depending on the engine and kit, this can include valve-cover gaskets, bolt grommets, half-moon plugs, cam plugs, and other related seals.
- Clean the mating surfaces. Remove old gasket material without scratching the aluminum or allowing debris to enter the engine.
- Apply sealant only where specified. Use the exact sealant type and locations stated in the factory repair manual. More sealant is not better.
- Install and torque correctly. Seat the gaskets without twisting them, follow the specified tightening sequence, and use the model-specific torque values.
- Reassemble and verify. Reconnect every hose and electrical connector, restore the oil level, start the engine, and check for leaks and vacuum-related running problems.
Blindly tightening valve-cover bolts is not a reliable repair. Overtightening can damage grommets, distort the cover, strip threads, or worsen leakage.
Repair Costs for Oil Leaks: What to Expect

A responsible estimate requires the Tacoma’s year, engine, drivetrain, leak source, location, and local labor rate. A quote may also change if the repair requires cleaning, fluids, related seals, damaged-thread repair, or additional parts found during disassembly. Confirm the leak source before comparing itemized local estimates.
Relative Cost by Leak Location
| Repair Type | Typical Labor Level | Why the Price Changes |
|---|---|---|
| Oil filter, cap seal, or drain-plug washer | Low, if no threads or housing are damaged | A stripped drain hole, cracked housing, or incorrect previous service can raise the cost |
| Valve-cover gasket | Moderate to high | Intake components, wiring, hoses, and related seals may block access |
| Oil pan or lower-engine reseal | Moderate to high | Four-wheel-drive hardware, crossmembers, or multiple pan sections can add labor |
| Front cover or crankshaft seal | High | Pulleys, cooling components, covers, and sealant preparation may require extensive work |
| Rear main seal | Very high | The transmission usually must be separated from the engine |
Dealer vs. Independent Shop vs. DIY
A Toyota dealer has direct access to factory service information and model-specific tools. A qualified independent shop may charge a different labor rate while using equivalent diagnostic methods. Compare itemized estimates, warranty terms, sealant and parts choices, and whether the quote includes cleaning and post-repair verification.
DIY work can reduce labor cost, but only when you have safe lifting equipment, the correct repair manual, a calibrated torque wrench, and the skill to avoid damaging sealing surfaces or threads. Deep-access leaks are poor first projects.
Questions to Ask Before Authorizing Repair
- What exact point was observed leaking after the engine was cleaned?
- Was UV dye used, and can the shop show you the leak path?
- Is the condition being classified as an active leak or seepage?
- Could oil be running down from a higher gasket or seal?
- Does a Toyota service bulletin apply to this exact year and engine?
- Which related gaskets, fluids, or one-time-use parts are included?
- What warranty covers the repair?
- Will the shop recheck the engine after a road test?
Effective Temporary Steps for an Oil Leak
A temporary measure should reduce risk while you arrange a proper repair. It should not hide the leak or introduce sealant where it does not belong.
- Check the dipstick frequently and add only the oil grade and amount specified for your exact Tacoma.
- Place cardboard or an absorbent mat under the parked truck to track the drip rate and protect the surface.
- Keep oil away from hot exhaust parts and clean any spill after the engine cools.
- Limit driving if the leak is active, and tow the truck when oil loss is rapid or warning signs appear.
- If a recently serviced filter or drain plug is suspected, have it inspected and tightened only to the correct specification.
Do not pour in a stop-leak product or smear RTV over the outside of a gasket as a default fix. Those approaches can mask the source or complicate the correct repair. Use RTV only where the factory procedure specifically requires it during disassembly and reassembly.
Maintenance Tips to Prevent Future Oil Leaks
- Follow the correct maintenance schedule. Use the oil grade, filter, capacity, and service interval listed for your exact year and engine in the Toyota owner’s manual and maintenance guide.
- Use a new drain-plug gasket when specified. Reusing a crushed or damaged washer can cause seepage.
- Avoid overtightening. Filters, drain plugs, covers, and small fasteners can leak after threads or sealing surfaces are damaged.
- Inspect after service. Look for fresh oil around the filter and drain area after an oil change and again after the next drive.
- Keep crankcase ventilation working correctly. The PCV system manages crankcase gases and pressure. Diagnose suspected ventilation faults according to the engine-specific procedure rather than replacing parts by guesswork.
- Repair active leakage before it worsens. Leaking oil can create odors, collect dirt, contaminate nearby components, and lower the engine-oil level.
- Recycle used oil properly. Store drained oil in a leak-proof container and take it to an approved collection point rather than pouring it onto the ground or into a drain. See the EPA’s used-oil recycling guidance.
Related Guides
Frequently Asked Questions
Why is my Toyota Tacoma leaking oil?
Possible causes include a filter or drain-plug sealing issue, a valve-cover gasket, an engine-cover seal, the oil pan, a crankshaft seal, or another engine-specific component. Recent service history and the highest fresh wet point usually provide the best clues.
How do I determine the oil leak location?
Check the oil level, verify that the fluid is engine oil, inspect from the top down, clean the suspected area, and recheck for fresh wetness. Use an engine-oil-compatible UV dye when normal inspection does not reveal the source.
What is the difference between an oil seep and an oil leak?
Toyota service guidance distinguishes seepage from an active leak. A light damp film may be documented and monitored, while active leakage that forms drops or progresses beyond the sealing area requires further diagnosis and repair as applicable.
Do 2016–2018 V6 Tacomas have a Toyota oil-leak bulletin?
Toyota T-SB-0073-18 applies to some 2016–2018 Tacoma models equipped with the 2GR-FKS engine and addresses oil leakage from one or more cam-sensor bolt holes. The condition must be confirmed before the bulletin’s repair procedure applies.
Can I drive my Tacoma with an oil leak?
Minor seepage may allow limited driving while you monitor the level and arrange service. Do not drive with rapid oil loss, a growing puddle, smoke, oil on a hot exhaust surface, abnormal engine noise, or a red oil-pressure warning.
Why does my Tacoma smell like burning oil?
Oil may be reaching a hot exhaust or engine surface. Shut the engine off if you see smoke or a significant leak, let it cool, and have the source inspected before driving farther.
What is the most common problem with a Toyota Tacoma?
Toyota does not designate one problem as the most common across every Tacoma year and configuration. Reliability concerns vary by generation, engine, drivetrain, use, and maintenance history. Check the specific VIN for recalls and review model-year service information instead of relying on a broad claim.
What was the worst year for the Toyota Tacoma?
No official source identifies one universally “worst” Tacoma year. Compare recalls, manufacturer communications, complaint patterns, service history, and a pre-purchase inspection for the exact truck. You can search by VIN or model year through NHTSA’s recall database and Toyota’s recall lookup.
Sources
- Toyota Technical Information System — factory repair manuals, service bulletins, wiring information, and model-specific procedures.
- Toyota Manuals and Warranties — owner’s manuals and maintenance information by vehicle.
- Toyota Warning Lights — guidance on warning indicators, including low engine oil pressure.
- Toyota T-SB-0008-20: Oil Leak Diagnosis and Repair — Toyota’s guidance for distinguishing powertrain-fluid leakage from seepage.
- Toyota T-SB-0073-18: 2GR-FKS Engine Oil Leak From Cam Sensor Bolt Hole(s) — applies to specified 2016–2018 Tacoma models equipped with the 2GR-FKS.
- National Highway Traffic Safety Administration Recall Lookup — VIN and model-year recall information.
- U.S. Environmental Protection Agency: Managing Used Oil — collection and recycling guidance for used motor oil.
Conclusion
A Toyota Tacoma oil leak is easiest to fix when you diagnose it before replacing parts. Check the level, identify the fluid, distinguish seepage from active leakage, and trace fresh oil from the top down. Then check whether Toyota has model- and engine-specific service information that applies to your truck. Use the factory procedure for torque values, sealant locations, and major repairs, and stop driving if oil loss, smoke, engine noise, or an oil-pressure warning makes continued operation unsafe.
