Last Updated: September 22, 2026
Toyota RAV4 ignition coil replacement on a 2010 2.5-liter four-cylinder is a straightforward top-side repair once you confirm that the coil is actually causing the misfire. Remove the engine cover, disconnect the affected coil, remove its 10 mm retaining bolt, pull the coil out, install the correct replacement, torque the bolt to 10 N·m or 7 ft-lb, reconnect the connector, and verify the repair with a scan tool.
The diagnosis matters as much as the installation. A P0301–P0304 misfire code on the 2.5L does not prove the coil itself has failed, so this guide shows how to use a coil-swap test, inspect the spark plug and connector, and decide what to test next. The 2010 RAV4 was also available with a 3.5-liter V6, but its rear-bank access is more involved and the 2.5L procedure below should not be treated as a complete V6 walkthrough.
Quick Answer
On a 2010 RAV4 2.5L, diagnose the misfire first. Then remove the engine cover, unplug the confirmed faulty coil, remove its 10 mm bolt, and pull the coil straight out. Install the matching replacement, torque the bolt to 10 N·m or 7 ft-lb, reconnect the plug, and scan the vehicle again after a short verification drive.
Key Takeaways
- A 2010 RAV4 can have a 2.5L four-cylinder with four coils or a 3.5L V6 with six coils.
- A cylinder-specific misfire code does not prove that the ignition coil is defective. Inspect and test the system first.
- Use a thin film of dielectric grease inside the coil boot. Do not pack grease into the electrical terminals.
- Tighten the small coil retaining bolt to 10 N·m, or 7 ft-lb, instead of tightening it by feel.
- If the misfire remains after replacement, inspect the spark plug, connector, wiring, injector, compression, and plug well.
At a Glance
| Time Required | Diagnosis time varies; the 2.5L coils have direct top-side access, while V6 rear-bank service requires more disassembly |
| Difficulty | 2.5L: basic top-side access; V6 rear-bank access is more involved because additional intake components must be removed |
| Tools Needed | 10 mm socket, ratchet, short extension, low-range torque wrench, scan tool, safety glasses, gloves, and a clean cloth or vacuum |
| Cost | Varies by engine, coil brand, and whether you replace one confirmed failed coil or a complete set |
Confirm Your RAV4 Engine and Diagnose the Misfire
Before removing parts, identify your engine. According to Toyota’s 2010 RAV4 specifications, that model year was available with a 2.5-liter four-cylinder engine and a 3.5-liter V6.
- 2.5L four-cylinder: Four ignition coils are arranged in one visible row on top of the engine.
- 3.5L V6: Six coils are split between two cylinder banks. Toyota’s V6 service sequence includes removal of the intake air surge tank before ignition-coil removal, so the four-cylinder instructions below should not be treated as a complete V6 procedure.
Warning: A flashing check-engine light can indicate a severe active misfire that may damage the catalytic converter. Reduce speed and engine load and seek service promptly. If the engine is shaking severely, stalling, or losing substantial power, stop in a safe location rather than continuing the test. See the EPA’s OBD guidance.
Read the Trouble Codes
Connect an OBD-II scan tool and record stored and pending diagnostic trouble codes before clearing anything. P0300 indicates random or multiple-cylinder misfires. On the 2.5L four-cylinder, P0301 through P0304 identify the cylinder where the engine computer detected the misfire; the V6 can also report P0305 and P0306.
A cylinder-specific code points you toward the problem area, but it does not prove the coil has failed. A worn spark plug, damaged connector, injector problem, oil-filled plug well, vacuum leak, or loss of compression can produce a similar result.
On the 2.5L, P0351 through P0354 are ignition-coil primary/secondary circuit codes. These can involve the coil, connector, wiring, power supply, or control circuit, so follow the Toyota diagnostic procedure instead of replacing a coil based on the code alone.
Perform a Coil-Swap Test
- Turn the ignition off and let the engine cool.
- Move the suspected coil to a cylinder that is not misfiring.
- Move the known-working coil from that cylinder into the suspected cylinder.
- Reconnect everything securely and start the engine. If the check-engine light flashes or the engine runs severely rough, stop the test.
- If the engine is stable enough for diagnosis, operate it only long enough to reproduce the original fault, then scan the system again.
If the misfire code follows the suspected coil to the other cylinder, the coil is probably defective. If the code stays with the original cylinder, inspect the spark plug, connector, wiring, injector, compression, and plug well before buying another coil.
Pro Tip: Move and test only one coil at a time. Record the original cylinder positions so you can interpret the next scan accurately.
Misfire Diagnosis Decision Table
| Test Result | What It Suggests | Next Step |
|---|---|---|
| Misfire moves with the swapped coil | The moved coil is the leading suspect. | Confirm fitment and replace the defective coil. |
| Misfire stays on the original cylinder | The coil is less likely to be the root cause. | Inspect the spark plug, injector, connector, wiring, compression, and intake sealing. |
| Several cylinders misfire | A shared power, fuel, air, timing, or electrical problem may be involved. | Check shared circuits, fuel pressure, air leaks, grounds, battery voltage, and engine timing. |
| Oil or water is found in the plug well | Contamination may be damaging the boot or providing a path for spark leakage. | Correct the leak or moisture source and clean the well before installing another coil. |
| P0351–P0354 appears on the 2.5L | The ignition-coil circuit requires diagnosis. | Check the connector, wiring, power supply, coil substitution result, and Toyota service information. |
What Does an Ignition Coil Do on a Toyota RAV4?
Each ignition coil raises the vehicle’s low battery voltage to the much higher voltage needed to create a spark across the spark-plug gap. The RAV4 uses a coil-on-plug design, so each cylinder has its own coil mounted directly over the spark plug.
A weak or failed coil can prevent one cylinder from burning its air-fuel mixture correctly. The result may include rough running, hesitation, reduced power, increased emissions, difficult starting, or a check-engine light. Delphi’s ignition-coil service guidance identifies misfires, poor starting, reduced fuel economy, and acceleration problems among common symptoms.
Installing a new coil does not automatically add horsepower or improve fuel economy. It can restore power, smoothness, and efficiency when a defective coil was causing incomplete combustion.
Signs of a Failing RAV4 Ignition Coil
Ignition-coil problems often appear under load, during acceleration, or when the engine is hot. However, the symptoms overlap with spark-plug, injector, wiring, and mechanical faults.
| Symptom | What You May Notice | Next Check |
|---|---|---|
| Rough idle or shaking | The engine runs unevenly, especially at a stop. | Scan for misfire codes and perform a coil-swap test. |
| Hesitation or reduced power | The vehicle stumbles during acceleration or climbing. | Inspect the coil, plug, boot, wiring, and fuel delivery. |
| Check-engine light | P0300 or a cylinder-specific P0301–P0306 code may be stored. | Record stored, pending, and freeze-frame data before clearing codes. |
| Hard starting or stalling | The engine takes longer to start or stops unexpectedly. | Check battery voltage, coil power, grounds, plugs, and fuel pressure. |
| Poor fuel economy | Fuel use rises because a cylinder is not burning efficiently. | Confirm the misfire instead of replacing coils based on mileage alone. |
| Visible coil damage | Cracks, burn marks, corrosion, torn boots, or carbon tracking are visible. | Replace the damaged component and identify any moisture or oil source. |
Tools and Parts Needed
Gather the correct tools before opening the engine compartment. Using a low-range torque wrench is safer than tightening the small coil bolts by feel.
- 10 mm socket
- Ratchet and short extension
- Low-range inch-pound or foot-pound torque wrench
- OBD-II scan tool
- Safety glasses and mechanic’s gloves
- Clean cloth, soft brush, or vacuum for loose debris
- A small amount of spark-plug boot dielectric grease
- Replacement ignition coil matched to the engine and vehicle identification number
- Spark-plug socket and gap gauge if you plan to inspect the plugs
Compare the new coil with the old one before installation. The connector shape, mounting tab, boot length, and part fit must match. Choose a complete coil with an undamaged boot and seal rather than transferring aged rubber parts from the old unit.
Note: Toyota publishes model-specific manuals through its owner-manual portal. Detailed repair procedures and specifications are available through the Toyota Technical Information System.
Toyota RAV4 Ignition Coil Replacement: 2010 2.5L Steps
1. Park Safely and Let the Engine Cool
Park on level ground, shift into Park, apply the parking brake, and turn the ignition off. Remove the key or move the smart key away from the vehicle. Let the engine cool before touching the coils or spark-plug area.
Keep the ignition OFF during removal and installation. Follow Toyota service information if your diagnostic procedure requires powered-circuit testing.
2. Remove the Engine Cover
Grip the plastic engine cover near its mounting points and lift evenly to release it from the rubber grommets. Do not pry aggressively or pull from one corner because the cover or grommets can crack.
Set the cover in a clean area. You should now see the four ignition coils arranged across the top of the 2.5L engine.
3. Clean Around the Coil
Remove loose dirt and debris from around the coil and spark-plug well with a vacuum, clean brush, or cloth. Keeping debris out of the plug well reduces the chance of contamination when the coil is removed.
4. Disconnect the Coil Connector
Press the connector’s locking tab and pull the connector straight back by its plastic housing. Do not pull on the wires. If the tab is brittle or difficult to release, press it gently while supporting the connector instead of forcing it with a large screwdriver.
Inspect the plug for bent terminals, corrosion, damaged insulation, loose wires, or a broken locking tab. A poor connector can cause an intermittent misfire even when the coil is working.
5. Remove the Coil Bolt
Use the 10 mm socket, extension, and ratchet to remove the retaining bolt. Place the bolt in a magnetic tray or another secure container so it cannot fall into the engine compartment.
6. Pull Out and Inspect the Coil
Grip the coil body, rotate it slightly to loosen the boot, and pull it straight upward. Avoid levering against the valve cover.
Inspect the removed coil for:
- Cracks or melted areas on the housing
- A torn, swollen, hardened, or oil-soaked boot
- White or dark carbon-tracking lines
- Corrosion in the spring or terminal area
- Oil, coolant, or water in the spark-plug well
Oil in the well often points to a valve-cover or spark-plug-tube seal leak. Correct the leak and clean the well before installing a new coil. Installing another coil into an oil-filled well can cause the misfire to return.
7. Inspect the Spark Plug
If the maintenance history is unknown or the coil shows heat or carbon damage, inspect the spark plug. Look for a worn electrode, cracked ceramic, heavy deposits, oil fouling, or an excessive gap. NGK explains that electrode erosion enlarges the gap and requires higher ignition voltage, increasing demand on the ignition system.
Toyota’s 2010 RAV4 maintenance schedule calls for spark-plug replacement at 120,000 miles or 144 months. If the plugs are due, address them as part of the repair instead of installing a new coil over an overdue plug. Follow the correct plug specification for your engine and do not alter the plug gap unless Toyota and the plug manufacturer permit adjustment.
8. Prepare the New Coil
Confirm that the new coil matches the original part. Check that its boot, internal spring, connector, and mounting ear are intact.
Apply only a thin film of dielectric grease around the inside lip of the rubber boot or lightly along the spark-plug ceramic where the boot seals. Permatex describes spark-plug grease as protection against moisture, corrosion, and boot sticking.
Dielectric grease is nonconductive. Do not fill the coil connector, coat the metal terminals heavily, or pack the bottom of the boot with grease.
9. Install and Torque the New Coil
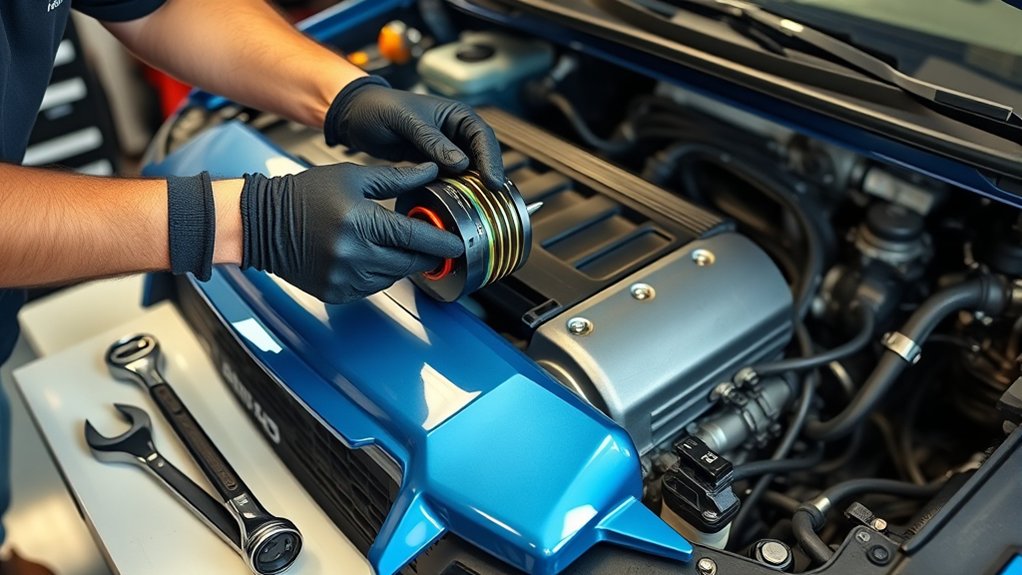
Guide the new coil straight into the spark-plug well. Press downward gently until the boot seats over the plug and the mounting ear rests against the valve cover.
Start the retaining bolt by hand to prevent cross-threading. Tighten it to 10 N·m, or 7 ft-lb. Do not use an impact wrench or overtighten the bolt.
10. Reconnect the Electrical Connector
Align the connector and push it onto the coil until the locking tab clicks. Give the connector housing a light pull to confirm that it is latched. Make sure no wire is stretched, pinched, or trapped beneath another component.
11. Repeat If Needed
Repeat the process for any other confirmed defective coils. Work on one cylinder at a time so connectors and parts remain in their original positions.
12. Reinstall the Engine Cover
Inspect the engine-cover grommets and replace any that are split or missing. Align the cover with its mounting posts and press evenly until each grommet seats securely.
Correct Use of Dielectric Grease
Dielectric grease helps seal out water, reduces corrosion around the boot, and makes future boot removal easier. It does not improve electrical conductivity.
- Use a small amount, not a large bead.
- Spread a thin film inside the opening of the rubber boot.
- Keep excessive grease away from the coil connector terminals.
- Wipe away grease that prevents the connector from seating or locking.
Dielectric grease protects the seal around the ignition connection; it is not a substitute for clean, tight metal-to-metal terminal contact.
Common Ignition Coil Replacement Mistakes
- Replacing a coil based only on a trouble code: Confirm the failure with inspection and a coil-swap test whenever practical.
- Ordering for the wrong engine: A 2010 four-cylinder coil and a V6 coil may not share the same fitment. Verify the engine and VIN.
- Pulling on connector wires: Release the tab and pull the plastic housing to avoid internal wire damage.
- Transferring a worn boot or seal: Use the complete, undamaged components supplied with the correct replacement coil.
- Applying excessive dielectric grease: A large amount can prevent the boot or connector from seating correctly.
- Ignoring oil or water in the plug well: Correct the leak or moisture source before installing the new part.
- Overtightening the bolt: Excessive torque can crack the coil mounting ear or damage the valve-cover threads.
- Replacing coils while leaving worn plugs: Inspect the spark plugs and follow Toyota’s scheduled maintenance guidance.
- Skipping the final scan: Stored or pending codes can reveal whether the fault was corrected.
Should You Replace One Coil or All of Them?
You can normally replace one coil when testing confirms that it alone has failed and the remaining coils have no damage or symptoms. Replacing every coil is not required simply because one unit fails.
A complete set may be reasonable when several coils have failed close together, multiple boots are cracked or carbon-tracked, or access is difficult enough that repeating the labor would be costly. The decision should reflect test results, condition, mileage, parts quality, and budget rather than an arbitrary interval.
Inspect the spark plugs at the same time. As NGK explains, a worn plug’s larger gap requires higher voltage from the ignition system.
How to Verify the Repair
- Check that every coil connector is locked and each retaining bolt is installed.
- Confirm that no tools, rags, or loose parts remain in the engine compartment.
- Start the engine and listen for a smooth, stable idle.
- Watch for warning lights, shaking, arcing sounds, fuel odors, or unusual noises.
- After the fault has been diagnosed and repaired, clear the repaired fault code with the scan tool.
- Take a short road test that includes gentle acceleration and normal operating temperature. Stop the test if the check-engine light flashes or the engine develops a severe misfire.
- Scan again for stored and pending codes.
A successful repair should eliminate the misfire symptom and prevent the cylinder-specific code from returning. The engine may need several normal drive cycles to complete all emissions-system readiness checks after codes or battery power have been cleared.
What to Do If the Misfire Remains
If the engine still misfires, do not keep replacing coils without testing. Use the result of the coil-swap test to narrow the fault.
- The misfire moved with the coil: Recheck part fit, connector engagement, and the replacement coil. The original coil was likely defective.
- The misfire stayed on the same cylinder: Inspect or test the spark plug, injector, connector wiring, compression, intake leak, and plug well.
- Several cylinders misfire: Check battery voltage, grounds, shared power circuits, fuel pressure, air leaks, and engine timing.
- The plug well contains oil: Repair the valve-cover or tube-seal leak and replace any oil-damaged boot.
- The connector is broken: Repair it with the correct automotive pigtail and sealed connections rather than relying on tape or an unsecured plug.
Professional diagnosis is appropriate when the misfire remains after the coil and spark plug have been tested, when compression is low, or when electrical circuit testing is required.
Related Guides
Frequently Asked Questions
How often should I replace ignition coils on my RAV4?
Toyota does not treat ignition coils as routine mileage-based replacement items. Replace a coil when diagnosis confirms failure, when its housing or boot is damaged, or when it cannot pass the appropriate electrical and swap tests.
Can I use aftermarket ignition coils instead of Toyota OEM coils?
Yes. Use a reputable coil listed for your exact RAV4 year, engine, and VIN. Compare the connector, boot length, mounting ear, and part number before installation. Poorly matched or low-quality coils may cause repeat misfires or fitment problems.
Do I need to replace all four or six coils at once?
No. You can replace one confirmed failed coil when the others test correctly and show no damage. A complete set may be reasonable after repeated failures, widespread boot deterioration, or when difficult access makes repeated labor impractical.
How much dielectric grease should I use?
Use only enough to create a thin film around the inside lip of the rubber boot or the spark-plug ceramic sealing area. Do not fill the boot or pack grease between the connector terminals because dielectric grease is nonconductive.
Will new ignition coils improve my fuel efficiency?
Replacing a weak or failed coil can restore fuel economy lost to a misfire. Replacing coils that are already functioning correctly is unlikely to produce a measurable mileage improvement.
Can I drive my RAV4 with a bad ignition coil?
Avoid unnecessary driving because an active misfire can reduce power, increase emissions, and overheat the catalytic converter. If the check-engine light flashes, reduce speed and engine load and seek service promptly. Stop in a safe location if the vehicle is shaking severely, stalling, or losing substantial power.
How do I know whether I installed the coil correctly?
The coil should sit fully in the plug well, its mounting ear should rest flat, the bolt should be torqued to 10 N·m or 7 ft-lb, and the connector should click into place. After installation, the engine should run smoothly and the misfire code should not return.
Conclusion
A successful Toyota RAV4 ignition coil replacement begins with diagnosis, not parts swapping. Confirm the engine, record the trouble codes, inspect the plug and wiring, and use a coil-swap test to verify the fault. During installation, keep the plug well clean, use dielectric grease sparingly, torque the retaining bolt to 10 N·m or 7 ft-lb, and secure the connector.
After the repair, check the idle, complete a short road test, and scan for pending codes. If the misfire remains on the same cylinder, investigate the spark plug, injector, wiring, compression, intake sealing, and fluid leaks instead of replacing additional coils without evidence.
Sources
- Toyota: 2010 RAV4 Specifications and Engine Options — confirms the 2.5-liter four-cylinder and 3.5-liter V6 engine choices.
- Toyota 2010 RAV4 Manuals and Warranties — provides official owner and maintenance documentation, including access to the Warranty and Maintenance Guide.
- Toyota Technical Information System — provides model-specific service procedures, diagnostic information, wiring data, and specifications.
- Permatex Spark Plug Grease Guidance — supports correct dielectric-grease placement and purpose.
- Delphi: How to Service Ignition Coils — supports ignition-coil symptoms, inspection, diagnosis, and service practices.
- NGK: How to Read a Spark Plug — explains plug wear, electrode-gap growth, and the resulting increase in ignition-voltage demand.
- U.S. Environmental Protection Agency: On-Board Diagnostics FAQ — explains that a flashing malfunction indicator lamp can indicate a severe misfire capable of damaging the catalytic converter.

