
Editing drone footage on a phone has become a precise workflow, especially with LightCut, CapCut, and DJI Fly Editor. A clean dronie often starts with a trim, then shifts into a reveal that needs careful pacing and a subtle speed boost through the middle. Music, simple effects, and a sharp 1080p export can make the final cut feel polished, but the difference between average and memorable often comes down to one small adjustment.
How to Shoot a Dronie
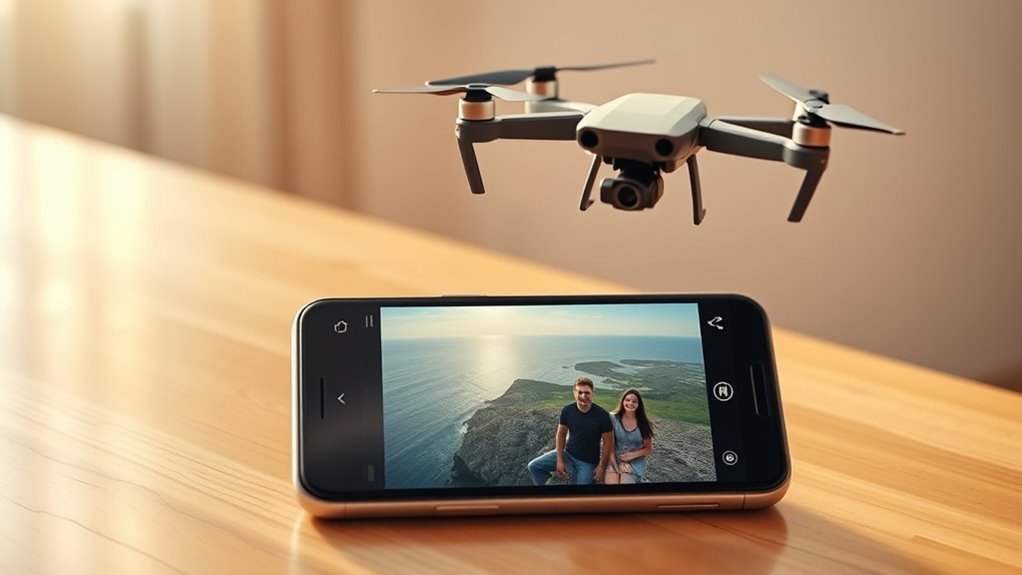
To create a dronie, the subject should be placed in an unobstructed area so the camera has a clean view as the drone rises and pulls away.
The drone should hover at eye level first, where framing can lock onto the subject with precision and the visual composition feels open, grounded, and free.
The drone should hover at eye level first, where framing settles on the subject with clarity and calm.
From there, the operator moves the right stick down and the left stick up at the same time, sending the aircraft upward while it flies backward in one controlled motion.
As the dronie expands outward, the gimbal dial helps keep the subject centered, preventing drift from breaking the shot’s clean geometry.
The retreat continues until the surrounding terrain, architecture, or landscape fills the edges of the frame, revealing scale and context in a single sweep.
This technique turns a simple portrait into a liberated aerial reveal.
Trim the Start of the Clip
Begin by opening the drone clip in a mobile editing app such as DJI Fly and scrubbing to the point where the shot should truly start. At that frame, the operator can use the trim or cut tool to remove the unwanted lead-in, leaving only the useful motion and clean composition.
In DJI Fly, selecting the cut option and confirming the change locks in the edited segment with a few taps. The goal is a clip that feels immediate, yet still begins with a short stretch of normal speed so the eye can settle into the movement without a jolt. This keeps the image fluid and gives the viewer a sense of freedom instead of delay.
Before moving on, the trimmed video should always be previewed to verify that the opening lands exactly on the intended moment and that no extra air remains before the action begins.
Edit the Dronie Reveal
The dronie reveal works best when the shot begins tight on the subject, then pulls back to expose the scene with a clean visual reset.
In DJI Fly, the clip can be split into three sections, with the opening held at normal speed and the middle accelerated to about 4 to 5x for a crisp, dynamic reveal.
A final playback check confirms the timing, framing, and motion before exporting in 1080p for sharing.
Start Close, Pull Back
A strong dronie reveal starts with the subject framed close and clean, positioned in an open area with no nearby obstructions.
In drone footage, the edit should preserve that opening clarity, especially for real estate shots where form and space must read instantly.
The drone is held at eye level for the first beat, then guided backward and upward with controlled stick input, keeping motion smooth and intentional.
As the camera pulls away, the gimbal dial holds the subject centered while the scene expands into view.
In DJI Fly App, create the clip, trim the lead-in, and leave only the purposeful reveal.
The result feels clean, spacious, and liberating, turning a simple subject into a wider environment without visual clutter or hesitation.
Speed Up The Reveal
Quickly speeding up the disclosure gives the dronie its punch. In LightCut, CapCut, or DJI Fly Editor, the footage is best split into three parts: beginning, middle, and end.
The middle section carries the landscape exposure, so that segment should be selected for speed control. Using the speed icon, the playback can be pushed to about 4x or 5x normal speed, turning a slow climb into a clean, liberated burst of motion. The checkmark applies the change.
Before exporting, playback should be reviewed to confirm the disclosure flows smoothly and lands with visual impact. That tighter rhythm reads well on social media, where motion sells freedom.
If the balance feels off, let us know next time, and the timing can be refined further.
Speed Up the Middle Section
Slice the drone clip into three parts—beginning, middle, and end—so the central segment can be isolated for speed control.
In LightCut, CapCut, or DJI Fly Editor, that middle slice becomes the zone for pacing adjustments, where slow motion techniques on the opening and closing shots can contrast with a faster core.
Select the middle section, tap the speed icon, and open the speed settings. A playback rate between 4x and 5x usually delivers a clean burst of motion without sacrificing the aerial subject’s shape or direction.
The result is a crisp, liberated glide through the scene, with visual shifts remaining readable rather than chaotic.
After the adjustment, confirm with the checkmark to lock the edit in place.
Then review the full sequence on the phone screen to verify timing, flow, and continuity before exporting.
Such checking helps guarantee the footage feels intentional, cinematic, and technically balanced throughout.
Add Music and Simple Effects
Music can be added quickly in apps like LightCut, CapCut, and DJI Fly Editor by choosing the audio or music tab, then dragging in a track that matches the drone clip’s mood and motion.
CapCut also supports sound effects and background music uploads, while DJI Fly offers royalty-free options suited to cinematic aerial scenes.
Simple shifts can then be applied to smooth visual cuts, with audio levels kept balanced so the original flight sounds do not get buried.
Music Selection
Sound design can shape the atmosphere of drone footage as much as the visuals themselves, so the selected track should match the scene’s mood and pacing for a cohesive result.
In the DJI Fly app, music can be drawn from the built-in library or uploaded as custom audio, letting creators shape liberated, personal soundscapes. Choosing among music genres is less about taste than visual fit: calm ambient tones suit wide coastal passes, while rhythmic electronic tracks reinforce fast climbs and reveals.
Clean sound synchronization keeps cuts feeling intentional, and subtle audio layering preserves narration or natural ambience beneath the score.
Before exporting, preview the timeline carefully to confirm volume balance, timing, and emotional continuity across the entire edit.
Simple Effects
To elevate drone footage on a phone, the editor can layer in background audio from the device library or royalty-free tracks inside the app, then fine-tune volume so the score supports the visuals without masking important natural sound.
From there, simple effects can shape flow and meaning. In CapCut and LightCut, shift styles between clips keep movement seamless, especially when aerial shots jump from wide reveals to tighter passes.
Text animations and captions can mark locations, altitudes, or key moments without clutter. Subtle color correction techniques or light grading help unify clips captured at different times, giving skies, water, and terrain a coherent look.
The result is polished, liberated storytelling: clean, mobile, and ready to carry the viewer through each glide with clarity.
Export in 1080p
| Setting | Result |
|---|---|
| Resolution | 1080p clarity |
| Render | Finalized clip |
| Storage | Phone memory |
| Review | Effect check |
| Outcome | Portable freedom |
That is the clean handoff from timeline to file: precise, mobile, and ready for release without sacrificing visual impact or device space.
Share Your Dronie Online
Once the dronie is exported in 1080p, the final step is to push it live through the DJI Fly app’s native sharing tools or a direct upload to Instagram and TikTok, preserving sharp detail while keeping the workflow fast.
From there, smart social media strategies sharpen reach: concise captions, targeted hashtags, and a clean thumbnail can frame the shot’s motion, altitude, and sense of freedom.
The app’s export path keeps color and contrast intact, so the footage lands with clarity on small screens.
For stronger audience engagement, posting during peak sharing windows can lift visibility and interaction, especially when the dronie’s reveal hits at a moment of high scroll activity.
After publishing, monitoring views, comments, saves, and shares helps identify what resonates.
That feedback loop informs future edits, timing, and framing, letting each new post move with more precision and less friction.
Frequently Asked Questions
Can I Edit DJI Videos on My Phone?
Yes, DJI videos can be edited on a phone with the DJI Fly app, which offers cutting, speed changes, music, and 1080p export.
It automatically saves edits to the device for quick sharing. For a sharper workflow, third-party apps add advanced video color grading and drone stabilization techniques.
These smartphone editing tips help shape clean, cinematic footage, giving creators mobile freedom to refine aerial clips anywhere, without being tied to a desktop.
What Is the Best App for Editing DJI Footage on My Phone?
DJI Fly is the strongest choice for editing DJI footage on a phone, almost as if the drone itself hands over a polished cut.
Its DJI features, automatic templates, and music sync make mobile editing fast and visually precise, while video stabilization preserves cinematic motion.
LightCut suits quick AI-driven edits, and CapCut offers deeper creative control.
For users seeking liberation from desktop workflows, DJI Fly feels purpose-built and efficient.
What Is the Best Video Editor for Editing Drone Footage?
CapCut is often the best video editor for drone footage, balancing intuitive controls with powerful creative tools. It supports drone stabilization techniques, precise color grading tips, and sound design basics, while keeping the workflow visually focused and fast.
LightCut is excellent for AI-driven efficiency, and DJI Fly Editor suits DJI-specific clips.
For users seeking liberation from complexity, CapCut offers the most versatile, polished, and accessible editing experience on a phone.
How Do I Edit My DJI Drone Videos?
To edit DJI drone videos, the creator should open DJI Fly, tap Create, import the clip, then trim the start, split the footage, and speed the middle segment to 4–5x.
Smooth, soaring sequences benefit from video stabilization tips, subtle color grading techniques, and sound design essentials.
After reviewing, export in 1080p for instant phone saving. This streamlined process frees the footage, shaping crisp, cinematic motion with precision and visual clarity.
Conclusion
A polished dronie begins in restraint and ends in expansion: a tight subject at the start, then a clean trim, a faster middle, and a reveal that opens into scale. LightCut, CapCut, and DJI Fly Editor each turn a phone into a compact post-production suite, balancing speed with precision. Paired with music and a crisp 1080p export, the footage shifts from casual capture to cinematic lift—small screen, large result.
