Yes, you can replace the touchscreen in a Toyota RAV4 Hybrid, but first determine whether the failed part is the touch digitizer, the LCD display, or the complete head unit. If the picture looks normal but taps are dead, shifted, or trigger the wrong area, the touch layer is the main suspect. U.S.-market 2016 RAV4 Hybrids were sold with different 6.1-inch and 7.0-inch Toyota Entune systems depending on trim and equipment, so do not order a replacement by model year alone. Verify the active screen size, radio manufacturer, factory radio or faceplate part number, and connector before buying a digitizer. Replacing only the failed touch layer can preserve the original factory radio and integrated features while avoiding an unnecessary complete-unit replacement.
Last updated: September 11, 2026
| Symptom | Check First | Likely Repair Path |
|---|---|---|
| Display image is normal, but touch is dead, inaccurate, or has dead zones | Restart the system, inspect for a touch-calibration issue, then verify the digitizer connection | Digitizer/touch-layer repair may be appropriate |
| Lines, discoloration, missing pixels, or no visible image | Check whether audio and other head-unit functions still operate | LCD, display connection, power, or head-unit diagnosis |
| Radio reboots, has no audio, or several multimedia functions fail together | Check power, software, connectors, and the head unit | Do not assume the digitizer is the cause |
| Only the backup-camera picture is missing | Diagnose the camera, camera wiring, and related connection | A touchscreen digitizer normally is not the first repair |
If your problem is mainly freezing, restarting, Bluetooth, or another software-related symptom rather than failed touch input, check the Toyota RAV4 software update guide before buying hardware.
First-hand verification:
Why You Might Need a Touchscreen Replacement for Your RAV4?
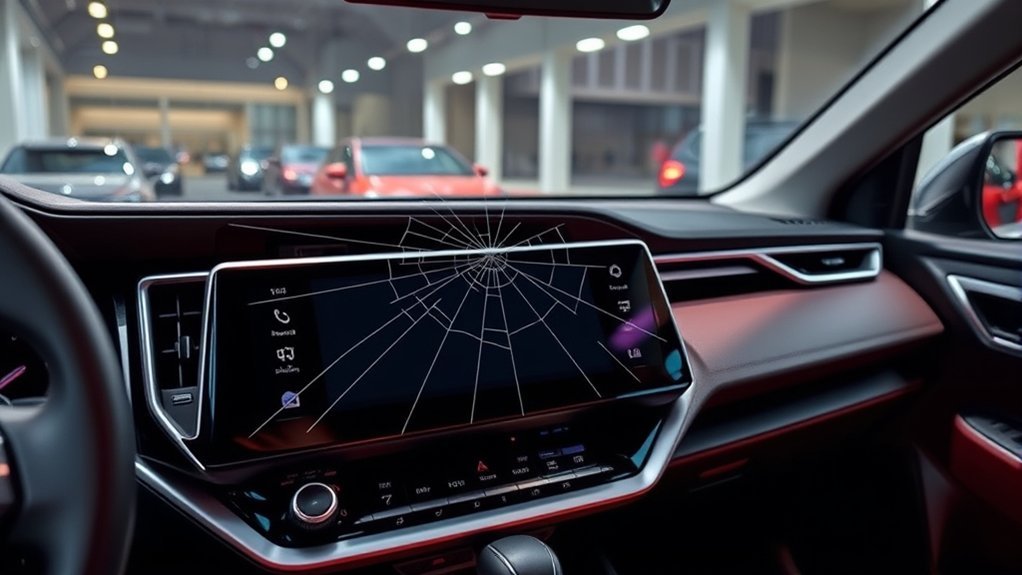
A touchscreen digitizer replacement makes the most sense when the display still produces a clear picture but touch input has failed. Common examples include dead zones, touches that register above or below your finger, ghost input, or a cracked touch surface.
Do not immediately replace the digitizer when the entire multimedia system is frozen or restarting. A software, power, connector, or head-unit problem can produce a different set of symptoms. Diagnose those problems first so you do not replace a working screen.
A digitizer-only repair can also be less disruptive than replacing the complete receiver. You keep the original Toyota multimedia unit instead of introducing a new radio, dash kit, camera interface, steering-wheel-control adapter, microphone, or amplifier interface.
However, the replacement part must match the actual radio in the vehicle. Toyota’s official 2016 RAV4 information shows that different multimedia systems were offered across the range, including 6.1-inch and 7-inch touchscreens. You can review Toyota’s 2016 RAV4 equipment overview for the factory system differences.
Step-by-Step Guide to Disassembling Your Toyota RAV4 Stereo
For a 2013–2018 RAV4-style factory receiver, dashboard removal is relatively straightforward, but the internal digitizer work requires more care. Park the vehicle, apply the parking brake, power the vehicle off, and follow the appropriate service procedure for disconnecting the negative terminal of the 12-volt battery before unplugging the receiver.
Do not work on the multimedia system while the vehicle is in READY mode. Do not disturb unfamiliar safety-system wiring, and never work on orange hybrid high-voltage cables or components.
Required Tools And Materials
Gather the tools before opening the dashboard. Use non-marring tools around visible trim rather than a knife or exposed metal blade.
| Tool/Material | Purpose | Notes |
|---|---|---|
| Plastic trim removal tool | Release dashboard trim and vents | Reduces the chance of scratching visible trim |
| 10mm socket, ratchet, and extension | Remove the factory receiver fasteners | Keep all fasteners organized for reassembly |
| Clean soft cloth | Protect the dashboard and display | Place removed trim and the receiver on a protected surface |
| Phone/camera and small organizer | Photograph connectors and store screws | Record the original connections before unplugging them |
| Verified replacement digitizer | Replace the failed touch layer | Buy only after confirming screen, radio, connector, and part-number compatibility |
A reputable removal reference for the 2013–2018 RAV4 also specifies a panel tool and 10mm hardware. See the Crutchfield RAV4 stereo-removal guide for an additional removal reference.
Step-By-Step Disassembly Process
- Record the existing functions. Before removing anything, check the radio, speakers, USB connection, steering-wheel controls, microphone, navigation if equipped, clock, and backup camera. This gives you a baseline for the final test.
- Protect the dashboard. Place a clean cloth around vulnerable trim and the center console.
- Release the upper trim and clock/hazard assembly. Use a plastic panel tool and work gradually around the retaining clips. Disconnect any electrical connector only after the trim is supported.
- Remove the receiver-side vents. Release the clips carefully instead of forcing the vent assemblies.
- Remove the receiver fasteners. The 2013–2018 RAV4 factory receiver is secured by four 10mm fasteners in the commonly documented installation layout.
- Pull the receiver forward carefully. Do not let its weight hang from the wiring.
- Photograph the rear connectors. Record the antenna, factory harnesses, USB and other installed connectors before unplugging anything.
- Release each connector by its locking tab. Pull on the connector body rather than the wires.
- Move the receiver to a clean workbench. The internal display and digitizer procedure can vary with radio manufacturer and part number, so verify the replacement instructions for your exact receiver before separating the display assembly.
If you are replacing only the digitizer, you normally do not need to modify the vehicle’s factory wiring harness. Wiring adapters become relevant when replacing the entire factory receiver with an aftermarket head unit.
Sourcing the Right Touchscreen Replacement for Your RAV4 Hybrid
Correct fitment is more important than choosing a touchscreen based only on “2016 RAV4 Hybrid” in a product title. Toyota sold different factory multimedia configurations, and visually similar Toyota screens may use different dimensions, ribbon connectors, or radio suppliers.
For U.S.-market 2016 vehicles, Toyota’s published equipment information shows the following general configuration:
| 2016 RAV4 Hybrid Configuration | Factory Touchscreen | What It Means for Replacement |
|---|---|---|
| Hybrid XLE | 6.1-inch Entune system was the normal XLE configuration; higher-level 7-inch equipment was also offered with certain equipment/packages | Do not assume every XLE uses the same digitizer |
| Hybrid Limited | 7.0-inch premium Entune system | Still verify the actual receiver and connector before ordering |
Equipment also varies by market, options, production configuration, and any radio that a previous owner may have installed.
Before ordering, record these details:
- Active screen size: measure the illuminated/viewable area diagonally rather than the entire plastic bezel.
- Radio manufacturer: check the identification label on the receiver.
- Factory radio or faceplate number: compare the number directly with the replacement supplier’s compatibility list.
- Digitizer connector: verify the ribbon and connector configuration instead of assuming all same-size screens use the same connection.
- Navigation and audio equipment: note whether your vehicle has factory navigation, JBL audio, or another premium package.
- Sales market: a U.S., Canadian, European, or other-market RAV4 may not use identical multimedia hardware.
Do not use LA070WV2 (TD)(01) as a default 2016 RAV4 Hybrid replacement identifier without independently matching it to the radio in your vehicle. The safer rule is simple: the replacement supplier’s fitment information must agree with the physical screen, radio label, connector, and factory configuration you actually have.
Tips for Installing Your New Touchscreen
Once the factory receiver is on a protected work surface, slow down. Dashboard removal and internal digitizer replacement are separate stages of the job.
Before You Separate the Digitizer
Confirm that the replacement part is a touch digitizer rather than a complete LCD module. The digitizer is the layer that detects your finger. The LCD underneath produces the picture.
If your original LCD already has missing pixels, lines, severe discoloration, or no visible image, a digitizer alone may not solve the problem.
Photograph the receiver before removing internal screws or ribbon cables. Organize fasteners by location, and never force a flat-flex ribbon cable out of a locked connector. The exact internal fastener and ribbon arrangement can differ between factory radio versions.
Step-by-Step Replacement Guide
- Verify the new part one final time. Compare size, connector position, ribbon style and supplier compatibility information with the removed unit.
- Remove the receiver’s display/front assembly according to the instructions for that exact radio. Keep screws and brackets in their original locations.
- Release ribbon-cable locks before removing the cables. Do not pull a locked ribbon cable by force.
- Separate the failed touch layer only as directed for the replacement kit. Some assemblies use clips, adhesive, or a combination of both.
- Keep debris away from the LCD. Fingerprints, adhesive fragments and dust trapped between layers may remain visible after reassembly.
- Install and connect the new digitizer. Confirm that the ribbon is fully seated and its locking mechanism is closed.
- Reassemble the receiver enough for a functional test. Do not reinstall every dashboard trim piece before you know the repair works.
- Reconnect the original vehicle connectors. Restore power according to the appropriate vehicle procedure.
- Test every function recorded before removal. Check touch response across the screen, audio, USB, steering-wheel controls, microphone, navigation if equipped, and backup camera.
- Finish reassembly only after the test passes. Reinstall the receiver fasteners, vents, clock/hazard assembly and trim without trapping wiring behind the unit.
If the new digitizer does not respond, stop before repeatedly taking the dashboard apart. Check the digitizer ribbon, locking tab, part compatibility and whether the original symptom was actually caused by the touch layer.
Troubleshooting Common Installation Challenges
| Problem After Repair | What to Check |
|---|---|
| New screen displays normally but does not respond to touch | Digitizer ribbon seating, connector lock, connector orientation, and part compatibility |
| Touch works but registers in the wrong location | Digitizer fitment, connector seating, and any calibration procedure documented for the exact factory unit |
| Display has lines, missing pixels, or no backlight | LCD connection and display hardware; a touch digitizer alone may not correct an LCD fault |
| Backup camera alone does not work | Restore the original camera-related connection and diagnose the camera circuit instead of assuming a digitizer problem |
| Navigation, voice control, audio, or several functions disappear after a complete radio swap | Head-unit compatibility, factory options, required interfaces, software/configuration, and all original connectors |
| Trim will not sit flush after reassembly | Check that wiring is not trapped behind the receiver and that every clip and vent is correctly aligned |
Do not assume a specific “yellow connector” is universally the RAV4 reverse-camera connection. Connector color and adapter arrangements can differ with radio, market, and aftermarket equipment. Use the diagram supplied for the exact vehicle interface or receiver being installed.
When a Full Head-Unit Upgrade Makes More Sense

If the factory display image and audio are healthy and only touch input has failed, replacing the digitizer is usually the least disruptive repair path.
A complete head-unit upgrade becomes more reasonable when the factory receiver itself has failed or when your main goal is adding capabilities the original system does not provide.
Before buying an aftermarket receiver, verify compatibility with:
- the dashboard opening and mounting kit;
- factory JBL amplification, if equipped;
- the original backup camera;
- steering-wheel audio controls;
- USB connections and microphone;
- factory navigation or other multimedia functions you want to retain.
A full receiver replacement can require vehicle-specific harnesses and interfaces that are unnecessary for a normal digitizer-only repair. For the broader repair-versus-upgrade decision, see How to Replace the Screen on a Toyota RAV4: Repair vs Upgrade Options.
Frequently Asked Questions
Will Changing the Touchscreen Void My Vehicle Warranty?
Not automatically in the United States. The Federal Trade Commission says using an aftermarket or recycled part by itself does not void a vehicle warranty. However, if an aftermarket part is defective or is installed incorrectly and causes damage, warranty coverage can be denied for the damaged component. Check any warranty or service contract that still applies to your vehicle and keep records of the repair. See the FTC’s auto-warranty guidance.
Can I Install a Touchscreen Myself, or Should I Hire a Professional?
You can replace a RAV4 touchscreen digitizer yourself if you are comfortable removing dashboard trim, handling small fasteners, releasing ribbon-cable locks, and working around delicate LCD components. Use a professional automotive-electronics technician if you are unsure about the radio identification, internal connectors, adhesive separation, or post-repair testing.
What Tools Are Needed for the Touchscreen Replacement Process?
For removing the 2013–2018 RAV4 factory receiver, the basic tools include a plastic panel tool, 10mm socket, ratchet and extension. A clean cloth and small organizer are also useful. Internal digitizer work may require additional small hand tools specified by the replacement kit or the exact radio assembly.
How Long Does the Installation Process Typically Take?
There is no reliable one-hour time that applies to every RAV4 touchscreen repair. Dashboard removal may be quick for an experienced installer, but identifying the unit, separating the digitizer, cleaning the display, reconnecting ribbon cables, testing all functions and reassembling the dashboard can take longer. Work slowly rather than planning around a fixed time estimate.
Are There Compatibility Issues With Aftermarket Touchscreen Units?
Yes. Compatibility is one of the most important parts of this repair. A replacement must match the actual factory radio, screen size, connector configuration and relevant multimedia package. Do not assume that every 2016 RAV4 Hybrid or every Toyota 7-inch touchscreen uses the same digitizer.
What Size Touchscreen Does a 2016 Toyota RAV4 Hybrid Have?
U.S.-market 2016 RAV4 Hybrids were available with more than one multimedia configuration. Hybrid XLE models commonly used a 6.1-inch Entune touchscreen, while 7-inch premium equipment was available in higher-level configurations and used on the Hybrid Limited. Verify your actual vehicle because trim, options, market and previous modifications can change the installed unit.
Can I Replace Only the Touch Layer on a Toyota RAV4?
In many compatible factory units, yes. If the LCD image, audio and other radio functions are normal but the screen has dead touch zones, inaccurate input, ghost touches, or physical damage to the touch surface, replacing the digitizer can be a more focused repair than replacing the entire head unit. Confirm the diagnosis and exact digitizer fitment first.
Conclusion
You can replace the touchscreen in a Toyota RAV4 Hybrid without automatically replacing the complete radio, but diagnosis and compatibility come first. On a 2016 RAV4 Hybrid, confirm whether you have a 6.1-inch or 7-inch factory system, record the radio and faceplate identification, and match the replacement digitizer to the actual hardware.
If the picture is normal and only touch input has failed, a digitizer repair may be the right path. If the LCD, audio, navigation, power, camera, or several functions fail together, diagnose those systems before buying a touchscreen. Test every original feature before final reassembly so a loose connector or incompatible part does not turn a simple repair into a second troubleshooting job.
