
To replace shocks and struts on a Toyota RAV4 safely, first identify the exact model year, VIN, drivetrain, trim, and production specification. Most RAV4 work involves front strut assemblies and separate rear shock absorbers. Replace matching components in left-and-right axle pairs, support the vehicle with rated jack stands, protect the brake hoses and ABS wiring, and use Toyota’s year-specific torque specifications. Never loosen a strut’s center piston-rod nut while the coil spring is loaded. The 2026 RAV4 begins a new sixth generation, so do not carry 2019–2025 part numbers, torque values, or detailed removal steps forward unless Toyota’s service information confirms them for your vehicle.
Last updated: September 19, 2026. Safety and fitment guidance rechecked against Toyota, KYB, Monroe, OTC, and current repair-cost data.
Quick Answer
Replace RAV4 front struts or rear shocks in matching axle pairs. Use complete front strut assemblies when possible, support the vehicle with rated jack stands, protect the ABS wiring and brake hoses, and follow year-specific Toyota torque specifications. Check the wheel alignment after front-strut work and stop if spring compression exceeds your training or equipment. Treat the redesigned 2026 RAV4 as a separate fitment and procedure check.
Key Takeaways
- Bouncing, body roll, clunking, cupped tire wear, and heavy fluid leakage justify a full suspension inspection, but none of these symptoms identifies the strut by itself.
- Front struts and rear shocks should normally be replaced as matching left-and-right pairs, not automatically as a four-corner set.
- Socket sizes and torque values differ among RAV4 generations. Obtain the procedure for your year, drivetrain, and VIN before starting.
- A complete loaded strut assembly avoids transferring the original spring. A bare strut requires a suitable spring compressor and advanced safety knowledge.
- An impact wrench may help remove suitable fasteners, but it should not be used to apply final torque or tighten the upper piston-rod nut.
- After front-strut replacement, inspect every bracket and hose, torque the wheels correctly, perform a cautious test drive, and have the alignment checked.
At a Glance
| Time Required | Variable by generation, corrosion, access, and whether the original spring must be transferred. Reserve a large uninterrupted work window for a first front-strut replacement; rear shocks are generally less involved. |
| Difficulty | Intermediate with complete assemblies or rear shocks; advanced when transferring a coil spring to a bare strut. |
| Tools Needed | Floor jack, rated jack stands, wheel chocks, torque wrench, breaker bar, model-specific sockets and wrenches, penetrating oil, trim tool, support jack, and safety equipment. |
| Cost | Varies substantially by year and repair scope. As one current benchmark, RepairPal’s August 2026 estimate for a 2022 RAV4 shock-or-strut replacement is $1,078–$1,317 before taxes, fees, location adjustments, and related repairs. |
Warning: Never work beneath a RAV4 supported only by its jack. The jack raises the vehicle; properly rated jack stands or a lift support it. Never remove a strut’s center piston-rod nut unless the coil spring is secured in a suitable compressor and is loose in both spring seats.
What Should You Check Before Buying RAV4 Struts or Shocks?
Start with the model year, VIN, drivetrain, trim, and production information on your RAV4. A part advertised for the same general generation may still use different spring rates, mounting brackets, left-and-right configurations, or hardware.
Use the vehicle information to confirm the part number with the manufacturer or supplier. Obtain the matching removal procedure and torque specifications from Toyota’s Technical Information System or another licensed source that reproduces Toyota service data.
Toyota identifies the 2026 RAV4 as the start of the sixth generation. Its suspension was retuned as part of the redesign, so a fifth-generation 2019–2025 procedure or part listing should not be assumed to apply to a 2026 vehicle. Review Toyota’s 2026 RAV4 overview and then verify the exact service information by VIN.
| Model Years | Fitment Rule |
|---|---|
| 1996–2005 | Treat fasteners, mounts, brackets, and replacement assemblies as generation- and year-specific. Do not import later-model torque values. |
| 2006–2012 | Verify engine, drivetrain, axle position, left/right fitment, and hardware before ordering or disassembly. |
| 2013–2018 | Confirm the exact complete or bare strut listing and the matching Toyota procedure for the vehicle. |
| 2019–2025 | Check powertrain, drivetrain, production origin, side, and axle position. Similar-looking parts are not automatically interchangeable. |
| 2026 | New sixth-generation vehicle. Start with 2026-specific parts and service information rather than carrying over 2019–2025 instructions. |
Why there is no universal torque chart here: RAV4 fastener specifications can change with model year, component, drivetrain, production configuration, and repair step. A single copied torque number is less useful—and potentially less safe—than the specification tied to your exact vehicle in Toyota service information.
Front Struts Versus Rear Shocks
A front strut combines the damper with structural suspension components and normally attaches to the steering knuckle. The rear shock controls suspension movement but is separate from the rear coil spring on common RAV4 configurations.
This difference matters because front-strut removal can affect steering geometry and may expose a compressed coil spring. Rear-shock replacement generally does not require a spring compressor, although the rear suspension arm may need support.
Complete Strut Assembly or Bare Strut?
A complete or loaded strut normally includes the damper, coil spring, upper mount, bearing, boot, and bump stop. It reduces assembly work and lets you leave the dangerous center shaft nut untouched.
A bare strut reuses the original spring and some mounting components. It may cost less in parts, but it requires careful inspection of the spring, mount, bearing, boot, insulators, and bump stop. It also requires an appropriate spring compressor.
Pro Tip: For a home repair, a reputable complete assembly that is cataloged for your exact RAV4 is usually the safer and simpler choice. Compare its bracket orientation, stud pattern, spring shape, and overall configuration with the original before installation.
How Do You Know When RAV4 Struts or Shocks Are Bad?

Changes in ride quality often provide the first warning. Excessive bouncing after a bump, increased body roll, front-end dive during braking, rear squat during acceleration, or unstable steering can indicate weak damping.
Inspect the tire tread for cupping or scalloped patches. Worn shocks or struts can contribute to this pattern by allowing the tire to lose consistent road contact, but wheel imbalance, damaged tires, loose suspension parts, and alignment errors can cause similar wear.
Listen for clunks, knocks, rattles, or binding while driving over bumps or turning. The sound may come from the strut, but worn upper mounts, bearings, sway-bar links, control-arm bushings, ball joints, or loose fasteners are also common causes.
Check the body of each shock or strut for dents, corrosion, damaged mounting points, and hydraulic fluid. A light film does not automatically prove failure. Clean the unit and recheck it. Heavy wet leakage running down the body supports replacement, especially when it appears with poor ride control. These symptoms are consistent with the inspection guidance published by Monroe.
A bounce test or visible leak can point you toward a problem, but a complete steering-and-suspension inspection should confirm the repair before you order parts.
How Much Does RAV4 Shock or Strut Replacement Cost?
The installed price depends on the RAV4’s model year, the axle being repaired, the parts selected, local labor rates, rust, and whether related components need replacement. A quote for one rear-shock pair should not be compared directly with a quote for two complete front strut assemblies.
For a dated benchmark, RepairPal’s August 7, 2026 estimate for a 2022 RAV4 is $1,078–$1,317 before taxes, fees, location adjustments, and related repairs. Its published estimates vary significantly across other RAV4 model years, so use your exact year and repair scope when comparing quotes.
Ask each shop whether its quote covers one unit or an axle pair. Confirm whether it includes mounts, bearings, boots, bump stops, springs, hardware, taxes, shop fees, alignment, and warranty coverage.
For deeper mileage, symptom, and ownership-cost guidance, see RAV4 strut lifespan and replacement cost. This guide stays focused on the replacement workflow and safety checks.
What Tools Do You Need for RAV4 Strut Replacement?
Gather the tools listed in the repair procedure for your exact RAV4. Common socket sizes seen on some models should not be treated as universal specifications.
Necessary Hand Tools
| Tool | Purpose |
|---|---|
| Model-specific sockets and wrenches | Wheel, bracket, link, knuckle, shock, and strut-mount fasteners |
| Breaker bar | Controlled loosening of tight fasteners |
| Torque wrench | Final tightening to Toyota specifications |
| Hex, Torx, or pass-through tools as specified | Holding a link stud or piston rod without damaging it |
| Trim tool and needle-nose pliers | Removing ABS-wire clips and retainers without pulling the wire |
| Penetrating oil and wire brush | Cleaning and preparing corroded exposed threads |
| Paint marker | Marking bracket positions as a reassembly reference |
Recommended Power Tools
An electric or pneumatic impact wrench can speed the removal of lug nuts and other suitable fasteners after the vehicle is supported. Use the correct impact-rated socket and keep the tool away from hoses, wiring, boots, and the polished piston rod.
Do not use an impact wrench for final tightening. Never use it to tighten the upper piston-rod mounting nut. KYB’s installation guidance calls for the proper shaft-holding tool and a torque wrench set to the vehicle manufacturer’s specification.
Safety Equipment Essentials
- Hydraulic floor jack with adequate capacity
- Rated jack stands
- Wheel chocks
- Safety glasses or a face shield
- Work gloves
- Closed-toe footwear
- A secondary jack for supporting the steering knuckle or suspension arm
- A suitable strut spring compressor only when transferring the spring
Note: If a spring is cracked, heavily corroded, bowed, or does not fit your compressor correctly, do not compress it. Take the assembly to a qualified suspension shop.
How Do You Safely Jack Up a Toyota RAV4?
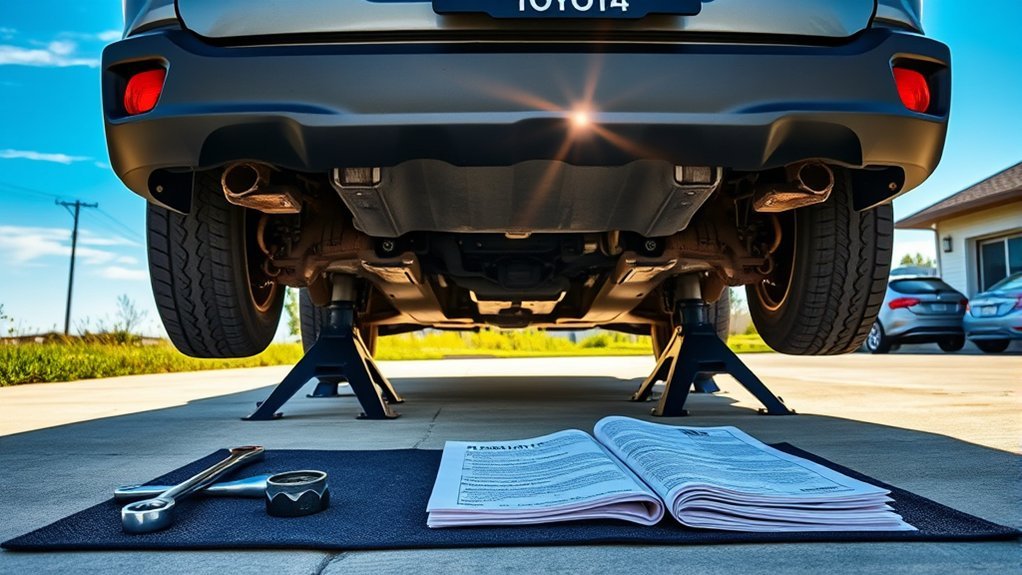
Choose a Safe Location
Park on firm, level pavement away from traffic. Shift into Park, apply the parking brake, turn off the vehicle, remove the key or move the smart key away, and chock the wheels that will remain on the ground.
Loosen the wheel nuts slightly before lifting the vehicle. Do not remove them while the tire is supporting vehicle weight.
Use Proper Equipment
Locate the approved lifting and support points in the owner’s information for your model year. Toyota’s RAV4 Quick Reference Guide directs owners to the full Owner’s Manual for tire-changing and jack-positioning procedures.
Raise the RAV4 with a floor jack and place rated jack stands beneath the approved support locations. Lower the vehicle onto the stands while keeping the jack nearby as a secondary precaution without allowing it to carry the working load.
Follow Safety Guidelines
- Confirm that each stand sits flat and carries the load evenly.
- Give the body a cautious push from outside the work area to verify stability.
- Remove the wheel and keep it clear of the work area so it cannot interfere with suspension movement.
- Never place your body beneath the suspension while it is supported only by a movable floor jack.
- Keep children, pets, and bystanders away from the work area.
How Do You Disconnect the Sway-Bar Link Safely?
Inspect how the sway-bar link connects to the strut before loosening it. Photograph the bracket, brake hose, and ABS-wire routing for reference.
- Clean the exposed threads with a wire brush and apply penetrating oil if corrosion is present.
- Use the specified wrench or socket on the nut.
- Hold the stud with the specified internal hex, Torx, or wrench flats if it begins to spin.
- Move the link aside without forcing the ball joint beyond its normal travel.
- Inspect the boots, studs, and joints for looseness, tears, or corrosion.
If the nut is seized and the link will be replaced, controlled cutting may be necessary. Protect the brake hose, ABS wire, CV boot, and strut body from sparks and cutting tools. Stop if you cannot isolate these components safely.
How Do You Remove a RAV4 Front Strut?
The steps below describe the common workflow, not a substitute for the Toyota procedure for your exact vehicle. Toyota service information controls the required fastener sequence, torque values, reusable or non-reusable hardware, and any model-specific support requirements.
Complete these steps on one side while using the other side as a visual reference. Do not allow the steering knuckle to hang from the brake hose, ABS wire, or CV axle.
Safe Strut Disconnection Techniques
- Remove the brake-hose and ABS-wire brackets from the strut. Release clips by their retainers rather than pulling the wire.
- Support the lower control arm or steering knuckle with a second jack.
- Mark the relationship between the strut and knuckle as a reassembly reference. This mark does not replace an alignment.
- Remove the strut-to-knuckle fasteners using the year-specific procedure.
- Control the knuckle as the fasteners come out. Do not pull it outward far enough to overextend or separate the inner CV joint.
- Support the strut from below and remove only the outer upper-mount nuts or bolts identified in the repair procedure.
- Lower the assembly through the wheel opening without striking the fender, brake hose, axle boot, or ABS wiring.
Warning: Do not loosen the center piston-rod nut while the spring is carrying load. On a complete assembly, leave that nut untouched throughout removal and installation.
Inspect the Removed Components
Compare the replacement with the original before installation. Check the upper-stud pattern, bracket locations, sway-link tab, hose and wire mounts, spring orientation, overall configuration, and left-or-right designation.
Inspect the steering knuckle, mounting holes, threads, sway-bar link, brake-hose bracket, ABS retainers, spring seat, and surrounding components. Replace single-use nuts, damaged clips, or deformed fasteners when the service procedure requires it, and use new installation hardware supplied with the replacement component when its instructions require that hardware.
When Is a Spring Compressor Required for a RAV4 Strut?
Skip this section when installing a complete loaded assembly. Spring compression is necessary only when the original coil spring or mount will be transferred to a bare replacement strut.
The points below are safety principles, not universal operating instructions. Spring-compressor designs differ, so the manufacturer’s instructions for your exact compressor control its mounting points, jaw placement, setup, and operating sequence.
Use a compressor rated for the spring’s diameter and shape. Inspect its threads, jaws or retaining components, pins, pads, and frame before use. Mount or secure the compressor exactly as its manufacturer requires.
- Mark the spring’s relationship to the lower seat and upper mount.
- Position the compressor on the approved coils or attachment points exactly as its instructions specify.
- Keep the spring centered and aligned as required by the compressor manufacturer.
- Compress it gradually only until it becomes loose in both seats.
- Stop immediately if the spring bows, a jaw or retaining component shifts, or compression becomes unusually difficult.
- Remove the piston-rod nut with the specified holding tool only after confirming that the spring is unloaded from the seats.
- Keep your hands, face, and body out of the potential release path.
- After assembly, verify that both spring ends sit correctly before slowly releasing compression according to the tool instructions.
Follow the operating instructions supplied with your compressor. The official OTC StrutTamer instructions warn that incorrect positioning can cause a sudden release and serious injury.
How Do You Install a New RAV4 Front Strut?

- Guide the replacement strut into the tower without damaging the studs or body opening.
- Start the outer upper-mount nuts by hand. Do not fully tighten them unless the service procedure directs you to do so at this stage.
- Align the steering knuckle with the lower strut bracket while supporting the knuckle.
- Insert the correct fasteners in their specified direction and install the required nuts or washers.
- Torque the strut-to-knuckle connection to the specification for your exact RAV4.
- Reconnect the sway-bar link without twisting its boot.
- Reinstall every brake-hose and ABS-wire bracket in its original position.
- Torque the upper mounting fasteners and other connections in the sequence required by Toyota.
Do not force a bracket to fit or enlarge a mounting hole. A mismatch can mean that the part is on the wrong side, has rotated during assembly, or does not fit the vehicle.
How Do You Reattach Components After Strut Installation?
Route the brake hose and ABS wiring exactly as they were before removal. Turn the steering from side to side while the vehicle remains supported and verify that neither component stretches, rubs, twists, or contacts the tire and spring.
Make sure every clip is fully seated and every bracket faces the correct direction. Confirm that the sway-bar link boots are not pinched and that the steering knuckle is fully seated against the strut bracket.
Install the wheel and tighten the nuts in a crisscross pattern. Lower the RAV4 and apply the final wheel-nut torque specified for the vehicle. Do not use an impact wrench as the final torque tool.
Repeat the procedure on the opposite front side. Matching new struts on the same axle help maintain balanced damping and predictable handling. KYB recommends replacing shocks and struts in axle pairs rather than replacing only one side.
How Do You Replace RAV4 Rear Shocks?
The rear procedure varies because upper-shock access and mounting arrangements differ by generation. Review the Toyota procedure before removing interior trim or suspension fasteners. The 2026 redesign should be treated as its own service application rather than assumed to match a 2019–2025 procedure.
- Chock the front wheels, raise the rear of the RAV4, and support it at the approved points.
- Remove the rear wheel if required for access.
- Support the rear suspension arm near the shock connection with a secondary jack. Do not lift the vehicle off its stands.
- Locate the upper and lower shock mounts. Remove only the trim or covers identified in the repair procedure.
- Clean and prepare exposed threads before loosening the fasteners.
- Remove the lower fastener while controlling the suspension arm with the support jack.
- Remove the upper mounting fastener or fasteners and withdraw the shock.
- Compare the replacement’s length, bushings, sleeves, washers, dust cover, and mounting configuration with the original.
- Install the new shock in the correct orientation and start all fasteners by hand.
- Torque the mounts under the suspension-loading condition specified by Toyota. Some rubber-bushed connections require final tightening under a specified suspension position or load condition.
- Repeat the repair on the opposite rear side.
Rear-shock replacement does not normally require removing the rear coil spring. Stop if releasing the shock allows uncontrolled suspension movement or if the procedure for your RAV4 requires additional spring support.
Why Does Alignment Matter After RAV4 Strut Replacement?
Removing a front strut can alter the relationship between the strut and steering knuckle. Replacement-part dimensions, mounting-hole position, ride height, and existing suspension wear can also affect alignment.
An incorrect alignment may cause pulling, an off-center steering wheel, unstable tracking, or rapid tire wear. Paint marks can help return parts close to their original position, but they cannot measure camber, caster, or toe.
KYB notes that the alignment effect depends on vehicle design and recommends checking the applicable service specifications. Arrange an alignment inspection after front-strut replacement and correct any measurements that are outside specification, especially when the steering wheel is off-center, the vehicle pulls, ride height has changed, or the tires already show abnormal wear.
What Should You Check After Replacing RAV4 Struts or Shocks?
Before driving, inspect both sides with a bright light. Confirm that no tools remain in the engine bay or wheel wells and that all mounting fasteners, hose brackets, ABS retainers, sway-bar links, and wheels are secure.
Start the RAV4 and check for ABS, brake, stability-control, or steering warnings. Turn the steering slowly from lock to lock while stationary and listen for binding, spring movement, or contact.
Take a short, low-speed test drive on a quiet route. Avoid highway speeds, hard braking, abrupt steering, and rough roads until normal operation is confirmed.
| Symptom After Repair | What to Check |
|---|---|
| Clunk over bumps | Upper mount, sway-bar link, knuckle fasteners, spring seating, and loose brackets |
| Pulling or off-center steering wheel | Alignment, tire pressure, knuckle position, and mismatched parts |
| ABS or stability warning | ABS-wire connector, routing, clips, sensor damage, and diagnostic trouble codes |
| Grinding or rubbing | Brake-hose routing, dust shield, tire clearance, spring orientation, and bracket placement |
| One side sits higher | Wrong part, spring not seated, mount orientation, or suspension binding |
Stop driving and reinspect the work if you hear a severe clunk, feel unstable steering, see a brake hose stretching, notice a wheel sitting at an unusual angle, or receive a brake, ABS, stability-control, or steering warning.
Related Guides
Frequently Asked Questions
How long does it take to replace RAV4 struts?
There is no universal RAV4 replacement time. The job varies by generation, corrosion, tool access, stuck sway-bar links, and whether you install complete assemblies or transfer the original springs. A first-time DIY front pair should be planned as a substantial job rather than a quick repair.
Can I drive my RAV4 with bad struts or shocks?
Minor wear may not make the vehicle immediately undrivable, but poor damping can reduce stability, tire contact, and braking control. Avoid driving if the vehicle bounces uncontrollably, sways severely, has a broken spring or mount, leaks heavily, makes harsh structural noises, or feels difficult to steer.
What are the symptoms of failing RAV4 struts?
Common symptoms include continued bouncing after bumps, excessive body roll, brake dive, clunking, cupped tire wear, unstable steering, and heavy hydraulic-fluid leakage. Because tires, mounts, links, bushings, and alignment can create similar symptoms, inspect the complete suspension before replacing parts.
Should I replace all four shocks and struts at once?
Replace matching components as an axle pair: both front struts or both rear shocks. Replacing all four can make sense when inspection shows similar wear at both axles, but one worn front pair does not automatically require new rear shocks.
Do I need OEM struts for my RAV4?
OEM parts provide factory-specific fit and damping characteristics, but they are not the only workable option. A reputable aftermarket part can be suitable when it is cataloged for the exact year, drivetrain, trim, production specification, side, and axle. Avoid mixing different brands or designs across the same axle.
Are complete strut assemblies safer for DIY replacement?
They remove the need to transfer the original coil spring, which eliminates the most hazardous part of strut disassembly. You must still verify fitment, support the vehicle and steering knuckle correctly, torque every fastener, and check the alignment.
Do I need an alignment after replacing RAV4 struts?
An alignment check is recommended after front-strut replacement because the strut connects to the steering knuckle and can affect wheel geometry. The need for adjustment depends on the design, part dimensions, and measured alignment, but checking it protects the tires and confirms proper handling.
Conclusion
Replacing Toyota RAV4 shocks and struts is manageable when you use the correct parts, support the vehicle securely, and follow the repair information for your exact model. Complete front assemblies simplify the job, while bare-strut replacement should be reserved for someone trained and equipped to control a compressed coil spring.
Replace components in axle pairs, protect the brake hoses, ABS wiring, and CV joints, and torque every connection to Toyota specifications. Finish with a careful inspection, low-speed test drive, and alignment check before returning the RAV4 to normal use. If you have a redesigned 2026 RAV4, start with sixth-generation service information rather than assuming an earlier procedure applies.
Sources
- Toyota Technical Information System — vehicle-specific Toyota repair manuals, procedures, and specifications
- 2024 Toyota RAV4 Quick Reference Guide — owner-manual and jack-positioning guidance
- Toyota 2026 RAV4 Overview — sixth-generation redesign and chassis information
- RepairPal 2022 Toyota RAV4 Shock or Strut Replacement Estimate — dated parts-and-labor cost benchmark
- KYB Shock and Strut Installation Tips — torque-wrench and piston-rod handling guidance
- KYB Alignment After Strut Replacement — alignment considerations after strut work
- Monroe Signs of Worn Shocks and Struts — ride, noise, tire-wear, and leakage symptoms
- OTC StrutTamer Operating Instructions — spring-compressor positioning and safety precautions
