If your Toyota Tacoma’s backup camera is black, blurry, intermittent, or not appearing in Reverse, start with the simple checks before replacing parts. Clean the lens, note exactly what the display does, inspect the tailgate connections, and check the correct fuse for your model year. The symptom usually helps you narrow the fault to the camera, wiring, reverse signal, display, or power supply.
Last reviewed: July 13, 2026
Quick Answer
Clean the camera lens, restart the truck and multimedia display, inspect the tailgate camera connector, and check the correct fuse using your Tacoma’s model-year manual. A screen that never switches to the camera points toward a reverse-signal or display issue, while a switched but black screen more often points toward camera power, wiring, or the camera itself.
Key Takeaways
- Identify whether the display switches to camera mode before you inspect or replace the camera.
- Check the tailgate connector and wiring first if the image cuts out when the tailgate moves.
- Use the fuse diagram for your exact model year and replace a blown fuse only with the same amperage.
- Treat battery disconnection as a secondary, model-specific step rather than a universal camera reset.
- Check your VIN through Toyota and NHTSA instead of assuming a recall applies to every Tacoma.
At a Glance
| Time Required | 15–45 minutes for basic inspection and testing |
| Difficulty | Easy for cleaning and visual checks; moderate for electrical testing |
| Tools Needed | Microfiber cloth, flashlight, owner’s manual, fuse puller, wheel chock, and an optional digital multimeter |
| Cost | Visual checks usually cost nothing; diagnosis, wiring repair, or camera replacement varies by model and parts required |
Warning: Park on level ground, set the parking brake, chock a wheel, and keep the engine off during visual inspections. Never stand behind the truck while another person shifts it into Reverse. Replace a fuse only with the same amperage listed for that circuit.
Immediate Troubleshooting Steps for Your Backup Camera
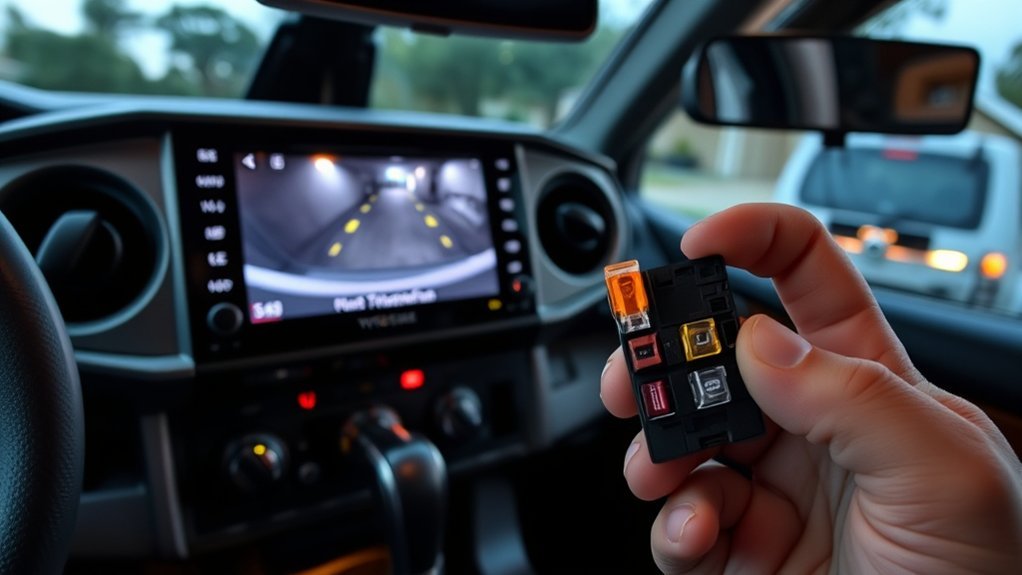
Start by observing the exact failure instead of assuming the camera has failed. Turn the ignition on, hold the brake pedal, and have a helper watch the display from inside the cab while you remain in a safe position. The way the screen responds provides the first diagnostic clue.
| What You See | Likely Area to Check | First Action |
|---|---|---|
| The display never changes when Reverse is selected | Reverse-position input, fuse, multimedia display, aftermarket radio wiring, or related control circuit | Check other display functions, the correct fuse, and whether recent radio or transmission work affected the reverse signal |
| The display changes but remains black or shows “No signal” | Camera power, ground, video circuit, connector, or camera assembly | Inspect the tailgate connector and camera harness for looseness, corrosion, or damage |
| The image flickers when the tailgate moves | Loose connector, broken conductor, pinched harness, or poor terminal contact | Inspect the removable-tailgate connection and every flex point in the harness |
| The image is cloudy, dim, or blurry | Dirty lens, condensation, scratched lens, water intrusion, or poor low-light conditions | Clean and dry the lens, then inspect it for moisture inside the camera housing |
| The image works but guidelines are missing or incorrect | Display settings, steering-angle data, calibration, software, or replacement-camera compatibility | Check the model-specific manual and have calibration or software inspected if needed |
Inspect the Camera Lens and Tailgate
Clean the lens gently with water and a clean microfiber cloth. Avoid abrasive polish, strong solvents, pressure-washer spray at close range, or household glass cleaner unless the product is confirmed safe for the lens material.
Check whether the tailgate was recently removed, repaired, or replaced. Tacoma tailgates may have a disconnect point for the camera harness. A connector that looks attached may still be partly unseated or have a bent terminal.
Make sure the tailgate is fully installed and latched. Look around the handle-mounted camera for impact damage, cracks, moisture, or signs that the camera angle changed.
Check the Correct Fuse
Use the fuse-box diagram and owner’s manual for your exact Tacoma year and equipment. Toyota provides model-specific manuals through its Manuals and Warranties portal.
A camera-related failure may involve a multimedia, accessory, parking-assist, reverse, or shared display circuit rather than a fuse labeled only “camera.” Pull only the fuse identified by the correct diagram. If it is blown, replace it with the same type and amperage.
If the replacement fuse blows again, stop replacing it. A repeated failure points to a short circuit, damaged wiring, water intrusion, or another electrical problem that needs diagnosis.
Power-Cycle the Truck and Display
Turn the truck off, open and close the driver’s door, wait for the multimedia system to shut down, and restart the truck. If your head unit supports a documented restart procedure, follow the instructions for that exact system.
A power cycle may clear a temporary display or communication fault. It will not repair an open wire, failed camera, blown fuse, corroded terminal, or missing reverse-position signal.
Pro Tip: Before unplugging anything, take clear photos of the connectors and harness routing. If the problem began after tailgate removal, stereo installation, trailer wiring, body repair, or battery service, inspect that work first.
Check Your Wiring: What to Look For
The camera needs the correct power, ground, signal path, and reverse-command input. A visual inspection can find many faults, but wire colors and expected voltages vary. Do not use a generic pinout from another Tacoma year.
Inspect Wiring Harness Condition
Inspect the wiring harness from the tailgate camera to the first accessible connector. Check the removable-tailgate connection, clips along the bed, underbody routing, and any section near a sharp edge or moving part.
Look for crushed insulation, exposed copper, stretched wires, rodent damage, previous splices, loose clips, or a harness trapped between the tailgate and body. Check for fresh damage after collision repair, bed removal, hitch work, or trailer-accessory installation.
If the picture cuts in and out when the tailgate moves, gently move the harness while a helper watches the display from the cab. Do not place yourself behind the truck during a live Reverse test.
Check Connector Integrity
Disconnect connectors only with the ignition off and after following any model-specific precautions. Inspect each accessible connector for moisture, green or white corrosion, dirt, backed-out terminals, bent pins, a broken lock tab, or a damaged seal.
- Confirm each connector seats fully and locks into place.
- Check that no pin has been pushed backward into the connector body.
- Dry moisture before reconnecting the circuit.
- Use only an electrical contact cleaner suitable for automotive connectors.
- Do not pack a connector with grease unless the service information calls for it.
A loose tailgate connector can create an intermittent image even when the camera itself remains functional.
Verify Ground Connections
A weak or open ground can cause a black, rolling, distorted, or intermittent image. Inspect accessible ground points and terminals for looseness, paint, rust, moisture, or corrosion.
If you have the correct wiring information and know how to use a digital multimeter, test the camera circuit under operating conditions. A continuity test alone can miss a high-resistance connection that fails only when current flows.
Do not probe sealed connectors carelessly or force oversized meter leads into terminals. Damaged terminal tension can create a new intermittent fault. Back-probing and voltage-drop testing should follow the correct Toyota service procedure.
Note: Skip testing the factory camera with a random monitor. Factory camera voltage, connectors, and signal formats can vary. Use the correct wiring diagram and compatible test equipment.
Quick Ways to Reset Your Backup Camera
A reset can help only when the problem comes from a temporary software or communication fault. Start with the least disruptive method and avoid treating a reset as proof that the camera is defective.
Battery Disconnect Method
Disconnecting the negative battery terminal may power-cycle several vehicle modules, but it is not a universal Tacoma camera-reset procedure. It can also erase settings or trigger relearning procedures.
Before disconnecting the battery, review the manual for your exact truck and multimedia system. Turn the ignition off, remove the key or move the smart key away from the truck, and wait for vehicle systems to shut down. If you are unsure about battery procedures, have a qualified technician perform the reset.
After reconnection, allow the multimedia system to start fully before testing the camera. If the same fault returns immediately, continue diagnosis instead of repeatedly disconnecting the battery.
ECU Reset Process
A backup-camera problem does not automatically mean the engine ECU needs a reset. Depending on the model year and equipment, camera operation may involve the multimedia display, reverse-position input, parking-assist system, camera assembly, or another control module.
If the display and camera have proper power, ground, and wiring but the image still fails, a Toyota-capable scan tool may reveal communication or system codes. A dealer or qualified repair shop can also check for applicable multimedia software updates and calibration procedures.
Common Backup Camera Problems
Common failures produce different symptoms. Use the display behavior and the truck’s recent repair history to decide where to look next.
- Blank screen after the display switches: Check camera power, ground, tailgate connectors, video wiring, and the camera assembly.
- Display never enters camera mode: Check the reverse-position signal, related fuse, head unit, aftermarket radio interface, and control-module communication.
- Intermittent image: Inspect loose connectors, broken conductors, corrosion, and harness sections that move with the tailgate.
- Distorted or rolling image: Check connector resistance, poor ground, damaged signal wiring, water intrusion, and incompatible replacement parts.
- Cloudy or fogged image: Clean the lens and inspect the camera housing for internal condensation.
- Image works but guidelines do not: Check display settings, calibration, steering-angle information, software, and camera compatibility.
The camera image is a visibility aid. Keep using your mirrors, look around the truck, and confirm the path is clear before backing.
Federal rear-visibility rules specify that covered light trucks manufactured on or after May 1, 2018, must display the required rearview image within two seconds after a backing event begins. You can review the requirements in Federal Motor Vehicle Safety Standard No. 111. A delayed or missing image confirms a problem, but it does not identify which component failed.
Model-Year Differences and Recall Checks
Tacoma camera designs, displays, connectors, fuse assignments, and available viewing features vary by generation, trim, and installed equipment. A repair method for a 2017 factory head unit may not apply to a newer multimedia system or an aftermarket radio.
Use Toyota’s official manual lookup to select your exact vehicle. Check the fuse diagram, camera instructions, system limitations, and any documented restart procedure before removing trim or disconnecting the battery.
Recall eligibility is also vehicle-specific. Enter the truck’s 17-digit VIN or license plate in the Toyota Safety Recall and Service Campaign Lookup. You can also search the VIN through the NHTSA recall database.
Do not assume that a backup-camera campaign for another Toyota model applies to your Tacoma. NHTSA also notes that recently announced recalls may not show every affected VIN immediately, so check again if Toyota has just announced a campaign.
Regular Maintenance Tips for Your Backup Camera
Clean the camera lens whenever road film, mud, salt, snow, or water spots reduce visibility. Use a soft microfiber cloth and avoid scratching the lens with dry grit.
Inspect the tailgate harness after removing or reinstalling the tailgate. Confirm the connector is locked, the protective cap or seal is positioned correctly, and the harness is not stretched or pinched.
Periodically check underbody wiring near trailer hitches, bed accessories, and repair areas. Aftermarket trailer wiring or a stereo installation can disturb camera-related wiring or the reverse-position signal.
Watch for internal condensation. Moisture inside the camera housing can indicate a failed seal and may require camera replacement rather than surface cleaning.
Use a water-repellent product only when its manufacturer confirms that it is safe for the camera’s lens material and coatings. Applying an unsuitable chemical can haze or damage the lens.
When to Seek Professional Help
Stop DIY testing and arrange professional diagnosis when the fault involves damaged sealed connectors, repeated fuse failure, extensive corrosion, an unknown aftermarket wiring modification, or inaccessible underbody wiring.
You should also seek help when:
- The screen stays black after power, ground, and accessible connections have been checked.
- The display never recognizes Reverse even though the transmission and reverse lights operate normally.
- The camera works intermittently and harness movement does not reveal the fault.
- The truck stores multimedia, parking-assist, body-control, or communication codes.
- A replacement camera requires programming, calibration, or guideline adjustment.
- The problem started after collision, tailgate, bed, transmission, or electrical repair.
A technician with Toyota wiring information and a compatible scan tool can test module communication, the reverse-position input, camera supply voltage, ground voltage drop, signal integrity, software status, and calibration.
Upgrading or Replacing Your Backup Camera
Do not order a replacement based only on the camera’s appearance. Confirm compatibility with the Tacoma’s model year, tailgate handle, connector, supply voltage, signal type, display, image orientation, viewing angle, and guideline system.
An incompatible camera may produce no image, a reversed picture, poor framing, distorted colors, missing guidelines, or a view that does not match the truck’s original safety markings.
For an aftermarket radio, verify that the interface retains the factory camera and converts its voltage or signal when required. Some installations need a reverse-trigger connection or adapter rather than a new camera.
Choose a weather-sealed camera designed for the mounting location. A wide field of view can help, but an excessively wide lens may make objects appear farther away and reduce useful detail. Correct placement and a clear, stable image matter more than marketing terms such as “night vision.”
Professional installation is sensible when the system requires new wiring through the tailgate, integration with a factory display, calibration, or troubleshooting of an existing aftermarket conversion.
Related Guides
Frequently Asked Questions
What would cause my Toyota Tacoma backup camera to stop working?
Common causes include a dirty or damaged lens, a loose tailgate connector, damaged wiring, corrosion, a blown related fuse, poor power or ground, a failed camera, a missing reverse-position signal, multimedia software trouble, or an aftermarket radio interface problem. Start by noting whether the display switches into camera mode.
Why is my 2017 Tacoma backup camera completely black?
If the display switches to the camera view but remains black, inspect the tailgate connector, camera wiring, power, ground, and camera assembly. If the display never changes when you select Reverse, investigate the reverse-position input, related fuse, head unit, or aftermarket wiring. Use the 2017 Tacoma wiring and fuse information rather than a procedure for another year.
How do I reset my Toyota Tacoma backup camera?
First turn the truck and multimedia system off completely, wait for the display to shut down, and restart it. Use a documented head-unit restart procedure when your system provides one. Disconnect the battery only when the manual or a qualified technician recommends it, because the procedure and possible relearning requirements vary.
Is there a recall for Toyota Tacoma backup cameras?
Recall coverage depends on the exact VIN and can change over time. Check your truck through Toyota’s official recall lookup and the NHTSA recall database. Do not assume that a camera recall for another Toyota model or model year includes your Tacoma.
Why does the camera cut out when I move the tailgate?
A picture that flickers with tailgate movement commonly points to a loose connector, damaged terminal, pinched harness, or conductor broken inside the insulation. Inspect the removable-tailgate connection and harness flex points with the ignition off.
Can a blown fuse disable the backup camera?
Yes, a blown fuse in a related camera, multimedia, accessory, parking-assist, or reverse circuit can stop the image from appearing. Fuse labels and locations vary, so use the diagram for your exact Tacoma and install only the specified amperage. A fuse that blows again indicates a fault that needs diagnosis.
Sources
- Toyota Manuals and Warranties — model-specific owner’s manuals, fuse information, and vehicle-system instructions
- Toyota Safety Recall and Service Campaign Lookup — VIN and license-plate recall checking for Toyota vehicles
- National Highway Traffic Safety Administration Recall Search — VIN-based safety recall information and recall-status guidance
- 49 CFR 571.111, Federal Motor Vehicle Safety Standard No. 111 — federal rear-visibility system requirements
Conclusion
When a Toyota Tacoma backup camera stops working, diagnose the symptom before replacing the camera. A display that never switches to camera mode points toward a different set of faults than a display that switches but stays black. Clean the lens, inspect the tailgate connector and harness, check the correct fuse, and power-cycle the multimedia system.
If the fault remains, use model-specific wiring information or arrange professional testing of the camera’s power, ground, signal circuit, reverse input, software, and related modules. Check Toyota and NHTSA with your VIN for open recalls, and continue using your mirrors and a direct visual check whenever the camera image is unavailable.
