
Building your first FPV drone is easier when you plan the parts, tools, safety checks, and budget before you start soldering. You need a strong frame, a compatible flight controller and ESC, reliable motors, a camera system, batteries, a charger, radio gear, and FPV goggles. A smart first build should be affordable, repairable, and simple enough to troubleshoot after crashes.
Quick Answer
For a first FPV drone, start with a durable 5-inch freestyle build using a budget carbon frame, a matched flight controller and ESC stack, four reliable motors, an analog or digital FPV camera system, 6S LiPo batteries, a quality charger, goggles, and a radio transmitter. Plan extra money for tools, props, batteries, and repairs.
Key Takeaways
- A first FPV build should focus on durability, parts compatibility, and easy repairs instead of maximum speed.
- The frame, flight controller, ESC, motors, camera, video transmitter, receiver, props, and battery must work together as one system.
- Your true budget must include the drone, radio, goggles, batteries, charger, soldering tools, spare props, and crash parts.
- Use a multimeter and smoke stopper before the first power-up to reduce the risk of electrical damage.
- Practice in a simulator and fly in open areas before attempting tight gaps, freestyle tricks, or long-range flights.
At a Glance
| Time Required | About 3 to 10 hours for assembly, setup, testing, and first-flight preparation |
| Difficulty | Beginner to intermediate, mainly because soldering and software setup require care |
| Tools Needed | Soldering iron, solder, flux, hex drivers, side cutters, tweezers, multimeter, smoke stopper, heat shrink, zip ties, threadlocker, and a computer for configuration |
| Cost | About $100 to $230 for basic build examples, plus roughly $150 or more for radio, goggles, charger, batteries, tools, and spares |
Essential Components for Your FPV Drone Build

When building your first FPV drone, you need to gather several essential components to support reliable flight, clean video, and easy repairs. Start with the Source One V5 frame, priced at $29.99 in this example build. It gives you a strong carbon-fiber layout, wide parts support, and enough space for a beginner-friendly 5-inch freestyle setup.
Next, integrate the Speedybee F405 flight controller and ESC stack, costing $69.99 in this parts list. A matched flight controller and ESC stack reduces wiring confusion and helps you avoid compatibility issues. The listed 55A ESC also gives you enough overhead for typical 5-inch motors when paired with a suitable battery and propeller setup.
For motor selection, choose four T-Motor Velox V2207 motors at $14.90 each. Motors in this size range are common for 5-inch freestyle drones because they balance thrust, durability, and control. Before ordering, match the motor KV rating to your battery voltage and prop size so the drone does not pull more current than your ESC can safely handle.
You also need a video system. The Eachine TX805, at $13 in this example, provides an affordable analog video transmitter. Pair it with the Foxeer Razer Micro FPV camera for $17.99 to capture a clear low-latency view while flying. Finally, power your build with a 6S 1000-1100mAh LiPo battery, such as the CNHL 6S 1100mAh, available for around $25 in this sample budget. This parts list gives you a practical starting point for your FPV adventure.
Note: Prices in FPV change often because parts go in and out of stock. Treat the prices above as planning examples, then confirm current pricing and compatibility before buying.
[Amazon Products Picked for You]
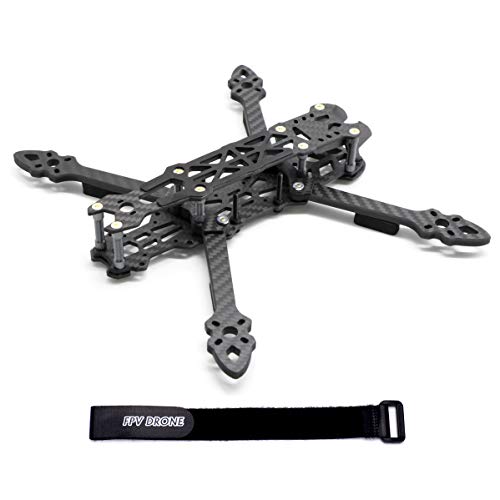
High quality 3K carbon fiber plate, high CNC processing.

This new 5 inch 250mm drone frame fit for DC HD FPV Freestyle RC Racing Drone.

Wide Compatibility: Compatible with DJI Air Unit, Caddx Vista, and 20x20mm or 30.5x30.5mm flight controllers.
Component Compatibility Checklist
Before you buy parts, check compatibility across the whole build. Many beginner mistakes happen because one part looks good alone but does not match the rest of the system. A flight controller, ESC, motors, props, receiver, camera, video transmitter, and battery all need the right voltage, plug type, mounting pattern, and firmware support.
- Frame size: A 5-inch frame usually uses 5-inch propellers and 22xx or similar motor sizes.
- Stack size: Confirm the frame supports your flight controller and ESC mounting pattern, such as 30.5 x 30.5mm or 20 x 20mm.
- Battery voltage: Match your motors and ESC to 4S or 6S power. Do not mix randomly.
- Motor KV: Lower KV motors usually pair better with 6S batteries, while higher KV motors often suit 4S builds.
- Receiver protocol: Match your receiver to your radio transmitter system before ordering.
- Video system: Choose analog, HDZero, Walksnail, or DJI-style digital before buying goggles and a video transmitter.
- Propeller direction: Set motor direction and prop direction correctly in software before the first flight.
Warning: Never guess wiring polarity. Reversed battery leads, crossed motor pads, or a shorted 5V rail can destroy electronics within seconds.
Recommended Budget Builds for 2024-2025

For those looking to build an FPV drone on a budget, several 2024-2025 style build paths balance cost and performance. The best choice depends on how much gear you already own. A pilot who already has goggles, a radio, batteries, and a charger can build the drone itself for much less than a complete beginner starting from zero.
| Build Type | Total Cost | Key Components |
|---|---|---|
| $100 Budget Build | $102.92 | Source One V5 frame, Speedybee F405 stack |
| $230 Reliable Build | $228.60 | T-Motor Velox V2207 motors, Eachine TX805 video transmitter |
| Flight Time (6S) | 1000-1300mAh | LiPo batteries from AliExpress |
| Additional Costs | ~$150 | Radio, goggles, charger |
You can build your own drone using affordable components like the Source One V5 frame and Speedybee F405 stack. These budget options help you get strong beginner performance without overspending. Quality LiPo batteries also matter because weak or poorly maintained packs can sag under load and reduce flight time.
A $100 budget build can work if you already own tools and FPV gear, but it leaves little room for mistakes. The $230 reliable build is usually more realistic for beginners because it gives you better parts, stronger motors, and a more forgiving setup. Your total first-time cost may still be higher once you include goggles, a radio, spare props, extra batteries, a charger, and soldering tools.
[Amazon Products Picked for You]
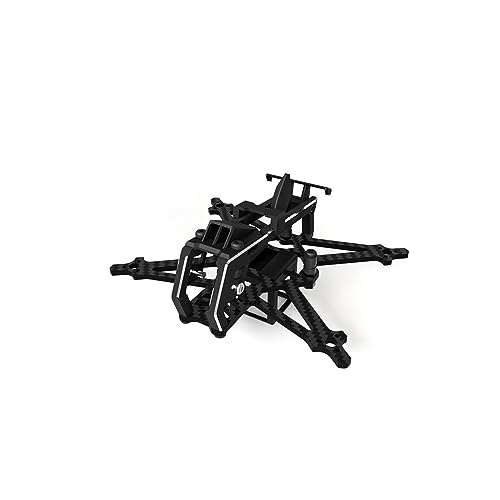
High-Performance Design: Our drone FPV frame kit features a lightweight and durable aluminum top piece combined with 3K carbon fiber material, ensuring high-efficiency and low-noise flight performance for optimal aerial experiences

Made of high-quality 3K Carbon Fiber,lightweight.

Sleek & Sturdy Frame Design: Streamlined High-Strength Frame: Features a newly designed slender profile that marries aesthetic appeal with robust construction, achieving an excellent balance between a sleek form and structural integrity
Realistic First FPV Budget Breakdown
A first FPV budget should include more than the airframe. Many beginners price only the frame, motors, stack, camera, video transmitter, and battery. Then they get surprised by the cost of the radio, goggles, charger, propellers, antennas, tools, and replacement parts.
| Budget Item | Why You Need It | Beginner Planning Notes |
|---|---|---|
| Drone parts | Frame, motors, flight controller, ESC, camera, video transmitter, receiver, props, and battery lead | Choose common parts so repairs and tutorials are easy to find. |
| Radio transmitter | Controls the drone and connects to your receiver protocol | Buy this early so you can practice in a simulator before flying. |
| FPV goggles | Show the live camera feed from the drone | Analog goggles are cheaper; digital systems cost more but offer clearer video. |
| LiPo charger | Charges, balances, and storage-charges batteries | Use a charger that supports your cell count and charge current. |
| Tools | Needed for soldering, assembly, testing, and repairs | A multimeter and smoke stopper are safety essentials, not optional extras. |
| Spares | Props, arms, screws, straps, wires, and antennas | Crashes are normal, so keep basic spares ready before your first session. |
Key Accessories for FPV Flying
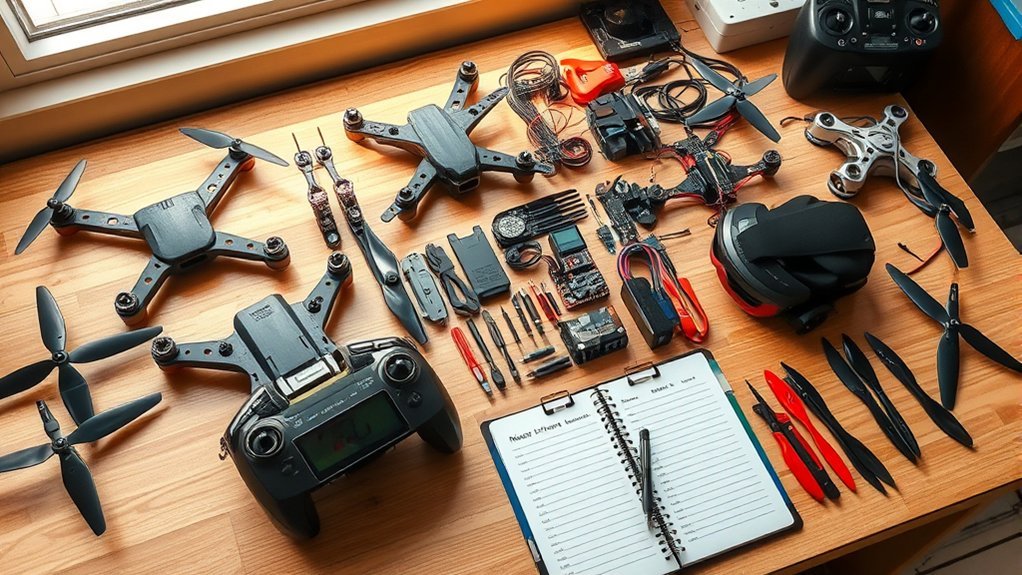
Key accessories play an essential role in improving your FPV flying experience. When you build FPV, the right gear helps you fly longer, repair faster, and avoid preventable failures. You should not spend your full budget on the drone and forget the equipment that supports it.
Essential accessories are crucial for maximizing your FPV flying experience, ensuring optimal performance and reliability from your setup.
- FPV goggles: High-quality options like the EV800D provide an immersive analog FPV experience at a beginner-friendly price.
- Radio transmitter: A reliable model, such as the FrSky Taranis Qx7, offers good control and communication with your drone when paired with a compatible receiver.
- Battery charger: The Hobbymate D6 Duo Pro efficiently charges multiple LiPo batteries, helping you spend more time flying and less time waiting.
- Spare propellers: Stocking extra 5-inch props is important because propellers are often the first parts to break during crashes.
- XT60 connectors: Having extra connectors and silicone wire is essential for reliable battery connections and quick repairs.
Investing in these accessories will greatly enhance your overall flying experience, making your first FPV flights smoother and less stressful.
[Amazon Products Picked for You]

【Comprehensive Cleaning Solution】: Our cleaning kit is meticulously designed to address every cleaning pain point of your drone. From removing stubborn dirt and grime to ensuring crystal-clear camera lenses, this kit has everything you need for a thorough cleaning experience.

【Designed for DJI FPV Drone】Very suitable for DJI FPV drone

Precision 3D Printed Components: This mounting base kit is manufactured using advanced 3D printing technology that ensures exact dimensional accuracy for fitment. The production method creates lightweight yet durable components that maintain structural integrity during flight operations and impacts.
Tools You Need Before Assembly
You do not need a professional electronics bench to build your first FPV drone, but you do need reliable basic tools. Poor solder joints, stripped screws, and untested wiring can cause more problems than the parts themselves.
- Soldering iron: Use a temperature-controlled iron with enough power for motor wires and battery leads.
- Solder and flux: Good solder and flux help you make clean, shiny joints that hold under vibration.
- Multimeter: Use it to check for shorts before plugging in a battery.
- Smoke stopper: This adds a layer of protection during the first power-up.
- Hex drivers: Quality drivers help you avoid rounding small frame and motor screws.
- Heat shrink and electrical tape: Use them to protect exposed joints and wires.
- Zip ties and battery straps: These keep antennas, wires, and batteries secure during flight.
- Computer and USB cable: You need these for firmware setup, receiver setup, and flight controller configuration.
Pro Tip: Buy your radio before the drone if your budget is tight. You can connect the radio to a simulator and build muscle memory before risking real parts.
Assembly and Setup Instructions

As you start assembling your first FPV drone, follow a detailed tutorial for your chosen frame. This helps confirm that all components fit correctly and reveals spacing issues before you cut wires or solder parts in place. Dry fitting is one of the easiest ways to avoid messy wiring and hard-to-reach screws.
Start by assembling the frame and checking all carbon edges for sharp spots. Then install the motors using 7mm screws and a small amount of threadlocker where appropriate. Make sure motor screws do not touch the motor windings. Screws that are too long can damage a motor before the drone ever flies.
For wiring, refer to a recommended diagram and perform a dry fit to assess wire lengths. Plan clean routing before cutting. Keep motor wires away from sharp carbon edges, propeller paths, and hot components. Next, install the Electronic Speed Controller (ESC) by sliding it onto long bolts in the frame. Solder the motor wires to the ESC, ensuring no exposed wire touches the frame or another pad.
After the ESC is installed, mount the flight controller in the correct direction or set the correct board orientation in software. Connect the receiver, camera, video transmitter, and buzzer if you use one. Secure the wiring neatly with small zip ties, heat shrink, or tape. Do not overtighten stack screws because soft mounts help reduce vibration.
After completing the assembly, use a multimeter to check for electrical shorts. Finally, connect the battery with a smoke stopper during your initial setup. This approach protects your budget while maximizing the drone’s functionality.
Software Setup Before Your First Flight
Hardware assembly is only half the job. Your FPV drone also needs software setup before the props go on. Connect the flight controller to your computer, confirm the board connects correctly, and configure ports, receiver settings, motor direction, failsafe, modes, and video transmitter settings.
- Remove the propellers first: Never configure motors with props installed.
- Confirm board orientation: Move the drone by hand and check that the 3D model moves the same way.
- Set receiver protocol: Confirm your radio and receiver bind correctly and the channel map responds as expected.
- Check motor order: Each motor must spin in the correct position and direction.
- Set arming modes: Add an arm switch and any useful modes, such as angle mode for early testing.
- Set failsafe: Confirm the drone disarms or enters the correct failsafe behavior when signal is lost.
- Configure OSD: Add useful on-screen data such as battery voltage, timer, warnings, and link quality if supported.
Warning: Keep propellers off during bench testing. A small FPV drone can still cause serious cuts if a motor arms unexpectedly.
Battery and LiPo Safety Basics
LiPo batteries give FPV drones strong power, but they require careful handling. Never charge damaged, swollen, hot, or punctured packs. Always use a balance charger, choose the correct cell count, and set a safe charge current based on the battery capacity.
Store batteries at storage voltage when you are not flying for more than a short period. Keep packs away from heat, metal objects, moisture, and flammable materials. After a crash, inspect the battery before flying again. If a pack smells sweet, looks puffed, gets unusually hot, or has damaged wires, stop using it.
- Charge batteries where you can watch them.
- Use a LiPo-safe bag, ammo-style box with venting, or another fire-resistant charging area.
- Do not leave batteries in a hot car.
- Do not over-discharge packs during flight.
- Label older packs so you can track weak or damaged batteries.
Tips for First-Time FPV Pilots

While diving into the world of FPV drone piloting, it’s smart to start with a budget-friendly build, such as the $100 option, to gain practical experience without overspending. Familiarizing yourself with essential components is vital for troubleshooting, repairs, and future upgrades.
Starting with a budget-friendly FPV drone build is key to gaining experience and mastering piloting skills.
- Invest in a good set of FPV goggles for a reliable first-person view experience.
- Practice flying in open areas to develop your piloting skills effectively.
- Expect crashes; they’re a natural part of the learning process.
- Understand the parts list: know your flight controller, ESC, and motors.
- Join the community on this website to seek advice and learn from both beginners and professionals.
These steps will help you build the drone confidently and accelerate your learning process. Remember, every expert was once a beginner.
Where to Fly and Basic Safety Rules
Choose a wide open field for your first flights. Avoid roads, people, animals, buildings, power lines, playgrounds, airports, stadiums, and emergency response areas. Even a small FPV drone can move fast, and a beginner pilot needs space to recover from mistakes.
Keep the drone close at first and fly short sessions. Land when battery voltage gets low instead of pushing for one more lap. Use a spotter when needed, especially when flying FPV. Also check your local drone rules before flying because registration, training, airspace, Remote ID, and visual line-of-sight requirements can vary by location and aircraft type.
Note: FPV rules can change. Before flying outdoors, check the current rules from your local aviation authority and avoid restricted airspace.
Common Beginner Mistakes to Avoid
Most first-build problems come from rushing. Slow down during wiring, software setup, and first power-up. A clean build usually flies better and is much easier to repair after the first crash.
- Buying mismatched parts: Check voltage, mounting pattern, receiver protocol, and frame space before ordering.
- Skipping the multimeter test: A short check takes seconds and can save your stack.
- Installing propellers too early: Keep props off until configuration and motor tests are complete.
- Ignoring failsafe: A poor failsafe setup can turn a signal-loss moment into a dangerous flyaway.
- Flying too far too soon: Stay close until you understand battery life, signal strength, and control feel.
- Not bringing spare parts: Extra props, screws, straps, and tools can save a flying session.
- Overtightening stack hardware: Too much pressure can crush soft mounts and transfer vibration to the flight controller.
Basic Troubleshooting After Assembly
If your FPV drone does not work correctly after assembly, troubleshoot in a simple order. Do not change five settings at once. Fix one issue, test again, and keep notes so you know what changed.
| Problem | Likely Cause | What to Check |
|---|---|---|
| Drone will not power on | Battery lead, solder joint, short, or damaged ESC | Check polarity, XT60 connection, multimeter readings, and smoke stopper behavior. |
| Receiver does not respond | Wrong port, wrong protocol, no bind, or incorrect channel map | Confirm wiring, receiver tab movement, radio model setup, and binding status. |
| Motors spin the wrong way | Motor direction mismatch | Reverse motor direction in ESC software or swap motor wires if needed. |
| Video has static or no image | Wrong channel, antenna issue, camera wiring, or video transmitter setup | Check antenna connection, band/channel, wiring, and video transmitter power settings. |
| Drone flips on takeoff | Wrong motor order, wrong prop direction, incorrect board orientation, or reversed gyro setup | Remove props, recheck motor order, prop direction, board alignment, and model movement in software. |
| Short flight time | Weak battery, aggressive props, heavy build, or poor tune | Try a healthy battery, check prop size, review weight, and watch voltage sag. |
Upgrade Path After Your First Build
One advantage of building FPV is that you can upgrade later. Do not rush into every upgrade at once. Fly the drone, learn what limits your experience, and improve the part that matters most.
- Better antennas: A simple antenna upgrade can improve video range and consistency.
- More batteries: Extra packs give you more practice time each session.
- Stronger motors: Upgrade motors after you understand how the current setup flies.
- Digital video: Move to a digital FPV system if you want a clearer view and your budget allows it.
- GPS or buzzer: Add recovery tools if you fly in larger fields or areas with tall grass.
- Frame arms and hardware: Keep spare arms and screws for quick crash repairs.
Related Guides
Frequently Asked Questions
Can I Use Old Drone Parts for My FPV Build?
Yes, you can use old drone parts for your FPV build if they are compatible, functional, and safe. Check the voltage rating, connector type, mounting pattern, firmware support, weight, and physical condition. Reusing parts can save money, but damaged electronics or weak motors can make troubleshooting much harder.
What Tools Are Essential for Building an FPV Drone?
You need a soldering iron, solder, flux, multimeter, hex driver set, side cutters, tweezers, heat shrink, zip ties, threadlocker, and a smoke stopper. These tools help you build cleanly, test for shorts, and make reliable repairs after crashes.
How Much Time Does It Take to Assemble an FPV Drone?
Assembling an FPV drone typically takes about 3 to 10 hours, depending on your experience, soldering skill, and familiarity with the parts. Your first build may take longer because you should dry fit parts, plan wire routing, check for shorts, and complete software setup carefully.
What Safety Precautions Should I Take While Flying?
Always check your surroundings for obstacles, people, animals, roads, power lines, and restricted airspace. Keep control of the drone, fly in open areas, use a spotter when needed, and land before the battery gets too low. Also remove propellers during bench testing and confirm failsafe before outdoor flying.
Can I Upgrade My FPV Drone Later?
Absolutely. You can upgrade your FPV drone later by replacing parts such as motors, antennas, cameras, video systems, receivers, frame arms, and flight controllers. Start with upgrades that solve real problems you notice while flying, such as poor video range, short flight time, or weak crash durability.
Should I Build or Buy a Ready-to-Fly FPV Drone?
Build your first FPV drone if you want to understand every part and repair it yourself. Buy a ready-to-fly drone if you want the fastest path to flying. Building takes more time, but it makes future repairs, tuning, and upgrades much easier.
How Many Batteries Do I Need for FPV Flying?
For your first sessions, three to six batteries is a practical starting point. One battery is not enough for meaningful practice, and too many batteries can get expensive before you know which size and brand you prefer.
Sources
- Federal Aviation Administration UAS — general drone safety, airspace, and pilot guidance.
- FAA Recreational Flyers — recreational drone flying rules and basic requirements.
- Betaflight Documentation — flight controller setup, configuration, receiver setup, and motor checks.
- SpeedyBee Documentation — setup references for SpeedyBee flight controller and ESC hardware.
- U.S. Consumer Product Safety Commission Fire Safety Information Center — general battery and fire-safety awareness.
Conclusion
As you begin your FPV drone journey, remember that every skilled pilot started with a first build and a first flight. By choosing compatible components, planning your budget, using the right tools, and checking your work carefully, you set the stage for safer and more enjoyable aerial adventures.
Just like the Wright brothers, persistence and practice will help you improve. Gear up, follow the assembly instructions closely, test before takeoff, and learn from each flight. Your skyward exploration awaits, so approach it with patience, safety, and confidence.
