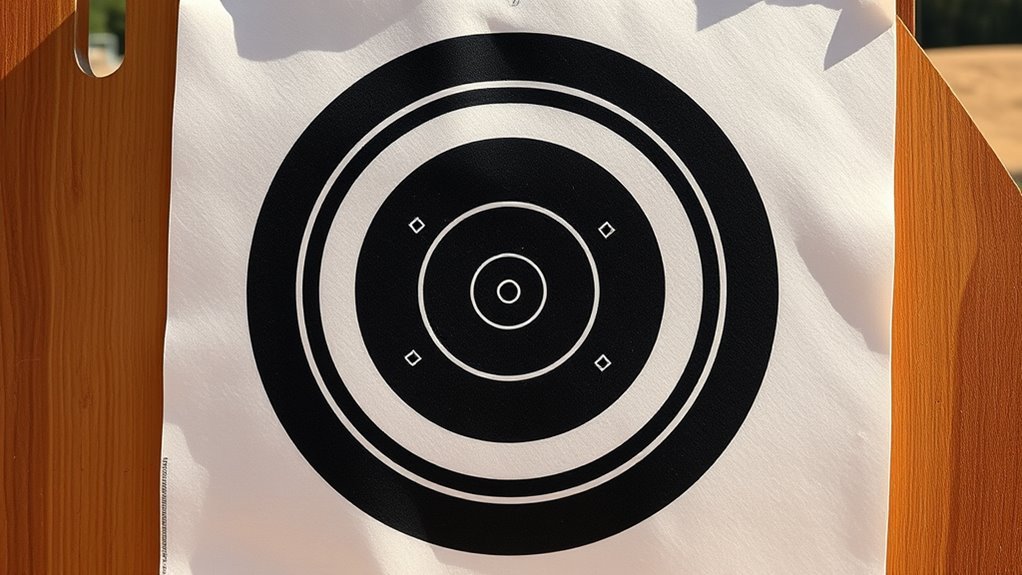
A high-contrast bullseye or grid target is best for adjusting a rifle scope. A clear center point lets the shooter see point of aim and point of impact quickly. Concentric rings help judge group size, while grid lines make elevation and windage corrections more precise. Bold dots also work well for checking consistency. Good contrast and simple markings reduce guesswork, and the next section explains how to match the target to distance and zeroing method.
Key Takeaways
- Use a high-contrast bullseye with a clear center for fast, accurate scope alignment.
- Grid-line targets help measure windage and elevation corrections precisely.
- Small dot targets reveal minor aiming errors and improve shot consistency.
- Concentric scoring rings make group size and shot dispersion easy to read.
- Match the target image to your distance, with durable, visible markings for outdoor use.
Best Target Images for Scope Zeroing
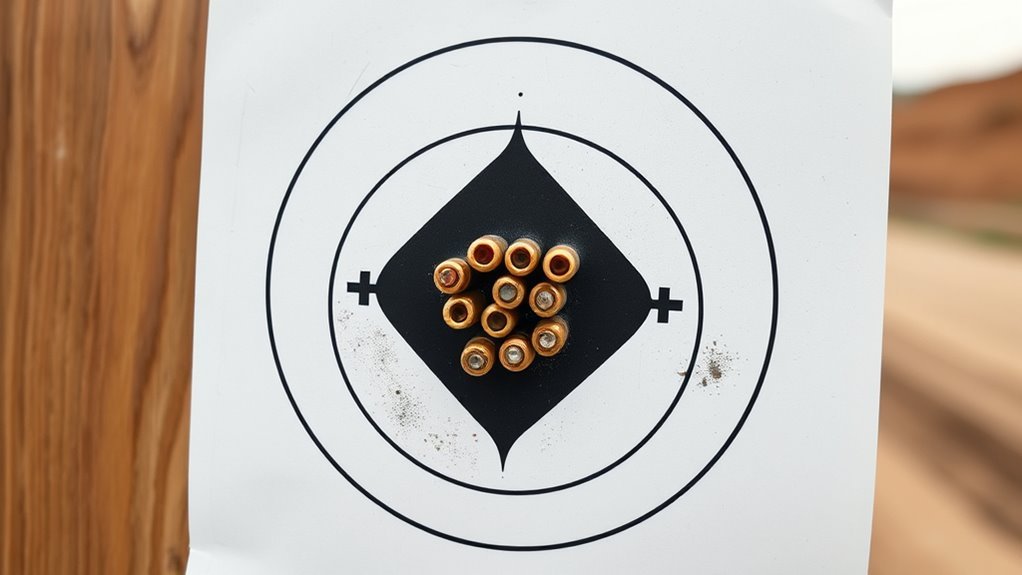
For scope zeroing, the most effective target images are those that provide a clear, measurable point of aim and impact. A grid target supports exact windage and elevation correction because each square reveals deviation immediately.
Bullseye layouts remain efficient for fast zeroing, since the central mark gives a precise reference on the target. Dot targets serve finer work, exposing small errors in alignment and confirming shot consistency.
Bullseye and dot targets offer fast reference points for zeroing, balancing quick alignment with fine precision.
Calibrated distance markers improve judgment of bullet drop at varied ranges, which is useful when an adjustable objective is set for different distances. Reactive images add immediate feedback, allowing the shooter to confirm strike location without delay.
In practice, the best target choice depends on the required adjustment level: broad patterns for initial alignment, small marks for refinement, and marked ranges for trajectory compensation. Clear image definition supports disciplined scope correction and helps the shooter reclaim accuracy through controlled, measurable steps.
Why a Bullseye Makes Scope Adjustments Easier
A bullseye target makes scope adjustments easier by giving shooters a single, unmistakable center point for aiming and evaluation. Its concentric rings create a precise frame for reading shot dispersion and calculating the point of impact.
High-contrast colors improve visibility, reducing ambiguity at short or extended range and helping the shooter identify needed corrections quickly. Because the layout is standardized, each session can be compared with the next, supporting disciplined scope tuning and repeatable performance.
- Center aim reference: a fixed bullseye clarifies where the shot should land.
- Deviation measurement: ring spacing shows how far impacts drift vertically and horizontally.
- Adjustment guidance: the visible pattern supports direct scope adjustments without extra guesswork.
This structure lets shooters work with less confusion and more control, preserving autonomy over the rifle setup.
How Grid Lines Help Zero Your Rifle Scope
Grid lines on a target board give a precise reference for aligning the rifle’s reticle during zeroing.
They also make it easier to measure point of impact against a known scale, supporting accurate elevation and windage adjustments.
Consistent grid spacing helps translate observed impact shifts into the correct turret clicks.
Grid Lines For Alignment
Intersecting lines on a target board give shooters a fixed visual reference for aligning a rifle scope with the intended point of impact.
Grid lines support disciplined setup, letting the operator adjust the scope without guesswork. Their spacing clarifies elevation and windage corrections, so bullet strikes can be centered with less trial and error.
Consistent intersections also reveal drift and drop at range, improving control over distance shooting.
- Align the reticle to a single intersection.
- Observe grouping against the grid lines.
- Refine elevation and windage until impact matches aim.
This method strengthens exact aiming and repeatable results.
Measuring POI With Grids
With a gridded target, the shooter can measure point of impact against point of aim with precision, using the intersection as a fixed reference for elevation and windage.
Measuring POI becomes a direct exercise in reading displacement across grid lines, not guessing. Each square reveals how far the shot landed above, below, left, or right of center, allowing exact adjustments in MOA or MRAD.
The shooter converts offset into turret clicks, then returns to verify the change. This clear framework also exposes repeated error patterns, which can indicate tracking faults or inconsistent hold.
How Crosshairs Show Bullet Impact
The crosshairs provide the central aiming reference, and their intersection marks the point of aim, which must be aligned with the point of impact during zeroing. The reticle shows where the shooter intends the bullet to strike, while scope adjustments move that reference until impact matches the target board. This alignment is the practical measure of control and accuracy.
Crosshairs mark the point of aim, and adjustments align impact until the rifle is zeroed.
- Crosshairs define the aiming center for consistent bullet placement.
- Elevation adjustments shift the reticle up or down, changing vertical impact.
- Windage adjustments move the reticle left or right, correcting lateral impact.
When the reticle and strike location coincide, the rifle is zeroed for the chosen distance. The system is direct: observe where the bullet lands, then apply adjustments to move the crosshairs toward that point.
Such method gives the shooter disciplined freedom from guesswork, because the scope becomes an instrument of deliberate alignment rather than uncertainty.
How to Read Elevation for Rifle Scope Zeroing
When zeroing a rifle scope, elevation is read by comparing the center of the shot group to the desired point of aim on a clearly marked target. The image should show a sharp POA and grid, so the point of impact can be measured without guesswork. Fire several rounds, then note the vertical offset. Use the table to translate that offset into clicks and adjust a rifle scope with discipline.
| Offset at target | Elevation action |
|---|---|
| Above POA | Dial down |
| Below POA | Dial up |
| 1 click | About 1/4 MOA |
| Confirmed zero | Set zero stop |
At 100 yards, one click usually moves impact about 0.25 inch. Compute total change before turning the turret, then verify the new group. Repeat only if the point of impact still sits outside the desired elevation line. After confirmation, reset the zero stop so future returns to zero remain exact and repeatable.
How to Read Windage on a Target Board
Windage is read by comparing the horizontal position of the shot group against the target center on a clearly marked board. This measure guides precise windage adjustments and reveals whether impact sits left or right. A steady cluster left of center calls for right correction; a cluster right of center calls for left correction.
The turret scale should be matched to its click value, often 1/4 Minute of Angle, or about 0.25 inches at 100 yards, to preserve disciplined shot placement.
- Identify the group’s horizontal offset.
- Match offset to turret clicks.
- Confirm environmental drift from wind direction and speed.
Consistent patterns matter more than isolated flyers. Repeated readings build competence, allowing the shooter to compensate for external forces without dependence on guesswork.
With practice, the target board becomes a map of freedom through informed control.
Printable Targets for 25-, 100-, and 250-Yard Zeroing
Printable 25-yard zero targets typically use a larger bullseye to speed initial POI-to-POA alignment before longer-range confirmation.
At 100 yards, sight-in boards with smaller scoring rings provide a more precise reference for elevation and windage correction.
At 250 yards, zero printouts help confirm zero under realistic conditions and account for bullet drop and lateral drift.
25-Yard Zero Targets
25-yard zero targets provide a practical starting point for scope adjustment, with a large bullseye that simplifies initial sight alignment and shot grouping.
These yard zero targets support distance calibration before longer-range work, preserving time and ammunition. The shooter should focus the reticle on the center, fire a controlled group, and read impacts against the printed grid.
- Center the rifle and focus the reticle.
- Adjust the elevation turret for vertical correction.
- Verify windage, then repeat until the group stabilizes.
Many sheets include caliber-specific marks, helping users match trajectory to their platform.
The format encourages disciplined practice and clearer feedback, enabling accurate zeroing without dependence on distant ranges.
100-Yard Sight-In Boards
A 100-yard sight-in board typically uses a central bullseye with distinct scoring rings and a clear grid, giving the shooter a precise reference for evaluating shot placement and scope correction.
For 100-yard zeroing, the board should be large enough, usually 8 to 12 inches, to expose each impact without crowding the aiming point. Printable targets are widely available and can be selected for this distance to support repeatable sighting work.
The grid functions as an adjustment reference for windage and elevation, while group measurement identifies the center of impact after firing.
Parallax adjustment should be confirmed before final corrections, because optical error can distort the apparent point of aim.
This format supports disciplined, independent marksmanship and efficient scope tuning.
250-Yard Zero Printouts
250-yard zero printouts provide a clear aiming reference for long-range sighting, typically using a distinct center point and high-contrast markings to improve visibility at distance.
For yard zero printouts, the shooter should confirm alignment at 25, 100, and 250 yards to establish a stable hold zero. Adjustable parallax should be set to remove sighting error before firing a measured group.
- Fire a controlled group.
- Measure the center of impact.
- Adjust elevation and windage to match point of aim.
Consistent zero printouts strengthen understanding of bullet drop and trajectory, supporting disciplined long-range shooting.
High-contrast targets also aid fast shot identification and preserve a clean sight picture. Used correctly, these printouts help the rifleman maintain precision without dependence on guesswork.
How Parallax Shifts Point of Impact
Parallax shifts point of impact when the target image and reticle do not share the same optical plane, causing the apparent aim point to move as head position changes.
In a scope, parallax causes the target and reticle to appear aligned while the eye is slightly off axis, so the shot may land elsewhere. This error grows at higher magnification and at longer ranges, where even minor misalignment can create meaningful deviation from the intended impact.
An adjustable parallax control lets the shooter focus the target image until the reticle and image coincide at the shooting distance. Correct setting reduces apparent target movement and stabilizes the sight picture.
A liberated marksman benefits from this discipline because precision is no longer left to guesswork. Proper parallax correction supports repeatable shot placement, preserves confidence, and keeps the optic serving the shooter rather than obscuring the truth of aim.
Common Target Board Mistakes That Hide Bullet Impact
Bad contrast choices on a target board can mask bullet holes, especially when the backdrop and impact marks share similar tones.
Overcrowded bullseye areas make individual hits difficult to separate, reducing confidence in zeroing adjustments.
Lighting and glare can further obscure impacts, so target visibility should be controlled before scope correction begins.
Bad Contrast Choices
Poor target contrast can make bullet impacts difficult to locate and slow scope adjustment. Effective sighting depends on high-contrast colors that separate holes from the background. White boards with black or fluorescent markers usually improve visibility, while pale surfaces may wash out strikes in bright sun. Darker targets often restore clarity and reduce eye strain.
- Select target material that shows clean punctures, such as paper rather than flimsy cardboard.
- Avoid busy patterns; distractions obscure impact points and weaken observation.
- Match target size to distance, using larger formats when precision is needed at longer ranges.
Proper contrast supports efficient correction, allowing the shooter to work with fewer wasted rounds and more autonomy.
Overcrowded Bullseye Areas
Crowded bullseys can mask bullet impacts and make correction calls unreliable. In an overcrowded bullseye, shot holes merge with scoring rings, reducing visibility and obscuring group shape. Large bullseyes or multiple aiming points can also confuse the shooter, because each strike must be matched to one reference area before adjustments are made. A clear target with distinct zones supports precise elevation and windage evaluation, enabling disciplined control.
| Target feature | Effect |
|---|---|
| Large bullseye | Less precise impact reading |
| Multiple aiming points | Confused correction decisions |
| Distinct zones | Cleaner group identification |
| Contrasting background | Better visibility of hits |
| Consistent target type | Reliable adjustment tracking |
Repeated use of one target format improves comparison over time and protects freedom from guesswork.
Lighting And Glare
Lighting can make bullet impacts appear sharper or disappear into the target entirely, so target boards should be evaluated under controlled conditions. Excess glare from overhead lamps or direct sun reduces visibility and distorts the target image, making scope adjustment less reliable. A matte board is preferred because it limits reflections and preserves impact edges.
- Use soft lighting at dawn or dusk to improve contrast.
- Place the target away from reflective surfaces that scatter glare.
- Confirm hits with a spotting scope or binoculars when naked-eye visibility is weak.
These steps support accurate reading of holes and cleaner rifle scope alignment. Careful lighting control removes distraction and helps the shooter observe each impact with precision, preserving autonomy in setup and adjustment.
Quick Guide to Choosing a Zeroing Target
A well-designed zeroing target should present a clear, high-contrast center so shot impacts are easy to identify during adjustment. For a proper zero, targets with bold dots or fine grid lines give immediate reference points for elevation and windage corrections, reducing guesswork and preserving control.
A scoring ring can further reveal group size and dispersion, helping the shooter evaluate consistency before making adjustments. The target should match the shooting distance: 25-yard targets suit initial zero work, then larger distances such as 100 or 200 yards confirm the final point of impact.
Durable, weather-resistant materials are essential for outdoor use, since moisture and wind can distort paper and obscure hits. The best choice is a target image that stays visible, structured, and stable across sessions, allowing precise, independent scope alignment without wasted rounds or unnecessary dependence.
Frequently Asked Questions
What Sight Is Most Accurate and Gives the Best View of Target?
A fine crosshair reticle is most accurate and preserves the best target view. FFP reticle types maintain precision across magnification levels, while proper target distance, clear optics, and careful windage adjustments improve alignment and control.
What Is the Standard Rule for Sight Adjustment?
The standard rule guides the shot like a compass: move impact toward the correction needed. For sight alignment, raise elevation for low hits; apply windage adjustment opposite drift. Zeroing techniques then confirm bullet drop.
What Is an Adjustable Objective Lens on a Rifle Scope For?
An adjustable objective lens provides focus adjustment to reduce parallax error and improve optical clarity at varying distances. Its lens coatings aid image sharpness, allowing precise target alignment and independent sighting control for liberated, informed shooters.
What Does a Reticle Look Like?
Like a quiet compass, a reticle is the scope’s aiming pattern. Reticle types include simple crosshair designs, duplexes, mil dot reticle markings, and illuminated reticles; each provides precise alignment and practical freedom in varied light.
Conclusion
For precise rifle scope adjustment, the ideal target image is one that makes point of impact immediately visible: a bold bullseye, a clear grid, or a high-contrast crosshair. Each serves the same purpose—turning uncertainty into measurable correction. A poor target blurs the shot; a proper one reveals it. When zeroing at 25, 100, or 250 yards, clarity is not convenience, but the difference between guessing and knowing.
