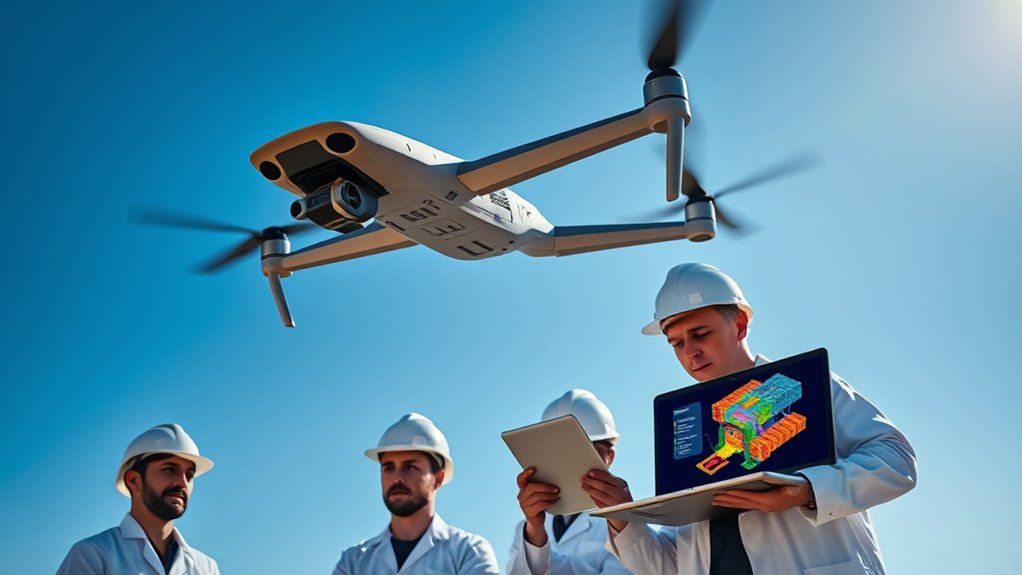
Autonomous missions can’t rely on guesswork. A missed inspection, weak handoff plan, or untested fail-safe can turn a routine vehicle test into a serious safety risk. You need clear safety checklists, documented operational protocols, trained operators, and reliable fail-safe mechanisms before any autonomous system moves on a track or public road. These safeguards help verify vehicle readiness, reduce preventable failures, and build public trust in autonomous technology.
Quick Answer
Safety checklists and fail-safes protect autonomous missions by confirming that the vehicle, autonomy system, operator controls, sensors, software, and emergency procedures are ready before operation. A strong process includes pre-trip inspections, manual control checks, track testing, redundant systems, fault detection, and clear documentation.
Key Takeaways
- Safety checklists give autonomous teams a repeatable way to verify vehicle readiness before testing or deployment.
- Manual operations require the autonomy system to stay disabled unless the vehicle is approved for autonomous testing.
- Track testing should confirm system health, scenario handling, operator oversight, and disengagement controls.
- Fail-safe mechanisms reduce risk by using redundancy, fault detection, safe stops, and backup control paths.
- Clear documentation and transparent safety practices help improve public confidence in autonomous vehicles.
At a Glance
| Main Goal | Confirm that an autonomous vehicle is safe, controlled, documented, and ready before operation. |
| Difficulty | Advanced safety process that requires trained operators, engineers, and operations staff. |
| Core Checks | Hardware inspection, software health, HMI function, autonomy status, manual override, sensors, brakes, steering, communication, and emergency procedures. |
| Best Used For | Private track testing, manual data collection, vehicle configuration changes, pre-trip inspections, and public road readiness reviews. |
Importance of Safety Checklists in Autonomous Missions

When you engage in autonomous missions, the importance of safety checklists can’t be overstated. These checklists help verify the safety of manual operations on public roads and autonomous operations on private test tracks. They also give teams a shared process, so each operator, technician, and engineer follows the same safety standard before a mission begins.
A good checklist should match the exact vehicle configuration being tested. For example, teams may need different checks after hardware updates, sensor changes, software updates, or integration with a new vehicle platform. This approach supports safety standards because every new setup gets reviewed before use.
Checklist items should follow “safe by design” and “safe as manufactured” principles. In practical terms, that means the design should include safety from the start, and the built vehicle should match the approved safety plan. Engineering and operations teams should keep documented evidence that each safety step has been completed.
Daily pre-trip inspections are also essential. These inspections confirm that vehicles meet checklist criteria before road or track operations. By using an approved Safety Checklist, vehicle operations teams reinforce transparency and accountability. They also reduce the chance that a preventable issue gets missed.
Your diligence in following these protocols is critical to the success of autonomous missions. A checklist does not replace expert judgment, but it makes expert judgment more consistent.
Components of a Safety Checklist

A thorough Safety Checklist consists of several critical components that protect the operational integrity of an autonomous vehicle. Each checklist should be tailored for new configurations, confirming that all hardware and integration updates go through careful safety evaluation before the vehicle operates.
You’ll find the strongest checklist items are grounded in “safe by design” and “safe as manufactured” principles. These items require documented evidence from both engineering and operations teams, not just a verbal confirmation that a step was completed.
Core checklist components should include vehicle condition, autonomy status, operator readiness, sensor health, communication systems, emergency controls, and documentation. A team should also confirm that any known issue has a clear risk decision before testing begins.
For track testing, the checklist should require essential private-track tests. These may include system health assessments, brake and steering checks, sensor calibration checks, and disengagement mechanism evaluations.
Daily pre-trip inspections are non-negotiable. They verify compliance with the Safety Checklist and help maintain high safety standards across repeated operations.
Additionally, verify that the autonomy system is disabled during manual operations. This prevents unintended control handovers and reduces the risk of an automated system responding when a human operator expects full manual control.
This extensive approach guarantees that every operational scenario is reviewed, creating a safer environment for vehicle teams, nearby workers, and the public.
Manual Operations and Safety Protocols

Before engaging in manual operations, you must conduct thorough pre-flight safety checks or pre-trip inspections to confirm that all vehicle systems are functioning correctly.
As an operator, your responsibilities include maintaining control of the vehicle, watching for hazards, following the approved route or test plan, and being prepared for emergency disengagement procedures at any moment.
Understanding these protocols is essential for maintaining safety standards during manual operations. Even when the vehicle is driven manually, the presence of autonomy hardware, data collection systems, and test equipment creates added safety responsibilities.
Warning: Never assume manual control is safe just because the vehicle is not operating autonomously. Confirm the autonomy system status, operator controls, emergency stop method, and communication plan before movement.
Pre-Flight Safety Checks
Ensuring safety during manual operations depends on rigorous pre-flight safety checks. In ground-vehicle operations, teams often call these pre-trip checks, but the goal is the same: confirm that hardware, software, controls, and people are ready before the mission starts.
These checks involve thorough inspections of hardware and functionality to confirm all systems are operational and aligned with safety standards. Daily inspections assess vehicle readiness, including HMI functionality and the status of the autonomy system.
| Safety Check | Verification Method |
|---|---|
| Hardware Inspection | Visual and functional tests |
| HMI Functionality | Operational checks |
| Autonomy System Status | Manual disable confirmation |
| Safety Checklist Completion | Documented evidence from engineering |
| Operator Presence | Verification during track testing |
This table covers the basic safety checks, but teams should also review brakes, steering, tires, lights, emergency stop systems, communication devices, weather conditions, and route limitations. Any abnormal result should trigger a pause until the issue is resolved or formally reviewed.
Operator Control Responsibilities
While operating vehicles manually, you must take full responsibility for confirming the autonomy system is completely disabled to avoid unintended actions by automated systems.
Prior to any manual operation, adhere to the following protocols:
- Conduct thorough safety checks, including hardware inspections and HMI functionality tests.
- Perform daily pre-trip inspections to confirm compliance with the approved Safety Checklist.
- Be prepared to take control of the vehicle at any moment, especially in unpredictable scenarios.
- Confirm operator training is up-to-date and health assessments are completed.
- Maintain clear communication with team members regarding operational status and potential hazards.
Operators should also know the stop criteria for the mission. Stop criteria are the conditions that require the team to pause or end the test. These may include sensor faults, unexpected vehicle behavior, communication loss, poor weather, route obstruction, or operator fatigue.
Emergency Disengagement Procedures
In critical situations where manual operators need to regain control, understanding emergency disengagement procedures becomes essential for maintaining safety and minimizing risks associated with autonomous systems.
You must verify that the autonomy system is disabled during data collection and testing phases when manual operation is required. This helps ensure that you are always in charge of the vehicle. Conduct regular hardware inspections and HMI functionality tests to confirm that disengagement mechanisms are functional and accessible.
In track testing scenarios, assess the effectiveness of these mechanisms, ensuring a swift response to emergencies. Documentation of emergency disengagement procedures is crucial for compliance and provides clear guidelines for safe intervention.
A strong emergency procedure should explain who can disengage autonomy, how they do it, what the vehicle should do next, and how the team communicates after the event. It should also require a post-event review before testing resumes.
Track Testing Procedures for Autonomous Vehicles
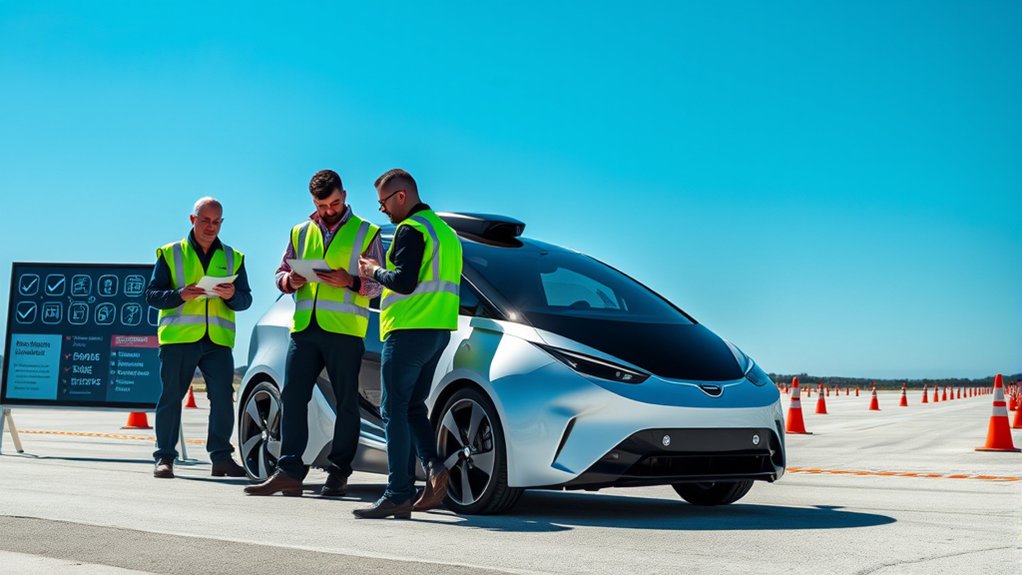
Before you begin track testing an autonomous vehicle, you’ll need to complete a Pre-Test Safety Checklist to confirm that all safety protocols are met.
This includes evaluating scenario navigation capabilities and confirming operator control protocols are in place for effective monitoring. Private track testing helps teams test defined scenarios in a controlled space before any public road operation.
Track testing should never become a casual trial run. Each test should have a defined purpose, known route or scenario, assigned roles, communication plan, and stop criteria.
Pre-Test Safety Checklist
Assuring the safety of autonomous vehicles during track testing is paramount, and the Pre-Test Safety Checklist plays an essential role in this process. This checklist verifies vehicle configurations on private tracks before public road use and supports clear safety principles.
Key items include:
- Evidence of hardware inspections
- Functionality tests of human-machine interfaces (HMI)
- System health assessments
- Tests of disengagement mechanisms to regain operator control
- Documentation of engineering and operations work
Completing and approving the Safety Checklist allows vehicle operations teams to start using the new configuration. Without this approval, a team may miss a change that affects braking, steering, perception, control logic, or operator takeover.
This methodical approach assures that high safety standards are upheld throughout the testing process. It also prioritizes the integrity of the vehicle’s design and functionality before any public deployment.
Scenario Navigation Assessment
After completing the Pre-Test Safety Checklist, the focus shifts to the Scenario Navigation Assessment. This step evaluates how well an autonomous vehicle handles various driving situations on private tracks.
During these tests, the vehicle operator remains on-site to take control if necessary, ensuring a layer of human oversight. Each test scenario involves additional checks, such as system health assessments and verification of disengagement mechanisms, to confirm safety during autonomous maneuvers.
You’ll closely monitor each scenario, allowing for real-time adjustments and assessments of both the vehicle platform and its autonomy system. Successful navigation through these scenarios is vital for a vehicle’s approval to operate on public roads, reinforcing the commitment to safety and reliability.
Common scenarios may include lane keeping, obstacle response, low-speed maneuvers, controlled stops, turns, merging simulations, sensor obstruction handling, and response to a planned disengagement. The exact scenario list should match the vehicle’s intended operating environment.
Operator Control Protocols
While testing autonomous vehicles on private tracks, operators must adhere to strict control protocols to maintain safety and performance standards.
These protocols are essential for ensuring that operators can regain control when necessary. Key procedures include:
- Presence of Operators: Always have an operator ready to assume control if needed.
- Safety Checklist: Complete a tailored checklist for each vehicle configuration, grounded in “safe by design.”
- System Health Assessment: Regularly check the vehicle’s systems for functionality.
- Disengagement Mechanisms: Test override capabilities to verify operator control.
- Daily Inspections: Conduct thorough pre-trip inspections before any testing on the track.
Following these protocols not only enhances safety but also secures compliance with regulations and internal safety requirements before public road use.
Pro Tip: Review disengagement data after every test session. Patterns in takeover events can reveal software limits, sensor issues, unclear procedures, or training gaps before they become larger risks.
Implementing Fail-Safe Mechanisms

To maintain operational integrity in autonomous missions, implementing fail-safe mechanisms is fundamental. These mechanisms serve as backups for critical components, helping the system respond safely during unexpected events.
Redundant systems play an essential role. If one component fails, another can take over or help the vehicle reach a safe state. Redundancy may apply to sensors, power systems, braking controls, steering systems, computing units, communication channels, or operator interfaces.
Real-time fault detection algorithms are imperative for identifying issues such as sensor malfunctions or actuator failures. They enable immediate corrective actions, which may include slowing down, alerting the operator, disengaging autonomy, or bringing the vehicle to a controlled stop.
Techniques like cross-verification among multiple sensors and prioritizing data from the most reliable sources enhance decision-making accuracy. For example, a system may compare camera, radar, lidar, map, and vehicle-state data before deciding how to respond.
Moreover, thorough monitoring of software systems is necessary for sustaining the reliability and performance of these fail-safes. Regular maintenance is paramount to confirm that all systems function at their best.
Common Fail-Safe Examples
Fail-safe design works best when every critical failure has a planned response. Common examples include:
- Safe stop behavior: The vehicle slows or stops when it detects a serious system fault.
- Sensor redundancy: Multiple sensors help reduce the risk of one failed sensor causing a wrong decision.
- Manual takeover: Operators can regain control through tested disengagement controls.
- Health monitoring: Software checks system performance and flags abnormal behavior.
- Communication fallback: The vehicle follows a defined response if communication is delayed or lost.
- Power backup: Backup power supports critical systems long enough for a safe response.
These mechanisms should be tested under controlled conditions before a vehicle operates in more complex settings.
Risk Assessment and Documentation
Safety checklists and fail-safes are stronger when they connect to a formal risk assessment process. A risk assessment helps teams identify what could go wrong, how severe the outcome could be, and what controls reduce the risk.
One useful approach is Failure Mode and Effects Analysis, often called FMEA. This process reviews possible failure modes, their effects, and the safeguards needed to reduce risk. It can help teams evaluate sensor failures, braking issues, software faults, HMI problems, communication failures, and operator response delays.
Documentation matters because autonomous testing involves many moving parts. Teams should record checklist completion, test conditions, vehicle configuration, software version, operator names, disengagement events, maintenance actions, and approval decisions.
Note: A checklist is only useful if teams treat it as a live safety control, not a paperwork exercise. Update it whenever the vehicle, software, route, operating conditions, or test goals change.
Enhancing Public Trust Through Safety
As autonomous technology continues to evolve, enhancing public trust through safety becomes essential. People are more likely to trust autonomous systems when companies explain how vehicles are tested, what safeguards exist, and how incidents are reviewed.
You can establish confidence in this technology by focusing on several key areas:
- Implement rigorous safety checklists to guarantee vehicles meet high safety standards.
- Demonstrate effective fail-safe mechanisms, like redundant systems and fault detection algorithms, to handle unexpected situations.
- Maintain transparency by providing regular updates on compliance with safety protocols and public road test results.
- Engage with the community through educational initiatives that clarify safety measures and protocols.
- Foster positive public experiences through successful safety outcomes and clear communication.
Public trust does not come from marketing claims alone. It grows when teams show disciplined testing, honest reporting, and clear evidence that safety decisions are made before speed or convenience.
Best Practices for Safe Autonomous Operations
Building public trust relies not only on transparency but also on the implementation of best practices for safe autonomous operations. To guarantee safety, follow these key practices:
| Best Practice | Description |
|---|---|
| Safety Checklist | Verify and document safety measures for each new vehicle configuration. |
| Daily Pre-Trip Inspections | Conduct thorough inspections to identify potential issues before operations begin. |
| Redundant Systems | Utilize fail-safe mechanisms to prevent single points of failure in critical components. |
Additionally, regularly performing Failure Mode and Effects Analysis helps proactively address risks. Continuous monitoring of system performance metrics, paired with predictive maintenance, can greatly enhance reliability and safety.
By integrating these practices, you’ll not only improve operational safety but also foster greater confidence in autonomous technologies.
Practical Safe Operation Steps
Use this sequence before and during autonomous operations:
- Confirm the mission plan: Define the route, test goal, operating area, speed limits, and stop criteria.
- Verify the vehicle configuration: Check hardware, software version, sensors, calibration status, and maintenance records.
- Complete the checklist: Document every required inspection before vehicle movement.
- Confirm operator readiness: Review training status, fatigue, communication tools, and takeover responsibilities.
- Test disengagement controls: Confirm that manual takeover and emergency stop methods work as expected.
- Monitor system health: Watch alerts, sensor status, compute status, communication, and vehicle behavior during the mission.
- Log issues immediately: Record faults, disengagements, abnormal behavior, and corrective actions.
- Review before resuming: Do not restart testing after a serious fault until the team understands the cause and approves the next step.
Related Guides
Frequently Asked Questions
What is the Take 5 Safety Checklist?
The Take 5 Safety Checklist is a short pre-task safety review used to pause, identify hazards, assess risk, control the hazards, and proceed only when the task is safe. For autonomous missions, the same idea can help teams review operator readiness, vehicle condition, environment, legal limits, and emergency procedures before starting.
What is fail-safe in drones or autonomous vehicles?
A fail-safe is a backup safety response that helps the vehicle remain controlled when a component, sensor, software process, or communication link fails. In drones, this may trigger return-to-home or landing. In autonomous vehicles, it may trigger a safe stop, operator takeover, degraded mode, or system shutdown.
What is the IMSAFE checklist?
The IMSAFE checklist is a structured self-assessment tool often used in aviation. It prompts the operator to review Illness, Medication, Stress, Alcohol, Fatigue, and Emotion or Eating. Autonomous vehicle teams can adapt the concept to confirm that operators are mentally and physically ready for safety-critical work.
What should a safety checklist include?
A safety checklist should include system health assessments, manual control verification, hardware inspections, HMI functionality tests, autonomy status confirmation, communication checks, emergency procedures, operator readiness, and daily pre-trip inspections. Each item should be evidence-based and tied to a clear safety requirement.
Why are disengagement procedures important?
Disengagement procedures are important because they define how a human operator can take control when the autonomous system behaves unexpectedly or reaches a limit. The procedure should be easy to trigger, tested often, and documented so the team can review each event after testing.
How do safety checklists build public trust?
Safety checklists build public trust by showing that autonomous teams use repeatable controls before operating vehicles. When companies document inspections, test results, emergency procedures, and corrective actions, the public can better understand how safety risks are managed.
Conclusion
In autonomous missions, safety checklists and fail-safes are not optional extras. They are core safeguards that help teams confirm vehicle readiness, protect operators, reduce preventable failures, and support responsible testing.
A self-driving vehicle should never operate without documented checks, tested emergency controls, trained operators, and a clear plan for faults. By following these protocols, you’re not just avoiding disaster. You’re improving reliability, strengthening public trust, and helping autonomous technology move forward with the discipline it deserves.

