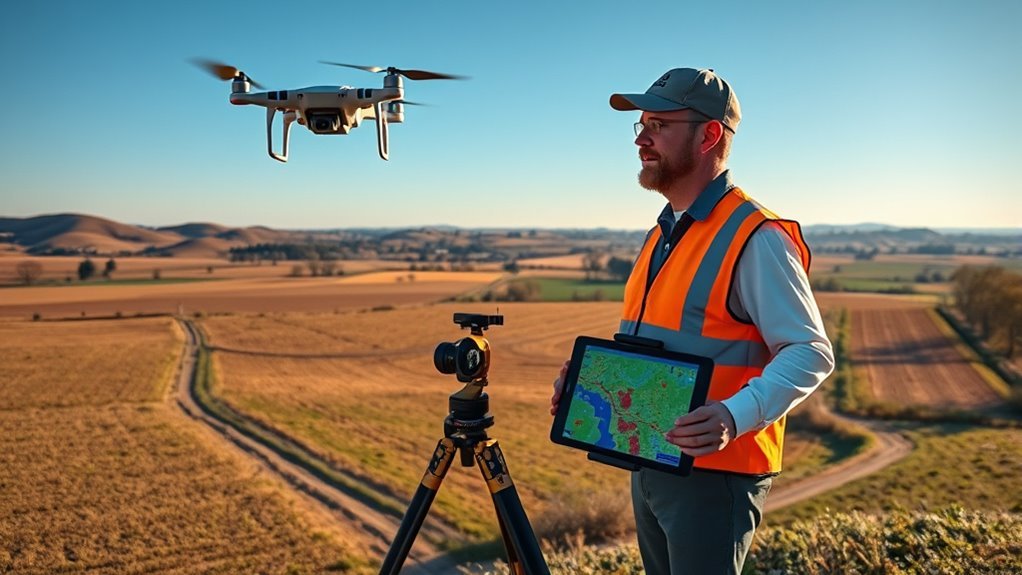
The DJI Mini 3 Pro can produce useful orthomosaics and basic aerial maps when the mission is planned carefully, but it is a consumer camera drone rather than a survey-grade mapping platform. Its 48MP-capable camera, low weight, and DJI Mobile SDK support make it workable for smaller photogrammetry jobs. The important limitations are its electronic rolling shutter, standard GNSS positioning, and the fact that DJI Fly does not provide a normal automated grid-mapping mission for the Mini 3 Pro.
Quick Answer
The DJI Mini 3 Pro is suitable for small, non-survey orthophoto projects if you capture sharp overlapping still images and process them in photogrammetry software. It does not have a normal grid-mapping mission in DJI Fly, and its rolling shutter and non-RTK GNSS make it less appropriate for work requiring verified centimeter-level accuracy.
Key Takeaways
- The Mini 3 Pro can capture image sets for basic orthomosaics, but it is not an RTK survey drone and uses an electronic rolling shutter.
- DJI Fly’s documented Waypoint feature on the Mini 3 Pro is part of Hyperlapse; it should not be confused with a dedicated automated grid-mapping mission.
- DJI RC is convenient for DJI Fly, but it does not allow third-party app installation. RC-N1 with a compatible phone may be more flexible when a supported third-party mapping app is required.
- DJI rates the Mini 3 Pro for up to 34 minutes with the standard battery and 47 minutes with the Plus battery under controlled test conditions.
- For general nadir photogrammetry, plan roughly 75% front overlap and at least 60% side overlap, increasing overlap for vegetation or difficult surfaces.
- Use still photos rather than 4K video as the primary source for an orthomosaic, and use GCPs or a higher-precision platform when absolute accuracy matters.
At a Glance
| Time Required | About 15–30 minutes for first-time setup; flight and processing time depend on the mapped area and overlap. |
| Difficulty | Moderate — basic flight is easy, but reliable photogrammetry requires careful overlap, exposure, and quality control. |
| Tools Needed | DJI Mini 3 Pro, compatible controller, charged batteries, UHS-I U3/V30 microSD card, DJI Fly, and photogrammetry software such as WebODM or PIX4D. |
| Cost | Varies by batteries, controller, mapping software, and accuracy equipment. In the U.S., Part 107 drone registration is currently $5 per aircraft. |
Is the DJI Mini 3 Pro Good for Mapping?
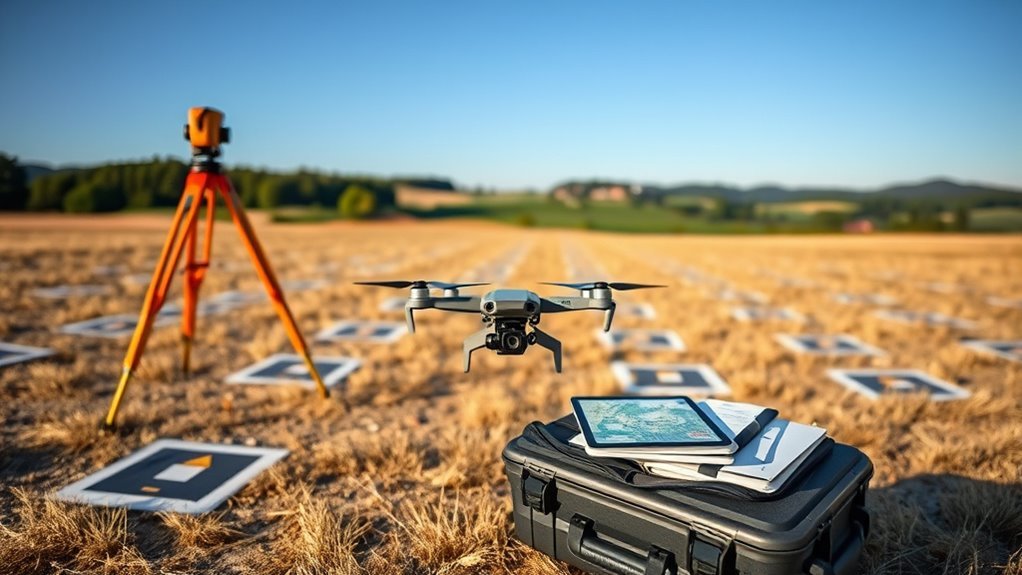
The DJI Mini 3 Pro can work well for basic mapping and orthophoto projects where portability, low equipment weight, and image detail matter more than survey-grade positioning. DJI lists a 1/1.3-inch CMOS sensor with up to 48MP still images and a 24 mm-equivalent fixed lens. DJI’s Mini 3 Pro specifications also confirm JPEG/DNG capture and an electronic rolling shutter.
That combination is capable of producing detailed photogrammetry datasets, but the 48MP number alone does not determine map accuracy. Overlap, image sharpness, flight height, camera motion, surface texture, GNSS accuracy, and control points can matter more than nominal resolution.
The Mini 3 Pro is also not an RTK or PPK aircraft. Photogrammetry software can create a visually strong and internally consistent orthomosaic from ordinary GNSS-tagged images, but its absolute geographic position may still be off by meters unless accurately surveyed ground control is used. Pix4D explains that standard drone GNSS normally provides image positioning in the meter range, while GCPs or RTK/PPK positioning can substantially improve absolute accuracy.
A sharp-looking orthomosaic is not automatically a survey-accurate map. Visual quality, relative accuracy, and absolute positional accuracy are different things.
The electronic rolling shutter is another limitation. A rolling shutter records different portions of the frame at slightly different times, so fast aircraft motion can introduce geometry distortion. Slower flight, adequate lighting, and a sufficiently fast shutter help reduce that risk.
Warning: Do not use a Mini 3 Pro orthomosaic as a legal boundary survey, engineering control survey, or other precision deliverable unless the required accuracy has been established with suitable ground control, checkpoints, procedures, and qualified personnel.
[Amazon Products Picked for You]
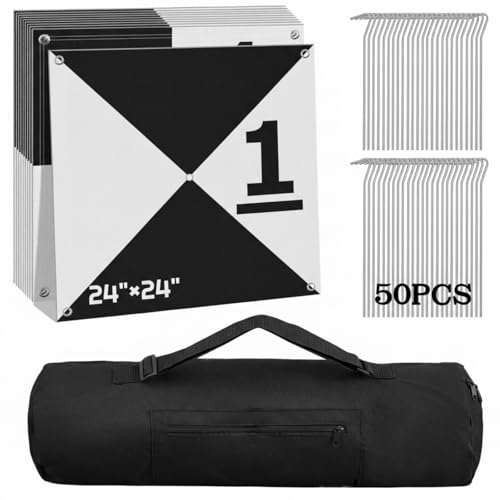
Set Includes: this set includes 10 ground control points labeled 0–9 for quick coordinate matching, a storage bag for easy portability and organization, and 50 metal stakes for secure placement; The pre-punched holes at each corner allow the markers to be firmly anchored, reducing movement in windy conditions and helping to maintain accuracy during aerial mapping

Enhanced Field Coordination: These UAV aerial drone center eyelets numbered survey markers enable effortless identification and precise coordinate tracking, streamlining your operations in the field. Easily locate and reference specific points during mapping missions.
Does the DJI Mini 3 Pro Support Waypoint Mapping?
This is one of the most important limitations to understand before buying the aircraft for mapping. DJI documents Waypoint as one of the Mini 3 Pro’s Hyperlapse modes. That feature lets the aircraft follow stored positions while creating a timelapse, but it is not the same as a dedicated lawnmower-style mapping grid that automatically calculates flight lines, sidelap, frontlap, image triggers, and survey boundaries.
Likewise, Point of Interest is designed to circle a selected subject. It is useful for cinematic capture but should not be described as a normal orthophoto grid-planning tool.
There is more flexibility through third-party software. DJI’s current Mobile SDK documentation includes the Mini 3 Pro among supported aircraft. However, support in the SDK does not guarantee that every mapping app supports every Mini 3 Pro function. Check the exact aircraft, controller, operating system, capture mode, and mission functions supported by the app before relying on it in the field.
Note: A repeatable Hyperlapse Waypoint route is not a substitute for a mapping application that explicitly controls grid spacing, overlap, camera triggering, altitude, and mission boundaries.
[Amazon Products Picked for You]

Easily plan and schedule repeatable flights

Weight: 0.75 lbs
【Real FPV Training Feel】The FLYDrone S8 Pro simulator controller is designed for beginner FPV pilots who want to practice before flying a real drone. The Mode 2 layout and non-centering throttle help build throttle control, stick coordination, and real FPV muscle memory in simulator training
Which DJI Mini 3 Pro Bundle Should You Buy?
The controller decision depends on the software you expect to use. The DJI RC has an integrated 5.5-inch display and DJI Fly already installed, so there is no phone to mount, cable to connect, or personal-device battery to manage. For ordinary DJI Fly operations and manually captured mapping images, that is a convenient field setup.
The RC-N1 uses a compatible smartphone. It requires more setup but can be the more flexible choice when your mapping workflow depends on a supported third-party mobile application.
This distinction matters because DJI states that third-party applications cannot be installed on DJI RC. Therefore, the DJI RC should not automatically be treated as the best controller for mapping merely because its screen is built in.
| Option | Best Fit | Mapping Consideration |
|---|---|---|
| DJI RC | Simple DJI Fly workflow | Built-in screen, but DJI does not permit third-party app installation. |
| RC-N1 | Phone-based operation | May offer greater third-party-app flexibility when the specific phone and mapping app are compatible. |
| Fly More kit | Repeated missions | Extra batteries and the charging hub reduce field interruptions. |
Pro Tip: If automated mapping is important, choose your mission-planning software first. Confirm that it supports the Mini 3 Pro and your intended controller, phone, camera mode, and flight functions before buying the controller.
[Amazon Products Picked for You]

No Registration Needed - Under 249 g, FAA Registration, and Remote ID are not required if you fly for recreational purposes.

No Registration Needed - Under 249 g, FAA Registration, and Remote ID are not required if you fly for recreational purposes.

Specially designed for DJI RC-N3,RC-N2,RC-N1,RC-N1C Remote Controller (Air 3S,Neo,Mavic 3,Mavic 3 Classic,Mini 4K,Mini 2,Mini 3, Mini 3 Pro,Air 2S,Mavic Air 2 remote controller) and Smart Controller
Set Up the DJI Fly App and Update Firmware
The Mini 3 Pro uses the DJI Fly app. iPhone and iPad users can use the supported App Store version. Android users should follow DJI’s current installation instructions because DJI states that DJI Fly is available through major app stores except Google Play and can be obtained from the official DJI Fly page.
New Mini 3 Pro batteries should be charged before first use. DJI states that new batteries are activated through charging. The aircraft itself is then activated through DJI Fly during first-time setup.
- Charge the aircraft battery and controller.
- Remove the gimbal protector and unfold the aircraft.
- Power on the controller and aircraft.
- Open DJI Fly and follow the activation prompts.
- Connect the controller and aircraft if they are not already linked.
- Check for aircraft, controller, and battery firmware updates.
- Restart the system if required after the firmware process completes.
DJI also supports firmware updates through DJI Assistant 2 for compatible consumer drones. Do not interrupt power or remove a battery while its firmware is being updated.
Check Airspace, Registration, and Remote ID Before Mapping
Drone rules depend on the country and the purpose of the flight. In the United States, the FAA’s under-250 g registration exception is limited to qualifying flights made exclusively for recreation. The FAA requires every aircraft operated under Part 107 to be registered regardless of weight.
The standard Mini 3 Pro configuration is listed by DJI at under 249 g, but installing the Intelligent Flight Battery Plus takes the aircraft above 249 g. DJI also states that the Mini 3 Pro supports FAA Standard Remote ID with either the standard or Plus battery when the required firmware is installed.
FAA guidance says drones that must be registered, or that have been registered, generally must comply with the Remote ID operating rules. Standard Remote ID broadcasts identification and location information while the drone is operating. See the FAA Remote ID guidance for current requirements.
Before launching, also verify controlled airspace, Temporary Flight Restrictions, airport restrictions, and local limitations. The FAA’s current B4UFLY program is offered through approved service providers, while LAANC can provide eligible airspace authorizations around participating airports.
Warning: Do not assume that a sub-250 g aircraft can be flown anywhere without registration or authorization. Flight purpose, aircraft weight, airspace, Remote ID status, and local rules all matter.
Set Your Mini 3 Pro Flight Settings
With firmware current, configure the Mini 3 Pro before each mapping mission. Set a sensible Return-to-Home altitude that clears nearby trees, poles, structures, and terrain without unnecessarily increasing climb time. Confirm the home point, GNSS status, battery level, storage capacity, and obstacle-avoidance settings before launch.
Cine, Normal, and Sport modes change aircraft responsiveness and maximum performance. Mapping generally benefits from predictable, moderate movement rather than maximum speed because image sharpness and consistent spacing are more important than finishing the route as quickly as possible.
Do not routinely calibrate the compass simply because a new flight is starting. DJI’s guidance calls for compass calibration when the app requests it or when circumstances make calibration appropriate. If calibration is needed, keep the aircraft away from vehicles, steel structures, reinforced concrete, electrical equipment, and other strong magnetic sources.
For an ordinary top-down orthomosaic, keep the gimbal nadir or close to nadir. A consistent camera angle, flight height, and image spacing make reconstruction easier than frequently changing the viewpoint during a mission.
Plan the Mapping Grid and Image Overlap
Image overlap is one of the biggest determinants of whether an orthomosaic processes successfully. Pix4D recommends at least 75% frontal overlap and 60% side overlap for general nadir image acquisition. Forests, crops, repetitive surfaces, and other difficult subjects can require substantially more overlap.
Pix4D’s image-acquisition guidance recommends regular grid flight lines and keeping the camera at a reasonably constant height above the terrain so ground sampling distance stays consistent.
- General terrain: start around 75% frontlap and 60% sidelap.
- Vegetation or repetitive terrain: increase both overlaps, commonly toward 80% or more.
- Corridors: make sure adjacent flight lines still provide sufficient cross-track coverage.
- Water: expect poor feature matching because moving and reflective water provides few stable photogrammetric features.
- Multiple batteries: overlap adjoining flight blocks rather than ending one flight exactly where the next begins.
OpenDroneMap likewise recommends high overlap for 2D and 2.5D mapping and notes that more complex vegetation and terrain benefit from overlap near the upper end of its recommended range.
Pro Tip: Extend the planned grid beyond the exact edge of the area you need. Orthomosaics are usually weakest at dataset boundaries because edge features appear in fewer photographs.
Choose Camera Settings for Orthophotos
Use individual still photographs as the main source for orthomosaic processing. Although the Mini 3 Pro records 4K video, photogrammetry software generally produces better mapping results from full-resolution stills because individual photos contain more useful detail and avoid video compression limitations.
The Mini 3 Pro can record 12MP or 48MP still images. A 48MP file provides more pixels, but it does not automatically produce a more accurate map. Test the selected capture mode with the mission app and processing software, especially if automated triggering speed matters.
Image sharpness is critical. The Mini 3 Pro has a fixed f/1.7 aperture, so practical exposure control comes mainly from shutter speed and ISO. In good light, keep ISO low and use a shutter speed fast enough to prevent directional motion blur. Pix4D gives roughly 1/300 to 1/800 second as a general aerial-photogrammetry shutter-speed range when manual adjustment is necessary, while emphasizing that the final image must be sharp and low in noise.
- Use still photographs, not 4K video, as the default mapping source.
- Keep the focal length/zoom unchanged throughout the dataset.
- Prefer ISO 100 in good light when exposure permits.
- Use a shutter speed fast enough to prevent motion blur.
- Avoid mixing very bright and very dark exposures across one mission.
- Do not change camera orientation or digital zoom midway through a mapping grid.
RAW/DNG can be useful when a workflow specifically requires it, but JPEG is widely supported by photogrammetry programs and can simplify large mapping datasets. Whichever format is selected, keep the capture method consistent throughout the mission.
How to Capture a DJI Mini 3 Pro Orthomosaic Dataset
- Define the output. Decide whether you need a visual orthomosaic, measurements, a terrain model, or verified positional accuracy.
- Check legal requirements. Confirm registration, pilot requirements, Remote ID, airspace authorization, and site restrictions.
- Inspect the site. Identify trees, towers, wires, terrain changes, people, moving vehicles, water, and safe takeoff/landing areas.
- Plan the grid. Use a regular flight pattern with enough overlap. For general nadir mapping, 75% front and 60% side overlap is a practical baseline.
- Set the camera. Use full-resolution still images, avoid digital zoom, keep ISO low when possible, and confirm that shutter speed prevents blur.
- Set the gimbal. Aim straight down or close to nadir for a conventional 2D orthomosaic.
- Fly consistently. Keep altitude and speed stable and avoid abrupt turns while photographs are being captured.
- Inspect images in the field. Zoom into several photographs and check for blur, missed rows, exposure problems, and inadequate overlap before leaving.
- Process the dataset. Import the original geotagged images into WebODM, PIX4D, or another photogrammetry program and review its quality report.
- Validate accuracy. If measurements or geographic position matter, use accurately surveyed GCPs and independent checkpoints rather than trusting the visual appearance of the finished map.
Understand Ground Control and Mapping Accuracy
A Mini 3 Pro can make an orthomosaic without ground control points, but that does not mean the map will be accurately positioned in a survey coordinate system. Consumer-drone GNSS positions can have meter-level errors.
There are two different accuracy questions:
- Relative accuracy asks whether features are correctly positioned relative to one another inside the model.
- Absolute accuracy asks whether those features are positioned correctly in the real-world coordinate system.
Pix4D’s mapping-accuracy guidance explains that accurately surveyed GCPs or RTK/PPK image positions can substantially improve absolute accuracy. Independent checkpoints should be reserved for evaluating accuracy rather than being used to force the model into position.
If the project only needs a visual site map, rough area overview, roof inspection reference, or documentation image, ordinary GNSS may be adequate. If the result will drive engineering, construction layout, property boundaries, volume certification, or other consequential measurements, use an appropriate high-accuracy workflow.
Choose Batteries, Charger, and Memory Card
The Mini 3 Pro has two main battery options. DJI rates the standard Intelligent Flight Battery for a maximum of 34 minutes under its controlled test conditions. The Intelligent Flight Battery Plus is rated for up to 47 minutes.
Actual mapping endurance will be lower because wind, turns, climbing, obstacle avoidance, temperature, reserve requirements, and returning to the home point all consume energy. Never plan a mapping route around DJI’s laboratory maximum flight-time figure.
The Plus battery weighs about 121 g and causes the Mini 3 Pro to exceed 249 g. Check the legal consequences before using it in your jurisdiction.
Battery life depends on temperature, wind, flight profile, storage, charge cycles, and the reserve needed to return and land safely; advertised maximum flight time should not be treated as usable mission time.
Charging can be done through the aircraft’s USB-C connection or the Mini 3 Pro Two-Way Charging Hub. DJI recommends its 30W USB-C charger or another compatible USB Power Delivery charger. The hub charges installed batteries sequentially rather than charging all packs simultaneously.
For storage, DJI specifies UHS-I Speed Grade 3 or higher microSD media. Its current recommended-card list includes SanDisk Extreme 128GB and 256GB V30 A2 cards as well as several SanDisk Extreme Pro capacities. A 128GB or 256GB card is a practical mapping choice because still-image datasets can grow quickly while remaining easy to back up after each mission.
Format the card in the aircraft when appropriate, start each mission with adequate free space, and copy the original files before processing them.
Frequently Asked Questions
Can You Provide a Beginner Guide to Using the DJI Mini 3 Pro?
Yes. Charge and activate the battery, activate the aircraft through DJI Fly, update firmware, inspect the propellers, confirm GNSS and the home point, set a safe Return-to-Home altitude, check airspace, then practice takeoff, landing, Cine, Normal, and emergency procedures in an open area before attempting a mapping mission.
Is the DJI Mini 3 Pro Worth Buying for Mapping in 2026?
It can still be useful for small visual orthomosaics and low-cost photogrammetry if its limitations fit the project. Buyers who require turnkey grid missions, RTK/PPK positioning, a mechanical or global shutter, or routinely verified centimeter-level accuracy should compare purpose-built mapping aircraft instead.
Can the FAA Know You Flew a DJI Drone?
Potentially. Standard Remote ID broadcasts the drone’s identification and location information plus control-station location information during flight. FAA registration and airspace-authorization records can also be relevant to an investigation. Remote ID should not be described as a universal FAA live-tracking database, but its broadcast identifiers can be associated with registration information by authorized authorities.
What Are the Best Photo Settings for DJI Mini 3 Pro Mapping?
Use individual still photos at a consistent resolution, avoid digital zoom, keep ISO as low as practical, and use a shutter speed fast enough to eliminate motion blur. In good light, ISO 100 is a useful target. Inspect the first images at full size and adjust shutter speed if edges or ground features show directional blur.
Does DJI Mini 3 Pro Have Normal Waypoint Mapping in DJI Fly?
No dedicated ordinary grid-mapping mode is documented in DJI Fly for the Mini 3 Pro. DJI’s documented Waypoint function for this aircraft is part of Hyperlapse. Third-party applications may provide additional automation through DJI’s Mobile SDK, but compatibility must be checked with the specific app and controller.
Should You Use 12MP or 48MP for an Orthomosaic?
Both modes can provide usable still images. A 48MP image contains more pixels, but mapping quality also depends on sharpness, overlap, image-trigger timing, lighting, processing support, and flight speed. Test the intended capture mode before a large mission rather than assuming that 48MP automatically gives better positional accuracy.
Conclusion
The DJI Mini 3 Pro can be a practical compact platform for basic orthophoto mapping, but it works best when its limitations are understood from the start. Its 48MP-capable camera and low weight are useful, while its rolling shutter, standard GNSS, and lack of a normal native DJI Fly grid-mapping mission limit its suitability for precision survey work.
Choose the controller according to the software workflow: DJI RC simplifies ordinary DJI Fly operation, while RC-N1 may make more sense when a compatible phone-based third-party mapping application is required. Plan adequate image overlap, use sharp still photographs, inspect the dataset before leaving the site, and add surveyed GCPs and checkpoints when absolute accuracy matters.
For batteries, use the correct Mini 3 Pro specifications: up to 34 minutes with the standard Intelligent Flight Battery and up to 47 minutes with the Plus battery under DJI’s controlled test conditions. The Plus battery also takes the aircraft above 249 g, so always review applicable registration and operating rules before launch.
Sources
- DJI Mini 3 Pro Support and Specifications — camera, aircraft weight, battery endurance, firmware, sensor, and shutter specifications.
- DJI Fly — current DJI Fly download and compatibility information.
- Federal Aviation Administration — Drone Registration — U.S. recreational and Part 107 registration requirements.
- Federal Aviation Administration — Remote ID — Remote ID operating and broadcast requirements.
- PIX4D — Designing the Image Acquisition Plan — mapping grids, image overlap, terrain, and acquisition guidance.
- OpenDroneMap — Flying Tips — overlap and photogrammetry image-acquisition recommendations.
