Coastal fishing gets easier when you stop treating tides as background noise and start using them as a trip-planning tool. Tides move bait, expose structure, change water depth, and create feeding lanes, so the same spot can fish completely differently at low, rising, high, and falling water. In this guide, you’ll learn how to read tide tables, apply the Rule of Twelfths, match tide stages to species and gear, and adjust your plan for wind, channels, passes, and local bottom shape.
Quick Answer
For fishing, read a tide chart by finding the high and low tide times, checking the tide height, and noting whether water is rising, falling, or near slack. The best bite often happens during moving water, especially the hours around a tide change, but wind, channels, and local structure can shift the pattern.
Key Takeaways
- Moving water usually matters most. Rising and falling tides often move bait and trigger predators better than dead slack water.
- Tide tables show time and height. Use the closest local station, then adjust for wind, weather, and geography.
- The Rule of Twelfths gives a quick estimate. It helps you predict when water movement will be weakest, strongest, and most useful for fishing.
- Local observation beats a chart by itself. Watch where current hits points, passes, bars, docks, drains, cuts, and grass edges.
- Safety comes first. Fast tides, exposed mud, incoming water, strong wind, and poor exit routes can turn a good fishing window into a hazard.
At a Glance
| Time Required | 5 to 10 minutes to check a tide table, plus ongoing observation while you fish. |
| Difficulty | Beginner to intermediate. The basics are simple, but local patterns take practice. |
| Tools Needed | NOAA tide table or tide app, weather forecast, local chart or map, watch, notebook, and safe access plan. |
| Cost | Free if you use public tide predictions and weather data. |
What Are Tides and What Causes Them
Tides are the regular rise and fall of sea levels along coasts. They happen mainly because the Moon’s and Sun’s gravity pulls on Earth’s oceans while Earth rotates.
You’ll see many shorelines move through two high tides and two low tides in a day, though some areas have one main high and low tide or a mixed pattern. Local geography can change the timing, height, and strength of each tide.
Tidal movement isn’t uniform. Coastline shape, seabed contours, inlets, wind, river flow, and atmospheric pressure all affect the tidal range and timing you experience where you fish.
Pay attention to how water movement accelerates in constricted bays, bridge openings, creek mouths, cuts, passes, and inlets. On wide flats or shallow shelves, the same tide may spread out and move more slowly.
For fishing trips, stronger current often concentrates bait and predators near inlets, rips, seams, points, oyster bars, marsh drains, sandbars, and tidal streams.
Understanding the basic mechanics helps you choose better spots and times. Instead of guessing, you can read the rhythm of tides, anticipate high and low shifts, and position yourself where fish are more likely to feed.
Note: Tide predictions are estimates, not guarantees. Wind, storms, pressure changes, and river flow can make actual water levels higher or lower than the chart shows.
How to Read a Tide Table Step by Step
Because accurate timing matters for safety and success, start by opening NOAA Tide Predictions or another reliable local tide source for the closest station to your fishing area.
Because timing matters, pull up tide predictions for your closest local station and your exact fishing date before you choose a spot.
You’ll use that source to read a tide chart. Find the date first, then check the columns showing tide times and tide heights. Note each listed high and low tide, along with the height beside it.
Heights are often listed relative to a local chart datum, such as Mean Lower Low Water. You do not need to master every survey term to fish well, but you should compare the numbers across the same tide table. A higher high tide or lower low tide can change access, current strength, and where bait travels.
Track the tide cycle across consecutive entries to see when slack water and peak flows may occur. Slack water happens near the turn of the tide, when current slows before changing direction. Peak flow usually happens between high and low, not exactly at the listed high or low time.
Record the tide times that match your planned fishing windows. Then plan your walk-in route, boat launch, anchoring, wading path, and return route around predictable highs and lows.
Stay aware that weather, barometric pressure, runoff, and local topography can shift actual tides from the predictions. Check updates before launch, then confirm what the water is doing when you arrive.
Use this methodical approach to make safer, more productive fishing decisions. The more you compare the chart to what you see on the water, the faster you’ll recognize repeatable patterns.
Simple Tide Table Reading Process
- Choose the closest station. A station far away may have different tide times and heights.
- Find your fishing date. Tide times change daily, so do not reuse yesterday’s timing.
- Mark high and low tide times. These are your reference points for planning.
- Check the tide height. Larger height differences often mean stronger water movement.
- Identify rising or falling water. Fish often feed better when water is moving.
- Adjust for wind and local structure. A strong wind can push water in or pull it out faster than expected.
- Compare the chart with real water. Look at grass lines, dock pilings, rocks, current seams, and bait movement.
Pro Tip: Save screenshots of the tide chart before you leave. Cell service can be weak near marshes, beaches, jetties, and remote boat ramps.
The Rule of Twelfths and Estimating Tide Movement
When you need a quick estimate of how fast the water will rise or fall between high and low tide, apply the Rule of Twelfths. It divides the roughly six-hour flood or ebb into twelve equal parts, using the pattern 1/12, 2/12, 3/12, 3/12, 2/12, and 1/12.
That pattern helps you estimate how much vertical water change happens during each hour of the tide. The middle hours usually have the largest vertical change and often the strongest current. For fishing, those middle hours can stir bait, move shrimp or crabs, push baitfish through drains, and draw predators into ambush lanes.
For a 6-foot tidal range, you can estimate about 0.5 feet in the first hour, 1.0 foot in the second hour, 1.5 feet in the third hour, 1.5 feet in the fourth hour, 1.0 foot in the fifth hour, and 0.5 feet in the sixth hour.
This gives you a useful planning shortcut. You still need local tide charts for exact high tides and low tides, but the Rule of Twelfths helps you predict when the water should move slowly, build speed, peak, and then slow again.
| Hour segment | Vertical change |
|---|---|
| 1 | 1/12 |
| 2 | 2/12 |
| 3 | 3/12 |
| 4 | 3/12 |
| 5 | 2/12 |
The missing sixth hour follows the same pattern and accounts for the final 1/12 of movement. In real fishing conditions, the pattern may shift because of shallow flats, narrow passes, storms, or wind, but it remains a helpful starting point.
Rule of Twelfths Example for Fishing
Suppose low tide is at 7:00 a.m., high tide is at 1:00 p.m., and the tide rises 6 feet. The first hour after low may move slowly, so shallow drains might not have enough water yet. By the second and third hours, bait may start pushing onto flats and through channels. Around the third and fourth hours, current is usually stronger, so predators may set up near points, cuts, pilings, rocks, and current seams.
As the tide nears high, current slows again. That may make fish less aggressive in open water, but it can also create a short opportunity near flooded grass, mangroves, oyster edges, docks, or backwater cover where bait has gathered.
Best Tide Windows for Different Species and Gear
Now that you can estimate hourly water movement with the Rule of Twelfths, match those tide windows to species behavior, water depth, and gear choices.
You’ll often target striped bass and corbina on the rise and fall, especially when baitfish, sand crabs, shrimp, or other forage move with the current. Focus on the hour before high tide, the early falling tide, and any visible current seam near shore.
On East Coast flats, inlets, and backwaters, expect strong action during moving water, often during the two hours before and after high tide. Use heavier gear and faster presentations when the current is strong enough to sweep lures, bait, or sinkers away from the strike zone.
On flats, cuts, and inlet edges, the best bites often happen when the tide is moving enough to carry bait past ambush points.
For bottom-dwellers like halibut and whitefish, fish the flood current or the early falling tide when seabed movement brings food within reach. Use stout rigs that hold bottom contact, but avoid going so heavy that your bait looks lifeless.
During slack tide, when movement is minimal, downsize tackle and use finesse techniques to draw cautious bites. This can mean lighter leaders, smaller hooks, slower retrieves, natural baits, or subtle soft plastics.
Full and new moons can increase tidal range in many coastal areas, creating stronger currents and larger water-level changes. These moon phases may improve fishing when the stronger movement lines up with safe access, clear water, and active bait.
You’ll plan better trips when you match tide stage, species, and tackle instead of using the same approach all day.
| Tide Stage | Fishing Pattern | Useful Gear Choice |
|---|---|---|
| Early rising tide | Fish begin moving onto flats, shorelines, and shallow cover | Light to medium tackle, shallow lures, live bait |
| Mid rising tide | Current builds and bait moves through cuts, drains, and channels | Medium tackle, moving baits, jigs, drifted bait |
| High slack | Movement slows, fish may spread into cover or pause feeding | Finesse rigs, smaller baits, slower presentations |
| Early falling tide | Bait drains from flats, marshes, and backwaters | Jigs, spoons, soft plastics, bottom rigs near drains |
| Low slack | Fish may hold in deeper holes, channels, troughs, and structure | Bottom rigs, deeper lures, slower retrieves |
Species-Specific Tide Tips
- Striped bass: Look for current seams, rips, bridge shadows, and bait pushed along points or inlets.
- Redfish: Fish flooded grass, oyster edges, drains, and shallow flats during rising and early falling tides.
- Flounder: Target channel edges, sandy drop-offs, creek mouths, and drains where bait gets swept past the bottom.
- Bluefish: Use faster retrieves around inlets, beaches, rips, and bait schools during strong current.
- Halibut: Work sandy troughs, holes, and channel edges when current moves food along the bottom.
- Surf species: Watch where waves, troughs, and tide height combine to expose feeding lanes near the beach.
How Wind, Geography, and Passes Change Tidal Effects
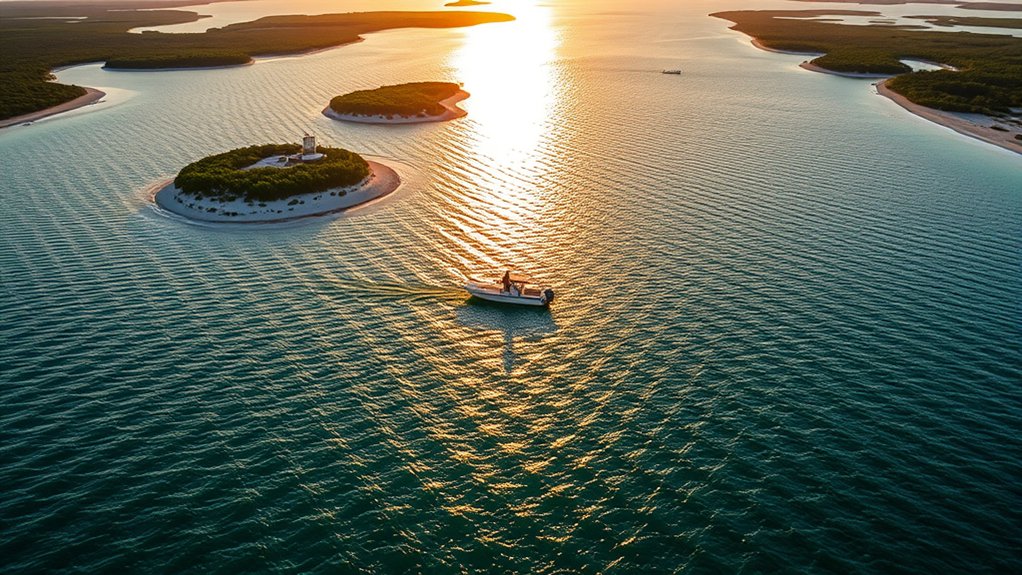
Although tides are driven by the moon and sun, wind, coastline shape, and the placement of passes often dictate how those tides actually translate to water movement where you fish.
You’ll find that sustained onshore wind can push water into bays, marshes, and back lakes, while persistent offshore wind can pull water out and make some areas too shallow. Strong wind can also stack water against a shoreline and create flooding concerns even without heavy rain.
Geography matters. Bay shape and orientation can focus or diffuse tidal currents, changing where bait and game fish concentrate. Narrow cuts, passes, bridge openings, and jetties often speed up flow. Wide flats, broad bays, and shallow lagoons may spread out that energy.
Texas offers a useful example. Along parts of the Gulf Coast, relatively few major passes connect large bay systems to the open Gulf. Areas near passes may show clearer tidal pulses, while more distant areas, including parts of San Antonio Bay and Laguna Madre, may have smaller tidal swings. In those places, wind can become the dominant driver of water movement.
For effective fishing, read both tidal phase and local wind patterns. Prioritize places where geography and passes create predictable flows, such as drains, creek mouths, gut entrances, rock gaps, bridge pilings, and points that force water to bend or speed up.
Warning: Never rely on tide time alone when wading, kayaking, or fishing from rocks. Incoming water, strong wind, slippery structure, and poor exit routes can trap you quickly.
How to Read Current on the Water
A tide table tells you when water should rise or fall. The water surface tells you where fish may actually feed. Look for foam lines, nervous bait, birds dipping, shrimp skipping, rippled seams, slicks, color changes, and current wrapping around structure.
When current hits a point, piling, rock, oyster bar, or channel edge, it often creates a softer pocket behind the obstruction. Predators can hold in that slower water and strike bait drifting past in the faster lane.
If the tide looks right but you see no bait, no current seam, no birds, and no visible life, move until you find water that looks active. A less famous spot with better water movement often beats a popular spot at the wrong tide.
Using Tide Charts With Solunar Data and Local Knowledge
Match tide charts with solunar peaks to narrow the windows when fish may be more likely to feed.
Add your local wind and current knowledge to refine those windows, since wind-driven shifts can alter bait movement, water clarity, and depth.
Use the Rule of Twelfths, recent reports, and your own notes to estimate tide speed and pick the most productive times.
Match Tides With Solunar
Curious how to time your trip for the best bite? Match tide phases with solunar windows to reduce guesswork. Use charts to align major or minor feeding periods with rising or falling tide around high and low points.
Observe water movement intensity because it refines predictions for species-specific behavior. A solunar peak during dead slack may not produce much if bait is inactive. A solunar peak during a clean moving tide near structure can be much more useful.
Combine solunar peaks with local spot knowledge to schedule targeted fishing when lunar phase, tide movement, and bait activity line up.
| Date | Tide (high/low) | Solunar peak |
|---|---|---|
| 1 | High (rising) | Major AM |
| 2 | Low (falling) | Minor PM |
| 3 | High (falling) | Major PM |
| 4 | Low (rising) | Minor AM |
Plan trips where charts and solunar periods align, then adjust based on what you see. Keep notes on tide stage, wind direction, water clarity, bait, lure choice, and catch results so each trip improves the next one.
Add Local Wind Knowledge
When you add local wind knowledge to tide charts and solunar data, you’ll sharpen predictions of water movement and fish behavior. Sustained onshore winds can raise water levels and lengthen flood conditions, while offshore winds can expose flats and intensify outgoing flow.
You’ll monitor wind direction and strength to see how tides and wind interact. Strong weather systems can change timing and height, making the tide rise longer, drain faster, or stall in shallow areas.
Use forecasts and on-site observation to confirm when water is moving toward or away from structure. Watch how floating grass, foam, leaves, or bait move past fixed objects.
Combine solunar peaks with wind-amplified currents to pick breaks and ambush points. A small drain with the right wind and tide can become a feeding funnel.
These fishing strategies free you from guesswork, letting you target windows when fish feed more predictably.
Keep a Tide Fishing Log
A simple log turns tide theory into personal knowledge. Record the date, location, tide stage, tide height, wind direction, wind speed, water clarity, moon phase, bait activity, lure or bait used, and what you caught.
After a few trips, patterns start to appear. You may learn that one creek mouth fishes best on the first half of the falling tide, while a nearby flat produces better on a rising tide with light wind.
This is where local knowledge becomes more valuable than a general rule. Tide tables give the framework, but your notes show how specific fish use specific water.
Planning a Fishing Trip: Practical Tips and Safety Considerations
Because tides strongly govern fish movement, consult current tide tables and local real-time data before planning a trip. As a starting point, aim for the rising tide, the falling tide, or the periods when water moves cleanly through structure.
Because tides influence fish movement and access, check tide tables and real-time conditions before you launch, wade, or walk far from your exit route.
Use tide tables to map high or low periods at your exact location, then align your fishing trip with those windows. Check real-time updates shortly before launch because conditions can shift fish behavior and create hazards.
Factor local geography and wind. Estuary shape, channels, passes, drains, bars, beaches, and prevailing winds modify tidal flows and feeding zones. Scout for likely structure, including rocky outcrops, submerged bars, oyster beds, dock pilings, troughs, grass lines, and marsh drains.
Prioritize safety considerations. Know tidal reach, mark safe exit routes, and assess current strength at low tide and high tide. Carry communications, flotation, drinking water, and a simple plan that lets you leave when the tide or wind turns.
You’ll fish more effectively and freely when preparation matches tidal science, local observation, and basic safety planning.
Pre-Trip Tide Planning Checklist
- Check the closest tide station for your date, high tide, low tide, and tide height.
- Compare wind direction with the shoreline, bay, pass, or inlet you plan to fish.
- Choose your target window based on moving water, safe access, and the species you want.
- Identify structure that should concentrate bait during that tide stage.
- Plan your exit route before the water rises, falls, or cuts off your path.
- Carry safety gear, especially if you fish from rocks, jetties, kayaks, marshes, or remote flats.
- Make a backup plan in case wind, storms, dirty water, or unsafe current changes the bite.
Common Tide Reading Mistakes to Avoid
Many anglers check the high tide time and stop there. That can lead to missed bites because fish often respond more to current than to the exact high or low mark. The best window may happen before high, after high, or during the strongest middle part of the tide.
Another mistake is using a tide station that is too far from the fishing spot. In bays, rivers, marshes, and backwaters, tide timing can lag behind the oceanfront station. Water may arrive late, drain slowly, or move differently because of narrow channels and shallow bottom.
Do not ignore wind. A strong wind blowing into a bay can keep water high even when the chart says it should fall. A hard offshore wind can drain flats before the predicted low.
Finally, avoid assuming one rule works everywhere. Some beaches fish best on incoming water, some inlets shine on outgoing water, and some flats need enough water to cover grass or oysters. Let the chart guide you, but let the fish and water confirm the final answer.
Frequently Asked Questions
How do you read tide charts for fishing?
Read tide charts by finding your date, the closest tide station, the high and low tide times, and the listed tide heights. Then decide whether you’ll fish rising water, falling water, or the slower periods near slack tide. Compare the chart with wind, local current, bait movement, and the species you want to catch.
How do you check the tide for fishing?
Check the tide through NOAA Tide Predictions, a reliable tide app, a local marina report, or a fishing chart service. Use the closest station available, then review wind, weather, pressure, and local reports. Before you fish, confirm the real water level by looking at pilings, rocks, grass lines, exposed bars, and current direction.
What tide level is best for fishing?
The best tide level depends on the species, structure, and location, but moving water is often better than slack water. Rising tides can push fish onto flats and shorelines, while falling tides can pull bait through drains, channels, and cuts. The most productive level is usually the one that gives fish access to food while concentrating bait.
What is the Rule of 12 in tides?
The Rule of 12, also called the Rule of Twelfths, estimates tide movement across a roughly six-hour rise or fall. The pattern is 1/12, 2/12, 3/12, 3/12, 2/12, and 1/12. For fishing, it helps you estimate when current will be weakest, strongest, and most likely to move bait.
Is incoming or outgoing tide better for fishing?
Both can be good. Incoming tide often helps fish move onto flats, beaches, mangroves, grass, and shallow cover. Outgoing tide often pulls bait from marshes, creeks, drains, and backwaters. The better choice depends on where bait gets concentrated at your spot.
Can wind matter more than the tide?
Yes. In shallow bays, lagoons, marshes, and areas far from major passes, wind can push water in or pull it out more strongly than the predicted tide. Always compare tide predictions with wind direction, wind speed, and what the water is actually doing.
Conclusion
Think of tides as a clockwork sea that teaches you when and where to fish. Read its hands with tide tables, estimate movement with the Rule of Twelfths, and study wind, channels, passes, and bottom shape like gears in the same system.
When you combine charts with solunar cues and local knowledge, you’ll time your casts when current moves bait and predators set up to feed. Practice, safety checks, and observation turn theory into reliable results, so you work with the water instead of fighting it.
Sources
- NOAA Tide Predictions — tide times, heights, and local station data for trip planning.
- NOAA Ocean Service: What Causes Tides? — basic explanation of tides, gravity, and coastal water-level changes.
- NOAA Tides & Currents — official coastal water-level, tide, current, and related observation data.
- National Weather Service Flood Safety — safety context for flooding, hazardous water, and weather-driven risks.