
The correct Toyota Camry lug nut torque is usually an exact manufacturer setting, not a broad range you can choose from. Many Camry owner’s manuals specify 76 ft·lbf (103 N·m), while at least one older U.S. manual rounds its value to 77 ft·lbf. Always confirm the specification for your model year, sales market, wheel, and lug-nut hardware before tightening.
Last updated: September 19, 2026 — torque values rechecked against Toyota owner-manual and Toyota Europe wheel-torque documentation; post-installation guidance rechecked against Continental.
Quick Answer
Many Toyota Camry owner’s manuals specify 76 ft·lbf (103 N·m) for factory wheel nuts; a few older manuals round the equivalent value to 77 ft·lbf (104 N·m). Treat the manual’s number as an exact setting, not a 76–80 range. Verify your year, market, and wheel hardware before torquing.
Key Takeaways
- Many factory-equipped Camrys use 76 ft·lbf (103 N·m), but the exact owner’s manual controls.
- Keep the wheel studs, nuts, seats, hub face, and wheel-mounting surface clean and dry.
- Hand-start every nut, then tighten gradually in a star or crisscross sequence.
- Use an impact wrench only for removal or controlled initial snugging; complete the job with a torque wrench.
- After wheel service, follow Toyota, the wheel manufacturer, and the installer’s instructions for any follow-up torque check.
At a Glance
| Time Required | About 10–20 minutes for a four-wheel torque check |
| Difficulty | Beginner for a torque check; intermediate if a wheel must be removed and reinstalled |
| Tools Needed | Correct owner’s manual, calibrated torque wrench, correctly sized socket, wheel chocks, and approved lifting equipment when removing a wheel |
| Cost | No parts are normally required; tool and professional-service costs vary |
Warning: Do not drive if a wheel nut is missing, visibly loose, cross-threaded, or unable to reach the specified torque. Stop safely and arrange professional inspection if you notice wheel wobble, new clunking, severe vibration after tire service, or a damaged wheel stud.
Deal tip: An impact wrench like the DEWALT DCF900 makes removing lug nuts quick, but always tighten to spec with a torque wrench. See our DEWALT tool deals for October Prime Day.
Why Does Toyota Camry Lug Nut Torque Matter?

Lug nut torque is the turning force used to create the clamping load that holds the wheel against the hub. The correct setting must be high enough to keep the wheel securely seated but not so high that it damages the wheel studs, nuts, seats, or wheel.
Under-tightened wheel nuts can loosen and allow movement between the wheel and hub. Excessive torque can stretch studs, damage threads, distort hardware, make roadside removal difficult, or conceal a partially failed stud.
103 N·m converts to approximately 76 ft·lbf. That is an exact specification, not permission to choose any value between 76 and 80 ft-lb.
Correct torque also depends on the condition of the mating surfaces. Dirt, corrosion, paint buildup, grease, an incorrect lug-seat design, or a wheel that is not fully seated can produce an unreliable installation even when the torque wrench reaches its setting.
What Is the Correct Toyota Camry Lug Nut Torque?
Many Toyota Camrys use 76 ft·lbf (103 N·m) for their factory wheel nuts. However, you should verify the exact value rather than applying one number to every year and market. Toyota’s official manuals show a small rounding difference in some older documentation.
| Camry example | Official specification | What it shows |
|---|---|---|
| 2001 U.S. Camry | 77 ft·lbf (104 N·m) | An older manual uses 104 N·m and rounds the imperial value to 77 ft·lbf. |
| 2005 U.S. Camry | 76 ft·lbf (103 N·m) | The manual gives one exact setting rather than a range. |
| 2014 U.S. Camry, including XLE specifications | 76 ft·lbf (103 N·m) | Toyota lists the same setting for the documented factory wheel sizes. |
| Toyota Europe Camry guidance | 103 N·m, approximately 76 ft·lbf | The current document lists 103 N·m for September 2018–May 2024 and June 2024 onward. |
Note: A value from another country or model year is useful for comparison but does not override the manual issued for your exact Camry. Wheel, fastener, and market specifications can change.
Use an Exact Value, Not a Range
Do not set the wrench somewhere between 76 and 80 ft-lb simply because several websites provide a range. Set it to the exact figure in the applicable manual. If the manual states 103 N·m, use 103 N·m or its properly converted value of approximately 76 ft·lbf.
The difference between 76 and 77 ft·lbf in older manuals is largely explained by the underlying metric specification and rounding. It is not evidence that 80 ft-lb is automatically approved.
Factory Wheels Versus Aftermarket Wheels
The vehicle specification is intended for the approved wheel and fastener combination. If you are changing wheel size or hardware, first confirm the Toyota Camry wheel and tire fitment for your exact application. An aftermarket wheel may require a different nut design, seat shape, washer, thread engagement, or documented torque procedure.
Toyota technical documentation illustrates tapered, flat, spherical, one-piece, and washer-equipped fasteners. Similar-looking hardware is not necessarily interchangeable. Use the wheel manufacturer’s approved nuts and written installation instructions. If the wheel maker’s instructions conflict with the vehicle information, have the conflict resolved by the manufacturer or a qualified wheel installer instead of averaging the values.
How to Properly Torque Your Camry’s Lug Nuts
The following procedure is suitable for checking or installing factory-style wheel nuts when it agrees with your exact owner’s manual. If you are removing a wheel roadside, follow the full Toyota Camry flat-tire procedure and use the approved lifting points and equipment for your model year.
- Verify the specification and hardware. Confirm the model year, market, wheel type, correct lug nuts, seat shape, socket size, and torque value before starting.
- Park safely. Use a firm, level surface. Shift to Park, apply the parking brake, switch the vehicle off, and chock a wheel that will remain on the ground.
- Inspect and clean. Remove dirt, corrosion, and foreign material from the wheel-to-hub contact surfaces. Inspect the studs, threads, nuts, washers, and wheel seats for damage.
- Keep the hardware dry. Do not apply oil, grease, or anti-seize to the wheel studs, nut threads, or seats unless a procedure specifically issued for that hardware requires it.
- Hand-start every nut. Turn each nut several full revolutions by hand. A nut that binds, tilts, or will not turn smoothly may be cross-threaded or incompatible.
- Snug the nuts in a star pattern. Tighten each nut a little at a time across the wheel so the wheel seats evenly. Do not fully tighten one nut while the others remain loose.
- Lower the vehicle as the manual directs. The tire must be prevented from rotating during final torque, and the wheel must remain fully seated against the hub.
- Torque in stages. Make one star-pattern pass at roughly half the final value, followed by a second pass at the full specification. Toyota manuals may direct two or three gradual passes.
- Complete a final verification pass. Apply smooth pressure until the wrench indicates the set torque once. Do not keep pulling or repeatedly click the wrench on the same nut.
Warning: Never place any part of your body beneath a vehicle supported only by a jack. If work requires access under the vehicle, use properly rated support equipment and follow Toyota’s lifting instructions.
How Do You Use a Torque Wrench on a Toyota Camry?
A torque wrench is a measuring tool, not simply a longer lug wrench. Select a wrench whose working range comfortably includes the required setting. A 1/2-inch-drive wrench is commonly convenient for passenger-car wheel service, provided the tool and socket are correctly rated.
- Read the wrench instructions. Confirm the units, direction of use, adjustment method, and calibration status.
- Set the exact value. For a Camry manual specifying 103 N·m, set 103 N·m or 76 ft·lbf—not an arbitrary 76–80 ft-lb range.
- Hold the designated grip. Gripping far above or below the handle’s marked area can affect some wrench designs.
- Pull smoothly. Avoid jerking, bouncing, or using body weight to force the handle.
- Stop at the signal. When a click-type wrench clicks, stop applying force. Repeated clicks can increase torque.
- Store the tool correctly. Follow the manufacturer’s storage instructions. Many adjustable click wrenches should be returned to their lowest marked setting after use without being wound below their scale.
Pro Tip: Use a breaker bar, lug wrench, or approved impact tool to loosen tight nuts. Reserve the torque wrench for measured final tightening unless its manufacturer specifically approves another use.
Top 5 Mistakes to Avoid When Torquing Lug Nuts

- Guessing the specification. Do not rely on a generic chart, another Camry owner’s setting, or a remembered 80 ft-lb figure. Verify your exact manual and wheel instructions.
- Lubricating the threads or seats. Oil, grease, and anti-seize change friction and can produce excessive clamping force at the same wrench setting. Toyota instructs owners to remove oil or grease from wheel hardware.
- Using an impact wrench as the final measuring tool. An impact wrench can quickly exceed the intended torque. Use it cautiously for removal or light initial snugging, then finish with a torque wrench.
- Installing the wrong lug nut. An incorrect thread, seat shape, washer, shank length, or diameter may appear tight without clamping the wheel correctly.
- Ignoring damaged or dirty parts. Cross-threaded studs, distorted nuts, rust buildup, paint between mating surfaces, and debris can invalidate an otherwise correct torque reading.
When Should You Recheck Toyota Camry Lug Nut Torque?
Toyota’s wheel-changing instructions emphasize having the wheel nuts tightened to the specified value with a torque wrench as soon as possible after a wheel change. A separate post-installation check may also be recommended by the tire shop, wheel manufacturer, or local service practice.
Continental recommends checking newly fitted wheels after approximately 50 kilometres, or about 31 miles. Toyota’s 2001 U.S. Camry manual gives a different, model-year-specific instruction: after the first 1600 km (1000 miles) following wheel installation, check that the wheel nuts are tight. These examples show why you should follow the exact manual, wheel manufacturer, and installer guidance for your car rather than applying one universal 50- or 100-mile rule to every Camry.
How to Perform a Torque Check
- Park on a level surface, apply the parking brake, and confirm the correct specification.
- Set the torque wrench to the specified value.
- Check the nuts in a star pattern without loosening them first.
- If a nut turns before the wrench signals, continue smoothly until the signal. If it does not turn, stop at the signal rather than clicking repeatedly.
Note: A torque check can identify a nut that is below the wrench setting, but it cannot prove that a nut was not previously over-tightened. If an impact gun may have excessively tightened the hardware, have the wheel removed, the studs and nuts inspected, and the installation corrected.
What Happens If Camry Lug Nuts Are Too Loose or Too Tight?
Incorrect torque can reduce the reliability of the wheel installation. Under-tightening may allow the wheel to move against the hub and progressively loosen the nuts. Over-tightening can damage threads, stretch studs, distort wheel seats, or make the wheel difficult to remove during an emergency.
Possible Signs of a Loose or Damaged Installation
- A new clicking, knocking, or clunking sound that changes with road speed
- Steering-wheel or body vibration that began after wheel service
- A visibly backed-off, missing, tilted, or damaged lug nut
- Rust dust, polished movement marks, or enlarged holes around a wheel seat
- A stud that spins, will not accept the nut smoothly, or cannot reach the specified torque
- A nut or decorative cap that is rounded, split, badly corroded, or swollen and no longer accepts the proper socket
Warning: If you suspect that a wheel is loose, reduce speed smoothly, stop in a safe place, and do not continue driving to “see if it improves.” Arrange roadside assistance or a tow when the wheel cannot be confirmed secure.
Does Toyota Camry Lug Nut Torque Change by Model Year?
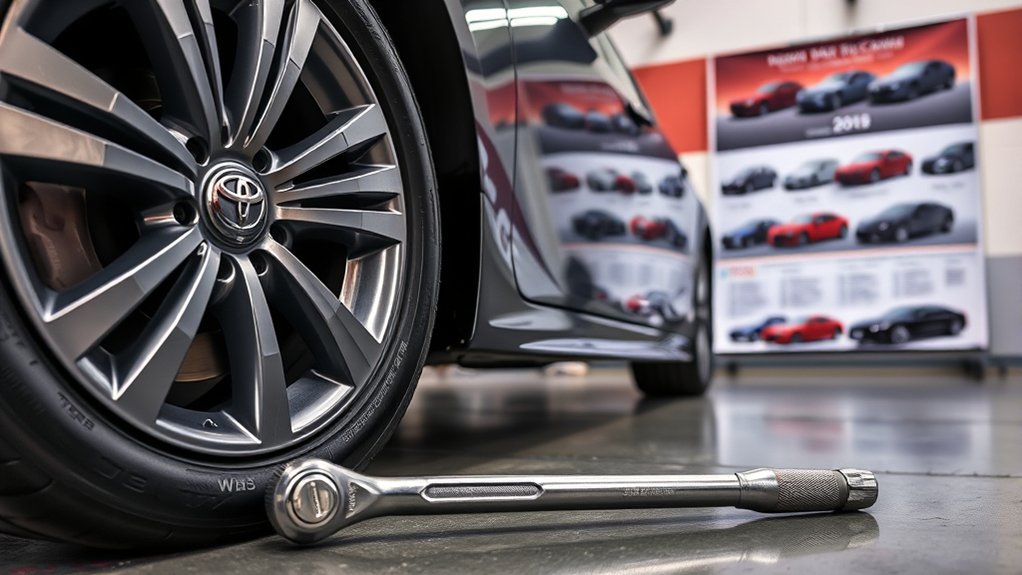
Many Camry generations do use approximately the same wheel-nut torque, but that pattern should not be turned into an unsupported “1986 to present” rule. Official documentation confirms the following representative values:
- 2001 U.S. Camry: 104 N·m, shown as 77 ft·lbf.
- 2005 U.S. Camry: 103 N·m, shown as 76 ft·lbf.
- 2014 U.S. Camry: 103 N·m, shown as 76 ft·lbf.
- European Camry from September 2018 onward: Toyota’s current wheel-torque document lists 103 N·m, including the updated model from June 2024.
Why Values May Look Slightly Different
Metric-to-imperial rounding explains some apparent differences. A specification of 103 N·m converts to about 75.97 ft·lbf and is normally shown as 76 ft·lbf. A specification of 104 N·m converts to about 76.7 ft·lbf and may be shown as 77 ft·lbf.
This does not mean every number from 76 through 80 ft-lb is equally approved. Use the exact displayed value from the applicable document.
Variations Among Wheels and Fasteners
Factory steel wheels, factory alloy wheels, temporary spare wheels, and aftermarket wheels may use different nut seats or washer designs. Some Camry manuals list one torque for all factory wheel sizes covered by that manual, but that does not make all replacement hardware interchangeable.
When using a wheel lock, install the correct key fully and keep the wrench aligned with the fastener. Do not use an impact wrench on a lock unless its manufacturer expressly permits it. Replace a damaged key or lock instead of forcing it at an angle.
Why a Consistent Procedure Matters
Even when the numerical torque remains unchanged between several Camry years, the installation still depends on clean mating surfaces, correct hardware, smooth hand-threading, an alternating tightening sequence, and a reliable torque wrench. A correct number cannot compensate for an incorrectly seated wheel or mismatched lug nut.
Camry Lug Nut Torque Quick Reference
- Common factory specification: 76 ft·lbf (103 N·m)
- Documented older example: 77 ft·lbf (104 N·m) for the 2001 U.S. Camry manual
- Tightening order: Star or crisscross sequence
- Thread condition: Clean and dry unless an applicable manufacturer instruction states otherwise
- Initial installation: Hand-start every nut and tighten gradually
- Final tool: Calibrated torque wrench
- After wheel service: Follow Toyota, the wheel maker, and the installer’s recheck instruction
- Aftermarket wheels: Use the wheel manufacturer’s approved fasteners and documented procedure
Where Can You Find Your Camry’s Exact Torque Specification?
- Exact owner’s manual: Use Toyota’s Manuals and Warranties portal and select the correct year and model.
- Wheel-changing and specification sections: Search the manual for “wheel nut torque,” “changing a flat tire,” “tires and wheels,” or “vehicle specifications.”
- Aftermarket wheel documentation: Use the instructions supplied by the wheel manufacturer, including its approved nuts, seats, washers, and torque procedure.
- Toyota service support: A Toyota dealer or qualified repair facility can verify the specification by model year, market, VIN, and installed wheel hardware.
- Do not rely on the tire placard alone: The door-jamb label is primarily used for tire and loading information and should not be assumed to contain the wheel-nut torque.
Frequently Asked Questions
What is the lug nut torque for a Toyota Camry?
Many Toyota Camry manuals specify 76 ft·lbf (103 N·m). However, use the exact owner’s manual for your model year and market. The 2001 U.S. Camry manual, for example, lists 77 ft·lbf (104 N·m).
What is the lug nut torque for a 2014 Toyota Camry XLE?
The reviewed 2014 U.S. Toyota Camry owner’s manual specifies 76 ft·lbf (103 N·m). Confirm that you are using the manual and wheel hardware issued for your vehicle and market.
Is a 50-mile re-torque necessary?
It is a common post-installation precaution, but it is not one universal Camry rule. Continental recommends a check after about 50 km, or 31 miles, following wheel fitting, while Toyota’s 2001 U.S. Camry manual says to check that the wheel nuts are tight after the first 1600 km (1000 miles). Follow the instruction for your exact model year, wheel hardware, and installation.
Can I tighten Camry lug nuts with an impact wrench?
An impact wrench may be used cautiously for removal or low-force initial snugging, but it should not be the final torque-measuring tool. Hand-start the nuts and finish the installation with a calibrated torque wrench.
Should I put anti-seize, oil, or grease on the wheel studs?
Not under the standard Toyota procedure. Toyota warns against oil or grease on wheel studs and nuts. Lubrication changes friction and can produce excessive clamping force at the specified torque. Keep the hardware clean and dry unless a specific manufacturer procedure directs otherwise.
Do aftermarket Camry wheels use the factory torque specification?
Not automatically. The aftermarket wheel may require different fasteners, seats, washers, or installation instructions. Use the wheel manufacturer’s documented specification and approved hardware, and resolve any conflict before driving.
Can a torque check detect over-tightened lug nuts?
No. A wrench set to the correct value can identify a nut that turns before reaching that value, but it cannot show how far above the setting a nut was previously tightened. Suspected over-torque requires removal and inspection of the studs, nuts, seats, and wheel.
Conclusion
Many Toyota Camrys use a wheel-nut torque of 76 ft·lbf (103 N·m), but the safest approach is to verify the exact manual for your model year, market, and wheel hardware. Keep the mounting surfaces and threads clean and dry, hand-start every nut, tighten in a star pattern, and finish with a calibrated torque wrench. If the hardware is damaged or the wheel will not torque evenly, stop and have the installation inspected before driving.
Sources
- Toyota Manuals and Warranties — official lookup for year- and model-specific Toyota owner’s manuals.
- 2014 Toyota Camry Owner’s Manual — verifies 76 ft·lbf (103 N·m), wheel-installation order, surface cleaning, and wheel-changing precautions.
- 2005 Toyota Camry Owner’s Manual — verifies 103 N·m and 76 ft·lbf.
- 2001 Toyota Camry Owner’s Manual — verifies the older 104 N·m and 77 ft·lbf specification and its model-year-specific 1600 km (1000 mile) wheel-nut check.
- Toyota Europe Wheel Torque Values, AIM 005 469-9 — current Camry torque values and wheel-fastener compatibility guidance.
- Continental Tires: Retorquing Wheels — staged crisscross tightening and post-installation torque-check guidance.
